
This guide unlocks the full potential of your hammer drill with 15 actionable home projects. You’ll learn how to tackle concrete, brick, tile, and masonry with confidence. From simple shelf mounting to complex installations, transform your living space in just one weekend.
Key Takeaways
- Safety is non-negotiable: Always wear eye protection and dust masks when operating a hammer drill.
- Right bit for the material: Use masonry bits for concrete and brick, but switch to standard bits for wood and metal.
- Start slow: Begin with a pilot hole at low speed before increasing power for cleaner, more accurate holes.
- Control the dust: Keep a vacuum handy or drill with a dust collection attachment to maintain visibility.
- Know your wall type: Identify concrete, brick, or hollow walls before choosing your drilling technique.
- Hammer drill vs. regular drill: Use hammer mode only for masonry; switch to standard drilling for other materials.
- Practice makes perfect: Test your technique on scrap material before drilling into visible surfaces.
Your Hammer Drill Is a Home Improvement Superhero
That hammer drill gathering dust in your garage is about to become your best friend for home projects. Unlike a regular drill, a hammer drill delivers a rapid hammering action that pulverizes concrete and brick while spinning. This dual action makes it the perfect tool for serious DIY installations that require rock-solid anchors. Understanding the difference between a drill and a hammer drill helps you choose the right tool for every job.
In this guide, you’ll discover 15 practical projects that transform your living space. We cover everything from mounting heavy shelves to installing bathroom fixtures on tile. Each project includes step-by-step instructions, safety tips, and pro tricks. By the end, you’ll wield your hammer drill with confidence and tackle any masonry project that comes your way.
Safety First: Gear Up Before You Start
Before touching your hammer drill, suit up with proper protection. The hammering action creates fine dust particles that can harm your lungs and eyes.

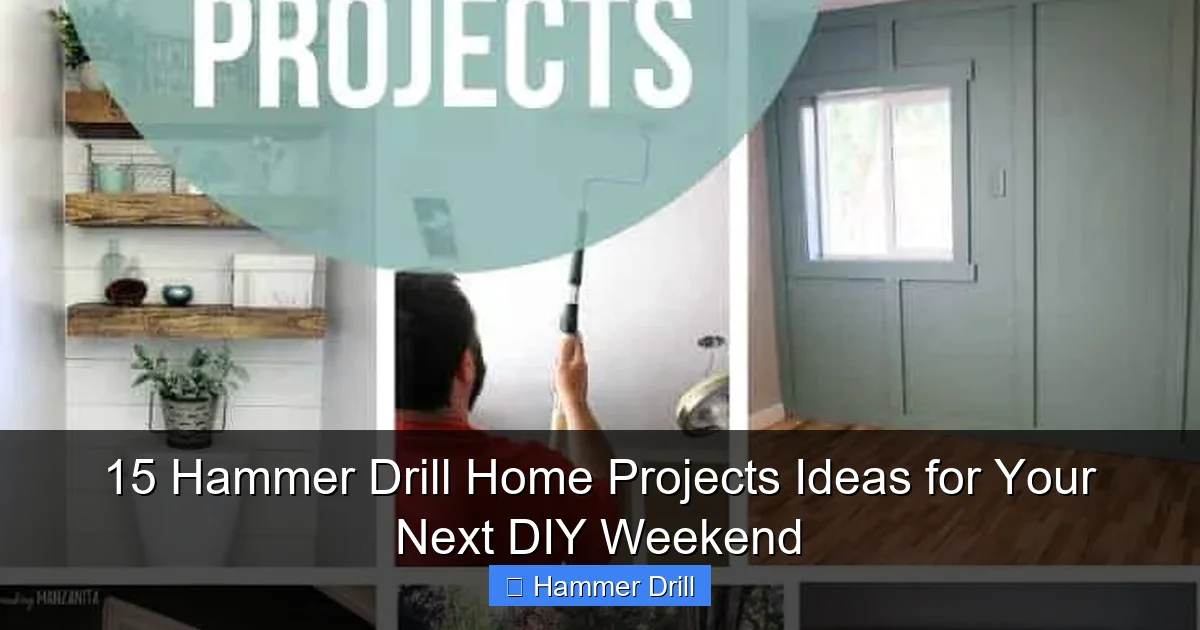
Visual guide about 15 Hammer Drill Home Projects Ideas for Your Next DIY Weekend
Image source: realestatemortgageblog.com
Essential Safety Equipment
- Eye protection: Safety glasses with side shields prevent flying debris from entering your eyes
- Dust mask or respirator: N95 masks filter concrete dust; upgrade to a respirator for large projects
- Hearing protection: Hammer drills exceed 85 decibels; use earplugs or earmuffs
- Work gloves: Protect your hands from sharp edges and vibrations
- Knee pads: Essential when drilling overhead or on hard surfaces
Tool Preparation Checklist
Inspect your hammer drill before each use. Check the power cord for frays, ensure the chuck is tight, and verify the mode selector moves smoothly between standard and hammer settings. Keep a vacuum or dust collection system nearby. Pro tip: Place a piece of masking tape on your drilling spot to prevent the drill bit from wandering when you start.
Project 1: Mount Heavy Shelves on Concrete Walls
Floating shelves on concrete basement walls look fantastic but require serious anchors. Your hammer drill makes this job quick and secure.
Visual guide about 15 Hammer Drill Home Projects Ideas for Your Next DIY Weekend
Image source: makingmanzanita.com
Step-by-Step Instructions
Step 1: Mark Your Locations
Use a level to draw straight lines for your shelf brackets. Mark each anchor point with a pencil. Space brackets 16 inches apart for standard shelves, or 12 inches for heavy-duty storage.
Step 2: Select the Right Bit
Choose a masonry bit that matches your anchor size. For 3/16-inch anchors, use a 3/16-inch bit. The bit should extend at least 1/2 inch deeper than your anchor length.
Step 3: Drill the Pilot Hole
Set your hammer drill to hammer mode. Hold it perpendicular to the wall. Start at low speed to create a guide mark, then increase to full power while maintaining steady pressure. Drill for 5-10 seconds, then pull the bit out to clear dust. Repeat until you reach the desired depth.
Step 4: Insert Anchors and Mount
Tap the plastic anchor into the hole with a hammer. Insert the screw through the bracket and into the anchor. Tighten with a screwdriver until the bracket sits flush against the wall.
Pro Tips for Success
Keep the drill bit cool by occasionally dipping it in water. If you hit rebar, stop immediately and relocate your bracket. Use a stud finder to identify concrete studs for maximum holding power.
Project 2: Install Bathroom Fixtures on Ceramic Tile
Tiling is beautiful until you need to drill into it. The hammer drill’s precision prevents cracks and creates clean holes for towel bars and soap dishes.
Visual guide about 15 Hammer Drill Home Projects Ideas for Your Next DIY Weekend
Image source: diytotry.com
Specialized Technique for Tile
Step 1: Create a Starting Point
Place a small piece of masking tape over each drilling location. This prevents the bit from slipping and protects the tile glaze from chipping.
Step 2: Begin Without Hammering
Set your drill to standard mode (no hammer action). Start at 45 degrees to create a small dimple, then slowly straighten the drill to vertical. Apply light pressure.
Step 3: Switch to Hammer Mode
Once you’ve created a guide hole through the tile, switch to hammer mode to drill into the wall behind. The tile is now protected from the hammering action.
Preventing Tile Damage
Never use hammer mode on tile itself. Keep the drill speed low. If you feel the bit wandering, stop and reposition. For glass tile, use a diamond-tipped drill bit and skip hammer mode entirely.
Project 3: Create Cable Management Holes in Studs
Running wires through finished walls is easier than you think. Your hammer drill creates clean holes through wooden studs for seamless cable hiding.
Drilling Through Wood Studs
Switch to standard drilling mode for this project. Use a spade bit or auger bit sized for your cables. Drill from the top plate down at a 45-degree angle to avoid nails. Keep the drill level for straight holes. Learn how to use a drill for screws into a wall to understand proper technique.
Running Cables Safely
Always drill in the center of studs, at least 1.5 inches from edges. This prevents splitting. Use fish tape to pull cables through holes. Install grommets in holes to protect wires from sharp wood edges.
Project 4: Mount TV Brackets on Masonry Fireplaces
A TV above the fireplace is a classic look. Masonry walls require specific techniques for secure mounting that won’t damage your expensive equipment.
Choosing the Right Anchors
For brick walls, use plastic sleeve anchors. For concrete block, use wedge anchors for maximum hold. Your TV mount weight rating should exceed the TV weight by 50%. Calculate total weight including the mount itself.
Drilling Technique for Brick
Brick is softer than concrete. Use moderate pressure and let the hammer drill do the work. Drill slowly to avoid cracking the brick. Clean out holes completely with a vacuum before inserting anchors.
Project 5: Install Curtain Rods in Plaster Walls
Plaster walls hide wood lath or metal studs. Your hammer drill finds the solid mounting points and creates perfect holes without crumbling the surface.
Finding Solid Mounting Points
Use a stud finder to locate lath strips behind plaster. Mounting into lath provides solid hold. If no lath is available, use toggle bolts designed for plaster. Drill pilot holes slightly smaller than your anchors.
Preventing Plaster Damage
Plaster cracks easily. Use low speed and light pressure. Wrap the drill bit with tape to mark your drilling depth, preventing you from drilling too far. Support the wall with your free hand from behind if possible.
Project 6: Build a Backyard Deck With Concrete Footings
Setting deck posts requires precise holes in concrete footings. Your hammer drill creates pilot holes for post anchors that ensure perfect alignment.
Post Anchor Installation
Mark anchor locations on the concrete footing. Use a masonry bit 1/16 inch larger than your anchor diameter. Drill to the exact depth needed. Blow out dust with compressed air or use a straw to suck debris from the hole.
Leveling and Alignment
Place the post anchor in the hole and check for plumb. Use shims if necessary. Fill the hole with epoxy anchor adhesive for maximum strength. Let it cure completely before setting posts.
Project 7: Install Garage Storage on Concrete Walls
Garage organization systems need serious holding power. Concrete walls are perfect for heavy-duty storage when you use the right technique.
Heavy-Duty Anchor Systems
For shelving units holding 100+ pounds, use 1/4-inch wedge anchors. Drill holes 1/4 inch deeper than the anchor length. Clean holes thoroughly. Tap anchors in until flush, then tighten nuts to expand the wedge.
Grid System Installation
For slatwall systems, use plastic anchors and pan-head screws. Drill every 16 inches vertically. Keep the drill perpendicular to ensure straight holes. Use a level on the slatwall before final tightening.
Project 8: Create Garden Planters with Drainage Holes
Turn concrete blocks or old buckets into planters by drilling drainage holes. Your hammer drill makes quick work of this garden project.
Drilling Drainage Patterns
Mark 4-6 hole locations on the bottom of your container. Use a 1/2-inch masonry bit for blocks. Drill slowly to prevent cracking. For plastic buckets, switch to standard mode and use a spade bit.
Preventing Cracks
Place the container on a soft surface like wood or cardboard. This prevents the bit from bouncing and reduces crack risk. Drill from the inside out for better control.
Project 9: Install Outdoor Lighting on Brick Exteriors
Landscape lighting and security fixtures enhance curb appeal. Brick exteriors require careful drilling to avoid spalling or cracking.
Brick-Specific Techniques
Always drill into the mortar joint when possible. Mortar is softer than brick and provides equal holding power. If you must drill into brick, choose the center of the brick away from edges.
Weatherproofing Your Holes
After drilling, apply silicone caulk around fixture bases. This prevents water infiltration. Use stainless steel anchors to resist rust. Run wires through conduit or use exterior-grade cable.
Project 10: Build a Gazebo Foundation on Concrete Slabs
Securing a gazebo to a concrete patio requires strong anchors that won’t pull loose in wind. Your hammer drill creates the perfect holes for this critical connection.
Anchor Selection for Outdoor Structures
Use stainless steel wedge anchors or sleeve anchors rated for outdoor use. Drill holes 1/2 inch deeper than anchor length. Clean holes completely before insertion.
Spacing and Pattern
Place anchors every 24 inches along each gazebo post base. Drill in a diamond pattern for maximum stability. Check alignment with a string line before drilling the final holes.
Project 11: Install Kitchen Backsplash on Existing Tile
Updating your kitchen often means mounting new backsplash over old tile. Your hammer drill navigates this challenge without removing the existing surface.
Drilling Through Multiple Layers
Start with standard mode to drill through the new backsplash material. Switch to hammer mode once you hit the tile. Use a carbide-tipped masonry bit for best results. Apply steady, moderate pressure.
Clean Installation Tips
Run a bead of adhesive on the backsplash before mounting. This fills gaps and provides additional support. Use plastic spacers to maintain even gaps between pieces. Wipe away excess adhesive immediately.
Project 12: Create a Home Office Wall Organization System
Modern home offices need flexible storage. A hammer drill installs French cleats, pegboards, and modular systems on any wall type.
French Cleat Installation
Cut a 45-degree angle on 1×4 boards to create cleat halves. Mount the wall half first, drilling into studs. Use 3-inch screws and drill pilot holes. Hang the board half and test fit before final mounting.
Pegboard on Drywall
For drywall, use toggle bolts every 12 inches. Drill pilot holes smaller than the toggle diameter. Insert toggles and tighten until snug. The hammer drill’s precision prevents drywall from crumbling.
Project 13: Install a Pet Door in Stucco Walls
Stucco is a challenging material that requires patience. Your hammer drill cuts through the multiple layers without damaging the finish.
Understanding Stucco Layers
Stucco has three layers: finish, brown, and scratch coat over wire mesh. Drill slowly through the finish coat, then increase speed for the base layers. Watch for the wire mesh and angle your drill slightly to avoid it.
Cutting the Opening
Drill a series of holes along your cut line. Use a jigsaw with a masonry blade for the final cut. Keep the drill bit cool by drilling in short bursts. Wear extra eye protection as stucco creates sharp fragments.
Project 14: Build a Built-In Bookshelf Into Wall Studs
Custom built-ins require securing shelves to wall studs. Your hammer drill creates pilot holes that prevent wood splitting and ensure perfect alignment.
Stud-Finding Precision
Locate studs with a stud finder. Mark the top and bottom of each stud. Drill pilot holes 1/8 inch smaller than your screw diameter. This allows the screw to grip without splitting the stud.
Shelf Support Installation
For adjustable shelves, install metal standards into studs. Drill pilot holes, then use the hammer drill’s driving mode to seat screws fully. Check alignment with a level before installing shelves.
Project 15: Mount Security Cameras on Exterior Walls
Home security starts with proper camera placement. Exterior walls of any material become mounting points with your hammer drill.
Weather-Resistant Mounting
Use stainless steel lag shields for brick and concrete. Drill holes 1/4 inch deeper than the shield. Apply silicone around the mount base. Route cables through conduit or use weatherproof connectors.
Angle and Positioning
Drill pilot holes for the mounting bracket first. Test the camera angle before drilling final holes. Use a laser level to ensure multiple cameras align perfectly. Keep all connections above the camera to prevent water dripping.
Troubleshooting Common Hammer Drill Problems
Even with the best technique, issues arise. Here’s how to solve the most common hammer drill problems.
Bit Won’t Penetrate Hard Surfaces
If your bit skates across concrete without biting, check that hammer mode is engaged. The hammering action should be audible. Replace worn bits. Apply more downward pressure, but keep the drill level. If you hit rebar, stop and relocate.
Holes Are Oversized or Sloppy
This happens when the drill wobbles. Ensure your bit is securely chucked. Use both hands: one on the handle, one on the side grip. Drill perpendicular to the surface. Start with a small pilot hole, then step up to the final size.
Excessive Vibration and Noise
Normal hammer drilling is loud, but excessive vibration indicates a problem. Check for bent bits or damaged chucks. Tighten all connections. If vibration continues, the tool may need servicing. Always wear hearing protection.
Bit Overheating
Overheating dulls bits quickly. Drill in 10-15 second bursts. Withdraw the bit frequently to clear dust and cool the tip. Dip masonry bits in water periodically. Don’t force the drill; let it work at its own pace.
Dust Management Issues
Without proper dust control, visibility suffers and health risks increase. Use a shop vacuum with a nozzle held near the drill point. Some hammer drills have built-in dust collection ports. For overhead work, use a dust-catching attachment or hold a container below the drilling spot.
Choosing the Right Hammer Drill for Your Projects
Not all hammer drills are created equal. Understanding the difference between an impact driver and hammer drill helps you select the best tool.
Corded vs. Cordless
Corded hammer drills deliver consistent power for long projects. They never run out of battery. Cordless models offer mobility and convenience. Choose cordless with at least 18V for masonry work. Keep a spare battery charged.
Variable Speed and Control
Look for models with variable speed triggers and multiple torque settings. This control prevents overdriving screws and allows precision work. A side handle is essential for masonry drilling. It provides stability and reduces fatigue.
Key Features to Consider
Quick-change chucks save time. LED lights illuminate dark work areas. Brushless motors last longer and run cooler. Hammer-only mode is useful for chipping tasks. Consider the weight; lighter tools reduce arm strain during overhead work.
Conclusion: Your Weekend Transformation Starts Now
These 15 projects transform your home with the power of a hammer drill. From simple curtain rods to complex built-ins, you now have the knowledge to tackle any masonry or wood project. Remember to prioritize safety, choose the right bits, and practice on scrap material first.
Your hammer drill is more than a tool; it’s a gateway to home improvement confidence. Start with easier projects like garden planters or cable management. As your skills grow, move to more complex installations like TV mounts and security systems. Each successful project builds experience and pride in your home.
Keep this guide handy for reference. Review the troubleshooting section before starting new projects. With proper technique and care, your hammer drill will serve you for years, making every DIY weekend more productive and rewarding. Now grab your safety glasses, select your bit, and start building something amazing.
