
Transform your home with these must-have hammer drill projects. This comprehensive guide walks you through eight practical DIY projects from hanging heavy shelves on masonry walls to mounting TVs on brick fireplaces. Learn proper techniques, safety steps, and troubleshooting to master your hammer drill and tackle any home improvement challenge with confidence.
Key Takeaways
- Choose the right tool: A hammer drill is essential for masonry, brick, and concrete projects where regular drills fail
- Safety comes first: Always wear eye protection, dust masks, and hearing protection when operating a hammer drill
- Start small: Practice on scrap material before drilling into your walls to perfect your technique
- Use proper bits: Masonry bits with carbide tips are required for hammer drill projects
- Mark twice, drill once: Use a level and pencil to ensure precise placement before drilling
- Control dust: Keep a vacuum nearby and use the drill’s dust collection features when possible
- Maintain your tool: Clean your hammer drill regularly and replace worn carbon brushes for optimal performance
Introduction: Why Every DIYer Needs Hammer Drill Skills
You’ve got a hammer drill sitting in your toolbox. Maybe you bought it for one project and now it’s gathering dust. Or maybe you’re thinking about buying one but aren’t sure if you really need it. Let me show you why mastering the hammer drill is a game-changer for home DIY projects.
Unlike regular drills, hammer drills combine rotation with a rapid hammering action. This makes them the only tool that can effectively drill into concrete, brick, and stone. For most DIYers, this means the difference between a successful project and a frustrating failure. In this guide, you’ll learn eight practical projects that require a hammer drill. Each project includes step-by-step instructions, safety tips, and pro advice to ensure your success.
Before we dive into the projects, it’s important to understand when to use a hammer drill versus a regular drill. Check out this helpful guide on the difference between a hammer drill and regular drill to make sure you’re using the right tool for each job.
Safety First: Your Non-Negotiable Prep Work
Before touching your hammer drill, you need proper protection. Masonry drilling creates fine dust that’s harmful to breathe. It also produces loud noise and flying debris.
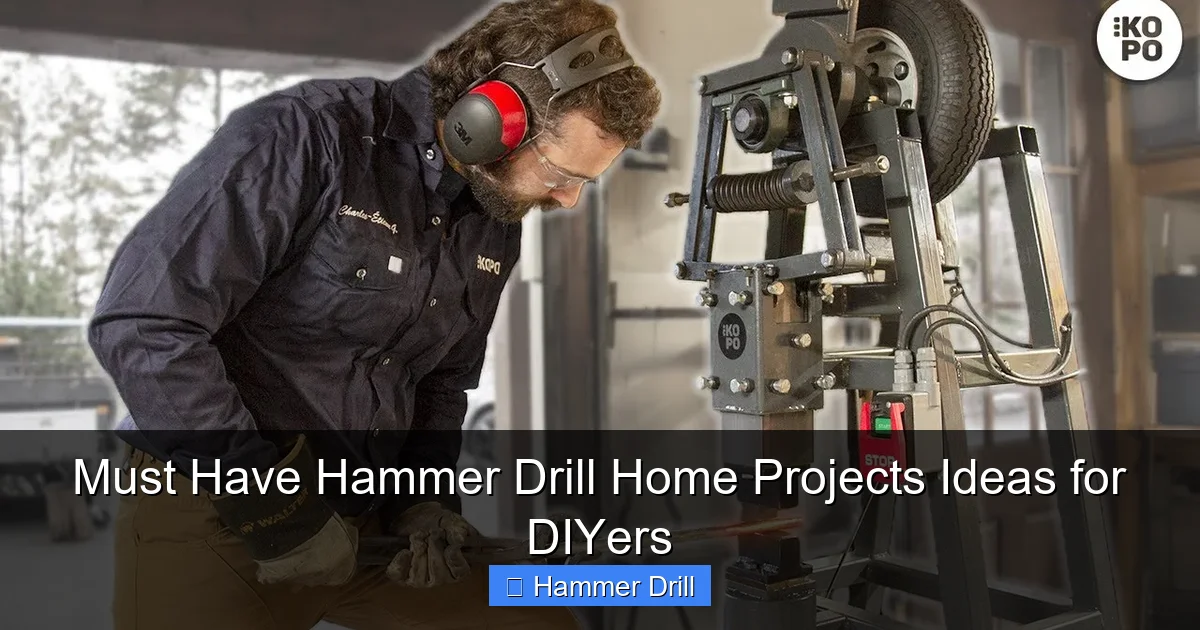
Visual guide about Must Have Hammer Drill Home Projects Ideas for DIYers
Image source: i.ytimg.com
Essential Safety Gear
- Eye protection: Safety glasses or goggles that seal around your eyes
- Dust mask: At minimum N95, but a respirator is better for large projects
- Hearing protection: Earplugs or earmuffs – hammer drills are loud
- Work gloves: Protect your hands from vibration and sharp edges
- Long sleeves: Wear durable clothing to protect your skin
Workspace Preparation
Clear the area around your drilling spot. Remove any obstacles that could cause tripping. Cover nearby surfaces with drop cloths to catch dust. Keep a vacuum cleaner nearby to clean as you go. Make sure you have adequate lighting to see your marks clearly.
Locate electrical wires and plumbing behind walls using a stud finder with AC detection. Drilling into a live wire is dangerous and costly. When in doubt, turn off the power to that area of your home.
Project 1: Hanging Heavy Floating Shelves on Masonry Walls
Floating shelves look amazing on brick or concrete walls, but they require secure mounting. A hammer drill is your best friend for this project.
Visual guide about Must Have Hammer Drill Home Projects Ideas for DIYers
Image source: i.ytimg.com
What You’ll Need
- Hammer drill
- Masonry drill bits (size matching your anchors)
- Lead masonry anchors
- Toggle bolts for extra support
- Level
- Pencil
- Vacuum cleaner
- Hammer
- Shelves with mounting hardware
Step-by-Step Instructions
Step 1: Mark Your Locations
Use a level to draw a straight line where your shelf will sit. Mark the exact spots where mounting brackets will go. Double-check measurements. Measure twice, drill once.
Step 2: Start with a Pilot Hole
Set your hammer drill to hammer mode. Start with a small pilot bit (1/8 inch). Drill at a slow speed to create a guide mark. This prevents the larger bit from wandering.
Step 3: Drill to Full Depth
Switch to your main masonry bit. Drill slowly at first, then increase speed. Apply firm, steady pressure. Pull the bit out every few seconds to clear dust. Drill slightly deeper than your anchor length.
Step 4: Clean and Insert Anchors
Vacuum out the hole thoroughly. Insert lead anchors and tap them in gently with a hammer. Attach your mounting brackets and slide the shelf into place.
Project 2: Mounting a TV on a Brick Fireplace
A brick fireplace is the perfect spot for a TV. But standard TV mounts won’t work on brick without proper tools.
Visual guide about Must Have Hammer Drill Home Projects Ideas for DIYers
Image source: cdn.thewirecutter.com
What You’ll Need
- Hammer drill
- 3/16″ masonry bits
- Heavy-duty lag shields
- Lag bolts
- Stud finder
- Level
- Extension cord
- Dust collection attachment
Step-by-Step Instructions
Step 1: Plan Your Height
Determine your ideal TV height while seated. Consider viewing angle and glare. Mark the center point on the wall.
Step 2: Locate Mounting Points
Hold the TV mount against the wall. Use a pencil to mark each screw location through the mount brackets. Use a level to ensure the mount is perfectly horizontal.
Step 3: Drill Carefully
Brick can be brittle. Start at low speed to create a divot. Then drill at medium speed. Don’t push too hard. Let the hammer action do the work. Drill to the depth of your lag shields.
Step 4: Secure the Mount
Vacuum all dust from holes. Insert lag shields. Use a socket wrench to drive lag bolts through the mount. Attach the TV according to manufacturer instructions.
Project 3: Installing a Garage Storage System on Concrete Walls
Garage walls are often concrete or cinder block. A hammer drill is the only way to secure heavy storage racks permanently.
What You’ll Need
- Hammer drill
- 1/4″ and 3/8″ masonry bits
- Plastic or metal sleeve anchors
- Storage system with hardware
- Chalk line
- Measuring tape
Step-by-Step Instructions
Step 1: Plan Your Layout
Measure your wall space. Decide where each storage component will go. Use a chalk line to create straight horizontal lines for shelf supports.
Step 2: Drill Anchor Holes
Mark anchor points every 16 inches vertically and horizontally. Drill holes for your anchors. For heavy shelves, use 3/8″ anchors. For lighter items, 1/4″ anchors work fine.
Step 3: Clean and Set Anchors
Blow out dust or vacuum holes. Insert anchors and tap them flush with the wall. Attach your storage rails or brackets. Level them before final tightening.
Project 4: Installing Outdoor Security Cameras on Brick
Security cameras deter intruders and protect your home. Brick exteriors require special techniques for clean, secure mounting.
What You’ll Need
- Hammer drill
- 1/8″ masonry bit for pilot holes
- Drill bit matching camera mounting screws
- Plastic anchors
- Security camera kit
- Cable clips
- Silicone caulk
Step-by-Step Instructions
Step 1: Choose Camera Location
Pick a spot with good coverage and protection from rain. Under eaves is ideal. Ensure the camera can reach power if needed.
Step 2: Drill Small Pilot Holes
Start with a tiny pilot hole. This guides your larger bit and prevents slipping on the smooth brick surface.
Step 3: Drill Final Hole and Mount
Drill to the correct depth for your anchors. Insert anchors and attach the camera mounting plate. Seal around the mount with silicone to prevent water damage.
Project 5: Installing Curtain Rods in Plaster and Lath Walls
Older homes have plaster walls over wooden lath. A hammer drill prevents cracking plaster while securing heavy curtain rods.
What You’ll Need
- Hammer drill
- Small masonry bit for plaster
- Wood drill bit for lath
- Toggle bolts
- Curtain rod hardware
- Drywall saw (just in case)
Step-by-Step Instructions
Step 1: Find Studs
Use a stud finder to locate wooden lath strips. Drilling into lath provides the best support. Mark these locations.
Step 2: Use Hammer Mode Sparingly
Set your hammer drill to low hammer setting. Plaster is brittle. Start at very low speed. The hammer action should be minimal to avoid cracking.
Step 3: Drill Through Lath
Once through plaster, you’ll hit wood lath. Continue drilling slowly. Use a bit slightly smaller than your toggle bolt. Insert toggle bolts for maximum holding power.
Project 6: Creating a Concrete Countertop with Proper Holes
DIY concrete countertops are trendy and durable. Drilling precise holes for faucets and sinks requires a hammer drill.
What You’ll Need
- Hammer drill
- Diamond-tipped core bits
- Water spray bottle
- Masking tape
- Backer board
- Caulking gun
Step-by-Step Instructions
Step 1: Mark Hole Locations
Place masking tape on the concrete surface where you’ll drill. Mark the exact center with a pencil. The tape prevents chipping.
Step 2: Keep Bits Cool
Spray water on the drilling area frequently. Diamond bits overheat without cooling. This extends bit life and prevents cracking.
Step 3: Drill Slowly
Use a core bit for large holes. Apply light pressure. Let the diamond teeth do the cutting. Drill from both sides for clean exit holes.
Project 7: Mounting a Heavy Mirror on a Concrete Wall
Decorative mirrors make rooms feel larger. Heavy mirrors need secure mounting on concrete walls.
What You’ll Need
- Hammer drill
- Masonry bits
- Heavy-duty picture hangers
- D-rings or wire
- Level
- Pencil
Step-by-Step Instructions
Step 1: Determine Weight
Weigh your mirror. Choose anchors rated for at least twice that weight. Better safe than sorry.
Step 2: Mark Mounting Points
Hold the mirror against the wall (with a helper). Mark where D-rings or wire sit. Use a level to ensure marks are even.
Step 3: Drill and Hang
Drill holes for your heavy-duty hangers. Insert anchors. Attach hangers securely. Lift the mirror into place and verify it’s level.
Project 8: Installing a Mailbox on a Brick Column
Brick columns add character but make mailbox installation tricky. A hammer drill makes this a simple afternoon project.
What You’ll Need
- Hammer drill
- 3/16″ masonry bits
- Plastic anchors
- Stainless steel screws
- Mailbox mounting template
- Level
Step-by-Step Instructions
Step 1: Use the Template
Most mailboxes include a paper template. Tape it to the brick. Use a level to ensure it’s straight. Mark hole locations through the template.
Step 2: Drill Carefully
Brick can spall if you drill too fast. Use medium speed. Pull the bit out frequently to clear dust. Drill to anchor depth.
Step 3: Mount and Seal
Insert anchors and attach the mailbox. Apply a small bead of silicone around the base to prevent water from seeping behind it.
Troubleshooting Common Hammer Drill Problems
Even with the right tool, things can go wrong. Here are solutions to common issues.
Problem: Drill Bit Won’t Bite Into Concrete
Solution: Check that hammer mode is engaged. Apply more downward pressure. Make sure you’re using a masonry bit with carbide tip. Dull bits won’t cut. Replace if necessary.
Problem: Excessive Dust and Mess
Solution: Use a vacuum with a brush attachment held near the drill bit. Some hammer drills have built-in dust collection. Tape a small bag to the wall under your drilling spot to catch falling dust.
Problem: Bit Gets Stuck
Solution: Don’t force it. Reverse the drill while pulling gently. Clear dust from the hole. Try a smaller bit first. If truly stuck, use penetrating oil and wait 10 minutes before trying again.
Problem: Hole Is Too Large
Solution: Use a larger anchor or fill the hole with epoxy. Drill a new hole 1/2 inch away. Always measure twice before drilling.
Problem: Overheating Drill Motor
Solution: Take breaks every 30 seconds of continuous drilling. Let the motor cool for 2-3 minutes. Ensure you’re not pushing too hard. For heavy use, consider a corded hammer drill with more power.
Maintenance Tips for Your Hammer Drill
Proper maintenance extends your hammer drill’s life and ensures safe operation.
Regular Cleaning
Wipe down the housing after each use. Blow out vents with compressed air monthly. Keep the chuck clean and free of debris. Apply a light oil to the chuck mechanism quarterly.
Check Carbon Brushes
Most hammer drills have accessible carbon brushes. Check them every 6 months. Replace if they’re shorter than 1/4 inch. Worn brushes damage the motor.
Inspect the Cord
For corded models, check for frayed wires or damaged insulation. For cordless models, ensure battery contacts are clean. Store batteries in a cool, dry place.
Lubricate Moving Parts
Apply grease to the hammer mechanism annually. Check your manual for specific points. Too much grease attracts dust, so use sparingly.
Conclusion: Build Confidence With Every Project
Mastering your hammer drill opens up a world of home improvement possibilities. From hanging shelves to mounting TVs, these eight projects give you a solid foundation. Remember to always prioritize safety, use the right bits, and practice on scrap material first.
Your hammer drill is a powerful tool that, when used correctly, will serve you for years. Keep this guide handy as a reference for future projects. As you gain experience, you’ll find new ways to use your hammer drill throughout your home.
Ready to learn more about using drills for different tasks? Check out this comprehensive guide on how to use a drill for screws into a wall to expand your skills even further.
