
Unlock professional-grade results on your home projects with a hammer drill—this essential power tool effortlessly tackles concrete, brick, or masonry where standard drills fail. Transform your weekend with 15 practical DIY ideas, from mounting heavy shelves and installing anchors to cutting precise holes, making tough tasks fast and frustration-free. Get ready to conquer masonry confidently and efficiently.
Key Takeaways
- Always wear safety goggles and secure your workpiece before drilling.
- Use hammer mode only for masonry, not wood or metal, to avoid damage.
- Start drilling at a slow speed to prevent the bit from slipping on hard surfaces.
- Choose the correct drill bit specifically designed for hammer action on your material.
- Apply steady, moderate pressure; let the tool’s hammer mechanism do the work.
- Select simple projects first, like hanging shelves, to build confidence with the tool.
Why This Matters: Understanding the Problem
Let me tell you about the time I bought my first hammer drill. It sat in my garage for months, wrapped in its shiny plastic bag, while I used my regular drill for everything. Sound familiar? I kept stripping screws and struggling to make holes in my concrete basement walls. I felt frustrated and felt like I’d wasted money on a tool I didn’t understand.
That all changed when I finally unboxed it and tried it on a simple brick wall. The difference was night and day. Suddenly, I had this powerful tool that could tackle projects I’d been avoiding for years. But here’s the thing—I had no idea what I could actually do with it beyond “making holes in hard stuff.”
That’s exactly why I’m writing this guide. If you’ve got a hammer drill gathering dust, or you’re looking for hammer drill DIY ideas 15 projects to try this weekend, you’re in the right place. These tools are incredibly versatile, but most people only use them for one or two tasks. Today, we’re unlocking the full potential of your hammer drill with practical, weekend-friendly projects that will actually make you excited to get started.
What You Need Before We Begin
Before diving into our hammer drill DIY ideas 15 projects to try this weekend, let’s make sure you’re properly equipped. Don’t worry—I’ll keep this simple and affordable.
Visual guide about Hammer Drill DIY Ideas 15 Projects to Try This Weekend
Image source: digthisdesign.net
Essential Tools & Materials
- Your hammer drill – This is the star of the show. If you’re unsure whether you have a true hammer drill versus a regular drill, check out this helpful guide on the difference between a drill and a hammer drill.
- Drill bits – You’ll need a variety: masonry bits for concrete and brick, wood bits for framing projects, and metal bits for any metalwork.
- Safety gear – Safety glasses are non-negotiable. A dust mask is highly recommended, especially for masonry work. I learned this the hard way after my first concrete project left me coughing for hours.
- Measuring tools – Tape measure, pencil, and a level. Trust me, eyeballing it never works out.
- Masking tape – This little helper prevents bit slipping and makes your marks more visible.
- Vacuum or brush – For cleaning up dust as you go.
Most of these items are probably already in your toolbox. The key is having the right bits for the material you’re working with. I made the mistake of trying to use a wood bit on concrete once. Let’s just say it was a very expensive lesson in bit selection.
Step-by-Step Guide to Hammer Drill DIY Ideas 15 Projects to Try This Weekend
Alright, let’s get into the good stuff. I’ve organized these projects from beginner-friendly to more advanced, so you can build confidence as you go. Each project includes the difficulty level and estimated time so you can plan your weekend perfectly.
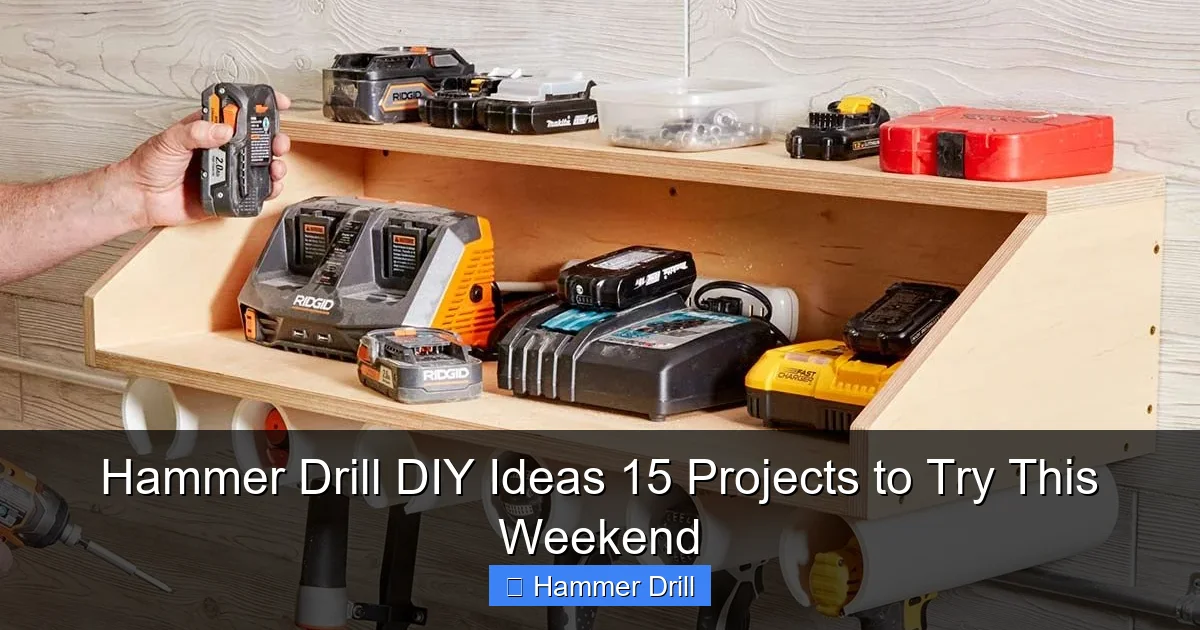
Visual guide about Hammer Drill DIY Ideas 15 Projects to Try This Weekend
Image source: i.pinimg.com
Step 1: Install Rock-Solid Wall Shelves (Beginner, 1-2 hours)
This is my go-to starter project because it’s practical and instantly rewarding. Forget those flimsy plastic anchors that pull right out of drywall.
First, decide where your shelf brackets will go. Use your level to draw a straight line—this step is crucial. Place a small piece of masking tape over each mark. This prevents the drill bit from wandering when you start.
Select a masonry bit that matches your anchor size. For most shelves, a 1/4″ bit works well. Set your drill to hammer mode—you’ll hear that distinctive clicking sound. Start slow, then increase speed as the bit bites into the wall. Apply steady pressure but don’t force it. The hammer action does most of the work.
Once you’ve drilled to the depth of your anchor, blow out the dust. I use my mouth or a small brush. Insert the anchor and tap it gently with a hammer until flush. Attach your bracket and you’ve got a shelf that can hold serious weight.
Step 2: Mount a Heavy TV or Entertainment Center (Beginner, 2-3 hours)
Similar to shelves, but with higher stakes. Your TV mount needs to be absolutely secure. I learned this after a wobbly mount nearly sent my TV crashing to the floor.
Find your wall studs using a stud finder. Mark the center of each stud. Hold the mounting bracket against the wall and use it as a template to mark your holes. Double-check those measurements—measure twice, drill once isn’t just a saying, it’s wisdom.
Drill into the stud centers using a wood bit slightly smaller than your lag bolts. The hammer function isn’t needed here since you’re drilling into wood studs, not drywall or masonry. Switch to regular drill mode for this step. For any holes that fall in drywall between studs, use heavy-duty toggle bolts and hammer mode with a masonry bit.
Secure the mount with lag bolts into the studs. The result? A rock-solid installation that’ll keep your expensive TV safe for years.
Step 3: Create the Perfect Garden Shed Anchors (Beginner, 1 hour)
If you’ve got a shed sitting on concrete or a brick foundation, this project is essential. Wind can wreak havoc on an unsecured shed.
Position your shed where you want it. Mark holes in the shed’s base plates. You’ll need to drill through metal and into concrete or brick. Use a metal bit for the shed base, then switch to a masonry bit for the foundation.
Start with the metal portion using regular drill mode. Apply cutting fluid if you have it—makes the job much easier. Once through the metal, switch to hammer mode for the concrete or brick. Use sleeve anchors for this application. They expand as you tighten them, creating a permanent hold.
This simple project can prevent thousands of dollars in damage during the next big storm. I wish I’d done this sooner with my first shed.
Step 4: Build a Concrete Planter from Scratch (Intermediate, 3-4 hours)
This is where things get fun. You can buy pre-made concrete planters, but making your own is incredibly satisfying and cheap.
Build a simple wooden form using plywood and 2x4s. Make sure it’s watertight—I learned this after my first attempt leaked everywhere. Mix concrete according to package directions. Pour it into your form and let it cure for 24 hours.
Once cured, remove the form. Now comes the hammer drill part. Mark where you want drainage holes—usually 3-4 in the bottom. Use a masonry bit one size larger than your drainage pipe. Start slowly to prevent cracking the concrete. The hammer action will gently chip through without shattering your planter.
Insert drainage pipes or simply leave the holes open. Sand the edges smooth and seal the concrete. You now have a custom, industrial-chic planter that cost you pennies compared to store-bought versions.
Step 5: Install a Garage Organization System (Intermediate, 2-4 hours)
Garage walls are usually concrete block or poured concrete. Regular drills just bounce off these surfaces. That’s where your hammer drill shines.
Plan your layout first. Slatwall systems are my favorite because they’re endlessly customizable. Mark where your mounting rails will go. Use a level—this is critical for a professional look.
Drill pilot holes for your rails using a masonry bit. I like to drill slightly deeper than needed to ensure full anchor insertion. Use plastic or metal anchors designed for concrete. Tap them in with a hammer, then screw your rails securely.
Once the rails are up, you can hang hooks, shelves, and bins anywhere. Your garage will transform from a black hole of clutter to an organized paradise. This project alone can add value to your home.
Step 6: Repair Crumbling Mortar on Brick Walls (Intermediate, 2-3 hours)
That crumbling mortar between your bricks isn’t just ugly—it’s a structural problem. This project saves you money on professional tuckpointing.
First, you need to remove the damaged mortar. Use your hammer drill with a chisel bit in hammer-only mode. Yes, many hammer drills have a dedicated hammer setting without rotation. This is perfect for chipping away old mortar.
Work carefully, removing mortar to a depth of about 3/4 inch. Don’t go too deep and damage the bricks. Clean out all the dust with a brush and vacuum. Mix new mortar to match the existing color as closely as possible.
Pack the new mortar into the joints using a pointing trowel. Smooth it out and let it cure. The result looks professional and protects your wall from water damage. I was shocked how much difference this made to my home’s appearance.
Step 7: Create a Brick Pizza Oven Base (Advanced, 4-6 hours)
This is a weekend warrior project that pays off with years of outdoor cooking fun. You’ll need some masonry skills, but it’s totally doable.
Build a base using concrete blocks or pour a concrete slab. Let it cure completely. Now, you’ll lay bricks on top to create the oven floor. Between each brick, you need weep holes for moisture to escape during firing.
Drill these holes using a masonry bit and hammer mode. Angle the drill slightly to create a channel. Be careful not to drill through into the base below. Space holes every 6-8 inches.
This ventilation is crucial for preventing cracks when you fire up the oven. Once complete, you have a solid foundation for a clay or pre-made pizza oven. My family has made countless memories cooking on ours.
Step 8: Mount Outdoor Motion Sensor Lights (Beginner, 1-2 hours)
Security and ambiance—what’s not to love? This project makes your home safer and looks great.
Choose locations high on your exterior walls. Mark the mounting holes. For brick or stucco, use hammer mode with a masonry bit. For wood siding, switch to regular drill mode.
I always drill a small pilot hole first, then follow with the correct size bit for the anchors. This keeps everything aligned. Install your anchors and mount the light fixture according to the manufacturer’s instructions.
Connect the wires and test the light. The whole process takes less time than mowing your lawn. Plus, you get the satisfaction of doing it yourself while adding real value to your property.
Step 9: Build a Concrete Bench for Your Patio (Intermediate, 3-4 hours)
Similar to the planter, but larger. This project creates durable, weather-resistant seating that looks modern and costs very little.
Build forms for the seat and legs. Use melamine-coated plywood for a smooth finish. Mix and pour concrete. After curing, you’ll need to drill holes for decorative rebar or to attach wooden armrests.
Mark your hole locations carefully. Use hammer mode with a masonry bit for any holes through the concrete. For attaching wood armrests, drill pilot holes through the concrete, then use concrete screws.
Sand all edges smooth and apply a concrete sealer. You now have a bench that will last decades and costs a fraction of store-bought furniture. I built two and they’ve survived three winters with no issues.
Step 10: Install a Basement Dehumidifier with Drain Line (Intermediate, 2-3 hours)
Basement moisture is a constant battle. Running a drain line through concrete walls makes the job automatic and worry-free.
Locate your dehumidifier position. Find the best path for the drain line to exit through the foundation wall. Mark where you’ll drill through the concrete.
Use a hammer drill with a masonry bit sized for your drain hose plus a little extra for clearance. Drilling through basement walls can be tricky—take your time and let the tool work for you. Don’t push too hard.
Install a rubber grommet in the hole to protect the hose. Run the drain line and test the system. No more emptying buckets every few hours. This simple upgrade makes a huge difference in convenience.
Step 11: Create Custom Concrete Countertops (Advanced, 6-8 hours)
This is the big leagues of hammer drill projects. Custom concrete counters look stunning and are surprisingly affordable if you DIY.
Build your forms carefully—measurements must be exact. Pour and cure the concrete. Once set, you’ll need to polish the surface and drill holes for faucets and sink cutouts.
For faucet holes, use a diamond-tipped hole saw with your hammer drill in hammer mode. Keep the area wet to reduce dust. For sink cutouts, drill a starter hole, then use a jigsaw with a concrete blade. The hammer drill helps create the initial access point.
Seal the finished counters with a food-safe sealer. The result looks like something from a high-end kitchen showroom. I still get compliments on mine years later.
Step 12: Mount a Basketball Hoop to Concrete (Beginner, 1-2 hours)
Got kids? This project might make you the coolest parent on the block. Permanent hoops are much safer than portable ones.
Position the mounting plate where you want the hoop. Mark all four holes. Use a masonry bit that matches your anchor bolts exactly. Drill to the depth specified in the instructions.
Blow out all dust thoroughly. Insert the bolts and tighten them securely. The hammer drill makes quick work of this, while a regular drill would take forever and might not even penetrate.
Attach the backboard and rim. You now have a regulation-height hoop that won’t tip over. My kids have worn out three basketballs on ours so far.
Step 13: Build a Brick Barbecue Island (Advanced, 6-8 hours)
Transform your backyard with a custom outdoor kitchen. This project requires masonry skills but pays off massively.
Start with a concrete slab base. Lay bricks using mortar. For the grill opening and storage doors, you’ll need to drill holes for ventilation and mounting hardware.
Use your hammer drill in hammer-only mode with a chisel bit to create clean openings in brickwork. You can also drill holes for gas lines or electrical conduits if you’re adding those features.
Install your grill and accessories. This project turns your patio into an entertainment destination. We’ve hosted countless BBQs since building ours.
Step 14: Install a Whole House Fan (Intermediate, 3-4 hours)
These fans can cut your cooling costs dramatically. Installation requires cutting through attic floors and drilling through framing.
Cut the hole in your ceiling according to the fan specifications. In the attic, you’ll need to drill holes through the roof rafters for mounting bolts.
Use a long masonry bit if you’re drilling through roof decking into rafters. For wood framing, switch to regular drill mode. The key is keeping the drill perpendicular to the surface for straight holes.
Secure the fan housing and install the vent cover. The difference in air circulation is incredible. My electric bill dropped noticeably after this installation.
Step 15: Create a Concrete Fire Pit (Beginner, 2-3 hours)
The final project in our hammer drill DIY ideas 15 projects to try this weekend list is perfect for summer evenings. Store-bought fire pits are expensive and flimsy.
You can buy a concrete fire pit ring or build one from blocks. If using blocks, you’ll need to drill holes for rebar to secure them together and to the ground.
Mark hole locations every 12 inches around the perimeter. Use hammer mode with a masonry bit to drill into the bottom of each block. Insert rebar pieces and secure with concrete adhesive.
Drive the rebar into the ground to anchor the pit. Add fire bricks inside and you’re ready for s’mores season. We’ve spent countless nights roasting marshmallows and telling stories around ours.
Pro Tips & Common Mistakes to Avoid
After completing dozens of these projects, I’ve learned some hard lessons. Let me save you the trouble.
Visual guide about Hammer Drill DIY Ideas 15 Projects to Try This Weekend
Image source: diyscraftsy.com
Pro Tip: Always start with a small pilot hole. I can’t tell you how many times I’ve slipped with a large bit and ruined a project before it started. A 1/8″ pilot hole guides your larger bit perfectly.
Warning: Don’t force the drill. Let the hammer action do the work. Pushing too hard can overheat the motor and burn out your bit. I learned this when I killed my first hammer drill trying to drill through a concrete beam. It wasn’t pretty.
Pro Tip: Keep your bits cool. Drilling into metal or dense concrete generates heat. Dip bits in water every minute or so. This extends their life dramatically. I keep a spray bottle of water right next to me on every project.
Common Mistake: Using the wrong mode. Hammer mode is for masonry only. Using it on wood or metal can damage your material and your drill. If you’re unsure which mode to use, remember this: if it’s hard and you hear clicking, you’re in hammer mode. If it’s wood or metal and spins smoothly, use regular drill mode.
Pro Tip: Clean as you go. Dust buildup is the enemy of precision. Keep a small brush or vacuum handy. I vacuum every few holes on big projects. It makes the work more pleasant and helps you see your marks clearly.
Warning: Watch for electrical wires and pipes. Always use a stud finder with AC detection or a dedicated wire scanner before drilling into walls. I’ve hit a wire once—it’s scary and dangerous. Don’t become a statistic.
FAQs About Hammer Drill DIY Ideas 15 Projects to Try This Weekend
Q: Can I use my regular drill for these projects instead?
A: Some projects, yes. But for concrete, brick, or masonry, you really need hammer mode. The hammering action breaks up the material as the bit rotates. A regular drill will just spin and overheat. If you’re unsure about your tool, check out this comparison of impact driver vs hammer drill to understand which tool you have and what it can do.
Q: How do I know which bit to use?
A: Match the bit to the material, not the project. Masonry bits have a carbide tip and are for concrete, brick, and stone. Wood bits have a pointed tip and flutes for chip removal. Metal bits are sharp and often have a spiral design. Using the wrong bit will damage both the bit and your material. When in doubt, look at the packaging—it always tells you what material the bit is designed for.
Q: Is hammer mode always necessary for concrete?
A: Yes, for any substantial hole. The hammer action chips away the concrete while the bit rotates. Without it, you’d just create friction and heat. For very small holes (under 1/4″), you might get away with a regular drill, but it’s not recommended. For anything larger or deeper, hammer mode is essential.
Q: How deep can I drill with a hammer drill?
A: Most consumer hammer drills can drill up to 1-1/2 inches in concrete effectively. For deeper holes, you’ll need special extensions or a more powerful tool. The key is patience—drill in stages, pulling the bit out frequently to clear dust. Trying to drill too deep too fast will bog down your motor.
Q: What safety precautions should I take seriously?
A: Safety glasses are mandatory—concrete chips are sharp and can fly surprisingly far. A dust mask is crucial because concrete dust is harmful to breathe. Hearing protection helps with the loud hammering noise. And always secure your workpiece. I once had a brick move on me and it ruined the hole and scratched my arm. Use clamps or have a helper hold things steady.
Q: Can I drill through tile with a hammer drill?
A: Yes, but be extremely careful. Tile cracks easily. Use a diamond-tipped bit or a specialized tile bit. Start at a very low speed and light pressure. Place masking tape over the spot to prevent slipping. Some people prefer to start with a small bit, then step up to the final size. I’ve had mixed results—sometimes it’s perfect, other times the tile cracks. Have a backup tile ready just in case.
Q: How do I maintain my hammer drill for these projects?
A: Keep it clean. Blow out dust from the vents after every use. Check the chuck regularly and keep it lubricated. Replace brushes when they wear down—most drills have indicator marks. Store it in a dry place. And most importantly, use it regularly. Tools that sit unused can develop problems. I use mine at least once a month, even if it’s just drilling a few test holes in scrap material.
Final Thoughts
Look, I get it. Taking on a new tool can feel intimidating. But your hammer drill isn’t just another power tool—it’s a gateway to projects you’ve been putting off for years. From simple TV mounts to full outdoor kitchens, the hammer drill DIY ideas 15 projects to try this weekend we’ve covered show just how versatile this machine really is.
Start small. Pick one project that solves a problem you’re actually facing right now. Maybe it’s that wobbly shelf or the need for better garage storage. Complete it successfully, and you’ll build the confidence to tackle the bigger projects.
Remember the key principles: use the right bit for the material, let the tool do the work, and safety first. Don’t be the person who lets this powerful tool gather dust in the garage. Put it to work and transform your home, your outdoor space, and your confidence as a DIYer.
Your hammer drill is waiting. That project you’ve been dreaming about is possible. This weekend could be the start of something amazing. Now grab your safety glasses and get drilling—your future self will thank you.
