
Fixing your hammer drill doesn’t require a pro. With the right knowledge and basic tools, you can diagnose and repair common problems like loss of power, strange noises, or a dead tool. This guide provides step-by-step instructions to help you save hundreds on repair bills and extend your tool’s life through proper maintenance.
Key Takeaways
- Safety is Non-Negotiable: Always disconnect the power source and use protective gear before opening your tool to prevent serious injury.
- Diagnosis is Half the Battle: Accurately identifying the symptom (e.g., no power, no hammer action) leads you directly to the most likely failed component.
- Cleanliness is Key: A vast majority of power tool failures are caused by dust and debris buildup; a thorough internal cleaning can often restore function.
- Start with the Simple Parts: Carbon brushes and power cords are inexpensive, wear-prone parts that are easy to replace and often the culprit.
- Know When to Call a Pro: Repairing a cracked gear housing or a faulty armature requires specialized tools and skills; sometimes professional service is the most cost-effective choice.
- Prevention Beats Repair: Regular cleaning, proper bit usage, and avoiding overheating are the best ways to avoid needing repairs in the first place.
Pro Hammer Drill Repair Tips to Save Time and Money
Is your trusty hammer drill acting up? Maybe it’s lost its punch, makes a terrible grinding noise, or just won’t turn on. Before you rush out to buy a new one or spend a small fortune at the repair shop, take a deep breath. Many common hammer drill problems are fixable in your own workshop. With a systematic approach, some basic tools, and a bit of patience, you can perform your own hammer drill repair. This guide will walk you through diagnosing issues, performing critical fixes, and maintaining your tool to prevent future headaches. You’ll not only save money but also gain the satisfaction of bringing a powerful tool back to life.
Golden Rule #1: Safety First
You cannot fix a tool if you get hurt. Hammer drills contain powerful motors, sharp gears, and in corded models, dangerous voltages.
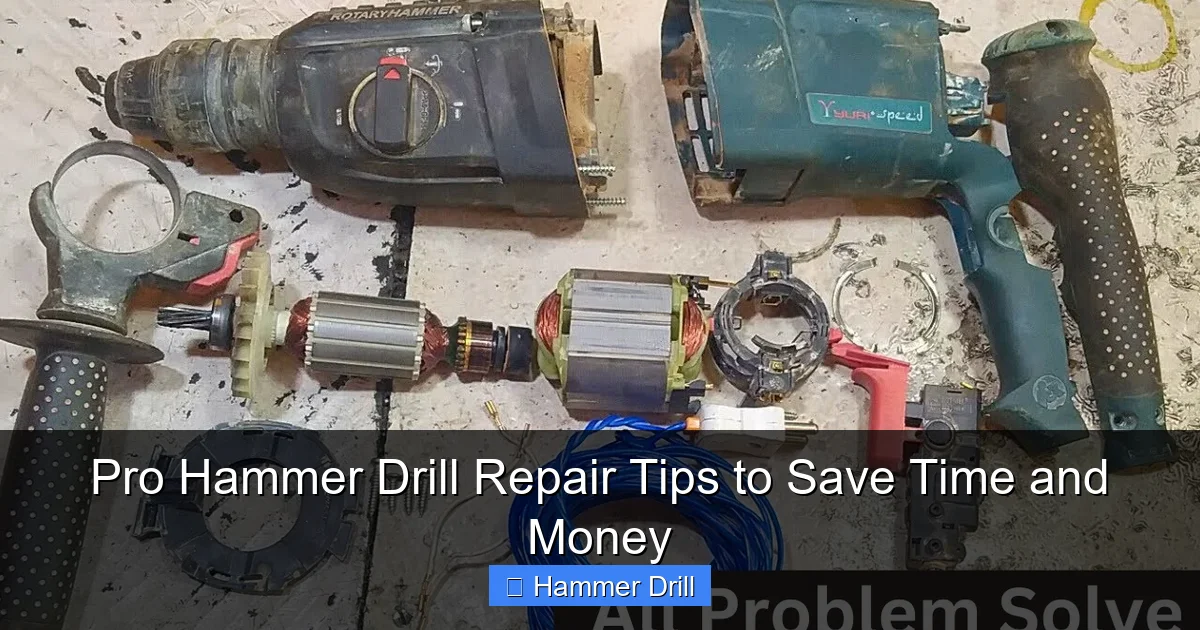
Visual guide about Pro Hammer Drill Repair Tips to Save Time and Money
Image source: i.ytimg.com
Essential Safety Steps
- Unplug or Remove the Battery: For corded drills, unplug from the wall. For cordless, remove the battery pack. This is your absolute first step, every single time.
- Wear Safety Gear: Don safety glasses to protect your eyes from springs, grease, and debris. Lightweight work gloves can protect your hands from sharp edges.
- Work in a Clean, Well-Lit Area: A tidy bench helps you keep track of small screws and components. Good lighting is crucial for seeing small details.
- Use the Right Tools: Have a set of quality screwdrivers (often Phillips and Torx), needle-nose pliers, and a multimeter ready.
Step 1: Diagnose the Problem
What exactly is your hammer drill doing (or not doing)? The symptom points to the faulty system. Here’s a quick diagnostic chart:
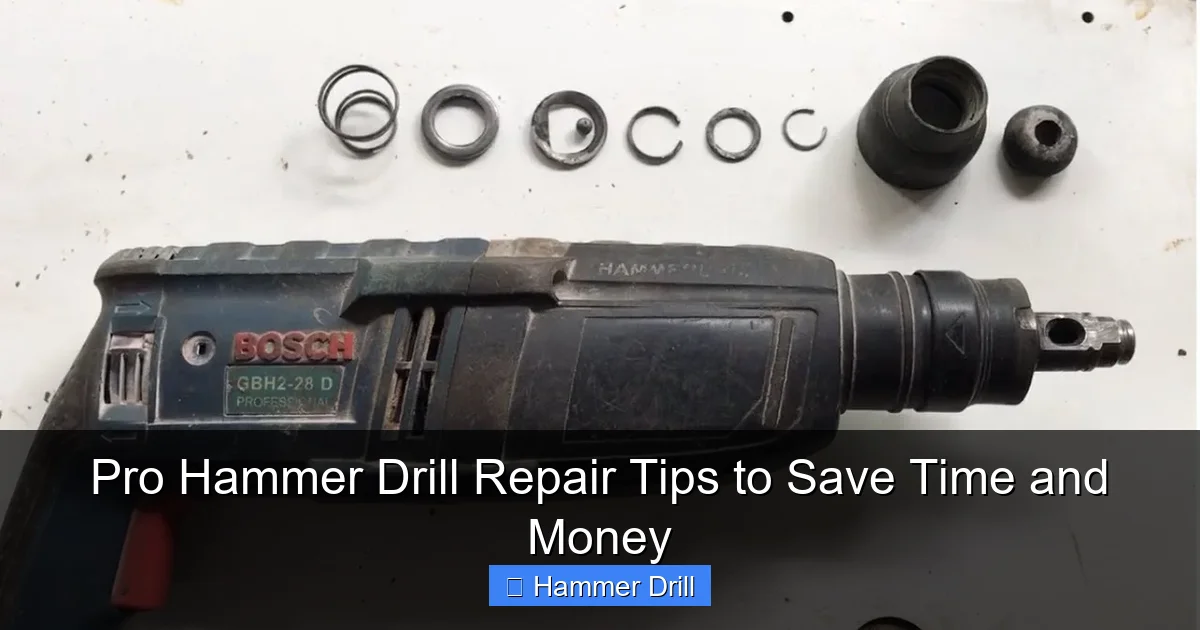
Visual guide about Pro Hammer Drill Repair Tips to Save Time and Money
Image source: i.ytimg.com
- Drill Won’t Turn On: Power source (battery/outlet), power cord, trigger switch, carbon brushes, or armature.
- Drill Runs But Has No Power/Slows Under Load: Worn carbon brushes, failing motor (armature), or a weak/bad battery (cordless).
- No Hammering Action, Only Rotation: Hammer mechanism is disengaged, or the piston, hammer bit, or associated springs are worn/broken.
- Strange Grinding or Rattling Noise: Damaged gears, worn bearings, or debris in the gearbox.
- Smell of Burning or Electrical Smoke: Overheated motor (armature/stator). This is a serious sign.
- Chuck is Wobbly or Won’t Hold Bits: Worn chuck jaws or damaged chuck assembly.
Knowing the difference between a hammer drill’s functions is key to diagnosis. If you’re unsure whether your issue is specific to the hammering function, our guide on the difference between a drill and a hammer drill can help clarify its unique mechanism.
Step 2: The Essential Cleaning & Inspection
Dust and concrete debris are the top enemies of your hammer drill. A deep clean often solves the problem.
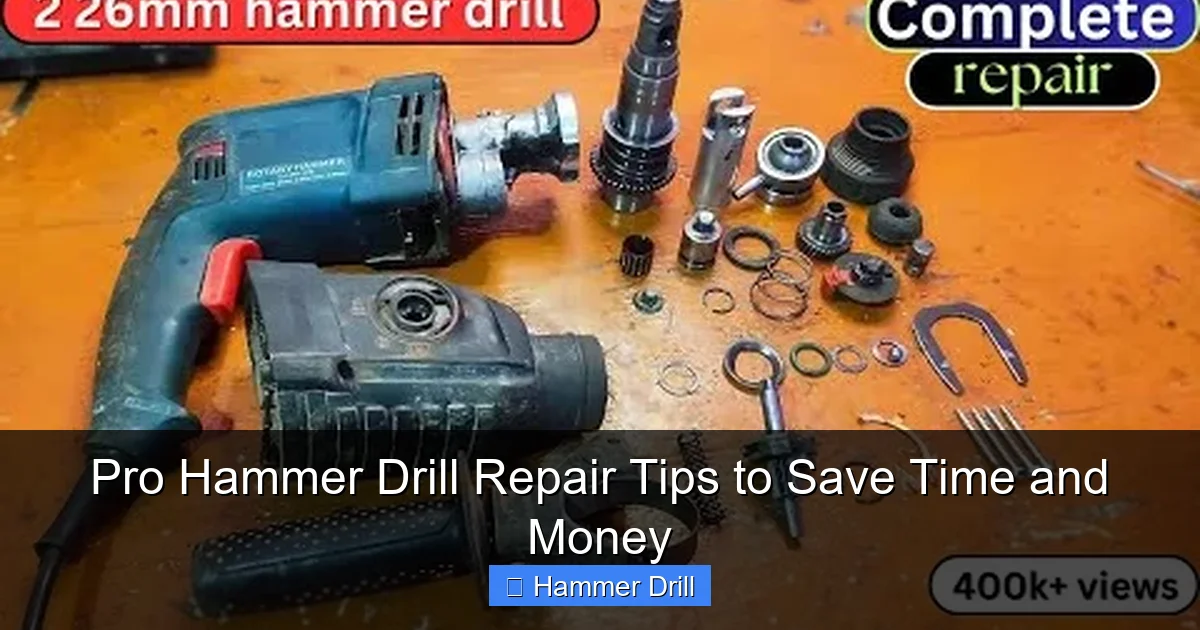
Visual guide about Pro Hammer Drill Repair Tips to Save Time and Money
Image source: i.ytimg.com
How to Perform a Deep Clean
1. Exterior Cleaning: Wipe down the entire tool. Use a soft brush to clear vent slots.
2. Disassembly: Carefully remove the housing screws. Note their locations as they may be different lengths. Gently separate the clamshell halves.
3. Internal Blow-Out: Use compressed air to blow dust out of the motor, gearbox, and switch area. Do this outside or over a trash can.
4. Brush and Vacuum: Use a small, dry paintbrush to dislodge caked-on debris. Follow with a vacuum nozzle.
5. Gearbox Inspection: If you feel comfortable, open the gearbox (often a separate section). Check for broken gear teeth and clean out old, contaminated grease. Re-grease with high-quality tool grease.
6. Reassemble and Test: Put everything back together and test. You’d be surprised how often this works!
Step 3: Common Replacements You Can Do
If cleaning didn’t work, it’s time to look at specific parts. These are the most common and user-replaceable components.
Replacing Carbon Brushes
Symptom: Intermittent operation, sparking from vents, loss of power, or no power at all.
Process: Most modern drills have externally accessible brush caps on the sides of the tool. Unscrew the caps, remove the old springs and worn brushes (they’ll be short and uneven). Insert new brushes and springs, replace the caps. If your model has internal brushes, you’ll need to open the housing to access them.
Tip: Replace both brushes at the same time, even if only one looks worn.
Replacing the Power Cord (Corded Models)
Symptom: Intermittent power, especially when the cord is bent near the tool.
Process: Open the tool housing. Locate where the cord enters and is attached to the switch. Take a photo of the wiring connections. Disconnect the old wires, noting which color wire goes to which terminal. Attach the new cord’s wires exactly the same way. Ensure no bare wire is exposed and the cord clamp is tight.
Testing and Replacing the Trigger Switch
Symptom: Tool doesn’t start, or speed is inconsistent when the trigger is pulled.
Process: With the housing open and the power source disconnected, use a multimeter set to continuity (the beep setting). Place probes on the switch’s input and output terminals. When you pull the trigger, the meter should beep, showing a complete circuit. No beep means a bad switch. Replacement involves carefully desoldering or unplugging the old switch and installing the new one. If you’re not confident with electrical components, this is a point to consider professional help.
Step 4: Troubleshooting Specific Hammer Drill Issues
Hammer Drill Won’t Hammer
First, ensure the mode selector is set to the hammer drill icon, not just “drill.” If it’s set correctly and still won’t hammer:
- Open the Gear/Hammer Mechanism: The hammering action is created by a ratcheting mechanism between two textured metal plates (or a piston system in SDS-plus/max models).
- Inspect for Wear: Look at these plates or the piston. Are the teeth rounded off or broken? Is the spring that pushes them together broken or missing?
- Clean and Re-grease: Often, thick grease or debris can gum up this mechanism. Clean all parts with a degreaser, inspect, and apply a light coat of fresh grease.
- Replace Worn Parts: If the hammer plates, piston, or springs are visibly damaged, you must replace them as a set. These are model-specific parts.
Remember, the hammering mechanism is what truly sets this tool apart. For a deeper understanding of this function compared to other tools, see our article on the difference between a hammer drill and regular drill.
Chuck Repair or Replacement
A wobbly chuck is dangerous.
- Keyed Chuck: Try tightening the chuck with the key. If it still slips, the internal jaws are worn. Replacement is the only option.
- Keyless Chuck: Grip the outer sleeve with a strap wrench and use an Allen key in the screw at the base of the chuck jaws (turning clockwise to loosen) to remove it. Install the new chuck by reversing the process, tightening the Allen screw very securely.
Step 5: Knowing When to Stop (Call a Pro)
Your DIY hammer drill repair has limits. Here’s when to take it to a service center:
- Motor Windings are Burnt: If you open the tool and see black, charred copper wire on the armature or smell a strong burnt odor, the motor is shot. Rewinding is not practical; replacing the armature/stator assembly is a professional job.
- Cracked or Broken Gear Housing: Plastic housings can crack from a drop. This affects alignment and safety. It’s often more cost-effective to buy a new tool.
- Complex Electronic Failure: Cordless drills with circuit boards for variable speed or brushless motors are very difficult to diagnose and fix without schematics and parts.
- You Feel Unsure: There is no shame in this. If you’re in over your head, a professional repair can still be cheaper than buying a new, high-quality hammer drill. If you’re considering a replacement, researching the best cordless drill options is a good next step.
Conclusion: Empowerment Through Repair
Attempting a hammer drill repair is more than just a way to save money. It’s a skill that builds confidence and deepens your understanding of the tools you rely on. By starting with safety, methodically diagnosing the issue, and tackling the most common fixes like cleaning and brush replacement, you can solve a majority of problems yourself. Remember, regular maintenance—blowing out dust, checking brushes, and using the right bits—is the best repair strategy of all. Keep this guide handy, invest in a good multimeter, and don’t be afraid to get your hands dirty. Your wallet (and your workshop) will thank you.
