
Proper hammer drill lubrication prevents expensive damage and extends tool life. This guide shows you exactly when and how to lubricate your hammer drill. Follow these simple steps to avoid shop repairs and keep your tool working perfectly.
Key Takeaways
- Regular lubrication prevents 90% of hammer drill failures: A simple 15-minute maintenance every 50 hours saves hundreds in repairs.
- Use only grease, never oil: Heavy-duty lithium grease protects gears while oil attracts dirt and washes away.
- Lubricate every 50 hours of use: Heavy users need monthly attention, casual users about 4 times per year.
- Listen for warning signs: Grinding noises, reduced power, or overheating mean lubrication is overdue.
- Focus on the gearbox and chuck: These two areas need 80% of your lubrication attention.
- Clean before you lube: Old grease and debris must be removed or new lubricant won’t work properly.
- Don’t over-lubricate: Too much grease causes overheating and can damage seals and bearings.
Hammer Drill Lubrication Tips to Avoid Expensive Repairs
You bought a quality hammer drill to tackle tough masonry jobs. But that tool won’t last forever unless you take care of it. Most hammer drill failures happen because of one simple thing: missed lubrication. The good news? You can prevent 90% of these problems with just 15 minutes of work every few months. This guide walks you through everything you need to know about hammer drill lubrication. We keep it simple, practical, and jargon-free. Let’s save you some money.
Why Hammer Drill Lubrication Matters
Your hammer drill works hard. It pounds away at concrete, brick, and stone hundreds of times per second. Those metal gears and bearings inside create intense friction. Without proper lubrication, that friction creates heat. Heat wears down metal. Metal shavings mix with dust. Suddenly you have a grinding mess that destroys your tool from the inside out.
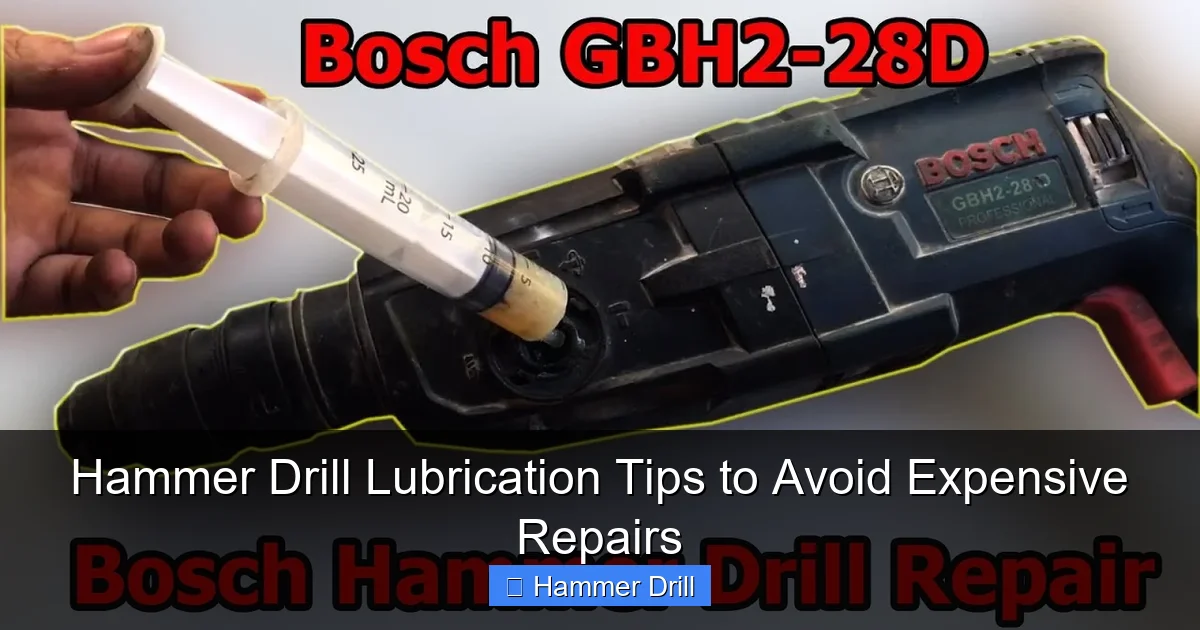
Visual guide about Hammer Drill Lubrication Tips to Avoid Expensive Repairs
Image source: i.ytimg.com
Think of it like your car. Change the oil on schedule and the engine lasts for years. Skip changes and you’re rebuilding or replacing. Your hammer drill works the same way. The gearbox takes the biggest hit. Those hammering mechanisms need constant lubrication. The chuck also needs attention. It’s the part that holds your drill bits. If it seizes up, you can’t work effectively.
Many DIYers think their hammer drill works fine without lubrication. They don’t notice problems until it’s too late. By then, internal damage has already started. Bearings are scored. Gears have metal flakes. The motor works harder and burns out faster. Regular lubrication stops this before it starts. It’s the cheapest insurance you can buy for your power tool.
Understanding what makes a hammer drill different helps you appreciate why lubrication is so critical. Unlike regular drills, hammer drills have a special mechanism that creates that hammering action. This mechanism creates far more stress and friction than a standard drill. If you’re curious about the technical differences, check out our guide on the difference between a drill and a hammer drill. This extra action means extra lubrication needs.
Understanding Your Hammer Drill’s Lubrication Needs
Not all hammer drills are the same. Your tool’s manual holds the key to its specific needs. Look for the lubrication section. It tells you what type of grease to use and where to apply it. Most brands use heavy-duty lithium grease. But some need special formulas. Using the wrong type can damage seals or reduce performance.
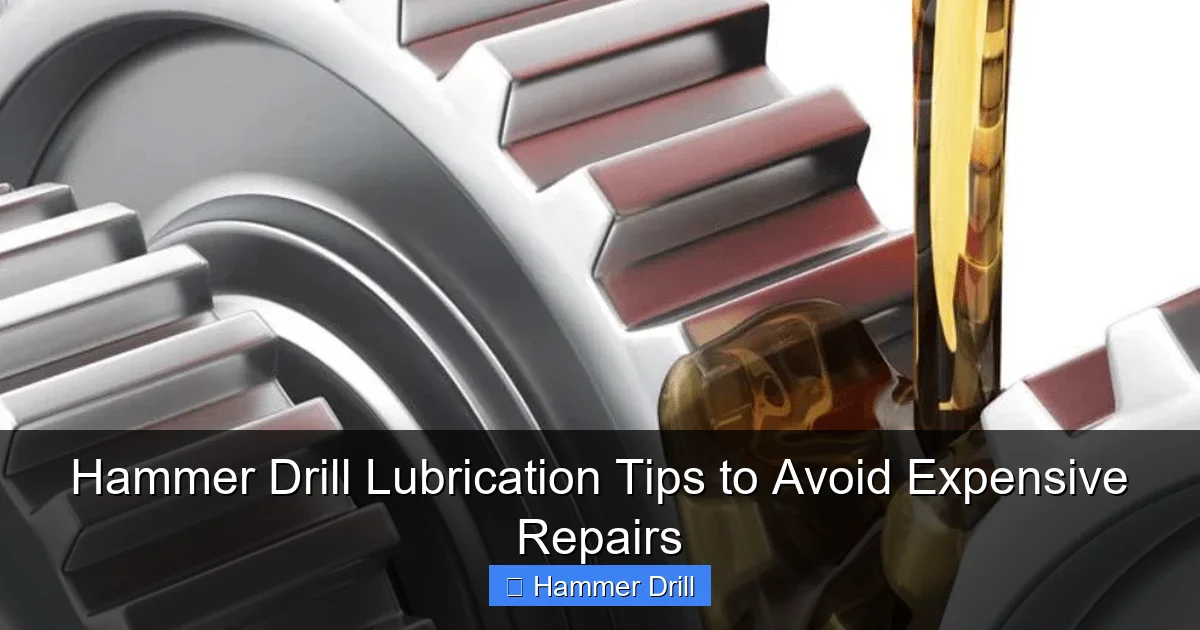
Visual guide about Hammer Drill Lubrication Tips to Avoid Expensive Repairs
Image source: hookedontool.com
Check if your hammer drill has grease fittings. These are small ports with rubber caps. You inject grease directly into these points. Many modern drills have sealed systems. These need complete disassembly for lubrication. Know which type you have before starting. Sealed systems still need maintenance every 100 hours or so. The grease inside breaks down over time.
How you use your hammer drill also affects lubrication frequency. Heavy concrete drilling demands more frequent service. If you’re drilling into soft brick, you can stretch intervals a bit. But working in dusty conditions? You need more frequent cleaning and lubrication. Dust acts like sandpaper inside your tool. It strips away grease and grinds down metal.
Consider your power source too. Cordless hammer drills work differently than corded models. The motor and gearing have different stress patterns. Battery tools often have more compact gearboxes. They need careful, precise lubrication. Too much grease can cause problems in tight spaces. Corded drills typically have more robust systems but still need regular attention.
Many people confuse impact drivers with hammer drills. While both have hammering mechanisms, they work differently and have different lubrication needs. If you’re unsure which tool you have, our article on impact driver vs hammer drill differences will help you identify your tool and understand its specific maintenance requirements.
Types of Lubricants: What to Use and What to Avoid
Choosing the right lubricant is crucial. Use the wrong type and you might as well not bother. Heavy-duty lithium grease is the gold standard for hammer drills. It stays in place, resists heat, and doesn’t wash away easily. Look for “EP” on the label. That stands for extreme pressure. It means the grease handles high stress.
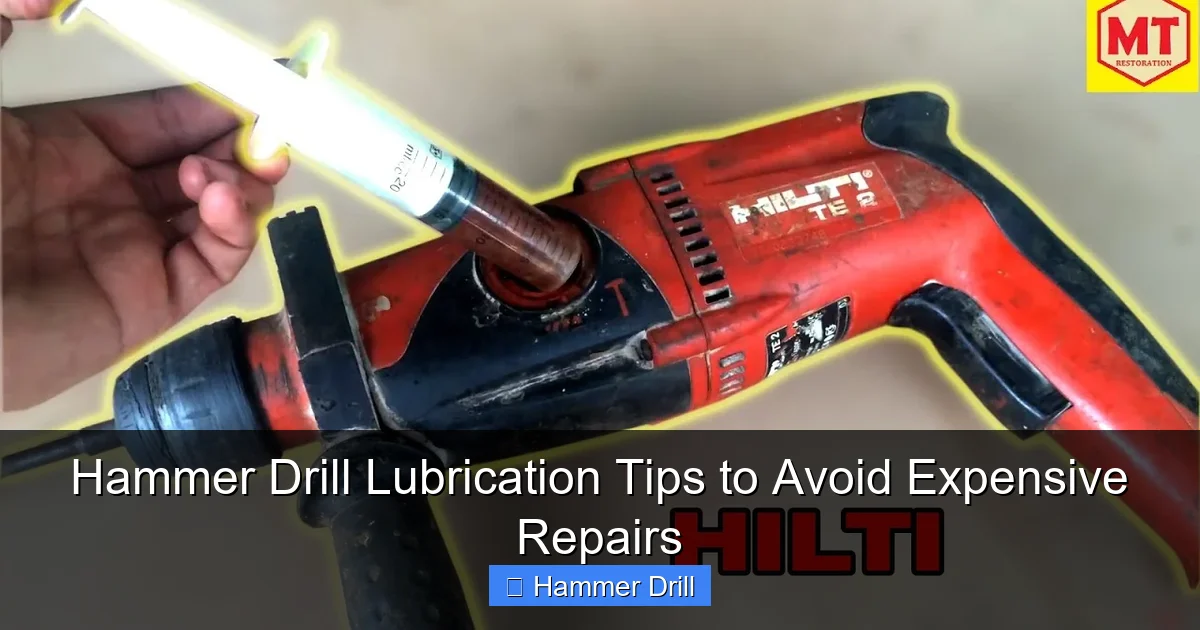
Visual guide about Hammer Drill Lubrication Tips to Avoid Expensive Repairs
Image source: i.ytimg.com
Avoid using motor oil, WD-40, or spray lubricants. These are too thin. They drip off gears and collect dust. WD-40 is a water displacer, not a lubricant. It actually removes existing grease. Motor oil breaks down under the extreme pressure inside your hammer drill. You’ll end up with a sticky mess that attracts more dirt.
Some manufacturers make specific tool greases. DeWalt, Milwaukee, and Bosch all offer their own formulas. These work great if you can find them. But they cost more than standard lithium grease. For most users, a quality automotive lithium grease works perfectly. Just make sure it’s the heavy-duty variety, not the white lithium you use on door hinges.
Temperature matters too. If you work in very cold conditions, look for low-temperature grease. Standard grease thickens in the cold. Your hammer drill might not engage properly. In hot climates, use high-temperature grease. It won’t melt and run out of your gearbox.
Never mix different types of grease. If you switch brands, clean out all the old grease first. Mixing greases can cause chemical reactions. They might separate or lose their lubricating properties. Take the extra time to do it right.
Store your grease properly. Keep it in a sealed container. Don’t leave it open where dust can get in. Contaminated grease does more harm than good. A small can of grease lasts for years if stored correctly. Keep it in a cool, dry place away from direct sunlight.
When to Lubricate Your Hammer Drill
Follow the 50-hour rule. For most users, that means lubricating about once a month during heavy use. If you only use your hammer drill occasionally, aim for every 3-4 months. Better to lubricate a little too often than not enough.
Watch for warning signs that your tool needs attention sooner. Listen for grinding or squealing noises. Feel for vibration that seems excessive. Notice if your drill seems less powerful. These are all red flags. Don’t wait for the 50-hour mark. Service your tool immediately.
Overheating is another warning sign. If your hammer drill feels hot after normal use, it’s working too hard. Friction is building up. That heat damages grease and metal. Let the tool cool down. Then check the lubrication. You might have lost grease or need to apply more.
After cleaning your hammer drill, always add fresh grease. Cleaning removes old lubricant. Running without grease, even for a short time, can cause damage. Make lubrication the final step in any cleaning routine.
Seasonal changes matter too. If you store your hammer drill over winter, lubricate it before storage. Old grease breaks down and can become acidic. It damages metal parts over time. Fresh grease protects your tool while it sits.
Keep a simple log. Note the date and hours used each time you lubricate. This helps you track maintenance. Many smartphone apps can track tool maintenance. Or just use a notebook in your toolbox. It’s worth the few seconds it takes.
Step-by-Step Lubrication Guide
Let’s get your hands dirty. This process takes about 15 minutes once you’ve done it once. Gather your supplies first. You need heavy-duty lithium grease, a clean rag, a small brush (old toothbrush works), screwdrivers, and maybe some degreaser. Work in a well-lit area with good ventilation.
Step 1: Safety First
Unplug your hammer drill or remove the battery. You don’t want it turning on accidentally. Work on a stable surface. Cover it with newspaper or a shop towel. You will get grease on things. Wear disposable gloves if you have them. Grease stains are tough to remove from skin and clothes.
Let the tool cool completely if you’ve been using it. Hot metal expands. Lubricating a hot tool means too much grease. It can leak out and make a mess. Plus, you risk burning yourself. Give it at least 30 minutes to cool down.
Keep kids and pets away. Small parts can be dangerous. Grease is slippery. Clean up spills immediately. Work in a space where you won’t be disturbed.
Step 2: Disassembly
Remove the chuck first. Most chucks unscrew by turning counterclockwise. You might need a chuck key or a hex wrench. Some chucks have a screw inside. Remove that screw first. It’s often reverse-threaded, so turn it clockwise to loosen. Check your manual if you’re unsure.
Next, locate the gearbox housing. This is usually at the front of the drill. You’ll see several screws holding it together. Remove these carefully. Keep them in a small container. It’s easy to lose small screws. Don’t force anything. If a screw won’t budge, stop and reassess. You might be missing a hidden retaining clip.
Separate the housing carefully. There might be wires or small parts that can break. Take a photo before you start. This helps with reassembly. Note how everything fits together. The hammer drill mechanism is delicate. Don’t drop it or bang it against hard surfaces.
Some models have sealed gearboxes. You can’t open these easily. For these, you’ll need to inject grease through the access ports. Skip to step 4 if you have this type. Most consumer drills have serviceable gearboxes though.
Step 3: Cleaning
Remove all old grease and debris. Use your rag to wipe away the bulk. An old toothbrush helps clean tight spaces. For stubborn grime, use a small amount of degreaser. Don’t soak the parts. Just spray a little on and scrub gently. Wipe clean with a dry rag.
Pay special attention to the gears. Look for metal shavings. These are tiny silver flakes. They indicate wear. If you see lots of shavings, your tool might need professional service. The bearings could be damaged. A few shavings are normal. A pile means trouble.
Check the seals too. These are rubber rings that keep grease in. If they’re cracked or hard, replace them. New seals cost just a few dollars. But they prevent expensive leaks. You can order them from your tool’s manufacturer.
Clean the chuck separately. Spin it open and closed. Remove any debris inside. Check for worn jaws. They should grip tightly. If they’re loose or damaged, replace the chuck. A bad chuck makes drilling difficult and dangerous.
Let all parts dry completely. Don’t reassemble with wet parts. Moisture mixes with grease and causes rust. This defeats the whole purpose of lubrication. Air drying for 10-15 minutes is plenty.
Step 4: Applying Lubricant
Apply grease to the gears first. Use a small amount. You want a thin, even coating. Don’t glob it on. Too much grease traps heat and causes problems. Use your finger or a small brush to spread it evenly. Cover all gear teeth completely.
Focus on the hammer mechanism. This is the heart of your drill. Apply grease to the moving parts. Make sure the hammering surfaces are well-coated. These parts take the most abuse. They need the most protection.
Lubricate the bearings next. These are usually small metal balls in a race. Apply a thin layer to the outside. Don’t pack them full. The bearings need to spin freely. Too much grease slows them down and causes drag.
For sealed gearboxes, insert the grease gun nozzle into the fitting. Pump slowly until you see fresh grease squeeze out. Don’t overfill. Usually 3-4 pumps is enough. Wipe away excess immediately.
Apply a light coat to the chuck threads. This prevents seizing and makes removal easier next time. Don’t forget the spindle. This is the shaft that holds the chuck. A light grease coating protects it from corrosion.
Remember that proper technique matters more than the tool itself. Just like learning how to use a drill for screws into a wall requires practice, good lubrication technique develops over time. Take your time and be thorough.
Step 5: Reassembly
Reassemble in reverse order. Use your photo as a guide. Make sure all parts are aligned correctly. Don’t force anything. If something doesn’t fit, stop and check. You might have a part upside down or backwards.
Tighten screws gradually and evenly. Don’t crank one screw all the way down before moving to the next. Work in a star pattern. This prevents warping the housing. Use the correct screwdriver size. Stripped screws are a nightmare to remove later.
Reinstall the chuck last. Make sure it’s tight and secure. Give it a test spin. It should rotate smoothly without wobbling. If it wobbles, remove it and check the spindle. There might be debris or misalignment.
Wipe away any excess grease. This prevents slipping and keeps your tool clean. Pay attention to the housing seams. Grease here can attract dust and dirt. A clean tool is a happy tool.
Test your hammer drill without a bit first. Run it briefly in a safe area. Listen for unusual noises. Feel for vibration. If everything sounds and feels normal, you’re good to go. If not, stop and recheck your work.
Troubleshooting Common Lubrication Issues
Too much grease? You’ll know because your hammer drill might leak. Excess grease oozes out of seals. It makes a mess and attracts dirt. If this happens, disassemble and wipe away the extra. Next time, use less. A thin coat works better than a thick one.
Not enough grease shows different signs. Your drill makes grinding noises. It might feel hot after just a few minutes of use. The solution is simple: add more grease. But first, clean out the old, dried grease. Fresh grease on top of old won’t help.
Grease that looks black or gritty is contaminated. You need to replace it completely. This usually means your seals are failing. Replace the seals while you’re at it. Contaminated grease damages everything it touches.
If your hammer drill still makes noise after lubrication, check the bearings. Worn bearings need replacement. They’re usually press-fit and require special tools. At this point, consider professional service. Trying to replace bearings without experience can cause more damage.
Sometimes the problem isn’t lubrication at all. If your hammer drill loses power, check the brushes. Worn brushes cause power loss. They’re easy to replace and much cheaper than a new motor. Your manual shows where they are and how to change them.
For cordless models, battery issues can mimic lubrication problems. A weak battery makes the drill work harder. It generates more heat and wears faster. Test with a fresh, fully charged battery. If the problem disappears, it’s not the lubrication.
Remember that safety comes first when working at heights. If you’re using your hammer drill on a ladder, make sure you’re following proper procedures. Check out our essential safety tips for climbing ladders to ensure you’re working safely while maintaining your tools.
Maintenance Schedule
Create a simple schedule and stick to it. For heavy users (construction pros), lubricate every 25-30 hours. For regular DIYers, every 50 hours is fine. For occasional users, every 3 months works.
Keep a maintenance log. Note the date, hours used, and any observations. This helps you spot patterns. Maybe your drill needs more frequent service than average. The log tells you that.
Deep clean your hammer drill every 100 hours. This means complete disassembly and thorough cleaning. Replace worn parts during this service. It’s easier to do everything at once.
Store your hammer drill properly between uses. Keep it in a dry place. A sealed case is ideal. This prevents dust and moisture from getting inside. Don’t store it with the battery attached. Remove batteries to prevent corrosion.
Consider professional service every 2-3 years. A pro can check internal parts you can’t easily access. They can replace worn components before they fail. This costs less than a new hammer drill.
Conclusion
Hammer drill lubrication isn’t complicated. It just takes a few minutes every month or so. That small effort saves you hundreds of dollars in repairs. It keeps your tool working perfectly for years. Think of it as a small investment of time for a big return in tool life.
Start today. Grab your grease and give your hammer drill the care it deserves. You’ll be glad you did when that next big project comes around. Your tool will perform better and last longer. Plus, you’ll have the satisfaction of knowing you did it yourself.
Remember these key points: use heavy-duty lithium grease, apply thin coats, clean before lubricating, and follow the 50-hour rule. Watch for warning signs and address them immediately. Keep a maintenance log. These simple habits make all the difference.
Your hammer drill is a valuable tool. It helps you tackle jobs you couldn’t do before. Take care of it, and it will take care of you. Happy drilling.
