
Saw blade kerf is the width of material removed by your blade during a cut – it’s not just a technical term but a critical factor in woodworking accuracy. Understanding kerf helps you minimize waste, achieve precise joinery, and select the right blade for every project. Mastering kerf knowledge transforms your cuts from frustrating to flawless.
Key Takeaways
- Kerf is the Cut Width: It’s the physical space the blade removes, measured in thousandths of an inch (e.g., 1/8″ = 0.125″).
- Impacts Precision & Waste: Wider kerfs mean more material loss and potential inaccuracies in joinery; thinner kerfs save wood and improve fit.
- Blade Type Dictates Kerf: Standard blades have wider kerfs (1/8″+), while thin-kerf blades are typically 1/16″ or less for finer work.
- Measuring is Crucial: Always measure your actual blade kerf before starting critical cuts; don’t rely on blade markings alone.
- Adjust for Kerf in Layout: Account for kerf width when marking cut lines to ensure final dimensions are correct.
- Material Matters: Harder woods and dense plywoods often require blades with specific kerf widths to prevent burning or binding.
- Troubleshoot with Kerf: Issues like burn marks or binding can often be traced back to an incorrect kerf width for the material.
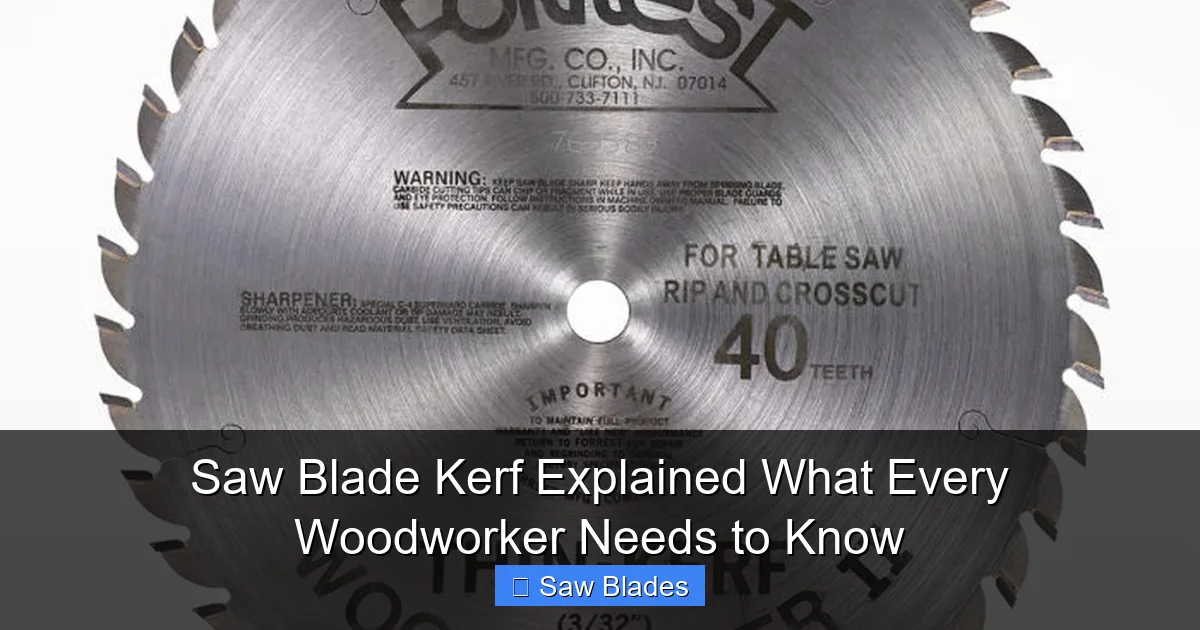
What is Saw Blade Kerf? Your Woodworking Secret Weapon Explained
Ever finished a cut only to find your perfectly measured piece is suddenly 1/16″ too short? Or struggled to get tight-fitting joints because the wood just won’t come together? The culprit might be hiding in plain sight: saw blade kerf. If you’re serious about precision woodworking, understanding kerf isn’t just helpful – it’s absolutely essential. Forget thinking of it as just “the cut the blade makes.” Kerf is the width of that cut, the physical material sacrificed to the saw blade’s teeth. It’s the invisible thief of your wood’s dimensions, and mastering it is the key to unlocking accuracy, minimizing waste, and achieving professional results. In this guide, we’ll demystify kerf, show you exactly how it impacts your projects, and give you the practical steps to measure, account for, and choose the right kerf for every cut. Get ready to transform your cuts from frustrating to flawless.
Why Kerf Matters More Than You Think
You might be thinking, “It’s just a little bit of wood, right? How big a deal can it be?” The answer: a massive deal, especially when precision matters. Here’s why kerf is non-negotiable knowledge for any woodworker:

Visual guide about Saw Blade Kerf Explained What Every Woodworker Needs to Know
Image source: thewoodsmithstore.com
The Precision Killer
Imagine building a cabinet box. You cut all four sides to the exact same length based on your tape measure. But if your blade has a kerf of 1/8″ (0.125″), and you cut each side without accounting for it, you’ve effectively lost 1/8″ of length per cut. For a box with two end cuts per side, that’s a potential 1/4″ error before you even start assembling! Suddenly, your square box is trapezoidal, and doors won’t fit. Kerf directly impacts the final dimensions of your project. Ignoring it is like trying to bake a cake without measuring the flour.
The Material Waste Multiplier
Kerf is literal material loss. A wider kerf means more sawdust and less usable wood. This becomes critical when working with expensive hardwoods, large panels like plywood, or when maximizing yield from a single board. Cutting ten identical pieces with a 1/8″ kerf blade versus a 1/16″ kerf blade can mean the difference between getting all ten pieces or having to scrap the last one due to insufficient length. Over time, this waste adds up significantly in both cost and environmental impact.
The Joinery Juggernaut
Dovetails, mortise-and-tenon, finger joints – tight-fitting joinery is the hallmark of quality woodworking. Kerf is the enemy of tight joints. If your tenon is cut to the exact width of the mortise slot, but the saw blade used for the mortise had a wider kerf than expected, the tenon will be loose. Conversely, if the tenon kerf was wider, it might not fit at all. Understanding and controlling kerf is fundamental to achieving that satisfying “snug fit” in your joints.
The Cut Quality Conductor
Kerf width influences how cleanly the blade cuts. A blade with too wide a kerf for a thin or soft material can cause excessive tear-out or burning. Conversely, a blade with too narrow a kerf for thick, dense hardwoods might bind, overheat, or produce rough cuts. The right kerf width helps the blade evacuate sawdust efficiently and maintain stability during the cut, directly impacting the quality of your cut surface.
Demystifying Kerf: What It Actually Is (And Isn’t)
Let’s clear up the confusion. Kerf is not the thickness of the blade plate itself. It’s the total width of the cut created by the blade’s teeth as they remove material. Here’s the breakdown:
Visual guide about Saw Blade Kerf Explained What Every Woodworker Needs to Know
Image source: thewoodsmithstore.com
The Physics of the Cut
Saw blades have teeth that are set (bent) alternately left and right of the blade’s centerline. This setting creates the wider path – the kerf – that the blade plate travels through. The amount of set determines the kerf width. Think of it like the path a snowplow makes: the plow blade (the saw blade plate) is narrow, but the path it clears (the kerf) is wider because the plow pushes snow (wood fibers) to the sides.
Standard Kerf vs. Thin Kerf: The Great Divide
- Standard Kerf: Typically ranges from 1/8″ (0.125″) to 3/32″ (0.09375″). These are the most common general-purpose blades. They are robust, less prone to deflection (bending) in thick cuts, and often more affordable. Ideal for rough cutting, framing, and general construction where ultimate precision isn’t the primary goal. You’ll find these on many circular saws and table saws right out of the box.
- Thin Kerf: Usually 1/16″ (0.0625″) or less, sometimes as narrow as 0.045″ or 0.050″. These blades remove significantly less material. They are essential for precision woodworking, fine furniture, cabinetry, and working with expensive or limited materials. The trade-off is that thin-kerf blades can be slightly more prone to deflection in very thick cuts or if pushed too hard, and they often cost a bit more. They are the go-to choice for serious woodworkers focused on accuracy and minimal waste.
Kerf Isn’t Just for Wood!
While we focus on woodworking, kerf applies to any material cut by a saw blade. Diamond blades for concrete or tile have a kerf (the width of the diamond segment), affecting how much material is removed and the precision of cuts. Metal-cutting blades also have specific kerf widths. Understanding kerf is universal to sawing.
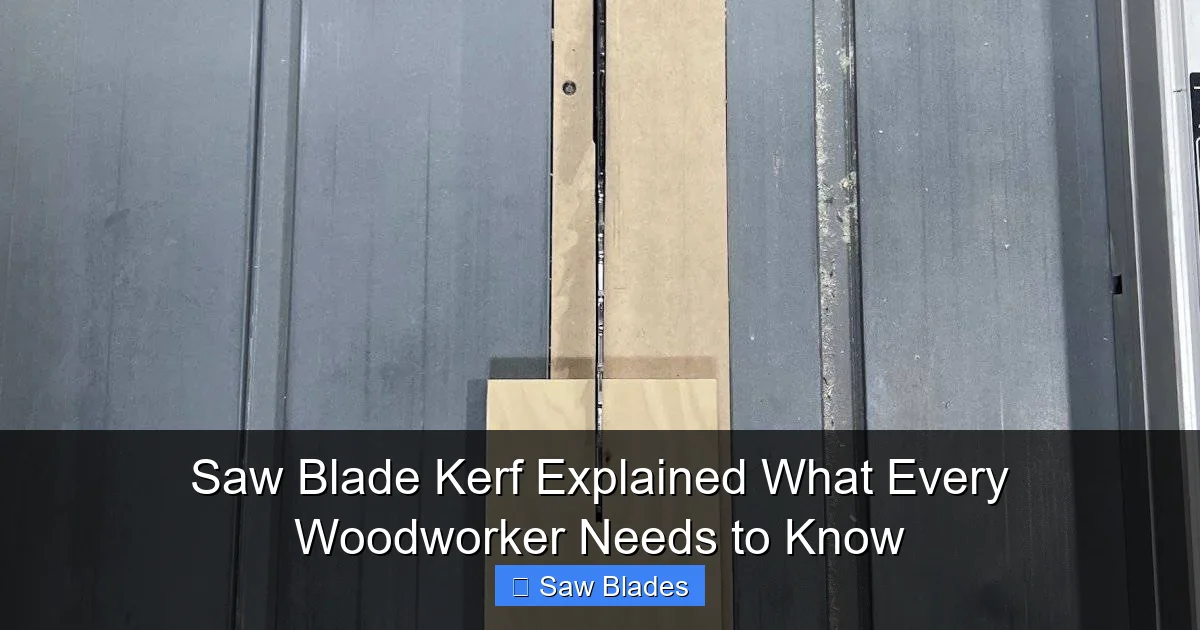
How to Measure Your Saw Blade Kerf (The Right Way)
Here’s the critical truth: Never assume you know your blade’s kerf. Manufacturers’ specifications can vary, and blades wear. The only reliable way is to measure it yourself. Here’s how:
Visual guide about Saw Blade Kerf Explained What Every Woodworker Needs to Know
Image source: obsessedwoodworking.com
Method 1: The Cut & Measure Technique (Most Accurate)
- Make a Test Cut: Cut a piece of scrap wood (plywood or solid wood works well) using the blade you want to measure. Ensure the cut is straight and representative of your normal technique.
- Mark the Kerf: Once the cut is complete, use a sharp pencil or marking knife to trace *both* edges of the kerf cut on the scrap piece. You now have two distinct lines showing the width of the cut.
- Measure Precisely: Use digital calipers for the most accurate measurement. Place the caliper jaws across the two pencil lines, measuring the distance between them. This is your actual kerf width. If you don’t have calipers, a steel ruler with fine gradations (thousandths of an inch) can work, but be meticulous. Measure in several places along the cut to check for consistency.
Pro Tip: Do this for *every* blade you own, especially before starting a critical project. Label the blade’s arbor washer or storage case with the measured kerf width (e.g., “0.098” Kerf”).
Method 2: The Blade Inspection (Less Accurate, But Quick)
- Clean the Blade: Remove any pitch or sawdust buildup from the teeth and plate.
- Inspect the Set: Look closely at the teeth. The set is the amount the teeth are bent outward from the blade’s center plane. Use a magnifying glass if needed.
- Estimate (Carefully): Compare the visible set width to a known measurement (like the thickness of a dime ~0.050″). Remember, kerf = blade plate thickness + (2 x set width). This method is rough and not recommended for precision work, but it can give you a ballpark figure if you’re in a pinch.
Warning: Never rely solely on the number printed on the blade (like “1/8″ kerf”). Manufacturing tolerances mean the actual cut width can differ. Always verify with Method 1 for important projects.
Choosing the Right Kerf for Your Project: A Practical Guide
Now that you know how to measure it, how do you choose? The “right” kerf depends entirely on your material, cut type, and required precision.
When to Use Standard Kerf (1/8″ – 3/32″)
- Rough Cutting & Dimensioning: Breaking down large sheets of plywood or dimensional lumber where speed and blade durability are more important than absolute precision.
- Thick Hardwoods (Over 1.5″): The wider kerf provides more stability for the blade, reducing the chance of deflection (bending) during the cut. A thin kerf blade might wander in very thick stock.
- General Construction: Framing, deck building, or any project where tight tolerances aren’t critical.
- Blades for Specific Tasks: Some specialty blades, like certain dado stacks or heavy-duty rip blades, are designed with standard kerf for robustness.
Example: Cutting 2x4s for a shed frame. A standard kerf blade will handle the thickness well and the slight material loss isn’t critical.
When to Use Thin Kerf (1/16″ or Less)
- Precision Woodworking & Fine Furniture: Cabinetry, joinery (dovetails, mortise-and-tenon), making small parts. Minimizing waste and maximizing accuracy is paramount.
- Working with Expensive or Limited Wood: Hardwoods like walnut, cherry, or figured maple where every fraction of an inch counts. Thin kerf can literally save you from needing to buy another board.
- Cutting Plywood & Veneered Panels: Thin kerf blades produce cleaner cuts with less tear-out on the veneer face and minimize the loss of valuable core material. Essential for cabinet sides and shelves.
- Crosscutting Thin Stock: On thin materials (under 1/2″), a standard kerf blade can cause excessive tear-out or even bind. A thin kerf blade glides through cleanly.
- Making Identical Repeated Cuts: When cutting multiple pieces to the exact same length (e.g., table legs, shelf pins), thin kerf minimizes cumulative error.
Example: Building a walnut dining table with breadboard ends. Using a thin kerf blade for the mortises ensures the tenons fit perfectly, and you maximize the yield from your expensive walnut slab.
Special Considerations: Dadoes, Rips, and Crosscuts
- Dado Blades: These are sets of blades designed to cut wide grooves (dados). Their effective kerf is the width of the dado they produce (e.g., 1/4″, 1/2″). Always measure the *actual* dado width produced by your specific stack, as it can vary.
- Ripping vs. Crosscutting: While kerf width is important for both, the *type* of blade matters more. Rip blades have fewer, deeper teeth for fast removal (often standard kerf). Crosscut blades have more, finer teeth for cleaner cuts (often available in thin kerf). Choose the blade type first, then consider kerf width based on the material thickness and precision needed.
Pro Tip: If you frequently switch between rough work and fine work, consider having two table saw blades: a standard kerf general-purpose blade and a dedicated thin kerf blade for precision tasks. Knowing how to change a blade quickly becomes essential.
Accounting for Kerf in Your Layout: The Woodworker’s Secret
Measuring kerf is useless if you don’t use that information. Accounting for kerf in your layout is where the magic happens for precision. Here’s how to do it correctly:
The Golden Rule: Cut on the Waste Side
This is fundamental. When marking your cut line, the line itself represents the kerf. Your saw blade should be positioned so that the center of the blade’s kerf follows this line. This means:
- The finished dimension (the good part you want to keep) is on one side of the cut line.
- The waste piece is on the other side of the cut line.
- The saw blade removes material centered on the line, taking equal amounts from both the finished piece and the waste (in theory).
Why this works: By placing the line where the kerf will be, you ensure that the material you want to keep is measured up to the cut line, not including the kerf that will be removed.
Step-by-Step: Layout for Accuracy
- Measure & Mark Your Finished Dimension: Use a reliable square and marking tool (knife or sharp pencil) to mark the exact dimension you need for your finished piece. This line is your cut line.
- Position the Blade: When setting up your saw (table saw fence, circular saw guide, miter saw stop), position it so that the center of the blade’s kerf will run directly along this cut line. On a table saw, this often means setting the fence so the *edge* of the blade plate is a specific distance (kerf width / 2) away from the cut line, depending on your fence system.
- Verify with a Test Cut: Before cutting your good stock, make a test cut on scrap material laid out exactly the same way. Measure the resulting piece. If it’s undersized, your fence/guide is set too far in (taking too much off the finished side). If it’s oversized, it’s set too far out (leaving too much waste). Adjust accordingly.
- Account for Multiple Cuts: When making a series of cuts (e.g., cutting tenons), remember each cut removes kerf. If you need ten pieces all 10″ long from a 100″ board, you need to account for 9 kerfs (one less than the number of pieces). Total length needed = (Number of pieces x Length per piece) + ((Number of pieces – 1) x Kerf width).
Example Calculation: Cutting 5 shelves, each 24″ long, from a single plywood sheet. Using a blade with a measured kerf of 0.098″.
Total length needed = (5 x 24″) + ((5 – 1) x 0.098″) = 120″ + (4 x 0.098″) = 120″ + 0.392″ = 120.392″.
Your layout marks must be spaced 24.098″ apart (24″ + 0.098″ kerf) to get five perfect 24″ shelves.
Advanced Technique: The Kerf Stick
For repetitive cuts on a table saw, create a dedicated “kerf stick.” This is a piece of scrap wood cut to the exact width of your measured kerf (e.g., 0.098″). Use it to set your fence:
- Place the kerf stick between the blade and the fence.
- Adjust the fence until the stick fits snugly.
- Lock the fence. Now, when you place your workpiece against the fence, the distance from the workpiece edge to the blade’s kerf center is precisely the distance you set with the stick.
This is incredibly fast and accurate for batch cutting.
Troubleshooting Common Kerf-Related Problems
Even with knowledge, issues arise. Here’s how kerf might be causing your headaches and how to fix it:
Problem: Finished Pieces are Consistently Undersized
- Likely Cause: You’re not accounting for kerf in your layout. The cut line is being placed on the finished dimension side, so the kerf is being removed from your good piece.
- Solution: Re-examine your layout method. Ensure the cut line represents the kerf path, and the finished dimension is measured to that line. Double-check fence/guide settings using the test cut method. Measure your actual kerf again – it might be wider than you thought.
Problem: Burn Marks on the Cut Edge
- Likely Cause (Thin Stock): Using a standard kerf blade on thin material (e.g., 1/4″ plywood). The wide kerf creates excessive friction and heat, burning the wood before sawdust can evacuate.
- Likely Cause (Thick/Dense Stock): Using a thin kerf blade on very thick or dense hardwood. The narrow kerf can’t evacuate sawdust fast enough, causing the blade to overheat and burn the wood.
- Solution: Match kerf to material. Use thin kerf for thin/soft stock, standard kerf for thick/dense stock. Ensure your blade is sharp – a dull blade generates more heat regardless of kerf. Reduce feed speed slightly.
Problem: Blade Binding or Pinching During the Cut
- Likely Cause: Using a thin kerf blade on thick stock. The narrow kerf doesn’t provide enough clearance for the blade plate, causing it to bind in the cut, especially if the wood moves slightly.
- Solution: Switch to a standard kerf blade for thick stock (over 1.5″). Ensure your saw’s riving knife or splitter is properly aligned and close to the blade. Use a zero-clearance insert on your table saw to support the wood right next to the cut.
Problem: Excessive Tear-Out on the Backside of the Cut
- Likely Cause: While primarily related to blade sharpness and tooth count, a very wide kerf on a blade with insufficient tooth count can exacerbate tear-out, especially on plywood veneers.
- Solution: Use a blade with more teeth (higher TPI) for crosscutting plywood. Ensure the blade is sharp. Use masking tape over the cut line. Support the back edge of the workpiece firmly (use a sacrificial board under the cut on a table saw). A thin kerf blade with fine teeth is often the best combination for clean plywood cuts.
Problem: Joints Don’t Fit (Too Tight or Too Loose)
- Likely Cause: Inconsistent kerf measurement or not accounting for kerf when cutting both parts of the joint (e.g., mortise and tenon). If the mortise kerf was wider than expected, the tenon will be loose. If the tenon kerf was wider, it won’t fit.
- Solution: Measure the kerf of the blade used for each part of the joint separately. When laying out the mortise, account for its kerf. When laying out the tenon, account for its kerf. Test fit with scrap first. Consider using the same blade for both parts if possible.
Remember: A dull blade will cause many of these problems regardless of kerf. Always check blade sharpness first. Learning how to assess blade condition is crucial.
Conclusion: Master Kerf, Master Your Woodworking
Saw blade kerf is far more than just a technical specification on a blade box. It’s the invisible force shaping the accuracy, efficiency, and quality of every cut you make. By understanding what kerf is, how to measure it precisely, how to choose the right width for your material and task, and – most importantly – how to account for it in your layout, you transform from a woodworker who hopes for good results to one who consistently achieves them. No more frustrating undersized pieces, excessive waste from expensive wood, or joints that just won’t come together. The simple act of measuring your blade’s actual kerf and adjusting your setup accordingly is one of the highest-leverage skills you can develop. It takes only a few minutes but pays dividends in every project that follows. So, grab your calipers, make that test cut, and start seeing your woodworking in a whole new light – one precise kerf at a time. Your next flawless project starts with this fundamental knowledge.
🎥 Related Video: Every woodworker needs three table saw blades.
📺 Stumpy Nubs (James Hamilton)
Your table saw isn’t the problem, you’re using the wrong blade! More links to help you▻ Video about blade tooth features: …
