
Prevent catastrophic injuries by always engaging the lock-out switch before changing bits—this single step stops accidental activation, the leading cause of serious drill-related accidents. Never skip ANSI-approved safety glasses, as flying debris causes permanent eye damage in seconds, and treat lithium-ion batteries with extreme caution to avoid dangerous explosion/fire risks from punctures or overheating. Following these non-negotiable steps is the absolute minimum for safe cordless drill operation.
Key Takeaways
- Always wear safety glasses to protect against flying debris and dust.
- Inspect battery and drill for damage before each use to prevent malfunctions.
- Secure your workpiece firmly using clamps or a vise to maintain control.
- Keep hands clear of the drill bit and moving parts during operation.
- Remove the battery before changing bits to prevent accidental activation.
- Maintain awareness of your workspace and keep others at a safe distance.
- Store drills and batteries properly in a dry, secure location away from children.
Why This Matters / Understanding the Problem
I learned this lesson the hard way. A few years back, I was rushing to hang a shelf. My cordless drill felt familiar in my hand—almost like an extension of my arm. I skipped my usual safety routine. That decision cost me a trip to urgent care when the drill bit caught and spun my wrist at an awkward angle.
That painful experience taught me something crucial. A cordless drill might feel like a simple tool, but it’s packing serious power. Without a proper safety checklist, you’re playing Russian roulette with every project. The Cordless Drill Safety Checklist 12 Critical Steps to Follow isn’t just bureaucratic nonsense. It’s your personal insurance policy against accidents.
Whether you’re a weekend warrior or a seasoned DIYer, this checklist will protect you, your tools, and your home. Let’s walk through it together.
What You Need
Before we dive into the steps, let’s gather our essentials. You don’t need much to get started with a proper safety routine.
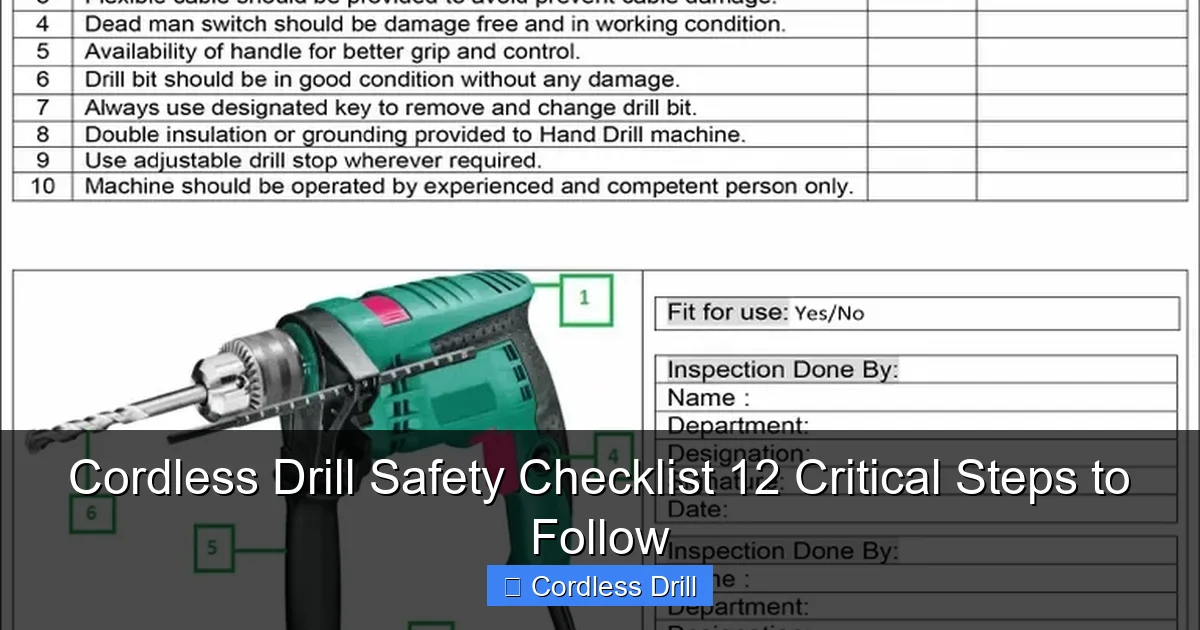
Visual guide about Cordless Drill Safety Checklist 12 Critical Steps to Follow
Image source: imgv2-1-f.scribdassets.com
- Your cordless drill (obviously!)
- The manufacturer’s manual (yes, you should actually read it)
- Basic PPE: safety glasses, work gloves, and closed-toe shoes
- A clean, well-lit workspace
- Your fully charged drill battery
- A pencil and this checklist (or you can print it out)
If you’re new to power tools, I recommend checking out our guide to the best cordless drill options. It’ll help you understand what features matter most for safety.
Step-by-Step Guide to Cordless Drill Safety Checklist 12 Critical Steps to Follow
Alright, let’s get into the meat of this. I’m going to walk you through each step exactly as I do it now—every single time I pick up my drill. This Cordless Drill Safety Checklist 12 Critical Steps to Follow has kept me accident-free for years.
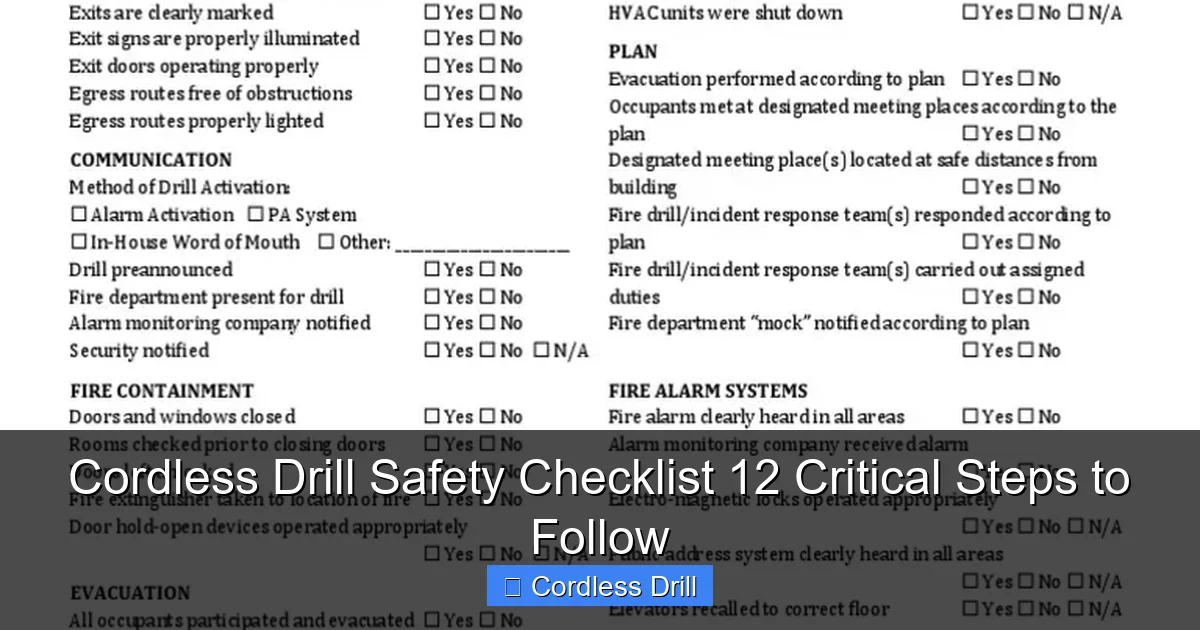
Visual guide about Cordless Drill Safety Checklist 12 Critical Steps to Follow
Image source: imgv2-1-f.scribdassets.com
Step 1: Read and Understand Your Drill’s Manual
I know, I know. Manuals feel like homework. But here’s the thing: every drill is different. The torque settings on my DeWalt don’t match my friend’s Makita. Reading the manual helps you understand your specific tool’s quirks and warnings.
Take five minutes to skim the safety section. Look for model-specific warnings. Some drills have unique clutch mechanisms or battery lockouts. These details matter more than you think.
Pro tip: Keep the manual in a plastic sleeve attached to your drill case. That way it’s always there when you need it.
Step 2: Perform a Pre-Use Visual Inspection
Give your drill a quick once-over before every use. Look for cracks in the housing, damaged switches, or loose parts. Wiggle the chuck—it should be tight and secure. Check that the trigger moves smoothly without sticking.
Don’t forget the battery. Look for swelling, leaks, or corrosion on the contacts. A damaged battery isn’t just a failure risk; it can be a fire hazard. If something looks off, stop using the drill immediately.
Step 3: Check Battery Health and Charge Level
A dead battery mid-project is frustrating, but an overheated battery is dangerous. Before you start, check your battery’s charge indicator. Most modern drills have LED lights that show the charge level.
Feel the battery for any unusual warmth. If it’s hot to the touch, let it cool down before use. Also, make sure the battery clicks securely into place. A loose battery can cause intermittent power or sudden shutdowns.
If you’re traveling with your tools, you might wonder about regulations. We’ve covered whether cordless drills are allowed on planes in a separate guide.
Step 4: Wear Appropriate Personal Protective Equipment (PPE)
Safety glasses aren’t optional. Wood chips, metal shavings, and dust love to fly into your eyes. I keep a pair of ANSI-rated safety glasses hanging on my workshop wall—right next to my drill station.
Wear fitted clothing. Loose sleeves or baggy shirts can get caught in the chuck. Roll up long sleeves or wear close-fitting workwear. If you have long hair, tie it back. And always wear closed-toe shoes—preferably with steel toes if you’re doing heavy work.
Step 5: Secure Your Workpiece Properly
Clamping your material is non-negotiable. I learned this when a board slipped and sent a screw flying across the room. Use clamps, a vise, or a helping hand tool to hold your work securely.
Make sure your workpiece is stable and won’t spin or shift when pressure is applied. If you’re drilling into something small, a bench vise is your best friend. For larger projects, use multiple clamps to prevent movement.
Step 6: Select the Correct Drill Bit for the Job
Using the wrong bit is like using a hammer to drive a screw—it works, but it’s messy and dangerous. Wood bits for wood, masonry bits for concrete, and metal bits for metal. Each has a specific tip geometry and flute design.
Inspect your bit before installing it. Look for dull edges, cracks, or excessive wear. A dull bit requires more force, which increases your risk of losing control. If it’s damaged, replace it. Bits are cheap compared to medical bills.
Step 7: Install the Bit Correctly and Check Chuck Security
Open the chuck fully, insert the bit, and make sure it’s centered. Then tighten it in three stages: first finger-tight, then use the chuck key or keyless chuck mechanism to secure it firmly.
Give the bit a good tug to ensure it’s locked in place. A loose bit can eject itself at high speed—trust me, you don’t want that surprise. After installing, spin the chuck by hand to make sure it’s not wobbling.
Step 8: Set the Appropriate Speed and Torque Settings
Most cordless drills have two speed ranges and an adjustable clutch. Low speed (0-500 RPM) is for driving screws and large bits. High speed (500-1500+ RPM) is for drilling holes in softer materials.
The clutch setting controls how much torque the drill applies before slipping. Start with a lower setting and increase as needed. For delicate materials like drywall, use a low clutch setting to avoid stripping screws.
Understanding these settings is crucial. If you’re unsure about the difference between drill types, our article on impact drivers vs hammer drills might help clarify when to use each tool.
Step 9: Maintain a Stable Stance and Proper Grip
Stand with your feet shoulder-width apart, knees slightly bent. This gives you balance and control. Hold the drill with both hands if possible—one on the main handle and one on the auxiliary handle if your drill has one.
Keep your body positioned to the side of the drill, not directly behind it. If the bit binds and kicks back, you won’t be in the direct line of fire. Apply steady, even pressure—no jerking or forcing.
Step 10: Clear Your Workspace and Eliminate Tripping Hazards
Take a quick look around your work area. Are there tools on the floor? Extension cords everywhere? Clean up first. A clean workspace is a safe workspace.
Make sure you have adequate lighting. Shadows can hide hazards. Keep your drill’s battery charger in a different area—you don’t want to trip over it while holding a powered tool.
If you’re working at height, this becomes even more critical. I always check my ladder setup before drilling overhead. For more on that topic, see our essential safety precautions when using a ladder.
Step 11: Keep Your Mind Focused and Avoid Distractions
Put your phone away. Seriously. No texting, no music with loud headphones, no chatting while drilling. Your full attention should be on the task.
If you’re tired or stressed, postpone the project. Fatigue causes mistakes. I keep a notepad nearby to jot down thoughts so I don’t feel the need to stop and check my phone constantly.
Take breaks during long projects. Your hands get tired, and that’s when accidents happen. Set a timer if you need to—five minutes every half hour is plenty.
Step 12: Perform Post-Use Safety Shutdown and Storage
After you’re done, remove the battery before doing anything else. This prevents accidental starts while you’re cleaning up. Let the drill cool down if it’s warm.
Clean the chuck and vents with a dry brush. Remove any dust or debris. Store your drill in its case, preferably with the battery removed. Keep it in a dry, temperature-controlled area—not your unheated garage where condensation can damage the electronics.
Pro Tips & Common Mistakes to Avoid
Let me share some hard-won wisdom. These are the things I wish someone had told me before my first DIY disaster.
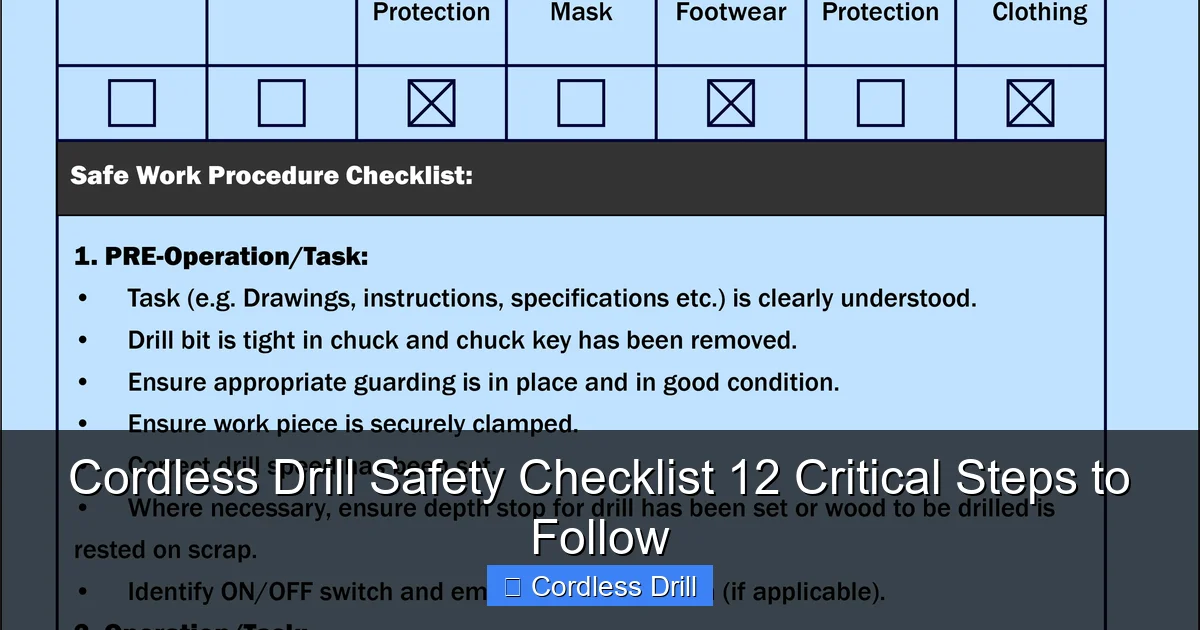
Visual guide about Cordless Drill Safety Checklist 12 Critical Steps to Follow
Image source: i.pinimg.com
Never skip the clutch. Many people treat their drill like a screwdriver and crank the torque all the way up. This strips screws and damages materials. The clutch is there for a reason—use it.
Don’t ignore the kickback. If your drill suddenly twists in your hand, that’s kickback. It happens when the bit binds. The best defense is a firm grip with both hands and maintaining that side stance we talked about.
Avoid overheating. If your drill feels hot after 10-15 minutes of continuous use, give it a break. Overheating damages the motor and battery. Let it cool for 5-10 minutes.
Never use a damaged battery. Swollen batteries are a fire waiting to happen. Recycle them properly and get a replacement. Most manufacturers have battery recycling programs.
Warning: I once tried to drill into a wall without checking for studs. The bit hit an electrical wire. Sparks flew, the circuit breaker tripped, and I spent the next hour in the dark. Always check for hidden wires and pipes before drilling into walls.
Don’t force the drill. If it’s not cutting, you’re either using the wrong bit or it’s dull. Forcing it only leads to loss of control. Stop, assess, and make the necessary changes.
FAQs About Cordless Drill Safety Checklist 12 Critical Steps to Follow
These are the questions I get most often from friends and fellow DIYers. Maybe they’ll answer some of yours too.
Q: How often should I replace my drill battery?
A: Most lithium-ion batteries last 3-5 years or 500-1000 charge cycles. You’ll notice reduced runtime and the battery getting warm faster than usual. When you see these signs, start shopping for a replacement.
Q: Can I use my cordless drill in the rain?
A: Absolutely not. Water and electricity don’t mix. Even if your drill is “weather-resistant,” it’s not waterproof. Working in wet conditions risks electrocution and tool damage. Wait for dry weather.
Q: Is it really necessary to wear safety glasses for small projects?
A: Yes. Debris doesn’t care about project size. I’ve seen people get chips in their eyes from drilling a tiny pilot hole. The glasses take two seconds to put on and could save your vision. No project is too small for proper protection.
Q: What’s the best way to store drill bits to keep them organized?
A: I use a plastic case with labeled compartments. Keep them separated by type and size. This prevents damage to the cutting edges and makes finding the right bit quick. A bit wallet or wall-mounted rack works too—just keep them dry to prevent rust.
Q: How do I know if my drill is overheating?
A: Most drills have a thermal cutoff switch that shuts them down if they get too hot. But you can usually feel it before that happens. If the motor housing is too hot to touch comfortably, or if you smell burning, stop immediately. Let it cool completely before continuing.
Q: Should I keep my battery on the charger all the time?
A: Modern chargers are smart enough to stop charging when full, but it’s still best practice to remove the battery once it’s charged. This reduces stress on the cells and extends overall battery life. Store batteries at about 50% charge if you won’t use them for a while.
Q: What should I do if my drill bit breaks during use?
A: First, release the trigger immediately. Remove the battery for extra safety. Then assess the situation. If the bit is stuck in the material, you’ll need to carefully extract it with pliers or a screw extractor. Never try to remove a broken bit while the drill is still connected to power.
🎥 Related Video: 5 Drill Features Everyone Should Know
📺 LRN2DIY
Do you know all of the features of your power drill? Let’s dive into each feature, when to use it and how to use it well. #powertool …
Final Thoughts
Look, I get it. Stopping to run through a 12-step checklist feels tedious when you just want to finish that shelf. But here’s what I’ve learned: the time you save rushing is never worth the pain of an accident.
Print out this Cordless Drill Safety Checklist 12 Critical Steps to Follow and tape it to your workshop wall. Keep a copy in your drill case. Make it a habit until it becomes second nature. Your future self will thank you.
Remember, a tool is only as safe as the person using it. Take your time, stay focused, and never assume you’re too experienced to skip a safety step. Even professionals get hurt when they get complacent.
Now go tackle that project with confidence. And if you ever need a refresher on proper technique, check out our comprehensive guide to using a drill for screws into a wall. Stay safe, and happy drilling!
