
This guide teaches you how to diagnose and fix common cordless drill problems like battery failure, chuck issues, and motor troubles. You’ll learn step-by-step repair techniques that professionals use, helping you save money and avoid buying a new tool. We cover everything from simple maintenance to complex repairs, making cordless drill repair easy for beginners.
Key Takeaways
- Safety first: Always remove the battery and wear protective gear before starting any cordless drill repair work.
- Battery issues are most common: Over 60% of drill problems stem from battery or charger failures, not the drill itself.
- Regular maintenance prevents 80% of problems: Clean your drill after each use and store batteries properly to avoid costly repairs.
- Chuck problems are easy to fix: Most chuck issues require simple cleaning or lubrication, not replacement parts.
- Know when to quit: If a repair requires specialized tools or costs more than 50% of a new drill, consider replacement instead.
- Keep a repair log: Document every fix to track recurring issues and extend your drill’s lifespan significantly.
Introduction: Why Learning Cordless Drill Repair Saves You Money
Your cordless drill is one of the most valuable tools in your workshop. When it breaks, you might think you need a professional or a brand new replacement. But here’s the truth: most cordless drill problems are simple fixes you can do at home with basic tools. This guide will teach you professional repair techniques that save you money and give you confidence. You’ll learn to diagnose issues quickly, perform essential maintenance, and fix common problems without expensive service calls. By the end, you’ll know exactly how to troubleshoot your drill like a pro.
Safety First: Essential Precautions Before Any Repair
Before you touch your drill, safety must be your top priority. Working on power tools can be dangerous if you skip basic precautions. Follow these steps every single time.
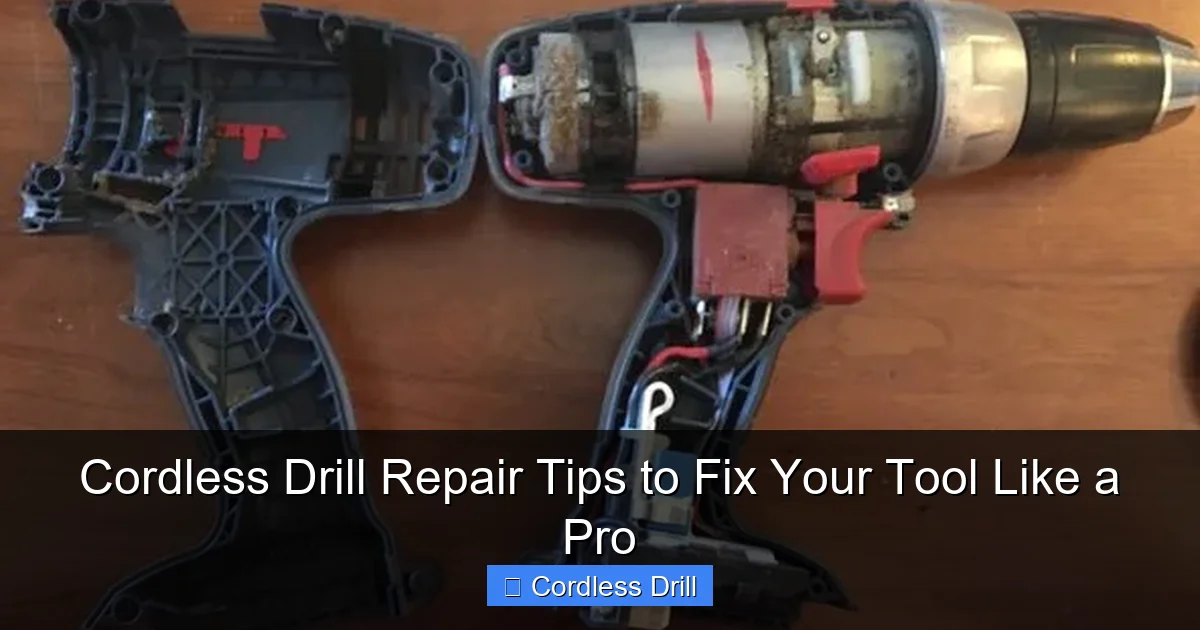
Visual guide about Cordless Drill Repair Tips to Fix Your Tool Like a Pro
Image source: guide-images.cdn.ifixit.com
Remove the Battery Completely
Take out the battery pack before opening any part of your drill. This prevents accidental starts and electrical shocks. Wait at least 5 minutes for internal capacitors to discharge. Touch the battery terminals to a non-metallic surface to ensure no residual charge remains.
Wear Proper Protection
Put on safety glasses to protect your eyes from metal shavings and dust. Wear work gloves when handling sharp edges. Use a dust mask if you’re cleaning out years of accumulated debris. Work in a well-ventilated area to avoid breathing in harmful particles.
Prepare Your Workspace
Clear a large, flat surface for your repair work. Use a clean towel or mat to keep small parts from rolling away. Have good lighting so you can see every detail. Keep a small container nearby for screws and other tiny components. Organization prevents lost parts and mistakes.
Common Cordless Drill Problems You Can Fix
Most drill issues fall into four main categories. Learn to identify which problem you’re facing before starting repairs. This saves time and helps you focus on the right solution.
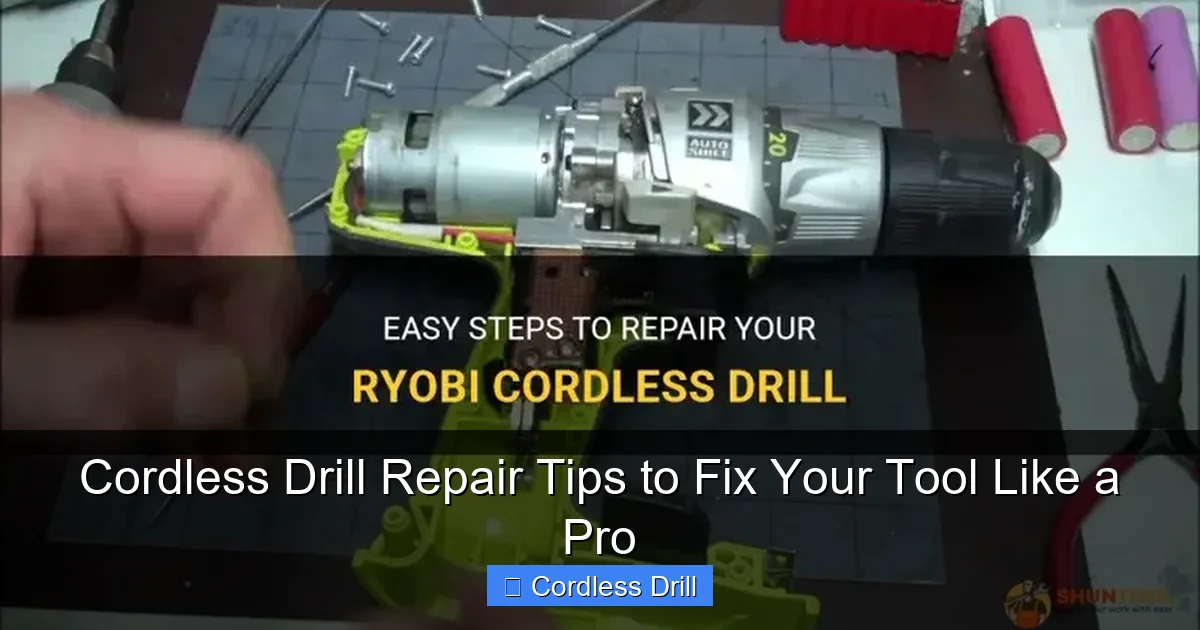
Visual guide about Cordless Drill Repair Tips to Fix Your Tool Like a Pro
Image source: shuntool.com
Battery and Power Issues
The most frequent complaint is a drill that won’t turn on. Often, this is a battery problem, not a drill problem. Swollen batteries, dead cells, or charger failures cause most power issues. These are usually easy to diagnose and fix.
Chuck Problems
A chuck that won’t tighten, slips during use, or won’t release bits is incredibly frustrating. Most chuck issues come from dirt, worn jaws, or loose retaining screws. Some require simple cleaning, while others need part replacement.
Motor and Switch Failures
If your drill makes strange noises, smells like burning, or runs weakly, you might have motor or switch problems. Brushed motors wear out over time. Switches get dirty or break internally. These repairs are more advanced but still doable at home.
Speed Control Malfunctions
When your drill only runs at full speed or won’t change speeds, the trigger switch or speed control board is likely faulty. This is common in drills used for years. The fix often involves cleaning or replacing the trigger assembly.
Step-by-Step: Troubleshooting Battery Issues
Battery problems cause most cordless drill repair calls. Follow this systematic approach to get your power back quickly.
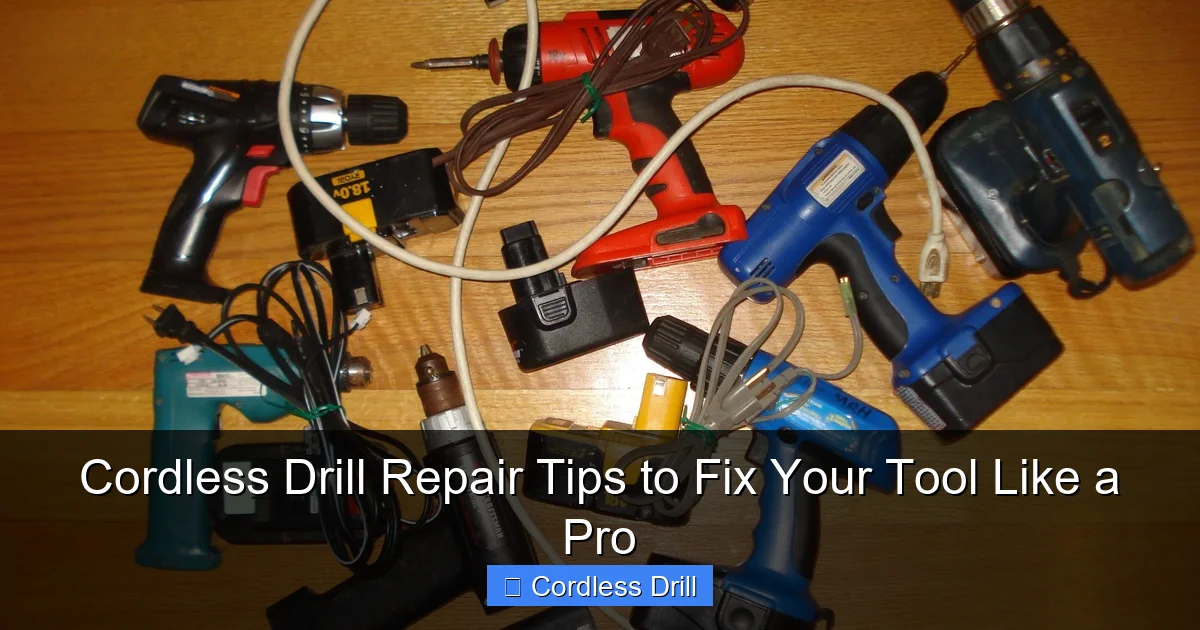
Visual guide about Cordless Drill Repair Tips to Fix Your Tool Like a Pro
Image source: i.pinimg.com
Inspect the Battery Pack
Look for visible damage like cracks, swelling, or leaks. A swollen battery is dangerous and needs immediate replacement. Check the plastic casing for stress marks. Smell for chemical odors indicating leakage. If you see any damage, stop here and replace the battery.
Test Battery Voltage
Set your multimeter to DC voltage. Touch the red probe to the positive terminal and black to negative. A fully charged 18V battery should read 20-21V. If it reads below 15V, the battery is weak. Zero volts means a dead battery. This test tells you if the battery holds charge.
Check the Charger
Plug in your charger and check the indicator lights. If the charger won’t light up or shows error codes, test the charger output with your multimeter. It should match the battery voltage. Clean the charger contacts with a cotton swab and rubbing alcohol. Dirty contacts prevent proper charging.
Clean Battery Contacts
Remove the battery from the drill. Look at the metal contacts on both the battery and drill. Use a small brush or sandpaper to clean corrosion or dirt. Wipe with a cloth dampened with rubbing alcohol. Let it dry completely before reinserting. This simple step fixes many connection issues.
Try a Known-Good Battery
If you have another battery, test it in your drill. This isolates whether the problem is the battery or the drill itself. Many people own multiple batteries without realizing one is dead. This test saves you from unnecessary drill disassembly.
How to Fix Chuck Problems in 5 Steps
Chuck issues are among the easiest cordless drill repairs. Most problems come from simple wear and dirt buildup.
Remove the Chuck
Open the chuck jaws fully. Look for a screw inside the chuck—this is the retaining screw. It’s reverse-threaded, so turn it clockwise to loosen. Use a screwdriver or Allen wrench. Once removed, unscrew the chuck counterclockwise from the spindle. You might need a strap wrench for grip.
Clean the Chuck Thoroughly
Spray the chuck with compressed air to blow out debris. Use a small brush to scrub between the jaws. Wipe away all grease and dirt. Check for metal shavings that might be stuck. A clean chuck works smoothly and grips bits better.
Inspect Chuck Jaws
Look at each jaw for wear, cracks, or deformation. Worn jaws won’t grip bits properly. Check if they move smoothly without binding. If jaws are damaged, you need a new chuck. Minor wear can be fixed with light sanding, but don’t remove too much material.
Lubricate Moving Parts
Apply a small amount of white lithium grease to the chuck threads. Put a drop of oil on the jaw mechanisms. Don’t over-lubricate—excess oil attracts more dirt. Work the jaws open and closed several times to distribute lubricant evenly.
Reinstall and Test
Screw the chuck back onto the spindle by hand first. Tighten it securely with your wrench. Reinstall the retaining screw and tighten it (remember: clockwise). Test the chuck by inserting different size bits and tightening. It should grip firmly without slipping.
Repairing Motor and Switch Failures
Motor and switch repairs are more advanced but still within reach for most DIYers. Take your time with these steps.
Access the Motor
Remove the drill’s housing screws. Carefully separate the two halves of the drill casing. Keep track of where each screw goes—they’re often different lengths. Take photos as you disassemble to help reassembly. Set aside all parts in order.
Inspect the Motor Brushes
Look for the motor brushes—usually small carbon blocks with wires. Check their length. If they’re shorter than 1/4 inch, they need replacement. Remove the brush caps and slide out the old brushes. Install new brushes of the same size and type. This simple fix brings many drills back to life.
Test the Motor Windings
Set your multimeter to ohms. Touch the probes to the motor terminals. You should see low resistance (2-10 ohms). Infinite resistance means open windings—the motor is dead. Zero resistance indicates a short. Either condition requires motor replacement.
Check the Trigger Switch
Locate the trigger switch assembly. Press the trigger and test continuity with your multimeter. The switch should show continuity when pressed and open when released. If it fails this test, replace the switch. Switches are usually inexpensive parts that solve many speed control issues.
Clean Electrical Connections
Look for any loose or corroded wires. Solder any broken connections. Use electrical contact cleaner on all terminals. Check that wires aren’t frayed or damaged. Secure any loose wires with zip ties to prevent them from touching moving parts.
Speed Control Troubleshooting Guide
When your drill won’t vary speed or only runs at full blast, follow this targeted repair process.
Identify the Speed Control Type
Most modern drills use a variable speed trigger with an electronic controller. Some older models have mechanical speed switches. Determine which type you have by listening for clicks when you press the trigger. Electronic triggers are silent, while mechanical switches click audibly.
Test Speed Sensor
For electronic drills, the speed sensor is often a small magnet on the trigger mechanism. Check that it moves smoothly and hasn’t come loose. Use your multimeter to test the Hall effect sensor if you have the skills. Most DIYers should simply clean and retest before replacement.
Clean the Trigger Assembly
Spray electrical contact cleaner into the trigger mechanism. Work the trigger back and forth to distribute the cleaner. This removes carbon buildup that interferes with speed control. Let it dry completely before reassembly. This fixes many intermittent speed issues.
Replace Faulty Components
If cleaning doesn’t work, replace the trigger assembly. They’re relatively inexpensive and plug into the drill’s wiring harness. Take the old one to your local hardware store to ensure you get the correct replacement. Installation is usually straightforward—just reverse the removal process.
Preventive Maintenance to Avoid Future Repairs
Regular maintenance prevents 80% of cordless drill problems. Spend just a few minutes after each use to keep your tool running perfectly.
Clean After Every Job
Wipe down the drill housing with a damp cloth. Blow out the chuck and air vents with compressed air. Remove any wood or metal chips stuck in crevices. This prevents debris from working into mechanisms and causing wear.
Store Batteries Correctly
Never leave batteries on the charger indefinitely. Store them at 40-50% charge in a cool, dry place. Avoid extreme temperatures—don’t leave them in your car during summer. Check stored batteries monthly and recharge if they drop below 30%.
Apply Proper Lubrication
Every 6 months, apply a few drops of light oil to the chuck mechanism. Use white lithium grease on gears if your drill has accessible gearing. Don’t over-lubricate—excess attracts dirt. Wipe away any excess immediately.
Check for Loose Screws
Every few months, inspect all visible screws on your drill. Tighten any that have loosened from vibration. Use thread-locking compound on critical screws if they continue to loosen. This prevents parts from shifting and causing internal damage.
Use the Right Bits and Settings
Always match your bit to the material you’re drilling. Use sharp bits—dull bits cause excessive strain on the motor. Adjust the clutch setting to match the task. Never force the drill—let the tool do the work. Proper use extends the life of every component.
When to Call a Professional or Replace Your Drill
Not every repair is worth attempting. Know these signs that it’s time for professional help or a new tool.
Cost-Benefit Analysis
Add up the cost of replacement parts plus your time. If repairs exceed 50% of a new drill’s price, replacement makes more sense. Consider that a new drill often comes with a warranty and better technology. Sometimes spending money on a new tool is the smarter investment.
Specialized Tools Required
Some repairs need expensive specialty tools like bearing presses or soldering stations for circuit boards. If you don’t own these tools and can’t rent them, professional repair might be your only option. Trying complex repairs without proper tools often causes more damage.
Warranty Considerations
Check if your drill is still under warranty. Opening the drill usually voids the warranty. If it’s covered, contact the manufacturer for free repair or replacement. Never void a warranty for a repair you could get for free.
Safety Concerns
If you see melted plastic, smell burning, or notice smoke, stop immediately. These indicate serious electrical problems. Continuing to use or repair a damaged drill is dangerous. When in doubt, take it to a certified repair shop or replace it safely.
Advanced Repair: Replacing Internal Components
For experienced DIYers, some internal repairs can be done at home. This section covers more complex fixes.
Gear Replacement
Worn gears cause grinding noises and reduced power. Access them by removing the motor assembly. Take photos of gear orientation before disassembly. Replace worn gears with exact matches. Apply fresh grease during reassembly. Gear replacement requires patience but costs much less than a new drill.
Electronic Speed Controller Repair
The ESC is a circuit board that controls speed and direction. Look for burnt components or cracked solder joints. Resolder any bad connections. Replace blown capacitors. This requires soldering skills and knowledge of electronics. If you’re not experienced with circuit boards, replacement is safer than repair.
Battery Pack Rebuilding
For expensive high-voltage batteries, you can replace individual cells. This requires spot welding skills and knowledge of battery chemistry. Only attempt this if you have experience with lithium-ion batteries. Improper rebuilding creates fire hazards. For most users, battery replacement is safer and easier.
Conclusion: Keep Your Drill Running for Years
Mastering cordless drill repair saves you money and reduces waste. Start with simple fixes like cleaning contacts and move to more complex repairs as you gain confidence. Remember to always prioritize safety and know when to quit. With proper maintenance, your drill can last a decade or more. The skills you learn here apply to many other power tools too. Keep this guide handy for future reference, and never throw away a drill that just needs a little TLC. You’ve got this!
Frequently Asked Questions
How often should I clean my cordless drill?
Clean your drill after every use to prevent debris buildup. A quick 2-minute wipe-down and air blast keeps most problems away. Do a deep cleaning every 3 months where you remove the chuck and clean internal parts.
Can I use any battery in my cordless drill?
Always use the correct battery voltage and brand recommended by your drill manufacturer. Third-party batteries can work but may not fit properly or deliver consistent power. Using the wrong voltage can damage your drill’s motor and electronics.
What causes a drill to lose power over time?
The most common cause is worn motor brushes that need replacement. Battery degradation also reduces available power. Dirty air vents cause overheating, which triggers thermal protection circuits that limit speed. Regular maintenance prevents most power loss.
Is it worth repairing an old cordless drill?
It depends on the problem and drill value. If repair costs less than half a new drill’s price and the drill is high-quality, repair makes sense. For cheap drills with multiple issues, replacement is often better. Consider the age and original cost when deciding.
How do I know if my drill’s motor is burned out?
Signs include a burning smell, smoke, or the drill running very weakly. Test motor windings with a multimeter—infinite resistance means open windings. If the motor smells burnt even when cool, it’s likely damaged beyond repair and needs replacement.
Can I use my cordless drill in the rain?
Never use cordless drills in wet conditions. Water causes electrical shorts and rust. Even “weather-resistant” drills aren’t waterproof. If your drill gets wet, immediately remove the battery and dry it thoroughly with compressed air. Let it sit for 24 hours before testing.
🎥 Related Video: Smart Tips for Changing Electric Drill Chuck
📺 ToMoBoxBox
In this video, DIYHandmadeMan shares effective techniques for replacing the chuck on an electric drill. Learn step-by-step how to …
