
Hammer drill brick drilling doesn’t have to be frustrating. This guide reveals professional techniques for clean, precise holes in brick walls without cracks or damage. You’ll discover the right settings, bits, and methods that actually work.
Key Takeaways
- Choose the right mode: Always use hammer drill mode, not regular drill mode, for brick work
- Use sharp masonry bits: Dull bits cause slipping, cracks, and overheating
- Start slow: Begin at low speed to create a pilot groove before increasing power
- Control dust: Tape a vacuum hose or use water to minimize harmful brick dust
- Watch for wires: Always check for hidden electrical wires and pipes before drilling
- Keep bits cool: Pull out frequently to clear dust and prevent overheating
- Angle matters: Drill straight and steady to avoid bit binding and brick damage
Hammer Drill Brick Drilling Tips That Actually Work
You know that feeling when your drill just spins on brick, making a horrible screeching noise while your hole looks like a disaster? Yeah, we’ve all been there. Hammer drill brick drilling can be one of the most frustrating DIY tasks if you don’t know the secrets. But with the right techniques, you can drill perfect holes every single time.
This guide will walk you through everything you need to know. From choosing the right settings to avoiding cracked bricks, these are the tips that professionals actually use. No more guesswork, no more ruined projects. Just clean, precise holes in your brick walls.
Understanding Your Hammer Drill for Brick Work
Before you even touch a brick, you need to understand what makes your hammer drill special. A regular drill simply spins. But a hammer drill? It spins AND hammers. That hammering action is what breaks through tough brick and mortar.
Visual guide about Hammer Drill Brick Drilling Tips That Actually Work
Image source: images.nexusapp.co
Hammer Drill vs Regular Drill: Why It Matters
Many beginners grab their regular drill thinking it will work. Spoiler alert: it won’t. The difference between a drill and a hammer drill is that critical hammering mechanism. When you’re working with brick, you need that rapid hammering motion—usually thousands of blows per minute—to chip away the material while the bit rotates.
If you’re not sure which tool you have, check for a “hammer” setting on the dial. It usually looks like a little hammer icon. Without this function, you’re just spinning your wheels and damaging your bit.
Key Features to Know Before Starting
Your hammer drill has three main settings you need to understand:
- Drill only: Spins without hammering (for wood and metal)
- Hammer only: Hammers without spinning (for chipping)
- Hammer drill: Both actions combined (for brick and concrete)
For brick drilling, you want that third setting—hammer drill mode. Also, look for adjustable speed and torque settings. Lower speeds give you more control when starting holes. Variable triggers let you ease into the material instead of going full power immediately.
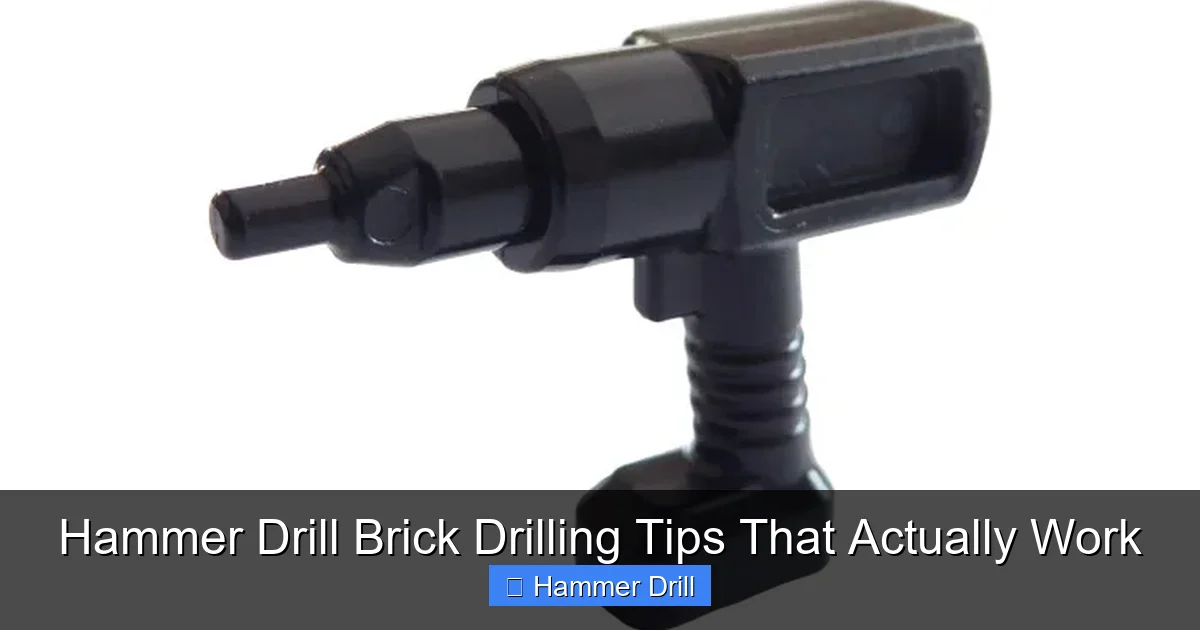
Essential Tools and Materials for Success
Having the right gear isn’t just about making the job easier. It’s about preventing disasters. The wrong bit can shatter brick or get stuck permanently.
Visual guide about Hammer Drill Brick Drilling Tips That Actually Work
Image source: img.brickowl.com
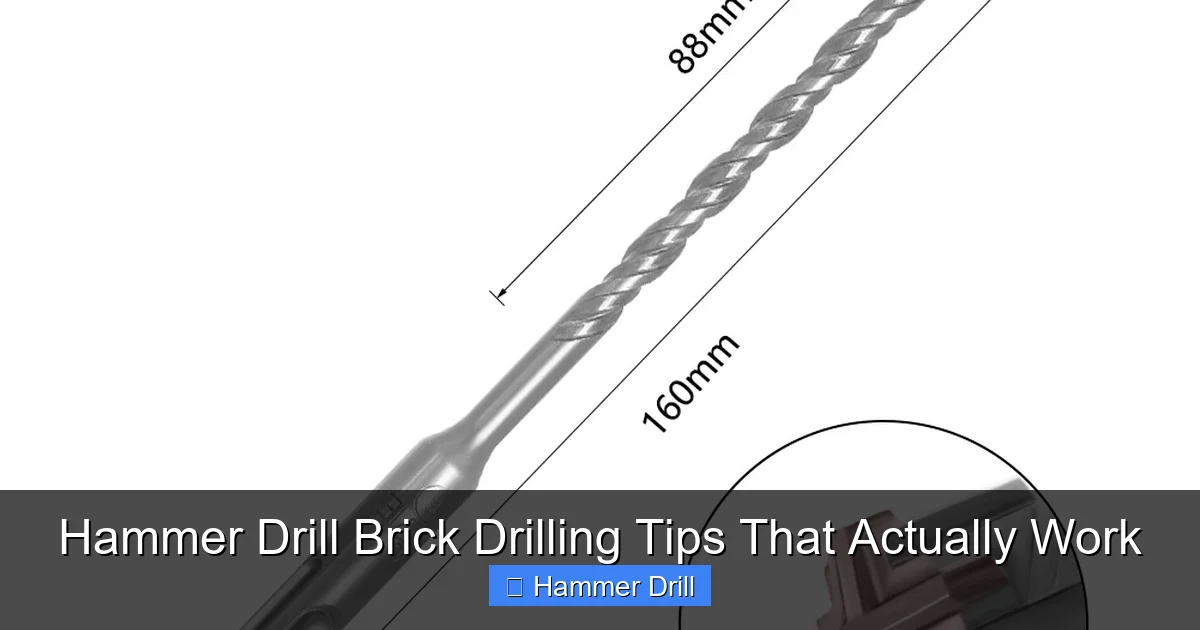
Choosing the Right Masonry Bits
Not all drill bits are created equal. For brick, you need carbide-tipped masonry bits. These have a hardened tungsten carbide tip that actually cuts through brick. Here’s what to look for:
- Size matters: Match your bit diameter to the anchor you’ll use. For most household projects, 3/16″ to 1/4″ bits work perfectly
- Length counts: Make sure your bit is long enough to go through the brick plus an inch for the anchor
- Sharp is essential: Dull bits overheat and slip. If your bit looks worn, replace it
Pro tip: Buy a set with multiple sizes. You’ll always need different diameters for various projects. Store them in a case to keep them organized and protected.
Safety Gear You Actually Need
Brick dust is nasty stuff. It gets everywhere and can be harmful to breathe. Don’t skip this equipment:
- Safety glasses: Flying chips can blind you. Seriously, wear them.
- Dust mask or respirator: A basic N95 mask works for small jobs. For bigger projects, get a proper respirator
- Work gloves: Protect your hands from sharp brick edges and vibration
- Hearing protection: Hammer drills are LOUD. Protect your ears
Consider wearing long sleeves too. Brick dust is incredibly itchy and hard to wash off your skin.
Preparing to Drill Brick: The Setup Phase
Good preparation turns a nightmare job into a smooth operation. This step is where most people rush and make mistakes.
Visual guide about Hammer Drill Brick Drilling Tips That Actually Work
Image source: i0.wp.com
Marking Your Drill Points Accurately
Grab a pencil and mark exactly where you want your hole. But here’s the trick: use a nail or awl to make a small dimple at that spot. This prevents your drill bit from walking or slipping when you start. For multiple holes, use a level to ensure they’re straight. Nothing looks worse than crooked mounting holes.
If you’re drilling into mortar joints instead of brick, be careful. Mortar is softer, but the joint might be thin. Center your bit in the joint for best results.
Checking for Hidden Wires and Pipes
This cannot be stressed enough. Drilling into a live wire or pipe can be deadly or cause major damage. Always use a reliable stud finder with AC detection or a dedicated wire and pipe detector. Scan the entire area where you plan to drill.
For extra safety, turn off the power to that section of your house at the breaker box. Better safe than sorry. Also, avoid drilling near electrical boxes or plumbing lines if possible.
Step-by-Step Brick Drilling Process
Now for the main event. Follow these steps exactly for perfect holes every time.
Setting Your Drill to Hammer Mode
First, locate the mode selector on your drill. Switch it to hammer drill mode (the hammer icon). Next, set your speed. For starting holes, use the lowest speed setting. This gives you maximum control. Once the hole is established, you can increase speed if needed.
Adjust the depth stop if your drill has one. This prevents you from drilling too deep. Measure your anchor length and set the stop accordingly. For most projects, you want the hole to be slightly deeper than the anchor length.
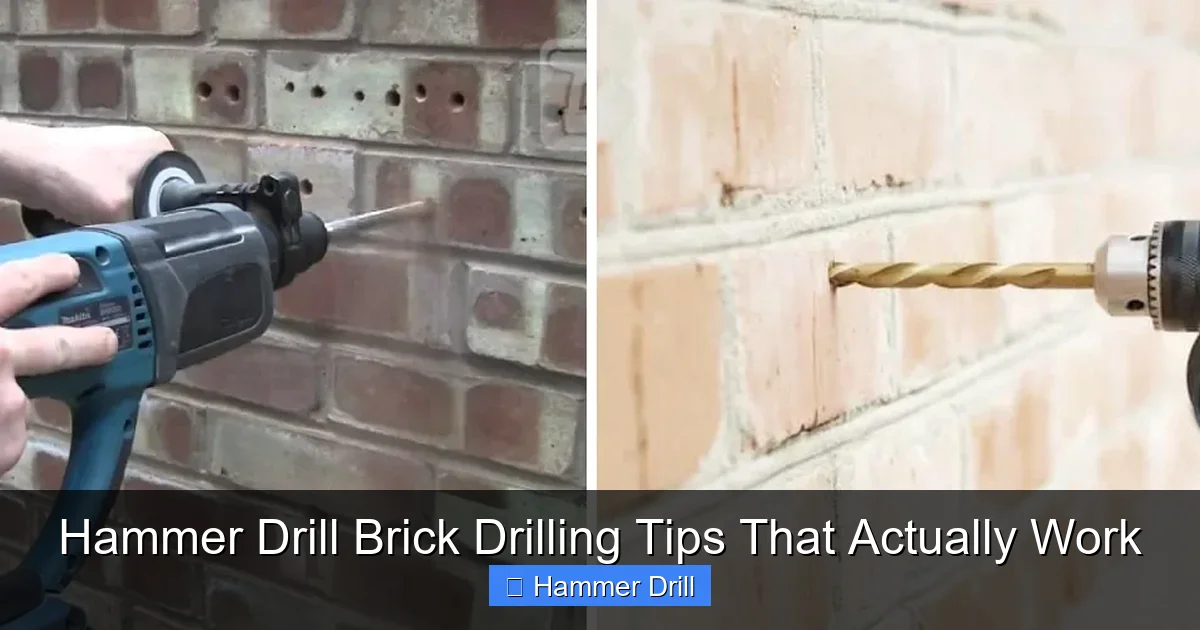
The Drilling Technique That Works
Here’s where the magic happens. Follow this exact sequence:
- Start at a 45-degree angle: This helps the bit bite into the brick without slipping. Once you have a small groove (about 1/8″ deep), straighten the drill to 90 degrees
- Use light pressure: Let the hammer action do the work. Pushing too hard can crack the brick or overheat the bit
- Pull out frequently: Every 10-15 seconds, pull the bit out to clear dust. This keeps the hole clean and prevents binding
- Keep it steady: Hold the drill firmly with both hands. Don’t let it wobble
Apply steady, moderate pressure. You should hear a rhythmic hammering sound. If you hear just spinning, stop and check your mode setting. If the bit is smoking, you’re pushing too hard or the bit is dull.
Depth Control for Perfect Holes
Drilling too deep or not deep enough will ruin your project. Use masking tape on your bit as a visual depth marker. Wrap a piece of tape around the bit at the depth you want to drill. When you reach the tape, stop.
For deeper holes, drill in stages. Go a few inches, pull out to clear dust, then go deeper. This prevents the bit from getting stuck in a pile of dust at the bottom of the hole.
Pro Tips for Perfect Brick Holes
These advanced techniques separate good results from professional results.
Keeping Bits Cool During Operation
Overheated bits dull quickly and can crack brick. The key is dust removal. Pull the bit out completely every 10-15 seconds. Blow dust out of the hole or use a vacuum hose. You can also dip the bit in water occasionally for very long holes, but don’t quench a hot bit suddenly—this can damage the carbide tip.
If you’re drilling many holes, have two bits ready. Switch between them to let one cool while you use the other. This saves time and extends bit life.
Preventing Brick Cracks and Damage
Brick is brittle. Too much pressure or the wrong technique will crack it. Always start slow. Use the lowest speed setting to create a pilot groove. Increase speed gradually as the hole establishes.
Drill into the brick, not the mortar, for maximum holding power. But if you must drill into mortar, use even lighter pressure. Mortar is softer and more prone to crumbling. Also, avoid drilling too close to the edge of a brick. Stay at least 1/2″ away from edges to prevent spalling.
Dust Management Solutions
Brick dust is a mess. Here are three ways to control it:
- The tape trick: Place a piece of masking tape over your drill mark. The tape catches some dust and helps the bit grip
- Vacuum assist: Have someone hold a shop vac hose near the drill point. This captures up to 80% of the dust
- Wet method: For very dusty jobs, mist the area with water. The dust will clump and fall rather than become airborne
Work from top to bottom when possible. Dust falls downward, so drilling upper holes first keeps your workspace cleaner.
Troubleshooting Common Brick Drilling Problems
Even with perfect technique, things can go wrong. Here’s how to fix the most common issues.
When Your Bit Won’t Bite the Brick
If the bit just spins and won’t penetrate, check these things:
- Mode setting: Double-check that you’re in hammer drill mode, not regular drill
- Bit sharpness: A dull bit won’t cut. Try a new bit
- Pressure: You might be pushing too hard, causing the bit to skate. Use lighter pressure and start at a 45-degree angle
- Brick type: Some bricks are extremely hard. You might need a hammer drill with more power or a diamond-tipped bit
If all else fails, try drilling into a mortar joint instead. Mortar is usually softer than the brick itself.
Dealing with Excessive Vibration
Too much vibration can damage your drill and hurt your hands. Make sure you’re holding the drill firmly with both hands. Keep your arms close to your body for better control. If the vibration is severe, the bit might be bent or damaged. Check for straightness by rolling it on a flat surface.
Also, ensure you’re not hitting a particularly hard spot in the brick. Some bricks have denser areas. Adjust your angle slightly to find a better path.
When the Hole Gets Too Hot
Smoking or hot bits mean you’re working too hard. Pull the bit out immediately. Let it cool. Clear all dust from the hole. Resume drilling with lighter pressure and more frequent dust clearing. Consider using a lower speed setting.
If overheating continues, your bit is likely dull and needs replacement. Continuing to use a dull bit can damage your drill’s motor and create a safety hazard.
Safety First: Never Skip These Steps
Working with power tools and brick requires serious safety measures. Always wear eye protection. Brick chips fly in all directions. Use hearing protection—hammer drills exceed safe noise levels. A dust mask is non-negotiable. Brick dust contains silica, which can cause lung disease.
Check your drill cord for damage before plugging in. If you’re using an extension cord, make sure it’s rated for your drill’s power. Keep the cord away from your drilling area to avoid tripping or cutting it.
Work in a well-lit area. You need to see exactly what you’re doing. If you’re drilling outdoors, avoid wet conditions. Water and electricity don’t mix.
Conclusion: Mastering Hammer Drill Brick Drilling
There you have it—the complete guide to hammer drill brick drilling that actually works. The key is preparation, the right tools, and patience. Don’t rush the process. Let your drill do the work. Keep bits cool and clear of dust. And always, always prioritize safety.
Remember, practice makes perfect. If you have an inconspicuous area, try drilling a test hole first. Get comfortable with the technique before tackling your main project. With these tips, you’ll be drilling like a pro in no time.
Now you know the difference between success and frustration when drilling into brick. Use this knowledge on your next project. Your walls will thank you, and your anchors will hold strong for years to come.
🎥 Related Video: How to drill a hole in concrete! #diy #constructionsupplies #drilling #satisfying #asmr
📺 My Tool Expert UK
