
This ultimate guide provides everything you need to confidently and safely operate your cordless drill. You will learn the core functions, from basic assembly and drilling into various materials to driving screws and crucial maintenance. We also cover essential safety protocols and troubleshooting common issues to ensure your projects are successful.
Key Takeaways
- Understand Your Drill’s Settings: Mastering the clutch/torque settings prevents stripped screws, while the variable speed trigger offers control for different materials.
- Always Use the Correct Bit: Match the drill bit to the material (e.g., masonry bit for concrete, spade bit for wood) and the driver bit to the screw head for optimal performance and safety.
- Secure Your Workpiece and Yourself: Clamp materials down and always wear safety glasses. A stable work platform is non-negotiable for precision and injury prevention.
- Battery Care is Crucial: For longevity, avoid fully draining lithium-ion batteries, store them in a cool, dry place, and consider having a spare for uninterrupted work.
- Let the Drill Do the Work: Apply steady, firm pressure, but avoid leaning into the drill with excessive force, which can damage bits, strain the motor, or cause injury.
- Regular Maintenance Pays Off: Keep the chuck clean, occasionally lubricate moving parts, and inspect your drill for damage to ensure reliable operation for years.
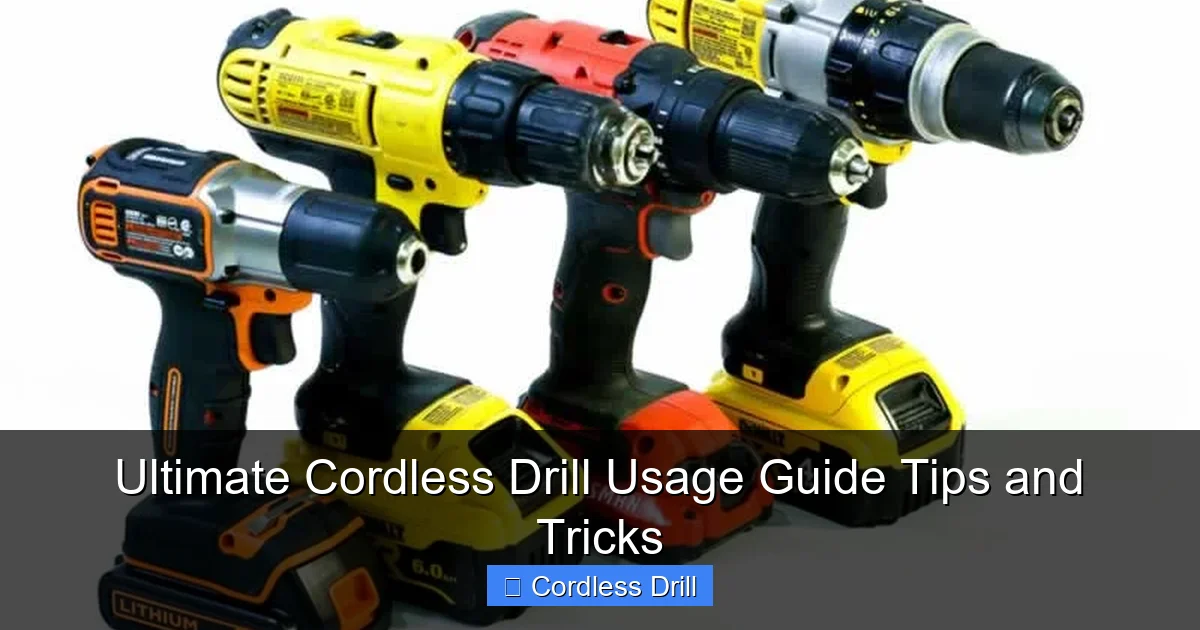
Ultimate Cordless Drill Usage Guide: Tips and Tricks
Welcome to your one-stop resource for mastering the cordless drill! This versatile tool is a powerhouse for DIY projects, home repairs, and professional tasks. But to unlock its full potential, you need to know more than just how to pull the trigger. This comprehensive guide will walk you through everything from understanding the parts of your drill to executing professional-looking projects. We’ll cover setup, core techniques, essential safety, and clever tricks that save time and frustration. By the end, you’ll handle your cordless drill with the confidence and skill of a seasoned pro.
Part 1: Know Your Tool – Components and Capabilities
Before you start drilling, let’s get familiar with what you’re holding. A cordless drill consists of several key parts.
Visual guide about Ultimate Cordless Drill Usage Guide Tips and Tricks
Image source: handymantips.org
The Major Components
The Motor: The heart of the drill, powered by the battery. More voltage (e.g., 18V, 20V) generally means more power for tougher jobs.
The Chuck: The clamp at the front that holds the drill bit. Most modern drills have a keyless chuck you tighten by hand.
The Battery: Typically a Lithium-ion (Li-ion) pack that slides into the handle or base. It’s your source of portable power.
The Trigger Switch: This is your speed control. Squeezing it gently provides low speed; squeezing it fully provides maximum speed.
The Forward/Reverse Switch: Located near the trigger, this lever controls rotation direction (clockwise for drilling/driving, counterclockwise for removing screws or bits).
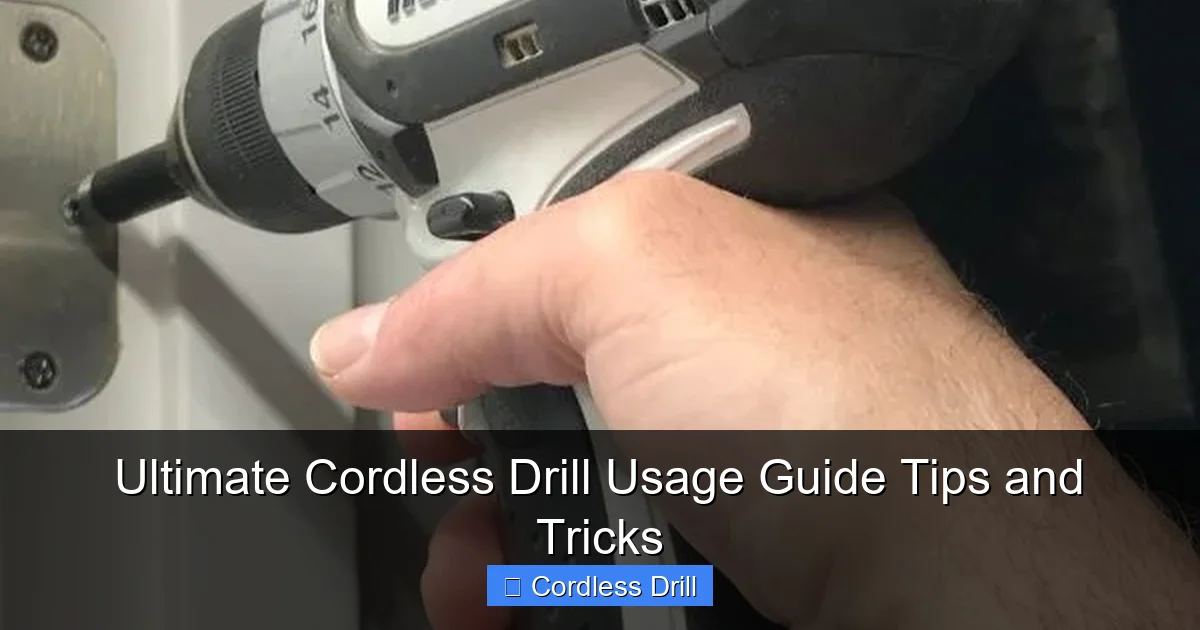
The Clutch/Torque Setting Ring: This numbered ring behind the chuck is crucial. It adjusts the twisting force (torque). Low numbers are for small screws in soft materials; high numbers are for larger screws. The drill symbol bypasses the clutch for drilling holes.
The Gear Selector: Many drills offer two speeds. Gear 1 (low speed, high torque) is for driving screws or drilling large holes. Gear 2 (high speed, lower torque) is for drilling smaller holes faster.
Part 2: Getting Started – Setup and Safety First
Proper setup and safety are the foundation of any successful project.
Visual guide about Ultimate Cordless Drill Usage Guide Tips and Tricks
Image source: carpentry-tips-and-tricks.com
Step 1: Charging and Installing the Battery
Insert your battery into the charger. A full charge usually takes an hour or less for modern Li-ion packs. Once charged, slide the battery firmly into the drill’s compartment until it clicks.
Step 2: Inserting and Tightening a Drill Bit
Open the chuck by rotating it counterclockwise. Insert the shank of your chosen drill bit. Center it as best you can, then tighten the chuck by hand clockwise until it’s very snug. For extra grip, you can use the chuck key if provided, but hand-tightening is often sufficient.
Step 3: Non-Negotiable Safety Gear and Practices
- Eye Protection: Safety glasses are mandatory. Debris, metal shavings, or broken bits can fly towards your face.
- Secure Your Workpiece: Always use clamps or a vise to hold the material you’re drilling. Never try to hold it with your free hand.
- Check for Hidden Hazards: Before drilling into any wall, use a stud finder to check for wires, pipes, or studs.
- Proper Attire: Avoid loose clothing, gloves, or jewelry that could get caught in the rotating chuck.
- Stable Footing: Ensure you are on stable ground. If your project requires a ladder, make sure it is secure. For more on ladder setup, see our guide on inspecting ladders for safety and performance.
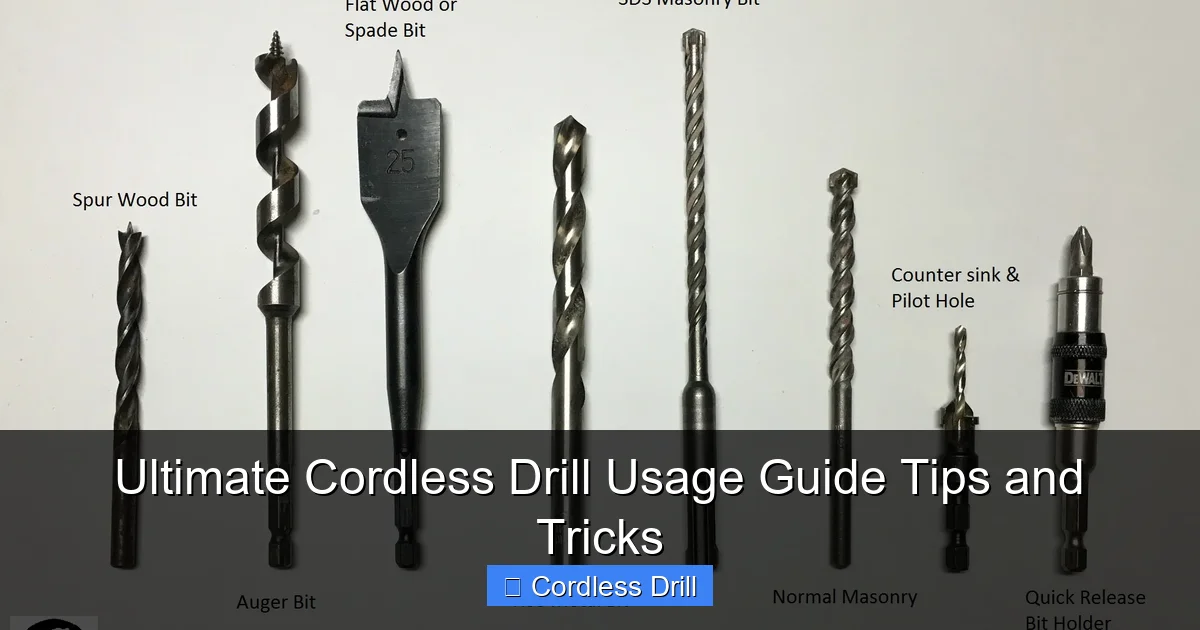
Part 3: Core Techniques – Drilling and Driving Like a Pro
How to Drill a Basic Hole
1. Mark Your Spot: Use a pencil and, for precision, create a small indentation with a center punch or nail to prevent the drill bit from “walking.”
2. Select the Correct Bit: Use a twist bit for wood and metal, a masonry bit for concrete/brick, or a spade/Forstner bit for larger wood holes.
3. Set Your Drill: Move the clutch ring to the drill icon. Select the appropriate gear (Gear 1 for large bits, Gear 2 for small bits).
4. Position and Start: Hold the drill perpendicular to the surface. Start at a slow speed to establish the hole, then increase speed while applying steady, firm pressure.
5. Withdraw the Bit: Once through, pull the trigger in reverse while gently pulling the drill out to clear debris from the hole.
Visual guide about Ultimate Cordless Drill Usage Guide Tips and Tricks
Image source: i.pinimg.com
How to Drive a Screw
1. Choose the Right Driver Bit: Match the bit exactly to the screw head (e.g., Phillips #2, Pozidriv PZ2, Torx T25). A mismatched bit will strip the screw.
2. Set the Clutch: Start with a low clutch setting (e.g., 4-5). The clutch will disengage when it reaches the set torque, preventing you from over-driving and sinking the screw too deep.
3. Use Low Speed (Gear 1): This provides more control and power for driving.
4. Apply Steady Pressure: Keep the drill straight on the screw axis. Let the drill’s torque do the work; don’t push excessively. For a detailed walkthrough on securing items to walls, check out our comprehensive guide on drilling screws into a wall.
Part 4: Advanced Tips, Tricks, and Maintenance
Pro Tips for Better Results
- Pilot Holes Are Your Friend: For hardwoods or when driving screws near the end of a board, drill a pilot hole slightly smaller than the screw’s core diameter. This prevents splitting and makes driving easier.
- Use a Depth Stop: If your drill has a depth stop rod, use it to drill holes to a consistent, precise depth.
- Clearing Dust: When drilling deep holes, periodically pull the bit out while it’s still spinning to clear wood or masonry dust.
- Magnetic Bit Holder: Invest in a magnetic bit holder extension. It makes inserting screws one-handed possible and prevents dropping tiny screws.
Battery and Tool Maintenance
Battery Care: Li-ion batteries prefer partial cycles. Avoid running them down to zero constantly. Store them at room temperature (around 68°F/20°C is ideal). If storing long-term, charge to about 50-60%.
Drill Care: Keep the chuck clean of debris. Occasionally add a drop of light machine oil to the chuck mechanism. Wipe down the drill after use and store it in a dry place. For insights on choosing a high-quality drill from the start, our best cordless drill guide is an excellent resource.
Bit Care: Keep your drill bits sharp. A dull bit requires more force, produces heat, and makes rough holes. Use a bit sharpener or replace worn bits.
Part 5: Troubleshooting Common Issues
- Drill won’t start: Check if the battery is charged and properly seated. Ensure the forward/reverse switch is not in the center “locked” position.
- Bit keeps slipping or won’t tighten: The chuck jaws may be dirty. Open it fully and clean with a brush or compressed air. Ensure you are hand-tightening it firmly.
- Stripped screw head: This happens with mismatched bits, wrong clutch setting (too high), or an angled drill. Use a screw extractor bit to remove it.
- Drill is smoking or smells hot: Stop immediately! You are overloading the motor. This can happen from excessive pressure, a dull bit, or using the wrong gear. Let the tool cool down completely.
- Hole is too big or rough: Your bit is likely dull, or you were applying too much sideways pressure. Use a sharp bit and focus on keeping the drill straight.
Conclusion
Your cordless drill is more than just a tool; it’s a gateway to accomplishing countless projects with efficiency and pride. By understanding its components, respecting safety protocols, and practicing the core techniques of drilling and driving, you’ve built a solid foundation. Remember the pro tips: use pilot holes, care for your battery, and let the tool’s power work for you. With this knowledge and a bit of practice, you’ll tackle tasks from assembling furniture to installing shelves with newfound confidence. Now, grab your drill, stay safe, and start building!
🎥 Related Video: What Do The Settings On A DeWALT Drill Mean
📺 The Bloke Cave
Got yourself a new DeWALT drill, but your not sure on what all the settings and symbols mean? This quick video is perfect and …
