
Hammer drill wood drilling doesn’t have to be frustrating. This guide teaches you when and how to use a hammer drill on wood, the right bits to choose, and step-by-step techniques to create clean, precise holes. Perfect results are achievable with the proper methods and safety precautions.
Key Takeaways
- Hammer drills can work on wood but should only be used for specific situations like dense hardwoods or thin materials where regular drills struggle.
- Always use the hammer-only mode for wood drilling and never the drill-hammer combination setting to prevent splintering and tear-out.
- Choose brad-point bits over spade bits for cleaner holes and better accuracy in wood projects.
- Secure your workpiece with clamps and mark locations with a center punch to prevent bit walking.
- Apply steady, moderate pressure and use high speed with low hammer frequency for best control and hole quality.
- Wear safety glasses and dust masks to protect against wood chips and airborne particles.
- Practice on scrap wood first to dial in your settings and technique before working on your actual project.
Hammer Drill Wood Drilling: Your Complete Guide to Perfect Holes
You have a hammer drill sitting in your toolbox. You need to drill a hole in wood. Should you use it? Many DIYers wonder if hammer drills belong anywhere near wood projects. The truth is, while hammer drills shine in concrete and masonry, they absolutely have a place in woodworking when used correctly. This guide will show you exactly how to master hammer drill wood drilling for flawless results every single time.
We will walk through safety basics, tool selection, step-by-step techniques, and pro tips that transform frustrating, splintered holes into clean, professional cuts. Whether you are building a deck, framing a wall, or crafting furniture, these strategies will save you time and materials. Let’s get started.
Understanding When to Use a Hammer Drill on Wood
Not every wood drilling job needs a hammer drill. Using the wrong tool creates problems. Knowing when to reach for this powerful machine makes all the difference.
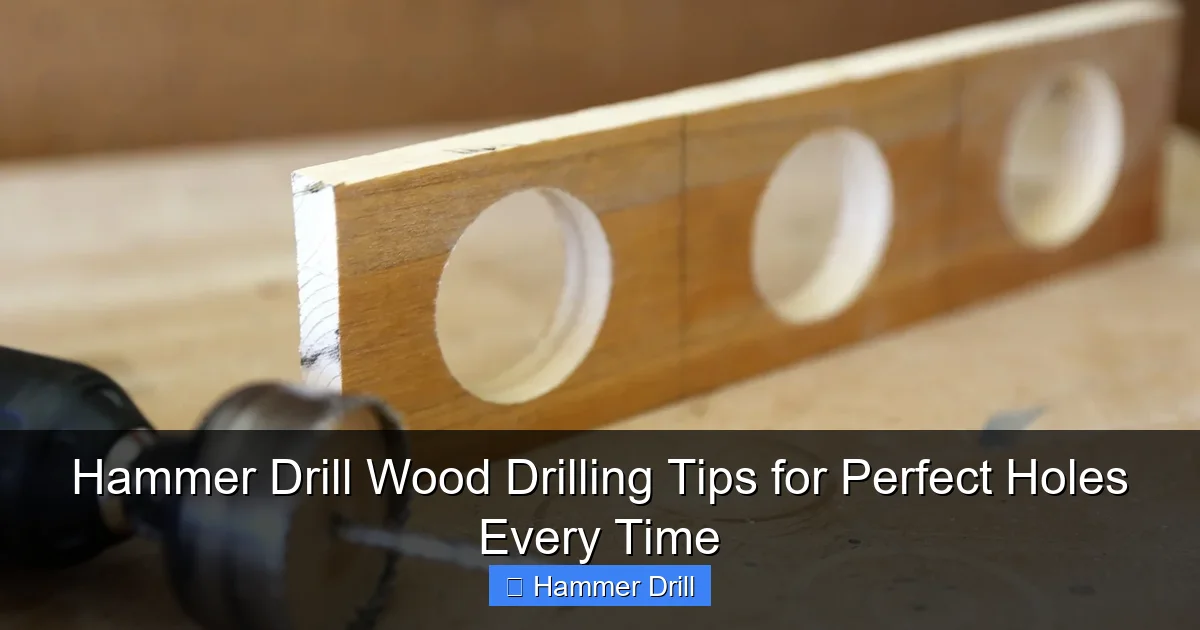
Visual guide about Hammer Drill Wood Drilling Tips for Perfect Holes Every Time
Image source: content.instructables.com
The Hammer Drill Mechanism Explained
Hammer drills combine rotation with a rapid forward-and-backward pounding action. This mechanism excels at crushing concrete and brick. On wood, this action can be too aggressive. That is why modern hammer drills feature multiple settings. For wood projects, you will use the standard drill mode or the hammer-only mode, never the combined setting. Understanding this distinction prevents damage to your workpiece and ensures cleaner holes.
Wood Types and Hammer Drill Compatibility
Softwoods like pine and cedar respond well to gentle drilling. Hardwoods such as oak, maple, and hickory resist standard bits. This is where a hammer drill becomes valuable. The hammer action helps power through dense grain without bogging down. Plywood and engineered wood products also benefit from the controlled hammer setting, especially when drilling near edges where tear-out is common. For ladder construction using specific wood types, check out what wood are ladders made from to understand material hardness.
When to Choose a Hammer Drill Over a Regular Drill
Choose a hammer drill when you face resistance that stalls your regular drill. Thick hardwood boards over one inch dense, drilling through knots, or working with pressure-treated lumber that contains preservatives are perfect scenarios. Hammer drills also excel when you need to drill many holes quickly in tough material. For most softwoods and thin materials, a standard drill suffices. If you are unsure about tool selection, read difference between a drill and a hammer drill to make an informed choice.
Essential Safety Precautions
Power tools demand respect. Wood drilling creates flying chips, dust, and noise. Proper protection prevents injuries and ensures comfort during extended use.
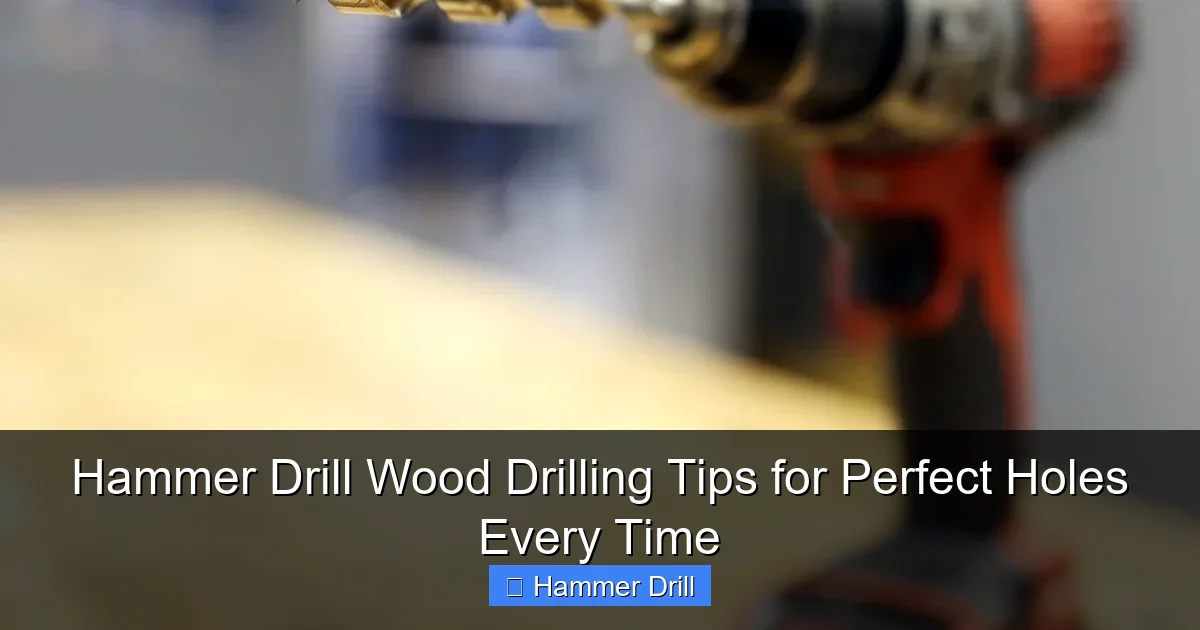
Visual guide about Hammer Drill Wood Drilling Tips for Perfect Holes Every Time
Image source: content.instructables.com
Personal Protective Equipment (PPE)
Always wear safety glasses with side shields. Wood chips fly in unpredictable directions. A dust mask or respirator is essential, especially when sanding or drilling treated lumber that releases toxic particles. Hearing protection matters too. Hammer drills generate significant noise levels. Keep loose clothing and long hair secured. Remove jewelry before starting. These simple steps create a safe working environment.
Workpiece and Workspace Safety
Clamp your wood securely to a stable workbench or sawhorses. Free-floating pieces shift during drilling, causing inaccurate holes or dangerous kickback. Ensure good lighting so you can clearly see your marked hole locations. Keep your workspace clean and organized. Remove tripping hazards and maintain a clear path around your work area. Good organization reduces accidents and improves focus.
Electrical Safety Tips
Inspect your hammer drill cord for damage before each use. Frayed wires create shock hazards. Keep cords away from your drilling path to avoid accidentally cutting them. For cordless models, ensure batteries are fully charged to prevent unexpected shutdowns mid-hole. Work in dry conditions only. Moisture near electrical tools invites danger. These precautions protect both you and your equipment.
Choosing the Right Hammer Drill and Bits
The right tool and bit combination makes or breaks your drilling success. Not all hammer drills perform equally on wood. Bit selection is equally critical.
Visual guide about Hammer Drill Wood Drilling Tips for Perfect Holes Every Time
Image source: thumbs.dreamstime.com
Corded vs. Cordless Hammer Drills
Corded hammer drills deliver consistent power without battery fade. They work best for long sessions drilling multiple holes. Cordless models offer mobility and convenience. Modern lithium-ion batteries provide plenty of power for most wood projects. For heavy-duty work, choose a corded model. For general DIY tasks, a cordless hammer drill gives you freedom to move. If you need help selecting the best tool, explore best cordless drill options and reviews.
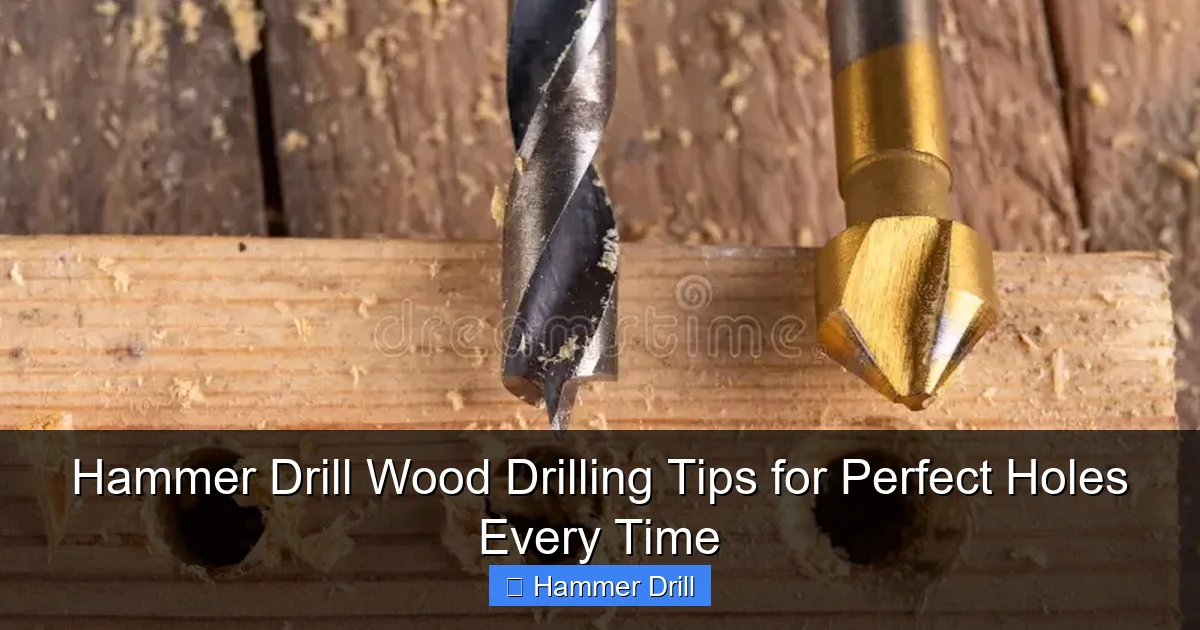
Understanding Drill Bit Types for Wood
Brad-point bits are the gold standard for wood drilling. Their sharp center point prevents walking and provides accurate positioning. The spurs score the wood fibers, creating clean entry and exit holes. Spade bits work faster but leave rougher edges. They suit rough construction where appearance doesn’t matter. Forstner bits create flat-bottomed holes but require a drill press for best results. Avoid masonry bits on wood. Their carbide tips and flat geometry tear rather than cut wood fibers.
Size and Speed Considerations
Match your bit size to the project requirements. Small bits (1/8″ to 3/8″) work well for pilot holes and delicate work. Larger bits (1/2″ to 1″) need more power and control. Hammer drills feature variable speed triggers. Lower speeds (0-1,000 RPM) work best for large bits and hardwoods. Higher speeds (1,500-3,000 RPM) suit small bits and softwoods. Check your drill’s speed settings and adjust based on bit diameter and wood density.
Preparing to Drill – Setup and Marking
Preparation prevents poor performance. Taking time to set up correctly ensures accurate, clean holes every time.
Measuring and Marking Your Hole Location
Measure twice, drill once. Use a tape measure and combination square to mark your hole location precisely. Make a small “X” to indicate the exact center. Then, use a center punch or awl to create a small indentation. This dent guides the bit tip and prevents it from wandering when you start drilling. Accuracy at this stage saves you from costly mistakes later.
Securing Your Workpiece
Clamping is non-negotiable. Use at least two clamps for rectangular pieces. For round stock, use a vise with protective jaws. Ensure the clamp pressure doesn’t damage the wood surface. The workpiece must not move when drilling pressure is applied. A stable workpiece means straighter holes and safer operation. Check your clamps before every hole.
The Drilling Technique – Step-by-Step
Now comes the moment of truth. Proper technique transforms a frustrating experience into a smooth, controlled process.
Starting the Hole (Pilot Hole Method)
Begin with a small pilot bit. Select a 1/8″ or 3/16″ brad-point bit for most projects. Place the bit tip in your center punch mark. Hold the drill perpendicular to the wood surface. Keep the drill level using a bubble level or visual reference. Squeeze the trigger gently to start the motor. Apply light downward pressure. Let the bit cut into the wood slowly. Once the tip penetrates about 1/4″, increase pressure slightly. This method establishes a precise guide for your larger bit.
Drilling at the Right Speed and Pressure
Find the sweet spot between speed and pressure. Too much pressure forces the bit, causing burning and splintering. Too little pressure makes the drill stall. Keep the RPM consistent. Listen to the motor sound. It should maintain a steady pitch without bogging down. Apply firm, steady pressure. Let the hammer action do the work. Your job is to guide and control the drill. For dense hardwoods, reduce speed and increase pressure slightly. For softwoods, increase speed and reduce pressure.
Managing Chip Removal
Wood chips must escape the hole. Stop drilling every 10-15 seconds to pull the bit out partially. This action clears chips from the flutes. Reinsert the bit and continue. For deep holes over 2 inches, use this pecking method consistently. Chip removal prevents overheating and bit binding. It also reduces motor strain and extends bit life. Clean chips from your work area regularly to maintain visibility.
Finishing Touches
The final steps determine hole quality. How you finish matters as much as how you start.
Withdrawing the Bit Properly
Never stop the drill motor while the bit is still in the hole. Continue rotating until the bit clears the wood completely. This prevents the bit from catching on wood fibers and splintering the exit point. Withdraw the bit straight out, maintaining alignment. Twisting or angling the bit while removing it can enlarge the hole or damage edges. Slow, deliberate removal ensures clean results.
Cleaning and Inspecting Your Hole
Examine your hole immediately after drilling. Run your finger around the edge to check for splinters. Lightly sand rough edges with fine-grit sandpaper. Blow out dust from the hole using compressed air or a shop vacuum. A clean hole provides better adhesion for glue, screws, or dowels. Inspect the bit for damage or dulling. Clean bits perform better and last longer.
Expert Techniques for Flawless Results
Professional woodworkers use these tricks to achieve perfect holes. Incorporate them into your routine for superior results.
Preventing Tear-Out and Splintering
Tear-out ruins beautiful wood surfaces. To prevent it, place a sacrificial backing board behind your workpiece. Clamp a piece of scrap wood to the back of your project. Drill through the project wood into the scrap. The backing supports the wood fibers, preventing splintering on the exit side. For visible surfaces, drill from the back side first. Then finish the hole from the front using a larger bit. This technique preserves the show face of your project.
Drilling Straight and Accurate Holes
Use a drill guide for perfect perpendicular holes. A simple right-angle guide attachment fits most hammer drills. These guides maintain 90-degree alignment automatically. For repeated holes at the same angle, create a custom jig from scrap wood. The jig guides the bit consistently, saving time and ensuring uniformity. Check your drill’s built-in level and use it religiously. A level drill means a straight hole.
Dealing with Hard Woods and Knots
Knots create unpredictable drilling conditions. The grain direction changes suddenly, causing bits to wander. Approach knots slowly. Use a smaller pilot bit first. Reduce speed and increase pressure gradually. If the bit starts to burn, stop immediately. Allow the bit to cool. Apply wax or soap to the bit flutes. This lubrication reduces friction and heat buildup. For extremely dense knots, consider pre-drilling with an awl to create a starting point.
Using Guides and Jigs
Jigs transform your hammer drill into a precision instrument. Build a simple box jig for drilling pocket holes. Use a template guide for repetitive hole patterns. These accessories eliminate guesswork and improve accuracy dramatically. Spend time creating jigs for frequently repeated tasks. The initial investment pays dividends in speed and precision. A well-made jig also reduces fatigue during long projects.
When Things Go Wrong – Solutions and Fixes
Mistakes happen. Knowing how to fix them saves your project and your confidence.
Bit Slipping or Walking
If your bit slips away from your mark, you likely skipped the center punch step. Stop drilling immediately. Create a new starting point with your awl. Consider using a nail to create a small pilot hole first. For existing slipped holes, fill with wood glue and a dowel. Once dry, sand flush and re-drill in the correct location. Prevention beats repair every time.
Burning or Charring Wood
Burn marks indicate too much pressure or too slow speed. The bit is overheating from friction. Reduce pressure immediately. Increase your drilling speed. Clear chips more frequently. If burning persists, remove the bit and let it cool. Apply lubricant to the bit. Check if your bit is dull. Dull bits generate more heat. Replace dull bits promptly. Fresh bits cut cleanly and stay cooler.
Wandering Holes or Off-Center Drilling
Wandering holes frustrate every woodworker. This problem stems from unstable workpieces or angled starting. Secure your wood better. Use more clamps. Ensure the drill is perfectly perpendicular at startup. Use a guide bushing or jig. If the hole is already off-center, you have two options. Drill a larger hole and fill it with a plug, then re-drill. Or, if possible, drill from the opposite side to intersect the wandering hole and create a clean exit.
Excessive Vibration and Bit Breakage
Vibration indicates misalignment or a bent bit. Stop drilling immediately. Check if your bit is straight. Inspect the chuck for wear. Tighten the chuck securely. Ensure you are using the correct mode setting. Using hammer mode on softwoods causes unnecessary vibration. Switch to standard drill mode for better control. If vibration continues, have your drill serviced. Worn bearings or gears create dangerous conditions.
Keeping Your Tools in Top Shape
Well-maintained tools perform better and last longer. Simple care routines prevent costly replacements.
Cleaning Your Hammer Drill
Wipe down your hammer drill after each use. Remove wood dust and chips from vents and the chuck. Use compressed air to blow debris from internal components. Check the cord for damage. For cordless models, clean battery contacts with a dry cloth. Store your drill in its case to protect it from moisture and impact. Regular cleaning prevents overheating and mechanical failure.
Sharpening and Replacing Bits
Sharp bits cut cleanly and reduce motor strain. Inspect bit tips regularly. Dull bits have flattened cutting edges and burned flutes. Many brad-point bits can be sharpened with a file or bench grinder. Follow the original angle precisely. If sharpening seems difficult, replace the bit. New bits cost little compared to ruined projects. Keep a set of sharp bits ready for different sizes. Organize them in a bit holder for quick access.
Storage Best Practices
Store your hammer drill in a dry, temperature-controlled environment. Extreme cold makes plastics brittle. Heat damages motor windings. Hang your drill or place it on a shelf. Never toss it in a toolbox where it can shift and damage internal components. Store bits separately to prevent them from knocking together and chipping. Proper storage extends tool life and maintains performance.
Conclusion
Mastering hammer drill wood drilling opens new possibilities for your projects. You now understand when to use this tool, how to set it up, and which techniques deliver perfect holes. Remember to prioritize safety, choose the right bits, and practice your technique on scrap wood first. The key to success lies in preparation and patience. Don’t rush the process. Let the tool do the work while you guide it with steady, confident hands.
Start with simple projects and gradually challenge yourself with harder woods and more complex drilling patterns. Each hole you drill builds skill and confidence. Soon, you’ll achieve professional-quality results that make your projects stand out. Keep this guide handy as a reference. Review the troubleshooting section when problems arise. Your hammer drill is a versatile tool in your workshop arsenal. Use it wisely, maintain it properly, and it will serve you well for years to come.
🎥 Related Video: Easy hack for drilling perfectly straight holes every time. 🕳️💯 #DrillingHack #WoodworkingTip
📺 Sawinery Woodworking
Easy hack for drilling perfectly straight holes every time. 🕳️ #DrillingHack #WoodworkingTip.
