
This guide teaches you exactly how to use your hammer drill’s hammer mode for professional results. You’ll learn the difference between hammer mode and regular drilling, when to use each setting, and the proper technique for drilling into concrete, brick, and masonry. Follow our safety tips and troubleshooting advice to avoid common mistakes and extend your tool’s life.
Key Takeaways
- Hammer mode combines rotation with rapid impacts to break through tough masonry surfaces that regular drills cannot handle.
- Always use carbide-tipped masonry bits with hammer mode to prevent bit damage and ensure clean holes.
- Apply steady, moderate pressure rather than forcing the tool. Let the hammer mechanism do the work for you.
- Wear essential safety gear including safety glasses, dust mask, and ear protection when operating hammer mode.
- Know when to switch modes – use regular drill mode for wood and metal, hammer mode only for concrete, brick, and stone.
- Maintain your drill regularly by cleaning dust from vents and checking the hammer mechanism for optimal performance.
Introduction: Take the Guesswork Out of Hammer Mode
You bought a hammer drill because you need to drill into concrete or masonry. But that hammer mode switch confuses you. Maybe you tried it on wood and heard an awful grinding sound. Or perhaps you used regular mode on concrete and burned out your motor. We get it. Hammer mode seems mysterious. This guide removes the mystery. You will learn exactly how hammer mode works, when to use it, and the step-by-step technique for perfect holes every single time. No more guessing. No more damaged bits. Just professional results in your home projects.
Understanding Your Hammer Drill’s Hammer Mode
What Is Hammer Mode and Why It Exists
Hammer mode is a special setting on your drill that makes it pound while it spins. Think of it like a tiny jackhammer built into your drill. The drill bit rotates like normal, but it also moves in and out rapidly. This creates thousands of small hammer blows per minute. These blows chip away concrete, brick, or stone as the bit rotates. Regular drill mode just spins without any pounding action. Using regular mode on masonry is like trying to cut wood with a hammer – it just doesn’t work well.
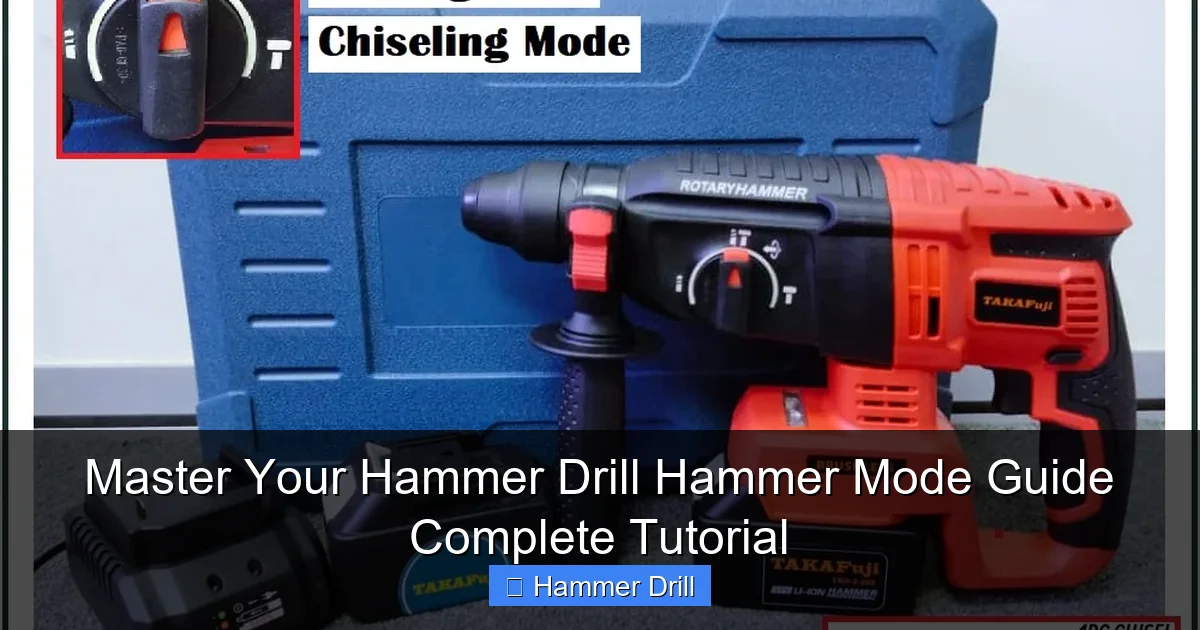
Visual guide about Master Your Hammer Drill Hammer Mode Guide Complete Tutorial
Image source: down-my.img.susercontent.com
Your hammer drill has three settings you need to understand. Off means no hammer action. This is your regular drilling mode for wood, metal, and plastic. On activates the hammer action. Use this only for masonry materials. Some drills have a third setting for rotation-only with hammer action disengaged. Knowing which setting to use prevents tool damage and ensures safety.
How Hammer Mode Works Mechanically
Inside your drill, a special mechanism called a hammer clutch creates the pounding action. When you turn on hammer mode, a set of gears called ratcheting gears engage. These gears have teeth that click past each other rapidly. Each click creates a small impact. This mechanism converts some of the motor’s rotational energy into forward thrusting motion. The result is a hammering action that can reach 30,000 blows per minute or more on powerful models.
The beauty of this system is that it only hammers when it meets resistance. When drilling into soft wood, the gears don’t engage fully. When the bit hits concrete, the resistance triggers the hammer mechanism automatically. This smart design protects your drill and gives you the right amount of power exactly when you need it.
When to Use Hammer Mode vs. Regular Drill Mode
Use hammer mode exclusively for hard, brittle materials. Concrete, brick, block, stone, and ceramic tile need hammer mode. These materials crack and chip under impact rather than cutting smoothly. The hammer action breaks them into manageable pieces that the bit can remove. For wood, metal, plastic, and drywall, always use regular drill mode. Using hammer mode on these materials will splinter wood, deform metal, and ruin your bits.
Understanding the difference between a hammer drill and an impact driver helps you choose the right tool. Impact drivers also hammer, but they rotate in short bursts rather than continuous rotation. They excel at driving screws but cannot drill holes. Your hammer drill does both. It is the only tool you need for drilling masonry holes and driving fasteners into wood or metal.
Essential Safety Precautions Before You Start
Personal Protective Equipment You Must Wear
Hammer mode creates dust, noise, and flying debris. Safety glasses are non-negotiable. Concrete dust gets everywhere and can permanently damage your eyes. Wear a NIOSH-approved N95 dust mask or respirator. Masonry dust contains silica that can cause lung disease. Protect your hearing with earplugs or earmuffs. Hammer drills are loud, often exceeding 100 decibels. Wear heavy-duty work gloves to protect your hands from vibration and sharp edges. Long sleeves and pants prevent skin irritation from dust.
Visual guide about Master Your Hammer Drill Hammer Mode Guide Complete Tutorial
Image source: industrialtoolsinfo.com
Preparing Your Workspace
Clear the area around your drilling spot. Remove any objects that could trip you or block your movement. Secure your workpiece firmly with clamps. A moving workpiece can cause the bit to bind or kick back. Check what’s behind the surface you’re drilling. Look for electrical wires, plumbing pipes, or structural elements. Use a stud finder with AC detection for walls. Mark your drilling spot with a pencil and center punch. This prevents the bit from wandering when you start.
Ensure good lighting so you can see your marks clearly. Keep a vacuum or brush nearby to clean dust from the hole periodically. Dust buildup reduces drilling efficiency and can damage your drill. Have a plan for where the dust will go. Cover nearby surfaces with a drop cloth if drilling overhead.
Tool Safety Checks
Inspect your drill before each use. Check the power cord for fraying or damage on corded models. For cordless drills, ensure the battery is fully charged and properly seated. Examine the chuck for cracks or excessive wear. Make sure the hammer mode switch moves smoothly and clicks into position. Test the trigger to ensure it returns to off when released. Check that the depth gauge is set correctly if you use one.
Verify your drill bits are sharp and undamaged. A dull bit requires more force and can overheat the motor. Ensure the bit is properly seated in the chuck and tightened securely. A loose bit can fly out during operation. Check that the hammer mechanism engages smoothly by running the drill briefly in hammer mode before starting your project.
Step-by-Step: Using Hammer Mode Correctly
Step 1: Selecting the Right Drill Bit
Choose carbide-tipped masonry bits for hammer mode. These bits have a soft steel shaft with a hard carbide tip brazed onto the end. The carbide tip withstands the hammering action without dulling quickly. The soft shaft absorbs some vibration, making drilling more comfortable. Never use regular twist bits in hammer mode. The hammering action will snap them instantly.
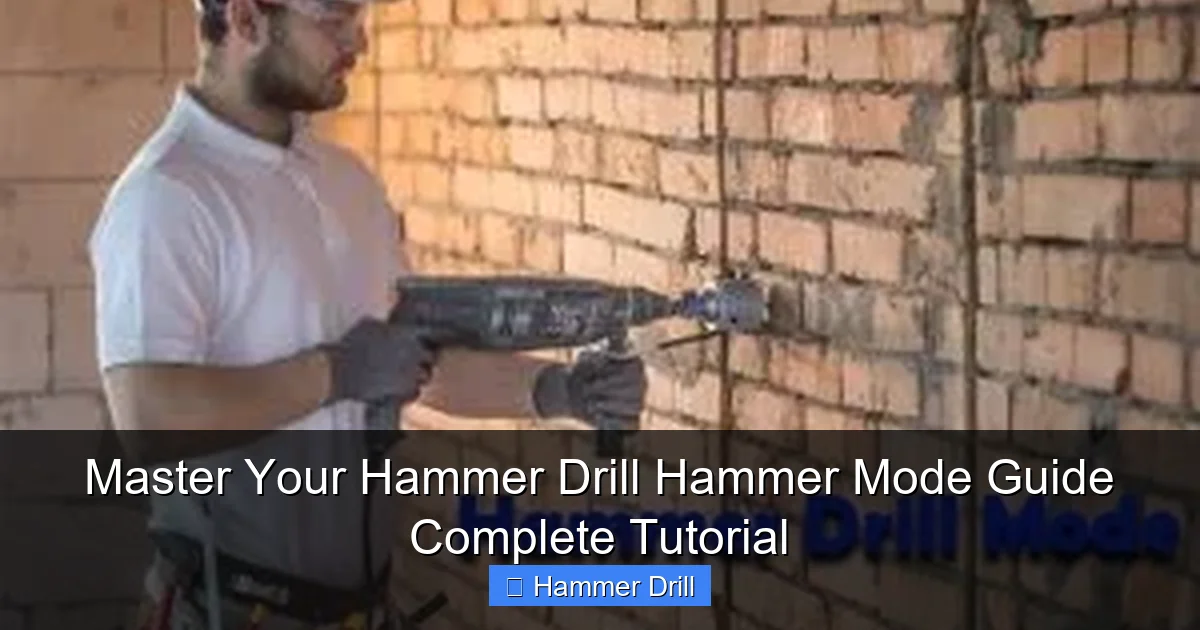
Visual guide about Master Your Hammer Drill Hammer Mode Guide Complete Tutorial
Image source: industrialtoolsinfo.com
Select the correct bit diameter for your project. Smaller bits (1/4″ to 3/8″) work best for anchors and small fasteners. Medium bits (1/2″ to 5/8″) suit larger anchors and conduit. Large bits (3/4″ and above) require more power and are harder to control. Use the smallest bit that will accomplish your task. Check the bit length too. Make sure it’s long enough to penetrate your material plus any anchors you plan to install.
Step 2: Adjusting Your Drill Settings
Set your drill to hammer mode before plugging it in or inserting the battery. Locate the mode selector switch, usually near the chuck or on top of the motor housing. Push it to the hammer symbol, often represented by a hammer icon next to a drill bit icon. Some drills have a separate switch for rotation direction. Set it to forward (clockwise) for drilling holes. Reverse is for removing screws or backing out stuck bits.
Adjust the speed setting if your drill has multiple speeds. Use low speed (first gear) for most masonry work. Low speed provides more torque and better control. High speed can overheat the bit and motor in hard materials. Set the torque control to its highest setting or drill mode if your drill has a clutch. The clutch prevents the motor from stalling if the bit binds. For hammer drilling, you want maximum power, so set it to the drill icon or highest number.
Step 3: Positioning and Starting the Hole
Mark your drilling spot clearly with a pencil. Use a center punch to create a small indentation. This gives the bit a place to start and prevents wandering. Hold the drill perpendicular to the surface. Use both hands – one on the main handle and one on the side handle. The side handle reduces torque and gives you better control. Apply light pressure just to keep the bit in contact with the surface.
Start drilling at low speed. Pull the trigger gently and let the hammer mechanism engage gradually. You’ll hear a clicking or rattling sound as soon as hammer mode activates. Keep the drill level and steady. Don’t push hard yet. Let the bit dig into the surface for a few seconds. Once you have a small groove established, you can increase pressure slightly. Never force the drill. Let the hammer mechanism do the work.
Step 4: Drilling Technique and Pressure
Maintain steady, moderate pressure throughout the drilling process. Think of it as guiding the drill rather than forcing it. Too much pressure can cause the bit to bind or overheat. Too little pressure reduces efficiency and can damage the bit tip. The ideal pressure feels like you’re leaning on the drill with your body weight, not muscling it through.
Pull the drill back slightly every 10-15 seconds to clear dust from the hole. This prevents dust buildup that can jam the bit and reduce hammering efficiency. Use a vacuum or brush to remove dust from the hole periodically. For deep holes, you may need to pull the bit out completely several times to clean the hole. Keep the drill moving in and out smoothly. Don’t let the bit get stuck in the hole.
Watch for signs of proper operation. You should hear a consistent hammering sound. The drill should advance steadily without excessive vibration. If the hammering sound stops or becomes irregular, you’re pressing too hard. Ease up on the pressure. If the drill stops advancing, you may have hit rebar or a hard aggregate. Reposition slightly and try again.
Step 5: Finishing and Retracting
As you approach the desired depth, reduce pressure slightly. This prevents the bit from breaking through the other side too aggressively, which can cause blowout. If you need to drill through the material completely, drill from one side until you break through, then finish from the other side for a cleaner hole.
To remove the drill, release the trigger and wait for the bit to stop rotating. Pull straight back out of the hole. Don’t twist or angle the drill while removing it. This can break the bit tip or damage the hole edges. Clean the bit with a brush to remove dust buildup. This keeps it sharp and ready for the next use.
Inspect your hole. It should be clean and round with minimal chipping around the edges. If there’s excessive chipping, you may have used too much pressure or the wrong speed. Practice on a scrap piece first if you’re new to hammer drilling. This saves time and materials on your actual project.
Practical Applications and Real-World Examples
Drilling Into Concrete for Anchors
Concrete is the most common material for hammer drilling. Whether you’re hanging a shelf, installing a TV mount, or securing a base plate, you need clean, precise holes. Start by marking your anchor locations with a tape measure and level. Use a center punch to create starter dimples. Select a bit that matches your anchor diameter exactly. Most anchors specify the hole size you need.
Drill slowly and steadily. Concrete varies in hardness. You might hit soft spots and hard spots. Adjust your pressure accordingly. When you hit rebar, the drill will bounce and the sound will change. Stop immediately. Use a stud finder to locate rebar before drilling if possible. If you must drill through rebar, switch to a rebar-cutting bit or change your hole location.
After drilling, blow out dust with compressed air or use a vacuum. Insert your anchor and tap it gently with a hammer until seated. Then install your fastener. This technique works for concrete walls, floors, and ceilings. For overhead work, use a right-angle drill attachment if needed to reduce fatigue.
Masonry and Brick Work
Brick and block require the same hammer mode technique but need extra care. These materials are more brittle than concrete and chip easily. Use less pressure and slower speed. Start each hole at the center of a brick rather than on the mortar joint when possible. Drilling through mortar can cause the bit to wander.
For brick veneer or thin masonry, watch for blowout on the backside. Support the material if possible. Drill partway through from one side, then finish from the other side for a clean hole through both faces. This is especially important for outdoor projects where water could penetrate through a ragged hole.
When installing masonry screws, drill the pilot hole slightly deeper than the screw length. This ensures the screw can seat fully without bottoming out. Clean the hole thoroughly. Masonry screws need a tight fit to hold properly. Use a hammer drill with a depth stop for consistent hole depths when installing multiple fasteners.
Tile and Stone Projects
Drilling through tile requires a steady hand and patience. Tile cracks easily under pressure. Start at low speed with very light pressure. Use a sharp tile bit or diamond-tipped bit specifically designed for ceramics. Place masking tape over your mark to prevent the bit from sliding on the glazed surface.
Begin drilling at a slight angle to establish a groove, then slowly bring the drill to vertical. Keep the drill perpendicular throughout. Use water to cool the bit when drilling natural stone. Stone generates heat that can crack the material and dull the bit. Drill in short bursts to allow the stone to cool between applications.
For stone, use the same hammer mode but at the lowest effective speed. Too much hammering can fracture natural stone. Granite and marble need special care. Consider using a diamond core bit for larger holes in stone. These bits cut slowly but produce clean, precise holes without cracking.
Troubleshooting Common Hammer Mode Issues
Drill Not Hammering at All
If your drill doesn’t hammer, first check that you’ve actually engaged hammer mode. The switch must click into the hammer position. Some drills have a separate hammer mechanism that needs to be engaged by pulling the trigger a certain way. Consult your manual. If the mode is engaged but still no hammering, the hammer clutch may be worn out. This is a common failure point in older drills.
Another possibility is that you’re not applying enough pressure. The hammer mechanism only engages under load. Press harder against the surface. If you’re drilling into very soft material, the hammer may not activate. Try drilling into a harder surface to test. If none of these work, the internal hammer mechanism may need replacement. This requires professional service.
Excessive Vibration and Difficulty Controlling
Too much vibration usually means you’re using too much pressure or too high a speed. Reduce both until the drill feels manageable. Check that your side handle is tight and properly positioned. The side handle should be on the side opposite your dominant hand. This gives you the best leverage and control.
Inspect your drill bits. A bent or damaged bit causes vibration. Replace it immediately. Make sure the bit is fully seated in the chuck. A partially inserted bit wobbles and creates vibration. Check that the chuck is tight. A loose chuck allows the bit to move, causing vibration and inaccuracy.
If vibration persists, the drill’s internal components may be misaligned or damaged. Worn bearings or gears cause uneven operation. Stop using the drill and have it inspected. Continued use can cause further damage and create a safety hazard.
Bit Slipping or Wandering from the Mark
Bit wandering happens when you don’t have a good starter point. Always use a center punch to create a dimple. If you skipped this step, stop and create one now. For existing holes that wandered, you may need to patch the old hole and start fresh. Use a masonry patching compound to fill misplaced holes.
A dull bit tip also wanders. The sharp point helps guide the bit. Replace dull bits. Make sure you’re holding the drill perpendicular to the surface. Use a drill guide or square to maintain proper angle. Practice on scrap material first to build confidence and muscle memory.
If you’re drilling into a slick surface like tile or polished stone, place masking tape over the mark. The tape provides friction that helps the bit grip. Press firmly at the start until the bit bites into the material. Don’t be afraid to use a little extra pressure just for the initial bite.
Overheating and Motor Problems
Overheating occurs from excessive use or insufficient cooling. Drill in 30-second bursts for deep holes. Allow the drill to rest for 10-15 seconds between bursts. This gives the motor and gears time to cool. Check that the drill’s ventilation holes are clean and unobstructed. Dust buildup blocks airflow and causes overheating.
Using the wrong speed causes overheating too. High speed generates excessive heat in masonry. Always use low speed for hammer mode. If your drill has thermal overload protection, it will shut off automatically when too hot. Let it cool for 10-15 minutes before resuming work. Don’t try to bypass this safety feature.
For cordless drills, a low battery can cause the motor to work harder and overheat. Keep batteries charged. Store batteries at room temperature. Cold batteries don’t deliver full power and cause the motor to strain. If overheating continues, the motor brushes may be worn. This requires professional repair.
Maintenance Tips for Long-Term Performance
Cleaning Your Hammer Drill
Clean your drill after every use. Use compressed air to blow dust from the chuck, vents, and hammer mechanism. Hold the drill with the chuck pointed down so dust falls out rather than deeper inside. Wipe the housing with a damp cloth. Never use solvents that could damage plastic parts. For stubborn grease, use a mild detergent and a soft brush.
Pay special attention to the chuck. Remove the chuck and clean its jaws thoroughly. Built-up dust prevents proper bit grip. Clean the hammer mode selector mechanism too. Apply a small amount of dry lubricant to moving parts. Avoid oil-based lubricants that attract more dust. Reassemble carefully, ensuring all parts are properly aligned.
Lubrication and Care
Lubricate the hammer mechanism every 50 hours of use. Use a light machine oil or a lubricant specifically designed for hammer drills. Apply a few drops to the hammer mechanism through the ventilation holes. Run the drill briefly in hammer mode to distribute the lubricant. Wipe away excess oil to prevent dust buildup.
Check the carbon brushes every 100 hours. Worn brushes reduce power and can damage the motor. Replace brushes when they’re less than 1/4 inch long. Keep spare brushes on hand for corded models. For cordless drills, battery care is crucial. Store batteries at 50% charge if not using for extended periods. Avoid leaving batteries on the charger continuously.
Storage Best Practices
Store your hammer drill in its original case or a dedicated tool box. This protects it from dust, moisture, and impact damage. Keep the drill in a dry, temperature-controlled environment. Extreme cold or heat can damage internal components and batteries. Hang the case on a wall or place it on a shelf to prevent accidental damage.
Store drill bits separately in a bit organizer. This prevents them from knocking together and chipping. Keep bits sorted by size and type for easy selection. Include a small bottle of bit lubricant in your storage case. This keeps bits sharp and ready for use. Store the manual with the drill so you can reference it easily.
Conclusion: You’re Ready to Drill Like a Pro
Hammer mode is not magic. It’s simple mechanical engineering that anyone can master. The key is understanding when to use it and how to use it properly. Always match the mode to your material. Use hammer mode for masonry, regular mode for everything else. Follow the step-by-step techniques in this guide. Wear your safety gear every single time. Maintain your drill regularly. These simple steps will give you professional results on every project.
Start with a practice piece of scrap concrete or brick. Master the technique before working on your actual project. Pay attention to how the drill feels, sounds, and performs. This experience builds confidence and skill. Soon you’ll be drilling clean, precise holes in the toughest materials with ease. Your hammer drill is a powerful tool. Now you know how to unlock its full potential.
