
Mastering your hammer drill’s reverse function is key to unlocking its full potential. This guide provides a complete walkthrough, from locating the function selector switch to expertly extracting bits and removing fasteners. You’ll learn essential safety tips and troubleshooting steps to work smarter, safer, and more efficiently on every project.
Key Takeaways
- Know Your Drill’s Layout: The reverse function is always controlled by a selector switch or collar near the trigger, separate from the hammer mode selection.
- Direction Dictates Action: Forward (clockwise) rotation is for drilling and driving. Reverse (counter-clockwise) is exclusively for backing out bits, screws, and clearing jammed holes.
- Always Stop Before Switching: The drill chuck must be at a complete stop before you change rotation direction to prevent gear damage and ensure safety.
- Use the Right Mode for the Job: Disable hammer action when using the reverse function for screw removal or bit extraction. Hammering in reverse can damage your tool and workpiece.
- Reverse is a Problem-Solver: It’s your go-to function for freeing stuck bits, cleaning masonry dust from deep holes, and correcting driving mistakes without damage.
- Safety is Non-Negotiable: Wear eye protection, secure your workpiece, and never use reverse to “unscrew” while the hammer function is active on masonry.
Unlock the Power of Hammer Drill Reverse Function Guide
So, you’ve got a hammer drill. You know it can bore into concrete and drive heavy-duty fasteners. But are you using it to its full potential? Many users overlook one of its most useful features: the reverse function. This isn’t just for taking screws out of drywall. On a hammer drill, the reverse function is a critical tool for safety, efficiency, and project success.
This guide will walk you through everything. You’ll learn where to find the reverse switch, how to use it correctly, and why it’s so important. We’ll cover practical applications, safety must-dos, and what to do if things don’t go as planned. By the end, you’ll wield your hammer drill with more confidence and skill than ever before.
Understanding Your Hammer Drill’s Controls
Before you flip any switches, you need to know what you’re dealing with. A hammer drill has more controls than a standard drill. Understanding the hammer drill reverse function starts with knowing its place among these controls.

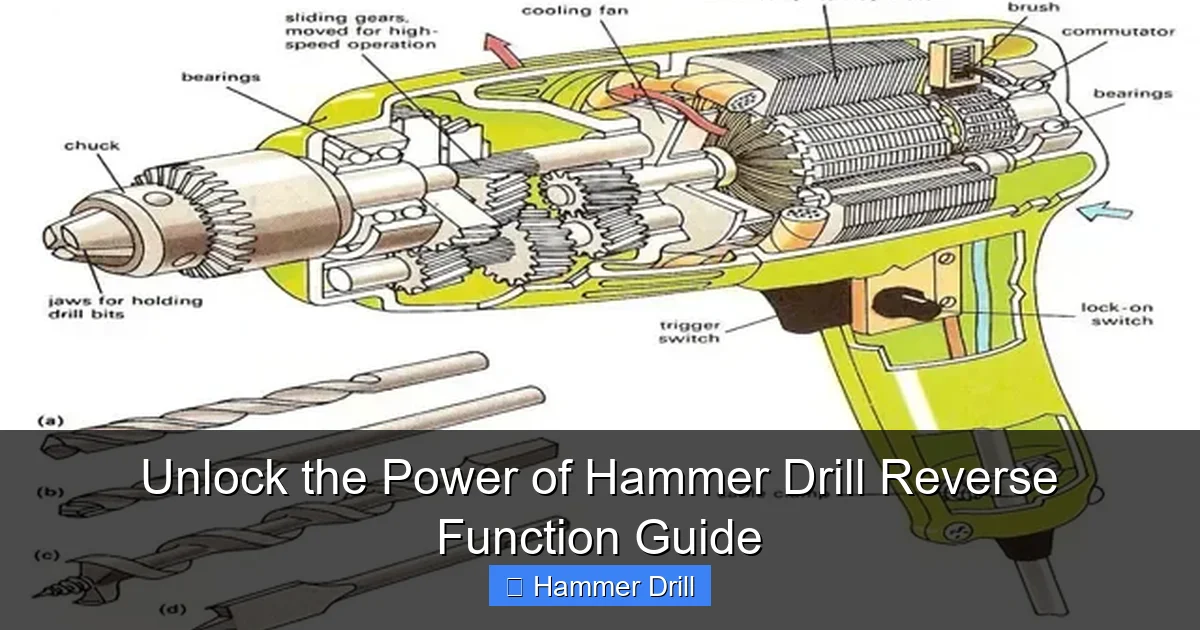
Visual guide about Unlock the Power of Hammer Drill Reverse Function Guide
Image source: shuntool.com
First, it’s crucial to know the difference between a hammer drill and a regular drill. The key addition is the hammer mechanism, which provides a pounding action for masonry. This function is typically selected via a separate collar or button, often marked with a hammer icon.
The Direction Selector Switch
This is the heart of the reverse function. It’s almost always a sliding switch located just above or beside the trigger. It has three positions:
- Forward (Often marked with an arrow pointing clockwise or a single line): This is for all drilling and driving tasks.
- Center (Often marked with a lock symbol): This is the trigger lock. It prevents accidental starts, a key safety feature.
- Reverse (Often marked with an arrow pointing counter-clockwise or two lines): This is the function we’re focusing on. It spins the chuck backwards.
The Mode Selection Collar
Do not confuse the direction switch with the mode collar. The mode collar chooses between:
- Drill-only mode (Drill bit icon): Standard rotary drilling for wood and metal.
- Hammer-drill mode (Hammer icon): Engages the hammering piston for masonry, concrete, and stone.
Critical Insight: The hammer drill reverse function is independent of the mode. You can put the drill in reverse while it’s in drill-only mode OR hammer-drill mode. But as you’ll learn, you almost never want to use reverse while the hammer action is on.
Step-by-Step: How to Use the Reverse Function Correctly
Using the reverse function is simple, but doing it correctly protects your tool and you. Follow these steps every time.
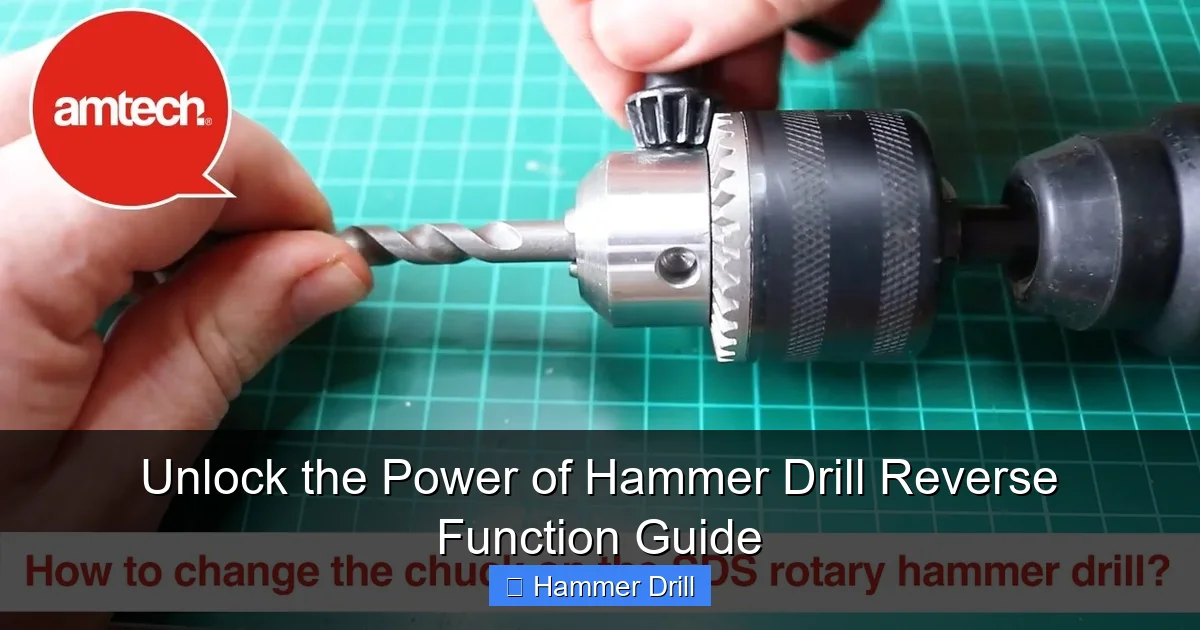
Visual guide about Unlock the Power of Hammer Drill Reverse Function Guide
Image source: ourhometools.com
Step 1: Prepare for Safety
Safety first, always. Put on your safety glasses. If you’re removing a long screw or bit, consider wearing gloves. Ensure your workpiece is clamped or securely held. Verify the drill is unplugged or the battery is removed while you are inspecting it and changing settings.
Step 2: Locate and Identify the Switches
Find the directional switch. Familiarize yourself with its forward, lock, and reverse positions. Then, look at the mode collar. Know whether you are currently in “drill” or “hammer” mode. For most reverse operations, you’ll want to be in “drill” mode.
Step 3: Stop the Chuck Completely
This is the most important rule. You must let the chuck come to a complete stop before changing direction. Changing from forward to reverse while the chuck is spinning strains the motor and can strip the internal gears. It’s like throwing your car’s transmission from drive into reverse while moving—it’s destructive.
Step 4: Select the Correct Mode (Hammer Off)
For the vast majority of reverse tasks—like extracting a bit or removing a screw—switch the mode collar to the standard “drill” setting. The hammering action is designed for driving forward into masonry. Using it in reverse serves no purpose and can damage the drill’s mechanism and your workpiece.
Step 5: Slide the Switch to Reverse
With the drill stopped and in drill mode, slide the directional switch to the reverse position. You should feel or hear it click into place. Now, the drill is ready to spin counter-clockwise.
Step 6: Perform Your Task
Gently squeeze the trigger. The chuck will now rotate backwards. Use low to medium speed and let the tool do the work. Don’t force it. For stubborn items, apply firm, steady pressure.
Step 7: Return to Forward or Lock
Once your reverse task is done, let the chuck stop. Slide the switch back to the forward position for your next drilling task, or to the center lock position for safe storage.
Practical Applications: When to Use the Reverse Function
Knowing when to use reverse is as important as knowing how. Here are the top uses for your hammer drill’s reverse gear.
Visual guide about Unlock the Power of Hammer Drill Reverse Function Guide
Image source: i.ytimg.com
1. Extracting Drill Bits from the Chuck
This is the most frequent use. After drilling, you can’t pull a bit out by hand if the chuck is tightened. Place the drill in reverse, hold the chuck collar (on a keyless chuck), and lightly pull the trigger. The reverse rotation loosens the chuck jaws, allowing you to open it and remove the bit easily.
2. Removing Screws and Fasteners
Made a mistake? Need to disassemble something? The reverse function turns your hammer drill into a powerful screw remover. Use a screwdriver bit that fits perfectly. Set the clutch to a high torque setting or “drill” mode, and slowly back the screw out. This is a core skill covered in our guide on how to use a drill for screws into a wall.
3. Clearing Masonry Dust from Deep Holes
When drilling deep into brick or concrete, debris can get packed in the hole and bind your bit. To clear it: stop drilling, keep the bit in the hole, switch to reverse (with hammer mode OFF), and briefly run the drill. The reverse rotation will often pull the dust out and free the bit, allowing you to continue drilling forward.
4. Freeing a “Stuck” Drill Bit
Bits can get wedged in wood (especially if they drift and bind) or jammed in metal. Forcing it forward can break the bit. Instead, stop, switch to reverse, and gently try to back it out. This can release the binding pressure and save your bit.
5. Backing Out of a Misaligned Pilot Hole
If you start a pilot hole in the wrong spot, don’t just try to force the drill sideways. Put it in reverse and back the bit straight out. This creates a cleaner exit and prevents damaging the surrounding material.
Troubleshooting Common Reverse Function Issues
What if it doesn’t work? Let’s solve some common problems.
The Switch Won’t Move or Feels Stuck
Cause: The most likely culprit is that the chuck is still spinning or the motor hasn’t fully stopped. Internal gears need to align for the switch to slide.
Solution: Release the trigger and wait a full 2-3 seconds. Try the switch again. Never force it.
The Drill Runs Backwards in the “Forward” Setting
Cause: This is rare but can happen if the directional switch mechanism is broken or dislodged internally.
Solution: This requires professional repair. Do not use the tool until it’s fixed, as you cannot reliably control it.
The Reverse Seems Weak or Sluggish
Cause: For cordless drills, a weak or dying battery is the first suspect. For corded models, it could be a worn motor brush or internal issue.
Solution: Try a fresh, fully charged battery first. If the problem persists with a good battery or on a corded model, consult a service center.
Hammer Action Won’t Disengage for Reverse
Cause: The mode selection collar might be dirty or stuck.
Solution: Unplug/remove the battery. Spray a small amount of electrical contact cleaner into the collar seam and work it back and forth. Wipe away excess grime. If it remains stuck, it may need repair.
Safety Warnings and Best Practices
- Eye Protection is Mandatory: Reverse operations often throw debris backward—toward you.
- Disable Hammer Action: We can’t say it enough. Use reverse in drill mode only, unless your drill manual specifies an exception.
- Secure the Workpiece: When removing a long screw, the torque can cause the material to spin violently if it’s not held down.
- Use the Right Bit: A worn or incorrect screwdriver bit can cam out and damage the screw head, making removal much harder.
- Mind the Cord: In reverse, the drill body may want to rotate slightly. Ensure the power cord or your body isn’t in the path of this motion.
- Understand Your Tool: Knowing your tool’s full capabilities prevents misuse. For a deeper dive on related tools, read about the difference between impact driver and hammer drill.
Conclusion: Reverse is Your Secret Weapon
Mastering the hammer drill reverse function transforms you from a simple operator into a skilled craftsman. It’s the feature that saves you from frustration, prevents damage, and expands what you can do with a single tool. It turns a stuck bit from a project-stopper into a minor pause. It lets you correct mistakes with ease.
Remember the golden rules: stop before you switch, hammer off for reverse, and always prioritize safety. With this guide in hand, you’re ready to tackle your next project with greater confidence and control. Your hammer drill is a powerful ally—and now you know all its secrets. To explore top-rated tools that feature excellent controls, check out our resource on the best cordless drill options available.
