
Hammer drills excel at drilling into concrete and masonry with a rapid hammering action. Impact drivers drive screws powerfully with rotational bursts. This guide helps DIY pros choose the right tool for each job, with step-by-step instructions and pro tips.
Key Takeaways
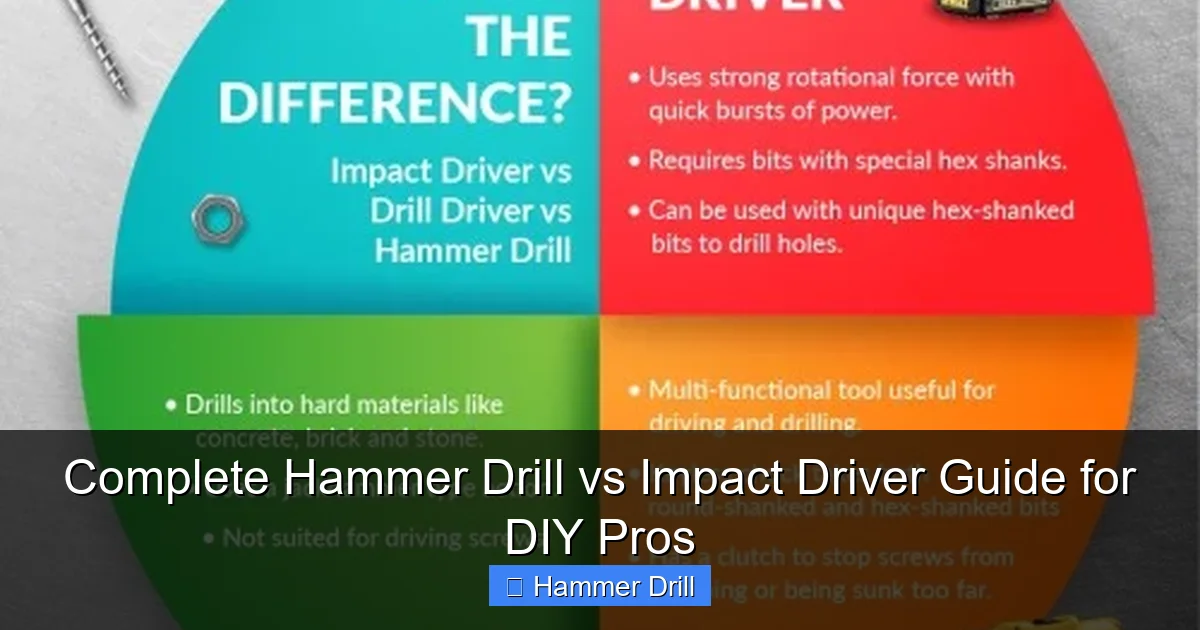
- Hammer drills combine rotation with forward hammering for drilling hard materials like concrete and brick.
- Impact drivers use rotational impact force to drive long screws and fasteners with minimal effort.
- You cannot use a hammer drill for driving screws effectively, and an impact driver cannot drill into masonry.
- Hammer drills typically have three modes: drill, hammer drill, and sometimes drive.
- Impact drivers require hex-shank drill bits and offer one-handed operation.
- For most DIY projects, you need both tools for complete versatility.
- Always use proper safety gear including eye protection and hearing protection.
Complete Hammer Drill vs Impact Driver Guide for DIY Pros
Welcome to your ultimate comparison of hammer drills and impact drivers. This guide cuts through the confusion and gives you practical, hands-on knowledge. You will learn exactly when to reach for each tool, how to use them properly, and which projects demand which machine. Let’s get started.
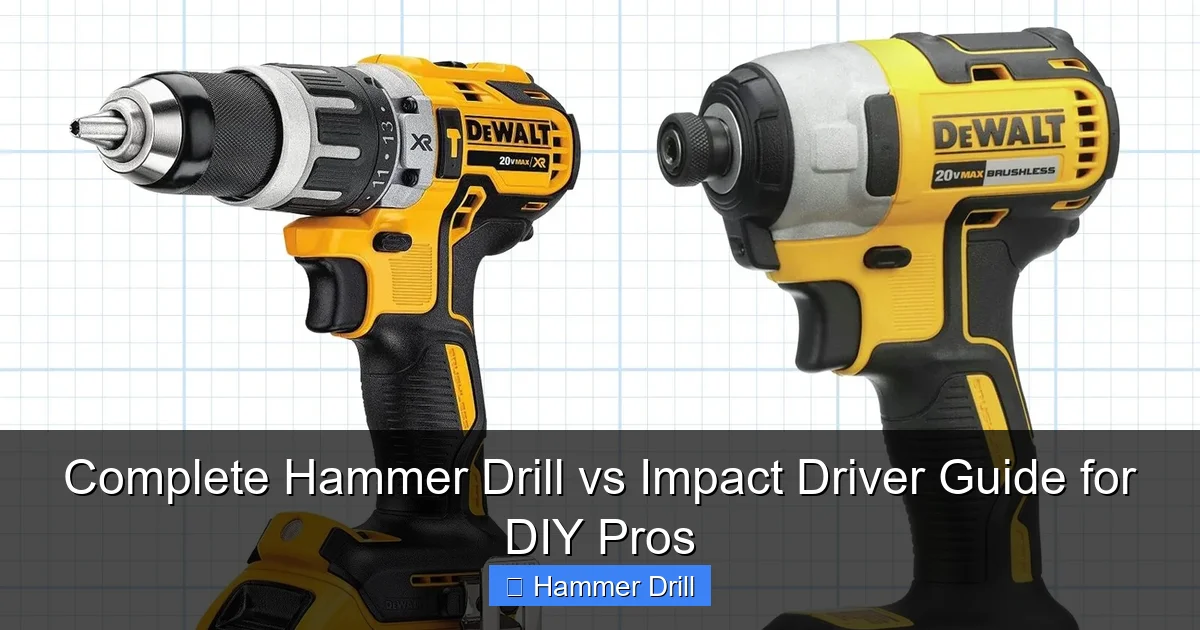
Understanding the Basics: What Is a Hammer Drill?
A hammer drill looks like a regular cordless drill but packs a powerful punch. The secret lies in its internal mechanism. When you switch to hammer mode, the drill bit moves forward and backward rapidly while spinning. This creates a hammering action that pulverizes hard materials as you drill.
Visual guide about Complete Hammer Drill vs Impact Driver Guide for DIY Pros
Image source: 64.media.tumblr.com
How Hammer Drills Work
The hammering motion happens at an incredible speed—often 20,000 blows per minute or more. The bit chips away at concrete, brick, or stone while the rotation removes debris. Think of it like a tiny jackhammer combined with a drill. Most models offer variable speed triggers and multiple modes.
Key Features of Hammer Drills
- Three operating modes: Standard drill, hammer drill, and sometimes a dedicated drive mode for screws
- Keyless chuck: Accepts standard round-shank drill bits as well as hex-shank bits
- Higher RPMs: Typically 0-3,000 RPMs for faster drilling
- Reversible action: Allows for easy bit removal and back-out of stuck bits
For more details on how these differ from standard drills, check out our article on the difference between a hammer drill and regular drill.
Understanding the Basics: What Is an Impact Driver?
An impact driver looks different from a hammer drill. It’s typically shorter and more compact with a chunky body. The tool delivers rotational bursts of force to drive fasteners. The impact mechanism kicks in when resistance is met, providing extra torque without straining your wrist.
Visual guide about Complete Hammer Drill vs Impact Driver Guide for DIY Pros
Image source: i.ytimg.com
How Impact Drivers Work
Inside the impact driver, a spring-loaded hammer mechanism rotates and strikes an anvil. This happens only when the tool encounters resistance—like when a screw is bottoming out. The bursts of torque can reach 3,500 impacts per minute. Your hand stays comfortable because the force is generated internally, not transferred to you.
Key Features of Impact Drivers
- Hex chuck only: Accepts 1/4-inch hex-shank bits exclusively
- Compact design: Shorter head length for tight spaces
- High torque output: Often exceeds 1,500 inch-pounds
- One-handed operation: Perfect for working overhead or with your other hand holding a workpiece
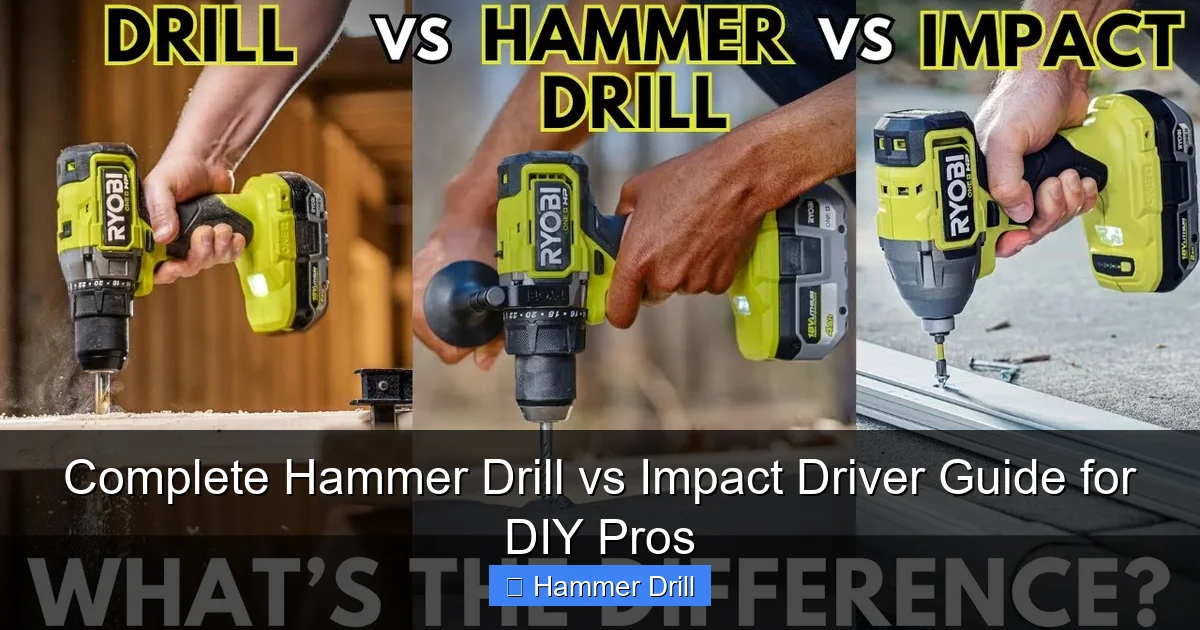
Key Differences: Hammer Drill vs Impact Driver
Now let’s compare these tools head-to-head. The fundamental difference lies in how they deliver force. Hammer drills pound forward. Impact drivers twist and hammer rotationally. Each excels at its specific task but fails at the other’s specialty.
Visual guide about Complete Hammer Drill vs Impact Driver Guide for DIY Pros
Image source: familyhandyman.com
Mechanism Comparison
Hammer drills use a clutch mechanism that drives the chuck forward and backward. This action breaks up hard materials. Impact drivers use a rotating hammer that strikes an anvil. This delivers sudden bursts of torque to drive fasteners. The mechanisms cannot be swapped or adapted.
Speed and Performance
Hammer drills spin faster, typically 2,000-3,000 RPMs. Impact drivers spin slower, usually 1,500-2,500 RPMs, but with much higher torque. A hammer drill can drill a 1/4-inch hole in concrete in seconds. An impact driver can drive a 4-inch lag bolt into oak without bogging down.
Bit Compatibility
This is a crucial difference. Hammer drills use a standard chuck that accepts round-shank masonry bits and regular drill bits. Impact drivers require hex-shank bits only. You cannot use a standard drill bit in an impact driver without an adapter, and even then, performance suffers.
User Experience
Hammer drills vibrate significantly and require two hands for control. They can be tiring during extended use. Impact drivers have minimal vibration and torque kickback. You can operate them with one hand comfortably. The impact driver’s design makes it ideal for long work sessions.
When to Use a Hammer Drill: Best Applications
Hammer drills shine when you need to make holes in tough materials. They are essential for any project involving masonry, concrete, or stone. Here are the specific jobs where a hammer drill is your only choice.
Masonry and Concrete Work
Drilling into concrete walls, brick facades, or stone foundations requires a hammer drill. Standard drills simply cannot penetrate these materials. The hammering action chips away the substrate while the rotation clears dust. For anchor installation, electrical box mounting, or running conduit through walls, you need a hammer drill.
Tile Installation
When installing tile on walls or floors, you often need to drill pilot holes for screws. A hammer drill prevents tile cracking by using controlled hammering. Start at low speed and gradually increase pressure. Use a masonry bit with a carbide tip designed for tile work.
DIY Projects Requiring Hammer Drills
- Mounting shelves on concrete walls
- Installing curtain rods in brick fireplace surrounds
- Running cables through basement concrete walls
- Setting up basketball hoops on concrete pads
- Creating holes for plumbing pipes in stone foundations
Understanding the difference between impact driver and hammer drill helps you avoid costly mistakes on these projects.
When to Use an Impact Driver: Best Applications
Impact drivers dominate when it comes to driving fasteners. They make quick work of long screws, lag bolts, and large fasteners that would stall a regular drill. Here’s where you should always reach for your impact driver.
Deck Building and Framing
Building a deck requires driving hundreds of deck screws. An impact driver does this effortlessly. The high torque drives screws flush without stripping them. The one-handed operation lets you hold a board steady with your other hand. You can drive 3-inch screws into pressure-treated lumber all day without wrist fatigue.
Furniture Assembly
Flat-pack furniture often requires driving many cam locks and screws. An impact driver speeds up assembly dramatically. Use a low torque setting initially to avoid stripping particle board. Increase torque as the screw seats. The compact size fits into tight spaces between furniture pieces.
Metal Stud Framing
When installing metal studs for drywall or commercial partitions, self-tapping screws are essential. An impact driver drives these screws through metal quickly. The impact action prevents the bit from slipping off the screw head. You can complete a wall frame in half the time compared to using a regular drill.
DIY Projects Requiring Impact Drivers
- Building treehouses or play structures
- Assembling garden sheds
- Installing wood flooring underlayment
- Creating custom shelving units
- Mounting TV brackets to studs
Choosing the Right Tool for Your Project
Most DIY enthusiasts need both tools eventually. But if you can only buy one, consider your most common projects. Here’s a simple decision tree to help you choose wisely.
Project Type Assessment
Choose a hammer drill if: You primarily work with concrete, brick, or stone. If you need to install anchors, mount hardware to masonry, or drill through hard surfaces, the hammer drill is essential. It can also function as a regular drill for wood and metal.
Choose an impact driver if: You primarily drive screws and fasteners. If you build decks, assemble furniture, or install drywall, the impact driver will save you time and effort. It can also drill holes in wood and metal with hex-shank bits.
Budget Considerations
Entry-level hammer drills start around $60 for corded models. Cordless hammer drills begin at $100 for bare tools. Impact drivers start at $80 for basic models. Premium brushless models for both types cost $150-250. Consider investing in a combo kit that includes both tools from the same battery platform.
Space and Portability
Impact drivers are more compact and lighter, typically 4-6 inches long and 2-3 pounds. Hammer drills are longer, usually 7-9 inches, and heavier at 4-6 pounds. If you work in tight spaces like crawlspaces or above ceilings, the impact driver’s size is a major advantage.
Step-by-Step: Using a Hammer Drill for Masonry
Follow these steps for safe, effective masonry drilling. Proper technique prevents bit breakage and ensures clean holes.
Step 1: Gather Your Materials
You will need the hammer drill, masonry bits with carbide tips, masking tape, a pencil, safety glasses, and hearing protection. Choose a bit slightly smaller than your anchor size. For example, use a 3/16-inch bit for 1/4-inch plastic anchors.
Step 2: Mark and Prepare the Surface
Mark your drilling location with a pencil. Place a small piece of masking tape over the mark. This prevents the drill bit from wandering when you start. Press firmly on the tape to create a clean starting point.
Step 3: Set the Correct Mode
Switch your hammer drill to hammer drill mode. This is usually indicated by a hammer icon. Do not use standard drill mode for masonry—it will not work and may damage the bit. Ensure the drill is set to forward rotation, not reverse.
Step 4: Start Drilling
Hold the drill perpendicular to the surface. Apply firm, steady pressure but let the tool do the work. Start at low speed to create a pilot groove. Once the bit is seated, increase speed gradually. Do not force the drill. If it bogs down, reduce pressure and clear dust from the hole.
Step 5: Clear and Complete the Hole
Periodically pull the bit out to clear dust. This prevents overheating and ensures proper depth. Continue drilling to your desired depth. When finished, switch to reverse if needed to back the bit out easily. Remove the masking tape and blow out dust with compressed air or a brush.
Pro Tips for Hammer Drill Success
- Keep the drill level to avoid creating an oval hole
- Use a depth stop or mark the bit with tape to control hole depth
- For deep holes, drill in short bursts to prevent overheating
- Never use hammer mode on wood or metal—it will damage the material
For more detailed instructions, read our guide on how to use a drill for screws into a wall.
Step-by-Step: Using an Impact Driver for Screws
Impact drivers make screw driving effortless when used correctly. Follow these steps for professional results.
Step 1: Select the Right Bit
Choose a hex-shank driver bit that matches your screw head. Use a #2 Phillips for most wood screws. For deck screws, a square drive (#2 Robertson) provides better grip. Insert the bit fully into the impact driver chuck until it clicks into place.
Step 2: Adjust Torque Settings
Most impact drivers have adjustable torque rings. Start at a lower setting for soft materials or small screws. Increase torque for hardwoods or large fasteners. The clutch stops applying force once the screw is seated, preventing stripping. Test on scrap material first.
Step 3: Position and Start
Hold the screw in place with your non-dominant hand or a magnetic bit holder. Position the bit in the screw head. Apply light downward pressure and pull the trigger. The impact driver will start spinning. Keep the bit straight to avoid cam-out.
Step 4: Drive the Screw
Maintain steady pressure as the screw drives in. You will feel and hear the impact mechanism engage when resistance increases. This is normal. Continue until the screw is fully seated. The clutch will disengage automatically at the set torque level.
Step 5: Remove and Inspect
Release the trigger and pull the trigger in reverse briefly to back the bit out. Inspect the screw head for stripping. If the head is damaged, you used too much torque or the wrong bit size. Adjust settings for the next screw.
Pro Tips for Impact Driver Success
- Always use high-quality driver bits designed for impact tools
- Keep spare batteries charged for continuous work
- Use a quick-release bit holder for faster bit changes
- For long screws, start at a higher speed setting
Troubleshooting Common Issues
Even experienced DIYers encounter problems. Here’s how to solve the most common issues with both tools.
Hammer Drill Problems
Problem: Bit won’t drill into concrete
Solution: Ensure you’re in hammer drill mode, not standard drill. Check that your bit is a carbide-tipped masonry bit. Apply more downward pressure and try again. If still unsuccessful, the concrete may be too hard—consider using a rotary hammer instead.
Problem: Bit keeps slipping out of chuck
Solution: Clean the chuck and bit shank. Tighten the chuck properly by hand and then give it an extra quarter-turn with the chuck key. For keyless chucks, make sure the bit is fully inserted before tightening.
Problem: Excessive vibration
Solution: Check that the bit is straight and not bent. Reduce speed and apply more pressure. If vibration continues, the hammer mechanism may be worn and need service.
Impact Driver Problems
Problem: Screw head strips immediately
Solution: You’re using too much torque or the wrong bit size. Reduce the torque setting. Ensure the bit is fully seated in the screw head. Use a bit with a better grip design, like a multi-point or impact-rated bit.
Problem: Bit won’t stay in chuck
Solution: Impact drivers use a collet-style chuck. Push the bit in until you hear a click. If it still falls out, the collet may be worn. Clean the collet and bit shank. Replace the collet if necessary.
Problem: Tool bogs down on long screws
Solution: Switch to a higher voltage battery if using a cordless model. Use a longer, sharper bit for better engagement. Pre-drill pilot holes in very hard materials. Consider using a more powerful impact driver with higher torque ratings.
Safety Tips for Both Tools
Power tools demand respect. Follow these safety guidelines every time you use your hammer drill or impact driver.
Essential Safety Gear
Always wear safety glasses to protect from flying debris. Hearing protection is crucial—both tools exceed 85 decibels. Consider a dust mask when drilling masonry. Wear close-fitting clothing and tie back long hair. Remove jewelry before starting work.
Work Area Preparation
Secure your workpiece with clamps or a vise. Never hold small items in your hand while drilling. Clear the area of tripping hazards. Ensure good lighting. Keep children and pets away from the work zone. Have a fire extinguisher nearby when working in dusty environments.
Electrical Safety
For corded tools, inspect the power cord for damage before use. Keep cords away from sharp edges and hot surfaces. For cordless tools, remove batteries when changing bits. Store batteries in a cool, dry place. Never expose batteries to water or extreme temperatures.
Proper Handling Techniques
Maintain a firm grip with both hands on hammer drills. Keep your body balanced and feet shoulder-width apart. Never overreach. Stop the tool before making adjustments. Allow the bit to come to a complete stop before setting the tool down. Keep your hands away from the rotating bit.
Conclusion: Which Tool Wins?
The hammer drill vs impact driver debate has no single winner—they serve different purposes. Your workshop needs both for complete capability. The hammer drill conquers masonry and concrete with its unique hammering action. The impact driver dominates screw driving with effortless torque and compact design.
Start with the tool that matches your immediate projects. Add the other tool as your DIY skills expand. Invest in quality brushless models from the same battery platform for maximum value. Remember that a good cordless drill can complement both tools for light-duty tasks.
Now you have the knowledge to choose, use, and maintain both tools like a pro. Your next project will benefit from the right tool selection and proper technique. Happy building!
