
Sparking in cordless drills is a dangerous warning sign that demands immediate attention to prevent electrical shock, fire hazards, or complete tool failure. This alarming issue is primarily caused by worn carbon brushes, electrical overload, or internal motor damage that compromises your safety. Safe resolution requires proper diagnosis and timely repairs to restore your drill’s reliability and protect yourself during operation.
Key Takeaways
- Replace worn carbon brushes immediately to prevent commutator damage and excessive sparking.
- Clean dust and debris regularly from vents and motor housing to avoid electrical shorts.
- Allow overheated drills to cool for 15-20 minutes before resuming use to prevent winding damage.
- Inspect battery terminals for damage and replace cracked or swollen batteries to eliminate short circuit risks.
- Replace faulty trigger switches showing signs of arcing or wear to restore proper electrical contact.
- Use correctly sized drill bits and avoid overloading the motor to reduce electrical stress and sparking.
- Seek professional repair for motor issues instead of attempting complex DIY fixes on internal components.
Why This Matters: Understanding the Problem
Picture this. You’re hanging shelves in your living room, halfway through the project, and suddenly you see tiny orange sparks shooting out of your cordless drill. Your heart skips a beat. Is it about to explode? Are you going to burn down the house? Should you throw it out the window?
Take a breath. I’ve been there too. That moment of panic when your trusty drill starts putting on a mini Fourth of July show is actually pretty common. But here’s the thing—most people ignore it or just keep drilling until something worse happens. That’s when you get the real nightmare scenarios.
Understanding the Cordless Drill Sparking Reasons and How to Fix Them Safely isn’t just about saving your tool. It’s about keeping your fingers intact and your house standing. A little spark today can become a fried motor tomorrow, or worse, an electrical fire. I learned this the hard way after replacing three drills in two years before finally figuring out what was actually happening inside.
Let’s talk about what’s really going on in that metal casing. Your drill’s motor has carbon brushes that conduct electricity. These little guys wear down over time, and when they do, they start creating sparks. Most of the time, it’s a simple fix. But if you ignore it? You’re looking at a $100+ paperweight.
What You Need Before We Start
Don’t worry, you won’t need a degree in electrical engineering. Most of this stuff is probably already in your garage or toolbox. Here’s your shopping list for diagnosing and fixing sparking issues:
Visual guide about Cordless Drill Sparking Reasons and How to Fix Them Safely
Image source: toolsprofy.com
- A multimeter (the $15 kind from any hardware store works fine)
- Replacement carbon brushes (check your drill model number)
- A small wire brush or old toothbrush
- Compressed air or canned air (optional but helpful)
- Basic screwdriver set (usually Phillips and flathead)
- Safety glasses (non-negotiable)
- Work gloves
- A clean, well-lit workspace
I keep a spare set of brushes for my drill in my toolbox now. They cost about $8 online and have saved me from countless project interruptions. If you’re not sure which brushes you need, just snap a photo of your drill’s model number and take it to your local hardware store. The folks there are usually happy to help.
Step-by-Step Guide to Cordless Drill Sparking Reasons and How to Fix Them Safely
Step 1: Safety First—Don’t Panic and Stop Drilling
The moment you see sparks, your first instinct might be to keep going. Resist that urge. Turn off your drill, remove the battery, and let it cool down completely. I mean it—put it on a non-flammable surface and walk away for 15 minutes. This isn’t just about preventing burns; it’s about giving your brain time to switch from “oh crap” mode to “let me figure this out” mode.
Visual guide about Cordless Drill Sparking Reasons and How to Fix Them Safely
Image source: toolsprofy.com
While you’re waiting, grab your safety glasses and gloves. You wouldn’t believe how many people skip this step and end up with a tiny metal shard in their eye. Not fun. Trust me on this one.
Step 2: Identify Where the Sparks Are Coming From
Now that your drill is cool and you’re suited up, take a close look. Where exactly are those sparks originating? This is crucial because it tells you what’s broken.
Most sparking happens in one of three places: around the chuck (where you put the drill bit), from the vents on the motor housing, or near the trigger switch. If it’s coming from the chuck area while you’re drilling, that’s usually normal friction. But if you see sparks from the motor vents or near the base of the handle? That’s your carbon brushes screaming for help.
Grab a flashlight and look through the vents. Do you see a blue-orange glow when you pull the trigger? That’s the brushes making contact. If you see actual sparks flying, that’s your confirmation. This step alone will save you hours of unnecessary troubleshooting.
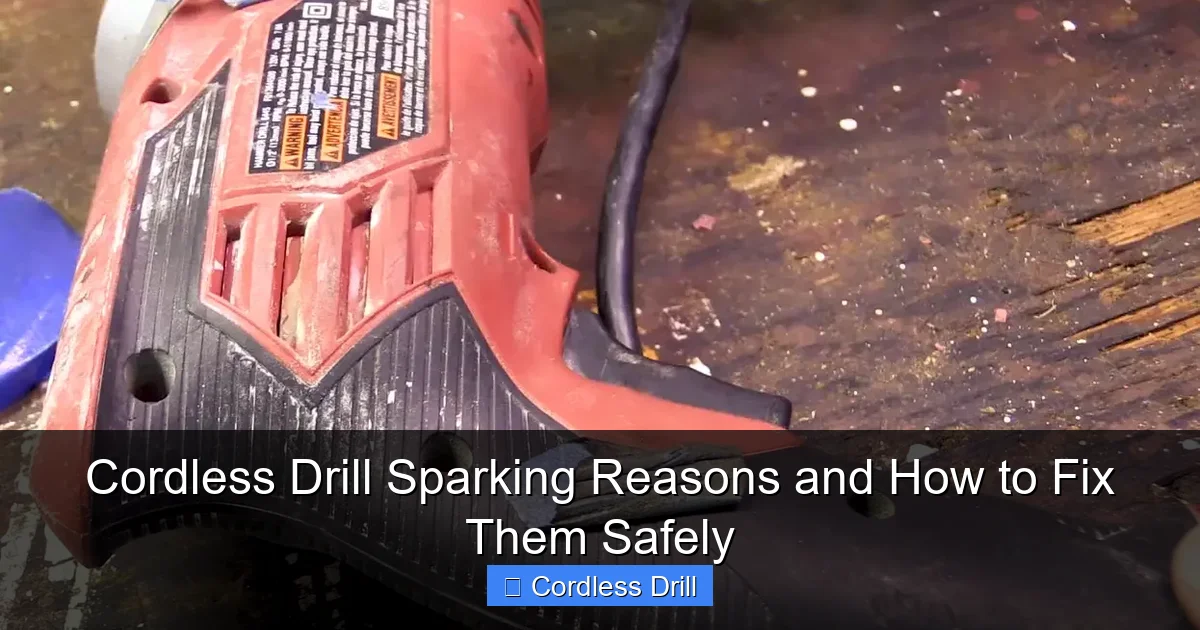
Step 3: Remove the Battery and Open the Housing
With the battery completely removed, locate the screws on your drill’s housing. They’re usually on the sides and sometimes hidden under stickers. Use the right size screwdriver—forcing the wrong one will strip the heads and make your life miserable.
Here’s a pro move: put the screws in a small container or a piece of tape so you don’t lose them. I learned this after my toddler decided my drill screws looked like fun toys. Now I use a muffin tin to keep everything organized.
Carefully separate the two halves of the housing. Some drills have clips that can be stubborn. Don’t force it. Look for hidden screws or release tabs. Take photos as you go—your phone is your best friend here. When you need to put it back together, you’ll thank yourself.
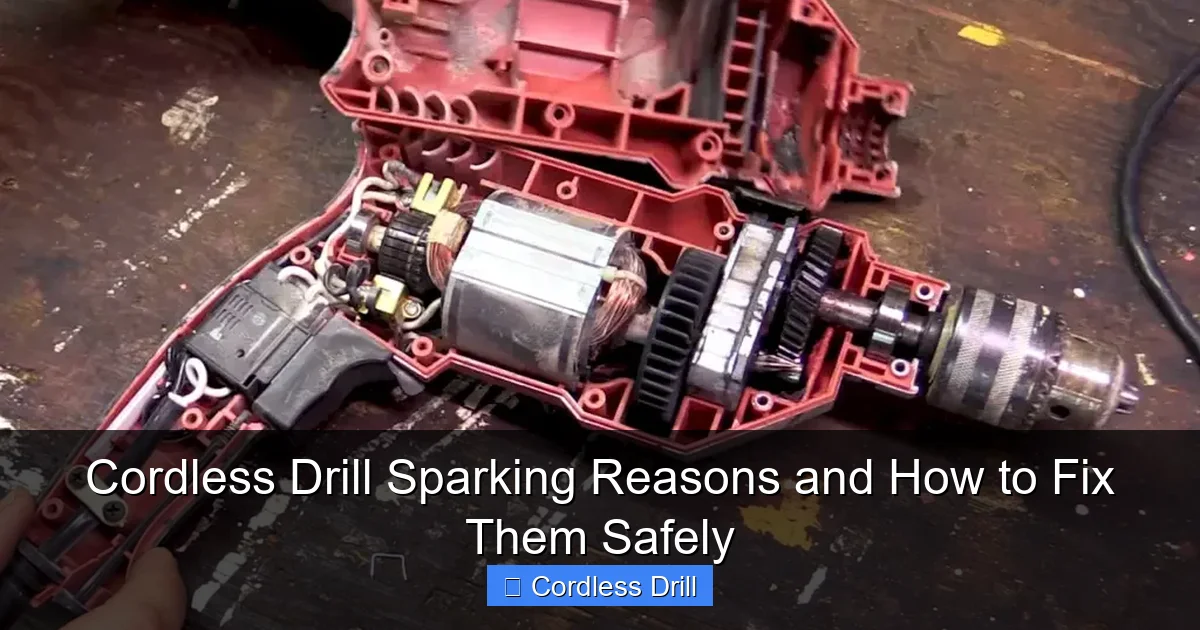
Step 4: Locate and Inspect the Carbon Brushes
Once you have the housing open, look for two small rectangular blocks with wires attached. Those are your carbon brushes. They’re usually held in place by small springs or clips.
Pull each brush out gently. Now check their length. Most brushes are about half an inch when new. If they’re worn down to a quarter inch or less, that’s your problem. You might also see uneven wear, chipping, or cracks. Any of these signs means replacement time.
While you’re looking at the brushes, check the springs too. If they’re stretched out or corroded, they won’t hold the brush firmly against the commutator. That’s another spark source right there.
Step 5: Examine the Commutator (The Copper Ring Thing)
Behind where the brushes sit, you’ll see a series of copper segments—that’s the commutator. It should look smooth and shiny. If it’s blackened, grooved, or has burn marks, that’s a bigger issue.
Take your wire brush and gently clean the copper segments. Don’t press too hard—you’re just removing carbon buildup, not scrubbing a pot. If the grooves are deep, you might need to replace the entire motor. But 90% of the time, a good cleaning is all it needs.
Here’s something I discovered by accident: if the commutator looks fine but your new brushes still spark, try rotating the chuck by hand a few times. Sometimes there’s just a sticky spot that needs to be worked loose.
Step 6: Test the Trigger Switch (The “Go” Button)
While the housing is open, check your trigger switch. Look for burn marks, melted plastic, or loose wires. These are rare but serious issues.
Use your multimeter to test continuity. Set it to the lowest ohms setting and touch the probes to the switch terminals. When you pull the trigger, you should see the reading change. If it doesn’t, your switch is dead. Replacement switches are available online for most models.
I once spent three hours troubleshooting a sparking issue only to find out the trigger switch had a tiny wire strand shorting against the housing. A piece of electrical tape fixed it. Moral of the story? Check everything, even the obvious parts.
Step 7: Clean Everything and Reassemble
Before putting your drill back together, take a moment to clean out all the dust and metal shavings. Use compressed air or your mouth (gently, with the drill pointed away from you). Those little particles can cause future shorts.
Insert your new brushes, making sure they sit flush with the springs behind them. Double-check that all wires are tucked away and won’t get pinched when you close the housing. This is where those photos you took come in handy.
Screw the housing back together, but don’t overtighten. You want it snug, not so tight that you crack the plastic. I’ve made that mistake. It’s embarrassing and expensive.
Step 8: Test Your Fix (Safely)
Here’s the moment of truth. Insert the battery but keep the drill away from anything flammable. Pull the trigger gently and listen. It should run smoothly without that angry buzzing sound.
If you still see sparks, stop immediately. You might have a deeper motor issue. But if it runs clean? Congratulations, you just saved yourself $100 and learned a valuable skill.
Run it for a minute without a bit, then try drilling into a scrap piece of wood. If everything looks good, you’re back in business.
Pro Tips & Common Mistakes to Avoid
Don’t ignore small sparks. I know it’s tempting to think “it’s just a little one” and keep going. But that little spark is eroding your motor brushes at an accelerated rate. I learned this after my drill suddenly died mid-project, leaving me with a half-finished bookshelf and a very angry wife.
Don’t use compressed air blindly. Spraying compressed air into your drill can force dust deeper into the motor. Always point it at an angle and use short bursts. Better yet, use a small brush first, then follow up with air.
Don’t mix up the brushes. If your drill has two different brush types (some do), mark them before removal. They might look identical, but swapping them can cause alignment issues and immediate sparking.
Don’t overtighten screws. Plastic housing cracks easily. I’ve replaced three drill casings because I got enthusiastic with my screwdriver. Hand-tight is usually enough.
Don’t forget to check the battery. Sometimes the issue isn’t the drill—it’s a failing battery sending irregular voltage. If you have a spare battery, test with that. If the sparking stops, your battery is the culprit.
One thing I wish someone had told me: keep a maintenance log. Note when you replace brushes, clean the commutator, or notice any odd behavior. After a few entries, you’ll see patterns. My drill needs new brushes every 18 months with regular use. Knowing that helps me plan ahead.

Visual guide about Cordless Drill Sparking Reasons and How to Fix Them Safely
Image source: toolstutor.com
FAQs About Cordless Drill Sparking Reasons and How to Fix Them Safely
Q: Is it normal for a cordless drill to spark a little?
A: Small, occasional sparks at the brushes during heavy use can be normal. Think of it like the spark plugs in your car—tiny, controlled sparks are part of the process. But if you see large sparks, continuous sparking, or sparks from anywhere other than the brush area, that’s abnormal and needs attention.
Q: How often should I replace the carbon brushes?
A: For most DIY users, every 12-24 months is typical. If you use your drill daily for heavy projects, check them every six months. The key is catching them before they wear down completely. Once you see the metal holder touching the commutator, you’re in damage territory.
Q: Can I use any brand of replacement brushes?
A: Stick with OEM (original equipment manufacturer) brushes or reputable third-party brands. Cheap off-brand brushes might fit, but they often wear unevenly and can cause more sparking. I tried the $2 Amazon brushes once. They lasted three weeks. The $8 DeWalt ones lasted a year and a half.
Q: My drill is sparking and smoking. Is it a total loss?
A: Not necessarily. Smoke usually means excessive friction from worn brushes or a dirty commutator. If you catch it early, cleaning and brush replacement can bring it back to life. But if you smell burning plastic or see melted components, stop—you might have a shorted motor winding that’s not worth repairing.
Q: Should I use my drill in the rain if it’s sparking?
A: Absolutely not. Water and electricity are a terrible combination. Using a sparking drill in wet conditions dramatically increases your risk of electrocution. Wait until you’ve fixed the issue and everything is completely dry.
Q: What’s the difference between brushless and brushed drills regarding sparking?
A: Brushless drills don’t have carbon brushes, so they don’t spark at all. That’s one reason they’re more expensive. If you’re tired of this problem, consider upgrading to a brushless model. They last longer and require less maintenance, though they cost more upfront.
Q: Can I fix a sparking drill without opening it up?
A: Unfortunately, no. You need to access the brushes and commutator to properly diagnose and fix the issue. However, if you’re not comfortable opening your drill, most tool repair shops can do it for $30-50—still cheaper than a new drill.
Final Thoughts
Look, I get it. When your drill starts sparking, your first thought is probably “great, another thing to fix.” But here’s what I’ve learned after years of tool abuse and repair: that sparking is your drill’s way of crying for help. It’s not trying to ruin your day; it’s trying to warn you before something catastrophic happens.
The Cordless Drill Sparking Reasons and How to Fix Them Safely process is simpler than most people think. With basic tools and about 30 minutes, you can diagnose and often fix the problem yourself. Plus, you’ll understand your tools better, which makes you a smarter DIYer overall.
Start by checking those brushes. That’s the #1 culprit 90% of the time. Keep spares on hand. Clean your drill regularly. And most importantly, listen to what your tool is telling you. That weird sound or small spark is never just “normal wear and tear”—it’s a message.
Remember, a well-maintained drill can last a decade or more. I still use my first cordless drill from 2012, and it runs like new because I learned to respect those little sparks. You can do the same.
Now go check those brushes. Seriously, I’ll wait. Your future self will thank you when you’re not shopping for a replacement drill at 8 PM on a Sunday because your old one died mid-project.
