
This guide provides everything a beginner needs to know to successfully use a cordless drill on masonry. You’ll learn how to choose the right drill and bits, master the correct drilling technique, and avoid common mistakes that can damage your tools or your project.
Key Takeaways
- Use a Hammer Drill: For effective masonry work, you absolutely need a cordless drill with a dedicated hammer function, as a standard drill will struggle or fail.
- Masonry Bits are Mandatory: Only carbide-tipped masonry bits are designed to grind through hard, abrasive materials like concrete and brick.
- Marking is Crucial: Always use a center punch to create a starter dimple on your drilling mark; this prevents the drill bit from “walking” and skittering across the surface.
- Start Slow and Straight: Begin drilling at a low speed without the hammer action to establish a clean, accurate pilot hole before engaging full power.
- Let the Tool Do the Work: Apply firm, steady pressure, but avoid pushing too hard. The hammering action of the drill provides the force you need.
- Manage Dust for Safety & Performance: Frequently pull the bit out to clear dust from the hole. This prevents overheating, bit binding, and ensures a cleaner, deeper hole.
- Safety is Non-Negotiable: Always wear safety glasses, a dust mask, and hearing protection. Be aware of hidden hazards like wires and pipes behind walls.
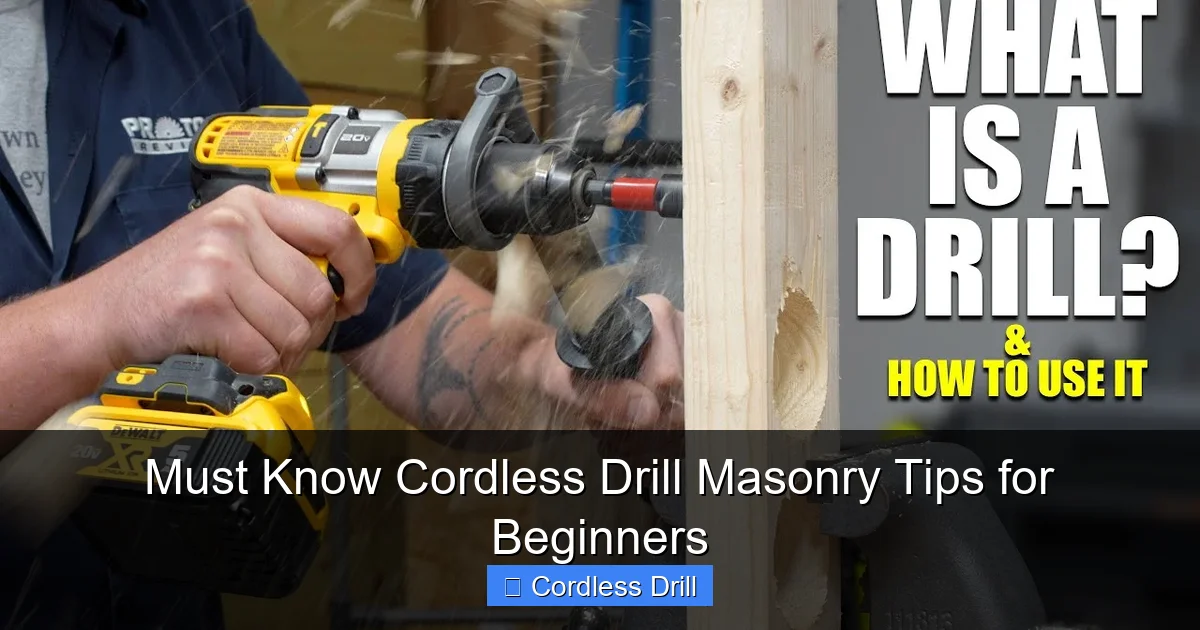
Must Know Cordless Drill Masonry Tips for Beginners
So, you have a cordless drill and a project that involves brick, block, or concrete. Hanging a shelf on a brick wall? Installing a mailbox post? Building a block planter? The thought of drilling into such hard material can be intimidating for a beginner. But here’s the good news: with the right knowledge, you can tackle these projects with confidence.
This guide is your complete roadmap. We’ll walk you through every single step, from choosing the right tool to pulling the trigger for the first time. We’ll demystify the process, share pro tips, and help you avoid the common pitfalls that trip up new DIYers. Let’s turn that intimidating masonry wall into just another successful project.
Understanding Your Enemy: What is Masonry?
First, let’s talk about what you’re up against. Masonry includes materials like brick, concrete block, poured concrete, stone, and mortar. These are composite materials – very hard and very abrasive. They are not like wood, where a sharp blade cuts fibers. Drilling into masonry is a grinding and crushing process. This fundamental difference is why you can’t just use any old drill or bit. You need the right tool for the job.

Visual guide about Must Know Cordless Drill Masonry Tips for Beginners
Image source: i.ytimg.com
Gear Up: The Essential Tools for the Job
Before you make a single mark on the wall, you need to assemble your toolkit. Having the right gear is 80% of the battle in masonry work.

Visual guide about Must Know Cordless Drill Masonry Tips for Beginners
Image source: carpentry-tips-and-tricks.com
The Right Cordless Drill
This is the most critical choice. Not all cordless drills are created equal for this task.
- Hammer Drill is a Must: For any serious masonry work, you need a cordless hammer drill. This tool has a special setting (usually marked with a hammer icon) that makes the chuck pulse forward rapidly while spinning. This hammering action helps to pulverize the material as the bit rotates, making the work possible. A regular drill just spins and will burn out or make painfully slow progress. For a deeper dive on this crucial tool, read our comparison on the difference between an impact driver and a hammer drill.
- Power and Battery: Look for a drill with at least 18 volts of power. Masonry drilling is demanding, and a weak drill will stall or drain its battery in minutes. A higher voltage and ampere-hour (Ah) rating on the battery means more runtime and power. If you’re in the market, our guide to the best cordless drill options can help you choose a powerful model.
The Correct Drill Bits
Using a wood or metal bit on masonry will destroy the bit in seconds. You need masonry-specific bits.
- Carbide Tip: Masonry bits have a distinctive arrowhead-shaped tip made of tungsten carbide. This ultra-hard material is designed to grind through masonry.
- Size Matters: Match the bit size to your wall plug (anchor) and screw. The bit size is almost always printed on the plug’s packaging.
Other Must-Have Items
- Safety Glasses: Concrete dust and chips are no joke. Wear them always.
- Dust Mask or Respirator: Silica dust from concrete and mortar is harmful to your lungs.
- Center Punch and Hammer: This is your secret weapon for accuracy.
- Torpedo Level: For making sure your marks and your final installation are straight.
- Wire & Pipe Detector: A crucial safety tool to scan the wall before you drill.
- Compressed Air or Vacuum: For clearing dust from the hole.
- Hearing Protection: Hammer drills are loud, especially indoors.
Step-by-Step: How to Drill into Masonry Like a Pro
Now, let’s get to the practical part. Follow these steps in order for the best results.
Visual guide about Must Know Cordless Drill Masonry Tips for Beginners
Image source: i.ytimg.com
Step 1: Preparation and Safety First
Good preparation prevents poor performance and accidents.
- Scan the Area: Use your wire and pipe detector to scan the entire area where you plan to drill. Mark any hazards with a pencil.
- Clear the Space: Move furniture, drop cloths, and ensure you have a stable footing. If you’re working high, follow our essential safety tips for climbing ladders.
- Gear Up: Put on your safety glasses, dust mask, and hearing protection.
Step 2: Marking Your Spot with Precision
Accuracy here saves frustration later.
- Use a pencil to make a small, clear “X” where you want the hole.
- Place the tip of your center punch directly on the center of the “X”.
- Tip: Hold the punch perfectly vertical. Give it a firm tap with a hammer. This creates a small dimple that will “capture” the tip of your drill bit and prevent it from wandering.
Step 3: Setting Up Your Cordless Drill
Don’t just start drilling! Set your tool up correctly.
- Insert the Bit: Ensure the drill is OFF. Insert the masonry bit fully into the chuck and tighten it securely.
- Select the Mode: Turn the collar to the hammer drill icon (the hammer symbol). This engages both rotation and hammering.
- Set the Speed: If your drill has a variable speed trigger and a gear selector, start in a low gear (often marked “1”). This gives you more control and torque.
- Check the Battery: Start with a fully charged battery. Drilling drains power fast.
Step 4: The Drilling Technique
This is the moment of truth. Proper technique is everything.
- Positioning: Stand firmly, bracing yourself if needed. Hold the drill with both hands – one on the trigger grip, the other on the auxiliary handle if your drill has one.
- Start Slow, No Hammer: For the ultimate pro tip: position the bit in your punched dimple. Start the drill on a slow, steady rotation without the hammer function engaged. Drill just 1/8 to 1/4 inch deep. This creates a perfect, clean pilot hole that guides the rest of the process.
- Engage Hammer and Increase Speed: Once your pilot hole is set, squeeze the trigger to your desired speed and let the hammering action begin. Apply firm, steady, forward pressure. Let the tool do the work. You should feel and hear a consistent pounding/grinding.
- Clear Dust Frequently: Every 10-15 seconds, or if you feel the drill bogging down, pull the bit completely out of the hole. Blow or vacuum out the dust. This keeps the bit cool and prevents it from getting stuck.
- Mind the Depth: If you need a specific depth, use a piece of masking tape wrapped around the bit as a visual guide. Stop when the tape reaches the surface.
Step 5: Finishing the Job
You’ve made the hole. Now what?
- Blow out the hole one final time to ensure it’s completely clean of dust. A dirty hole won’t hold an anchor properly.
- Insert your plastic wall plug by tapping it gently with a hammer until it’s flush with the surface.
- Drive your screw into the plug. For more on this final assembly stage, our comprehensive guide on how to use a drill for screws into a wall has you covered.
Troubleshooting Common Problems
Things don’t always go perfectly. Here’s how to fix common issues.
- Problem: The drill bit won’t start / keeps “walking.”
Solution: You didn’t use a center punch, or you didn’t hit it hard enough. The pilot hole technique (Step 4) is also the fix for this. - Problem: Drilling is extremely slow or the drill is smoking.
Solution: You are either using a regular drill (not a hammer drill), a dull bit, or the wrong type of bit. Check your tool mode and bit. A smoking bit is usually toast – replace it. - Problem: The drill bit gets stuck in the hole.
Solution: You didn’t clear the dust enough. Don’t force it. Stop, switch the drill to reverse (while still in hammer mode if possible), and gently try to back it out. You may need to wiggle it slightly. - Problem: You hit rebar or an extra-hard aggregate stone.
Solution: You’ll feel a sudden stop and hear a different sound. Do not force it. You need a special rebar-cutting masonry bit or a rotary hammer to get through it. Sometimes, you can simply move your hole over an inch and try again.
Conclusion: You’ve Got This!
Drilling into masonry with a cordless drill is a fundamental DIY skill that opens up a world of projects. Remember the golden rules: use a hammer drill and masonry bits, mark with a center punch, start with a pilot hole, clear the dust, and always prioritize safety. It might feel awkward the first time, but with practice, it will become second nature. Grab your gear, take a deep breath, and start that first pilot hole. That brick wall doesn’t stand a chance. For more power tool knowledge and project ideas, explore all our content in the cordless drill category.
