
This guide will show you how to organize your cordless drills and accessories effectively. You will learn storage solutions for every space, crucial battery care, and simple maintenance routines. Implement these tips to create a safer, more efficient, and professional-looking workshop.
Key Takeaways
- Declutter and Clean First: A successful storage system starts with assessing your tools and giving them a proper clean to prevent rust and damage.
- Choose the Right Wall Storage: Pegboards, slatwalls, and French cleats offer versatile, visible, and space-saving options to keep drills within easy reach.
- Utilize Cabinet and Drawer Space: For a cleaner look, use tool cabinets, drawer organizers, and clever inserts to store drills, bits, and accessories securely.
- Prioritize Battery Care: Store batteries in a cool, dry place at a partial charge and use dedicated charging stations to maximize their lifespan and safety.
- Implement a Maintenance Routine: Regular cleaning, inspection, and proper long-term storage are essential for keeping your cordless drill in top working condition.
- Label and Zone Your Workshop: Clearly label storage areas and create dedicated zones for different tasks to maintain organization and improve workflow.
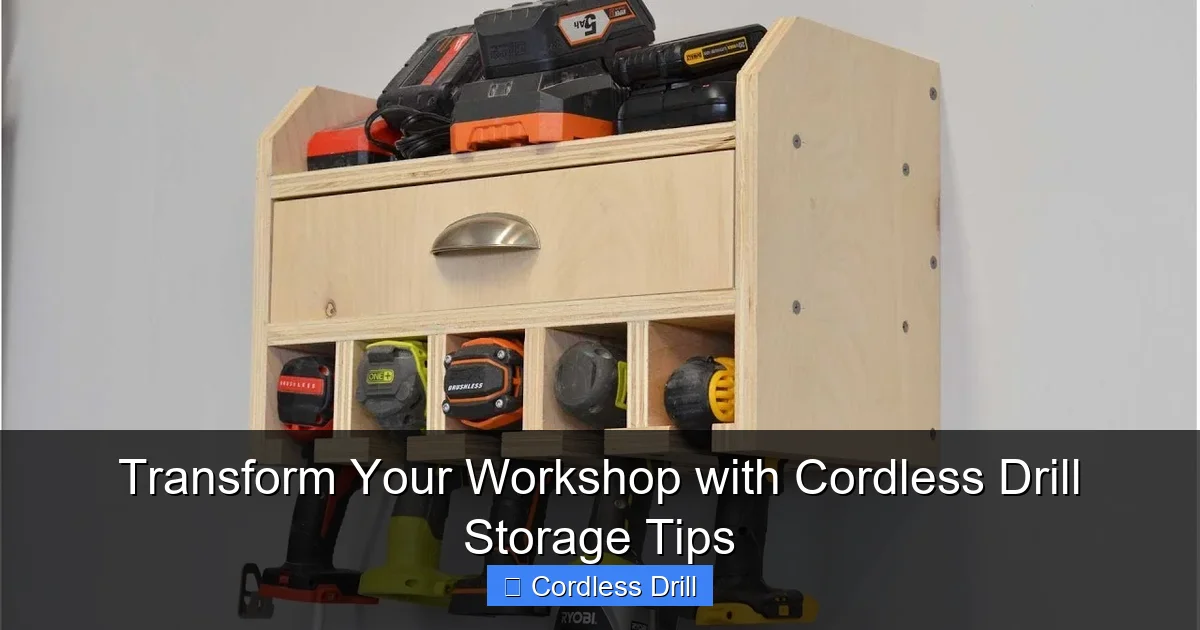
Transform Your Workshop with Cordless Drill Storage Tips
Is your cordless drill always buried under a pile of tools? Do you spend more time looking for the right bit than actually drilling? You are not alone. A cluttered workshop saps your efficiency and can even be dangerous. But what if you could open your shop door to a space where every tool has a home? A place where your best cordless drill is always ready for action.
This guide is your blueprint. We will walk through simple, effective strategies to store your cordless drills, batteries, and bits. You will learn how to protect your investment, save precious time, and create a workshop that inspires productivity. Let’s transform your space from chaotic to capable.
Step 1: The Foundation – Assess and Prepare Your Tools
Before you buy a single hook, you need to know what you’re storing. A great storage system is built on a solid foundation.

Visual guide about Transform Your Workshop with Cordless Drill Storage Tips
Image source: prettyhandygirl.com
Take Inventory of Your Drills and Accessories
Gather all your cordless tools. Lay out every drill, impact driver, and hammer drill. Then, collect all the accessories: drill bit sets, driver bits, hole saws, countersinks, and chuck keys. Seeing everything in one place is eye-opening. You might find duplicates or broken items you can discard.
Clean Your Tools Thoroughly
A clean tool is a happy tool. Wipe down your drills with a dry cloth to remove dust and debris. For stubborn grime, use a slightly damp cloth, but avoid getting moisture in the vents or battery port. Use a small brush or compressed air to clean the chuck and air vents. This prevents dirt from causing wear or overheating. Cleaning is also the perfect time to inspect your tools for damage.
Step 2: Go Vertical – Wall Storage Solutions
Walls are your most underutilized storage asset. Getting tools off the bench and onto the wall clears workspace and makes everything visible.
Visual guide about Transform Your Workshop with Cordless Drill Storage Tips
Image source: i.ytimg.com
The Classic Pegboard System
Pegboard is affordable and endlessly customizable. Use specialized hooks designed for power tools to cradle your drills securely. You can outline your tools with a marker so you always know where they go. Add small bins for bits and shelves for chargers. It’s a timeless solution for a reason.
Modern Slatwall Panels
Slatwall, like what you see in retail stores, is a step up in durability. Various hooks, baskets, and tool holders clip into the channels. It can support more weight than pegboard and offers a sleeker look. It’s ideal for a busy workshop where you frequently rearrange your layout.
DIY French Cleats
For the ultimate in flexible, strong storage, build a French cleat wall. You mount angled strips horizontally on the wall. Then, you build custom tool holders with a matching cleat that slides onto the wall strips. You can create holders perfectly shaped for each specific cordless drill model. It’s rock-solid and completely customizable.
Magnetic Tool Bars
A simple but powerful option. Strong magnetic bars can hold steel-bodied drills and drivers securely. It’s a quick-access solution perfect for frequently used tools. Just ensure the magnet is rated for the weight of your drill.
Step 3: Concealed and Protected – Cabinet & Drawer Storage
If you prefer a clean, uncluttered look or need to lock up your tools, enclosed storage is the answer.

Visual guide about Transform Your Workshop with Cordless Drill Storage Tips
Image source: i.ytimg.com
Tool Cabinets and Chests
A rolling tool cabinet is a workshop powerhouse. Use the deep bottom drawer for larger drills and the shallower top drawers for accessories. Foam drawer liner prevents sliding and scratching. You can even cut custom foam inserts for a professional, protective fit for each tool.
Drawer Organizers for Bits and Accessories
Stop digging through a tangled mess of bits. Use small plastic bins, adjustable dividers, or even a fishing tackle box to sort your drill bits by size and type (wood, masonry, metal). Label each section. This makes finding the right bit for using a drill for screws into a wall a five-second task.
Dedicated Charging Station
Create a designated home for your battery chargers. Mount a power strip inside a cabinet or on a shelf. Install the chargers and label them. This keeps cords managed, batteries charging safely, and prevents the “lost charger” dilemma.
Step 4: The Heart of the System – Battery Storage & Care
Your drill is only as good as its battery. Proper storage is critical for performance, lifespan, and safety.
Find the Ideal Storage Spot
Never store batteries in extreme temperatures. A cool, dry place is best. Avoid leaving them in a freezing garage or a hot car trunk. The ideal storage temperature is around 59°F to 77°F (15°C to 25°C).
Charge for Storage
Do not store batteries fully charged or completely dead. For long-term storage (a month or more), charge them to about 40-60%. Most modern smart chargers have a storage mode that does this automatically. Check manufacturer guidelines.
Use a Battery Organizer
Store batteries in a dedicated organizer or case. This protects the terminals from dirt and accidental short-circuiting. Label batteries with purchase dates to help you rotate their use.
Step 5: Maintenance and Long-Term Storage
A good storage system includes a plan for tool care.
Create a Simple Maintenance Routine
Once a month, give your stored drills a quick check. Wipe off any dust. Check for loose parts. If you have a hammer drill or impact driver, ensure the mode selector is clean and moves freely.
Prepare for Long-Term Storage
If you’re putting tools away for a season, remove the batteries. Store the drills and batteries separately in their ideal conditions. Give the tools a thorough clean and a very light lubrication of any moving parts per the manual.
Troubleshooting Common Storage Problems
Problem: Drill falls off hook.
Solution: Ensure the hook is designed for the tool’s weight and shape. Consider a hook with a safety latch or switch to a cradle-style holder.
Problem: Can’t find bits quickly.
Solution: Implement a drawer organizer system with clear labels. Sort by function and size.
Problem: Battery won’t hold a charge after storage.
Solution: The battery may be deeply discharged. Try charging it on the manufacturer’s charger. If it won’t take a charge, it may need replacement. Always follow the 40-60% rule for future storage.
Step 6: Putting It All Together – Workshop Zones and Labeling
Organization is about workflow. Group related items together.
Create Dedicated Zones
Set up a “Fastening Zone” with your drill, impact driver, screws, and bits. Create a “Charging Station” in a corner. Have a “Project Prep” area. This logical flow saves countless steps. Remember, keeping your workspace clear also means practicing good general workshop safety, like knowing the essential safety tips for climbing ladders when accessing high storage.
Label Everything
A label maker is an organizer’s best friend. Label shelf edges, bin fronts, and drawer contents. When everything has a clear, specific home, it’s easy to put things back and for others to find them.
Conclusion: Your Transformed Workshop Awaits
Effective cordless drill storage is more than just tidying up. It’s about respecting your tools, your time, and your craft. By implementing these tips—starting with a clean slate, using your walls, caring for batteries, and creating a logical system—you build a foundation for better, safer, and more enjoyable work. Your tools will last longer, your projects will go smoother, and you’ll reclaim the joy of walking into an efficient, purpose-built space. Start with one section today. Before long, you’ll have a workshop that truly works for you.
