
Mastering a hammer drill starts with avoiding simple errors. This guide walks you through the most common hammer drill beginner mistakes, from using the wrong drill setting to poor handling techniques. Learn the easy fixes to save time, protect your tools, and ensure your masonry projects are a success.
Key Takeaways
- Know Your Drill Mode: Using hammer mode on wood or metal can damage your tool and workpiece. Always match the drill setting to your material.
- Use a Carbide-Tipped Masonry Bit: Standard twist bits will fail and overheat in concrete or brick. Invest in the correct bit for the job.
- Let the Tool Do the Work: Pushing too hard overloads the drill’s motor and reduces its hammering effectiveness. Apply steady, moderate pressure.
- Mark Your Spot Accurately: Drilling in the wrong place is a major headache in masonry. Use a center punch or nail to create a precise starting dimple.
- Manage Dust and Debris: Inhaling concrete dust is hazardous, and clogged holes stall progress. Always drill with a vacuum attachment or use short, clearing bursts.
- Secure Your Workpiece: A shifting brick or cinder block can cause the bit to slip, leading to injury or a ruined project. Clamp everything down firmly.
- Wear Essential Safety Gear: Safety glasses, a dust mask, and hearing protection are non-negotiable when operating a powerful, loud hammer drill.
Top Hammer Drill Beginner Mistakes and How to Fix Them
So, you’ve got a new hammer drill. Exciting! You’re ready to tackle those shelves, mount that TV, or build that patio project. But hold on. A hammer drill is a powerful beast, different from your everyday drill. Jumping in without knowing the ropes is a fast track to frustration, broken tools, or even injury.
Don’t worry, every pro was once a beginner. The key is to learn from others’ errors. This guide will walk you through the most common hammer drill beginner mistakes. More importantly, we’ll show you exactly how to fix them. You’ll learn to work smarter, safer, and get professional-looking results on your very first try.
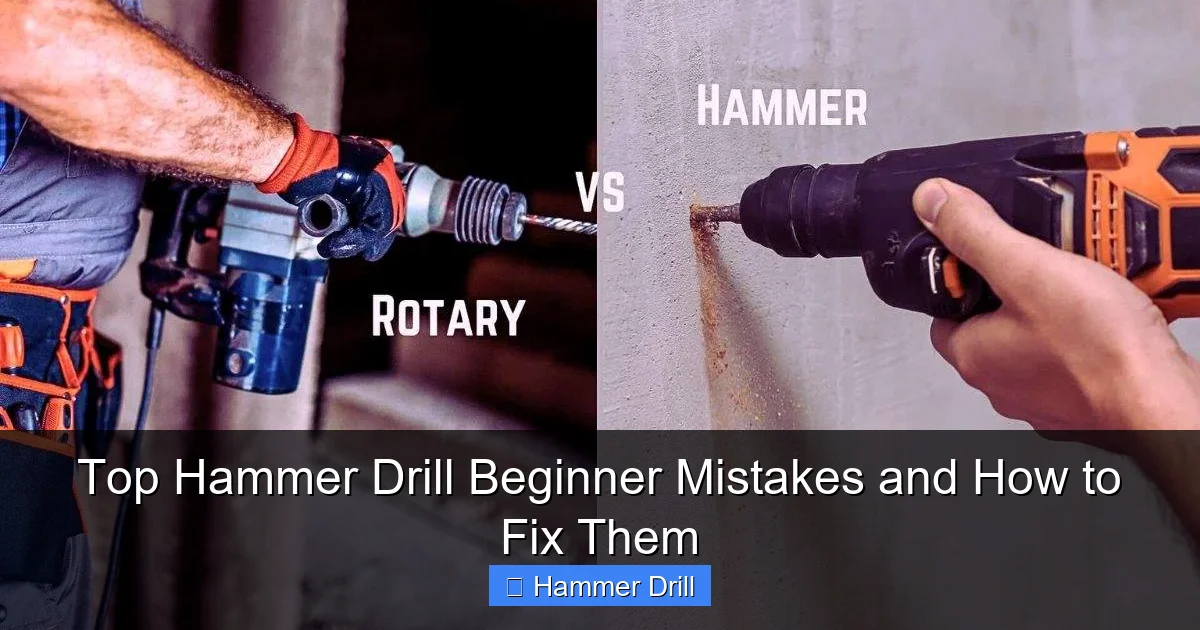
Mistake #1: Not Knowing When to Use Hammer Mode
This is the #1 mistake. A hammer drill combines rotation with a rapid pounding action (the “hammer” function). This is essential for breaking into hard, brittle materials like concrete, brick, stone, and masonry blocks.
Visual guide about Top Hammer Drill Beginner Mistakes and How to Fix Them
Image source: thespruce.com
The Mistake: Beginners often leave the drill in “hammer” mode for every task. Using hammer mode on wood, drywall, or metal is a big error. The pounding action will splinter wood, shred drywall, and dull drill bits on metal. It’s also hard on your drill’s internal mechanism when it’s not needed.
The Fix: Learn your drill’s settings. Most have a collar near the chuck with icons:
- Drill-only icon (a drill bit): Use this for drilling into wood, plastic, or metal. No hammering action.
- Hammer-drill icon (a drill bit with waves): Use this only for masonry, concrete, brick, and stone.
- Some models also have a “driver” setting for driving screws.
Still confused about which tool to use? Check out our detailed articles on the difference between a drill and a hammer drill and the difference between an impact driver and a hammer drill to become a power tool expert.
Mistake #2: Using the Wrong Drill Bit
You wouldn’t use a butter knife to cut a steak. Don’t use a wood bit to drill into concrete.
Visual guide about Top Hammer Drill Beginner Mistakes and How to Fix Them
Image source: shedblog.com.au
The Mistake: Trying to use standard high-speed steel (HSS) twist bits on masonry. These bits will overheat, lose their edge almost instantly, and get stuck. You’ll ruin the bit and possibly your drill.
The Fix: Always use a carbide-tipped masonry bit for hammer drill work. Carbide is a super-hard material that can withstand the abrasiveness of concrete. They have a distinctive spear-like tip and wider flutes to clear dust.
- Tip: For larger holes (over 1/2 inch), consider a rotary hammer and specialized SDS-plus carbide bits, which handle the pounding action even better.
Mistake #3: Applying Too Much Pressure
It feels natural to lean into it, but a hammer drill is not a regular drill.
Visual guide about Top Hammer Drill Beginner Mistakes and How to Fix Them
Image source: i.ytimg.com
The Mistake: Pushing down with all your weight. This can overheat the motor, stall the bit, and prevent the hammering mechanism from working effectively. It also wears you out fast.
The Fix: Let the tool do the work. Your job is to guide it and apply steady, moderate forward pressure. The hammer action is designed to fracture the material; the rotation pulls out the debris. If progress slows, don’t push harder. Pull the bit out slightly to clear dust, then continue. Listen to the motor—if it sounds like it’s straining, you’re pushing too hard.
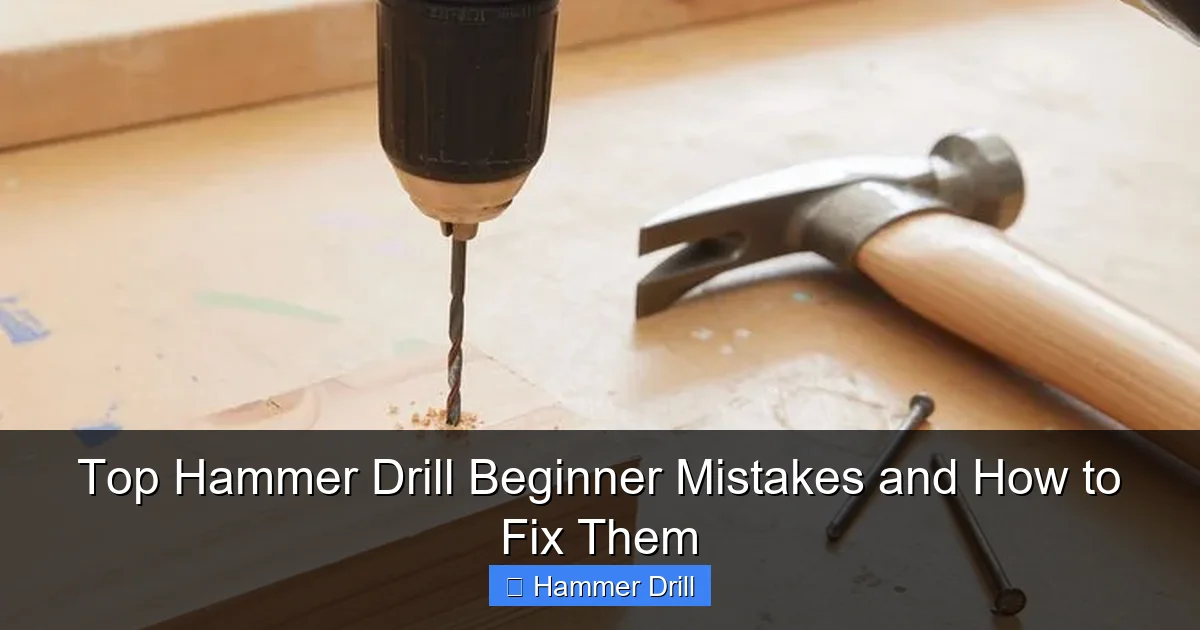
Mistake #4: Not Starting the Hole Correctly
On smooth concrete or brick, a drill bit can easily “walk” or skitter away from your mark.
The Mistake: Placing the bit on your pencil mark and pulling the trigger at full speed. The bit will dance across the surface, leaving an ugly scar and missing your spot.
The Fix: Create a pilot dimple.
Step-by-Step Guide to a Perfect Start
Step 1: Mark your spot accurately with a pencil or marker.
Step 2: Use a center punch and a club hammer to tap a small indentation. No center punch? A large nail and a hammer work in a pinch.
Step 3: Place your carbide bit into this dimple. Start the drill at a slow speed without the hammer function engaged for the first second. This helps the bit seat itself.
Step 4: Once the hole is started, switch to hammer mode and increase speed.
Mistake #5: Ignoring Dust Control
Masonry dust is more than just messy.
The Mistake: Drilling without managing the cloud of fine concrete or silica dust. This dust is harmful to your lungs and can clog the hole, causing the bit to bind and overheat.
The Fix: Control the dust.
- Best Method: Use a hammer drill with a vacuum attachment port. Connect a shop vac to suck dust away as you drill.
- Good Method: Have a helper hold a vacuum hose near the hole.
- Essential Method: Periodically pull the bit completely out of the hole to clear packed dust from the flutes. This is called “chipping out.” Wear a proper respirator or dust mask (not a cloth one).
Mistake #6: Working with an Unsecured Material
Loose bricks or blocks are dangerous and inaccurate.
The Mistake: Trying to drill into a cinder block or paver that’s just sitting on the ground. The force of the hammer drill will make it bounce, shift, or spin.
The Fix: Clamp it down. Use bar clamps or a vise to secure the workpiece firmly to a sturdy workbench. If you’re drilling into a wall, you obviously can’t clamp it, but ensure you have a stable stance. For ground-level work, kneel on a pad and use your body to stabilize the tool, not the block.
Mistake #7: Forgetting Basic Safety Gear
Power tools demand respect.
The Mistake: Thinking you can drill a “quick hole” without safety glasses, ear protection, or gloves. Concrete chips can fly, the drill is loud, and masonry is rough on hands.
The Fix: Make it a non-negotiable habit. Before you pull the trigger, put on:
- Safety Glasses: Full seal goggles are best to keep dust out of your eyes.
- Hearing Protection: Earmuffs or earplugs. Hammer drills are loud enough to cause hearing damage over time.
- Dust Mask/Respirator: Protect your lungs from silica dust.
- Gloves: Improve grip and protect from sharp edges and vibrations.
- Sturdy Shoes: Protect your feet from falling materials.
Troubleshooting Common Problems
Even when you avoid the big mistakes, small issues pop up. Here’s how to fix them.
The Drill Bit is Stuck
Cause: Dust packed in the hole, hitting rebar, or a wandering bit.
Fix: STOP. Switch the drill to reverse (if it has it) while gently wiggling the tool. Do not force it. If that fails, try to chip away some material around the bit with a small cold chisel and a hammer. Patience is key.
The Hole is Crooked or Oversized
Cause: Not starting correctly, applying uneven pressure, or using a worn-out bit.
Fix: For a new hole, restart with a better pilot dimple. Hold the drill perfectly perpendicular to the surface. Use a drill guide for critical holes. A worn bit will drill oversized holes—replace it.
The Drill is Overheating
Cause: Pushing too hard, using a dull bit, or drilling for too long without a break.
Fix: Let the drill cool down. Check the bit—is it sharp? Apply less pressure. For deep holes, use a pecking motion: drill for 10-15 seconds, pull out to clear dust, let the motor cool for 5 seconds, repeat.
Conclusion: Drill with Confidence
Starting with a hammer drill can feel daunting, but it doesn’t have to be. By understanding and avoiding these seven common beginner mistakes, you’re already ahead of the curve. Remember: match the mode to the material, use the right bit, let the tool work for you, start your hole cleanly, control dust, secure your workpiece, and never skip safety gear.
Your hammer drill is a gateway to more advanced DIY and home improvement projects. With these tips, you’ll handle it with the confidence of a seasoned pro. Now, grab your safety gear, charge up that best cordless drill, and make some holes! For your next project involving screws in walls, be sure to read our guide on how to use a drill for screws into a wall to round out your skills.
