
Hammer drill beginner mistakes can turn simple projects into expensive disasters. This guide reveals the seven most common errors DIYers make, from choosing wrong bits to ignoring safety. Master proper technique and avoid frustration with these essential tips.
Key Takeaways
- Wrong tool selection: Using a hammer drill when you need a regular drill (or impact driver) causes stripped screws and damaged materials.
- Mode confusion: Not understanding the difference between drill, hammer drill, and screwdriver modes leads to poor results.
- Bit blunders: Using wood or metal bits on concrete creates dangerous situations and ruins bits instantly.
- Technique errors: Forcing the tool or using wrong pressure causes crooked holes and motor burnout.
- Safety neglect: Skipping eye protection and dust masks risks serious injury from flying debris.
- Surface prep: Failing to mark and prepare surfaces results in cracked tiles and wandering drill bits.
- Speed sins: Using wrong RPM settings for different materials makes holes messy or breaks bits.
Introduction: Why Hammer Drill Beginner Mistakes Cost You Time and Money
So you bought your first hammer drill. You’re ready to tackle that bathroom remodel or hang heavy shelves. But within minutes, your bits are smoking, your holes are crooked, and your wall looks like a disaster zone. Sound familiar?
Hammer drill beginner mistakes are incredibly common. These powerful tools look simple but require specific knowledge to use correctly. Without it, you’ll damage materials, ruin bits, and even risk injury. The good news? Most mistakes are easy to avoid once you know what to watch for.
This guide walks you through the seven most costly errors beginners make. You’ll learn exactly what not to do and how to get professional-looking results on your very first project. Let’s save your walls, your wallet, and your sanity.
Mistake #1: Choosing a Hammer Drill When You Don’t Need One
This is the granddaddy of all hammer drill beginner mistakes. Many DIYers think “more power = better tool.” That’s simply not true. Using a hammer drill for tasks that don’t need it is like using a sledgehammer to swat a fly.
Visual guide about Hammer Drill Beginner Mistakes That Ruin Your Projects
Image source: langs.co.uk
Understanding When NOT to Use Hammer Mode
Hammer drills combine rotation with a rapid hammering action. This design punches through concrete and masonry. But that same action will destroy drywall, strip screws, and splinter wood. If you’re driving screws into wood or drilling small holes in metal, you need a regular drill or impact driver.
Before you start any project, ask yourself: Is this material concrete, brick, or block? If the answer is no, switch to a regular drill. For most woodworking and metal projects, a standard cordless drill works perfectly. Check out our guide on the difference between a hammer drill and regular drill to make the right choice every time.
The Screw Stripping Disaster
Here’s what happens when you use hammer mode on wood screws. The hammering action vibrates the screw as you drive it. This vibration loosens the threads from the wood fibers. The screw spins freely without biting. You end up with a stripped hole that won’t hold anything.
Worse yet, you might think the problem is your technique. So you push harder. This makes the hole bigger and destroys the wood around it. Now you need wood filler, plugs, or a complete do-over. All because you didn’t switch off hammer mode.
Material Damage You Can’t See
Hammer action creates micro-fractures in materials. These tiny cracks weaken structures over time. A shelf bracket might hold today but fail months later. Tiles can crack underneath the surface, leading to future leaks. Brick can spall and crumble.
These hidden damages are expensive to fix. They also create safety hazards. Don’t assume your hammer drill is always the right tool. Respect the material, and choose your tool mode wisely.
Mistake #2: Confusing Drill Modes Like a Beginner
Modern hammer drills have three settings: drill mode, hammer drill mode, and screwdriver mode. Beginners often leave the switch in the wrong position and wonder why nothing works right. This confusion causes more project failures than any other mistake.
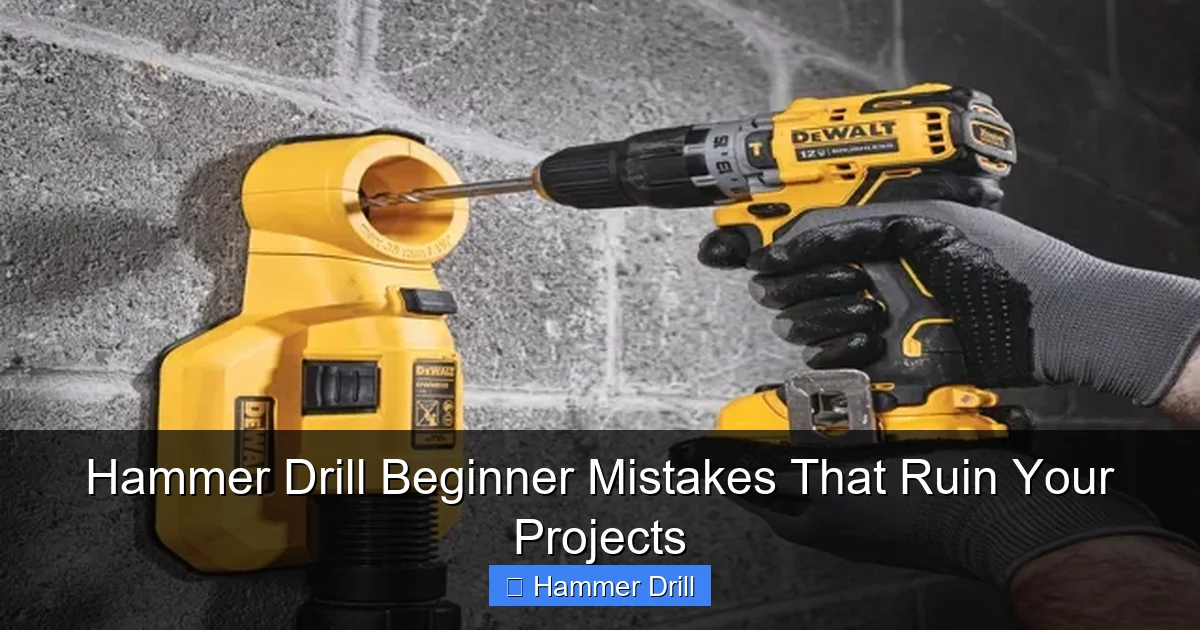
Visual guide about Hammer Drill Beginner Mistakes That Ruin Your Projects
Image source: ourhometools.com
The Three Modes Explained Simply
Drill Mode (No Hammer): Pure rotation. Use this for wood, metal, and plastic. It’s the standard setting for most tasks.
Hammer Drill Mode: Rotation plus hammering action. Only for concrete, brick, and stone. Never use this on wood or metal.
Screwdriver Mode: Rotation with adjustable torque. The clutch stops spinning when the screw is tight. Prevents stripping and overdriving.
Many beginners leave their drill in hammer mode all the time. They think it makes the tool more powerful. In reality, it just makes the tool wrong for 80% of tasks.
Mode Switch Mechanics
Always stop the drill completely before changing modes. Never switch modes while the trigger is pressed. The mode selector is a mechanical switch that can break if forced.
Most drills require you to push a button or slide a collar. You’ll usually feel a click when the mode engages. Test the switch by rotating the chuck with your hand. You should feel the difference between smooth rotation and hammering action.
Pro tip: Take a photo of your drill with the mode switch in each position. Save it to your phone. When you’re standing on a ladder, you won’t have to remember which symbol means what.
Impact Driver Confusion
Many beginners confuse hammer drills with impact drivers. They look similar but work completely differently. An impact driver uses concussive blows in a circular motion. It’s designed for driving long screws and bolts. A hammer drill hammers forward and is for drilling holes in masonry.
Using an impact driver to drill into concrete won’t work. The bit will spin but won’t penetrate. Using a hammer drill for deck screws will strip every hole. Know the difference. Our article on impact driver vs hammer drill clears up this confusion.
Mistake #3: Using the Wrong Drill Bits (And Ruining Them)
This mistake is expensive and dangerous. Beginners grab whatever bit is lying around. They use wood spade bits on concrete. They try masonry bits on metal. The results are predictable: broken bits, ruined workpieces, and sometimes injury.
Visual guide about Hammer Drill Beginner Mistakes That Ruin Your Projects
Image source: blacksmithu.com
The Bit Material Matters
Masonry bits are made from hardened steel with a carbide tip. This tip is what actually chips away concrete. Wood and metal bits are made from high-speed steel. It’s sharp but not hard enough for concrete. Using a wood bit on concrete will dull it instantly. The bit will turn red hot and snap.
Always look for the label on your drill bit. It should say “masonry” or “concrete.” The tip will have a distinct tungsten carbide plate you can see and feel. If you’re unsure, don’t guess. Buy the right bit. It’s cheaper than replacing your wall.
SDS vs Standard Chucks
Many hammer drills use SDS bits instead of standard chucks. SDS bits slide in and lock automatically. They’re designed for the high vibration of hammer drills. Standard bits can work but often slip or fly out. This is extremely dangerous.
If your drill has an SDS chuck, use SDS bits. Don’t try to adapt standard bits. The risk isn’t worth saving a few dollars. If you have a standard chuck hammer drill, make sure it’s tightened properly before each use.
Bit Size and Application
Using a bit that’s too large for your task is another common error. Large bits require more torque and can bind. When they bind, the drill can kick back violently. This is how beginners lose control and damage walls.
For holes larger than 1/2 inch, start with a smaller pilot hole. This guides the larger bit and prevents wandering. Also, make sure your bit is long enough to reach through the material plus the anchor you’re using. A bit that’s too short won’t give you proper depth.
Keeping Bits Sharp
Dull bits cause more problems than you think. They require more pressure, which leads to crooked holes. They overheat and break. They create excessive dust and vibration. Check your bits before each use. If the carbide tip looks rounded or chipped, replace it.
Many DIYers try to sharpen masonry bits themselves. Don’t. It’s nearly impossible to get the correct geometry. Buy new bits. They’re an investment in project success.
Mistake #4: Poor Technique That Creates Crooked Holes
Even with the right tool and bits, technique makes or breaks your project. Hammer drill beginners often push too hard, angle the drill wrong, or use inconsistent speed. These errors create holes that are crooked, oversized, or incomplete.
The Right Way to Hold a Hammer Drill
Hold the drill with both hands. Your dominant hand controls the trigger. Your other hand holds the auxiliary handle. This handle is crucial for controlling vibration and keeping the drill straight.
Stand with your feet shoulder-width apart. Brace your body like you’re firing a shotgun. Let the drill do the work. Don’t muscle it. Apply firm, steady pressure. Think “guiding” not “forcing.”
Keep the drill perpendicular to the surface. Use a level or square if you’re drilling multiple holes that need to align. A slight angle creates an oval hole that won’t hold anchors properly.
Starting the Hole Correctly
Beginners often pull the trigger to full speed before touching the wall. The bit spins in the air and dances across the surface. It leaves a nasty scratch and then wanders when it finally bites.
Always start at low speed. Touch the bit to the surface. Make a small dimple. Then increase speed gradually. This dimple keeps the bit from walking. For tile, use a center punch to create a starting point. This prevents the bit from sliding across the glossy surface.
Depth Control and Withdrawal
Drilling too deep is a common error. You hit the wall behind the drywall, damaging pipes or wires. Or you drill completely through concrete and ruin the bit on rebar.
Mark your bit with tape at the desired depth. This visual cue tells you when to stop. For through-holes, drill from one side until you break through. Then finish from the other side. This prevents blowout on the backside.
Withdraw the bit while it’s still spinning. This clears dust and prevents the bit from getting stuck. Don’t pull straight out. Wiggle it slightly to break the bond with the concrete dust.
Speed Settings for Different Materials
Hammer drills have variable speed triggers. Beginners either use full speed all the time or don’t understand how to modulate the trigger.
For concrete, use full speed. The hammering action needs high RPMs to be effective. For metal or wood (in regular drill mode), use slower speeds. High speed on metal creates heat and dulls bits fast. On wood, it can cause tear-out.
Practice your trigger control on scrap material. Learn how little pressure you need for different tasks. Good control prevents bit breakage and gives you cleaner holes.
Mistake #5: Skipping Safety Gear Like an Amateur
This isn’t just about looking cool. Hammer drill safety is serious business. Concrete dust is toxic. Flying chips can blind you. Vibration can damage your hands. Skipping protection is a mistake you might pay for with your health.
Eye Protection Is Non-Negotiable
Concrete and brick chips fly backward at high velocity. A single piece in your eye can cause permanent damage. Regular glasses don’t count. You need safety goggles that seal around your eyes.
Look for goggles marked ANSI Z87.1. This standard means they’re impact-rated. Make sure they have side shields. Better yet, get ones with a foam seal. This keeps dust out too.
Keep a spare pair in your toolbox. Fogged lenses are annoying. You’ll be tempted to take them off. Don’t. Have a backup pair ready.
Dust Mask or Respirator
Concrete dust contains crystalline silica. Breathing this causes silicosis, lung cancer, and other diseases. A simple dust mask from the hardware store won’t cut it. You need at least an N95 respirator.
For serious projects, upgrade to a half-face respirator with P100 filters. These capture 99.97% of particles. They’re more comfortable for long jobs and provide better protection.
Work upwind of the dust when possible. Use a fan to blow dust away from you. Consider a shop vac with a HEPA filter attached to the drill. Many drills have dust ports built in.
Hammer drills are loud. 85 decibels can damage hearing over time. Most hammer drills hit 90-100 dB. Wear earplugs or earmuffs. Better yet, wear both for maximum protection.
Vibration white finger is real. It’s caused by prolonged exposure to tool vibration. Wear anti-vibration gloves. They reduce the buzz and prevent numbness. Look for gloves with padded palms and good grip.
Wear close-fitting clothing. Loose sleeves can get caught in the chuck. Remove jewelry. Keep long hair tied back. These simple steps prevent accidents.
Mistake #6: Failing to Prepare Your Surface
Rushing into drilling without preparation ruins more projects than you think. A little prep time prevents big mistakes. It ensures clean holes and protects your materials.
Marking and Measuring
Measure twice, drill once. Use a tape measure and pencil to mark your hole location. Double-check measurements against your plans. For multiple holes, use a level to ensure they’re aligned.
Place a piece of masking tape over your mark. This prevents the pencil mark from disappearing into dust. It also reduces surface chipping. Mark the center of the tape.
For tile, use a grease pencil or permanent marker. The glaze makes pencil marks hard to see. Score the tile surface lightly with a utility knife. This gives the bit a starting point and prevents wandering.
Locating Studs and Obstacles
Drilling blindly is asking for trouble. You could hit electrical wires, plumbing pipes, or HVAC ducts. Use a stud finder with AC detection. These models detect live wires behind walls.
Mark stud locations with tape. Drilling into a stud gives you the strongest anchor point. Avoid drilling near the edges of studs. This can split the wood.
For concrete walls, check for rebar. Rebar is steel reinforcement that will destroy your bit. Use a rebar detector or magnet to find it. If you hit rebar, stop immediately. Reposition your hole at least 2 inches away.
Surface Protection
Protect finished surfaces from damage. Place a scrap piece of wood behind your drilling area. This catches any blowout and prevents marks on the wall behind.
For delicate surfaces like tile, start with a small drill bit. Make a pilot hole. Then step up to the full size. This prevents the tile from cracking under pressure.
Keep a vacuum handy. Clean dust as you go. Dust buildup reduces visibility and can cause the bit to slip. It also makes a mess you’ll have to clean up later.
Mistake #7: Forcing the Tool and Burning It Out
Hammer drills are tough, but they’re not indestructible. Pushing too hard or using the wrong speed can burn out the motor. Beginners often think more pressure means faster drilling. In reality, it means a dead tool.
Let the Tool Do the Work
Apply firm, steady pressure. Don’t lean into the drill like you’re arm-wrestling. Your body should be balanced, not straining. If the drill struggles, reduce pressure slightly. Check that you’re using the right mode and speed.
Listen to your drill. A high-pitched whine means you’re pushing too hard. A grinding sound means something is wrong. Stop immediately if you hear unusual noises.
For deep holes, drill in stages. Pull the bit out every few seconds to clear dust. This prevents overheating and reduces strain on the motor. Think of it like taking breaths while running.
Motor Care and Maintenance
Allow your drill to cool periodically. Continuous drilling for more than 2-3 minutes can overheat the motor. Give it a 30-second break. This extends the tool’s life significantly.
Keep the air vents clean. Dust buildup restricts airflow and causes overheating. Use compressed air to blow out vents after each use. Don’t use water or solvents.
Check the brushes on corded models. Worn brushes cause poor performance and can damage the motor. Replace them when they’re 1/4 inch long or less.
Extension Cord Issues
Using a cheap extension cord can starve your drill of power. This makes the motor work harder and burn out. Use a 12-gauge cord for drills over 10 amps. Keep cords as short as possible.
Check for loose connections. A poor connection creates resistance and heat. Uncoil extension cords fully. Kinks and coils reduce power and can cause fires.
For cordless models, keep batteries charged. Drilling with a low battery strains the motor. Store batteries at room temperature. Cold batteries deliver less power.
Troubleshooting Common Hammer Drill Problems
Even experienced users run into issues. Here are solutions to the most common hammer drill problems.
The Drill Won’t Hammer
If your hammer drill mode isn’t working, check the mode selector. It might not be fully engaged. Stop the drill and reselect the mode. You should feel a distinct click.
Grease and debris can build up in the hammer mechanism. Remove the chuck and clean the piston. Apply fresh grease. Don’t over-grease. Excess grease attracts dust and gums up the mechanism.
Bits Keep Slipping
Slipping bits mean the chuck isn’t tight enough. Turn off and unplug the drill. Open the chuck fully. Insert the bit and tighten it firmly. Many beginners hand-tighten only. Use the chuck key to secure it properly.
For SDS bits, make sure the shank is clean. Wipe it with a dry cloth before inserting. The ball bearings in the chuck need to seat properly in the grooves.
Excessive Vibration
Too much vibration means something’s wrong. Check that the bit is straight. A bent bit creates imbalance. Check for worn bearings. Listen for grinding or squealing sounds.
Make sure you’re not hitting rebar or a hard spot. The drill will vibrate more when it encounters unexpected material. Reposition your hole if necessary.
Poor Hole Quality
Chipping around the hole means you’re using too much pressure or the bit is dull. Reduce pressure. Use a sharper bit. For tile, use a diamond-tipped bit or start with a very slow speed.
Oval holes mean the drill isn’t perpendicular to the surface. Use a guide or level. Check that the auxiliary handle is tight. A loose handle lets the drill wobble.
Conclusion: Master Your Hammer Drill and Build Confidence
Hammer drill beginner mistakes don’t have to ruin your projects. The difference between disaster and success is simple: knowledge and preparation. Choose the right tool mode. Use proper bits. Practice good technique. Wear safety gear. Prepare your surface.
Take time to read your drill’s manual. Practice on scrap material before tackling your real project. Keep this guide handy as a reference. Review it before each job.
Remember, every expert was once a beginner. Your hammer drill is a powerful ally when used correctly. Respect it, maintain it, and it will serve you for years. Now go build something amazing.
Final Checklist Before You Drill
- Is hammer mode actually needed for this material?
- Am I using the correct masonry bits with carbide tips?
- Is my drill in the right mode and fully stopped before switching?
- Am I wearing safety goggles, respirator, and hearing protection?
- Have I located studs, wires, and pipes?
- Is my surface properly marked and protected?
- Am I holding the drill correctly with both hands?
- Have I let the drill reach full speed before applying pressure?
- Am I clearing dust regularly from deep holes?
- Is my extension cord adequate or battery fully charged?
