
Hammer drill chisels transform your power tool into a versatile demolition and carving machine. This guide covers everything from choosing the right chisel type to mastering techniques for concrete, tile, and masonry work. You’ll learn essential safety steps, troubleshooting tips, and maintenance routines to get professional results while protecting yourself and your tools. Whether you’re removing old tile or cutting through concrete, this comprehensive guide ensures you use your hammer drill chisel effectively and safely.
Key Takeaways
- Choose the right chisel type: Flat chisels for demolition, pointed for precision work, and spade chisels for large material removal.
- Safety is non-negotiable: Always wear eye protection, hearing protection, and dust masks when operating a hammer drill chisel.
- Match shank to tool: SDS-plus and SDS-max shanks fit most hammer drills while hex shanks work with adapters.
- Start slow: Use low speed and light pressure when beginning any chiseling project to maintain control.
- Angle matters: Hold the chisel at 45-60 degrees for optimal material removal and tool life.
- Regular maintenance: Clean and inspect chisels after each use to prevent damage and ensure longevity.
Your Complete Hammer Drill Chisel Guide and Usage Tips
So you’ve got a hammer drill and a chisel, but you’re not quite sure how to make them work together? You’re not alone. Many DIYers and even some professionals treat these powerful combinations like mysterious black boxes of destruction. But here’s the truth: using a hammer drill chisel is simpler than you think, and it opens up a world of possibilities for your projects.
In this guide, you’ll discover exactly how to select, install, and use hammer drill chisels for concrete, tile, masonry, and demolition work. We’ll walk through every step with clear instructions, safety warnings you actually need to hear, and pro tips that took us years to learn. By the end, you’ll be chiseling like a seasoned pro.
Understanding Hammer Drill Chisels: The Basics
Before we dive into techniques, let’s understand what makes this tool combination so special. A hammer drill chisel isn’t just a regular chisel you happen to attach to a drill. These are specifically designed cutting tools that work with the unique hammering action of your drill.
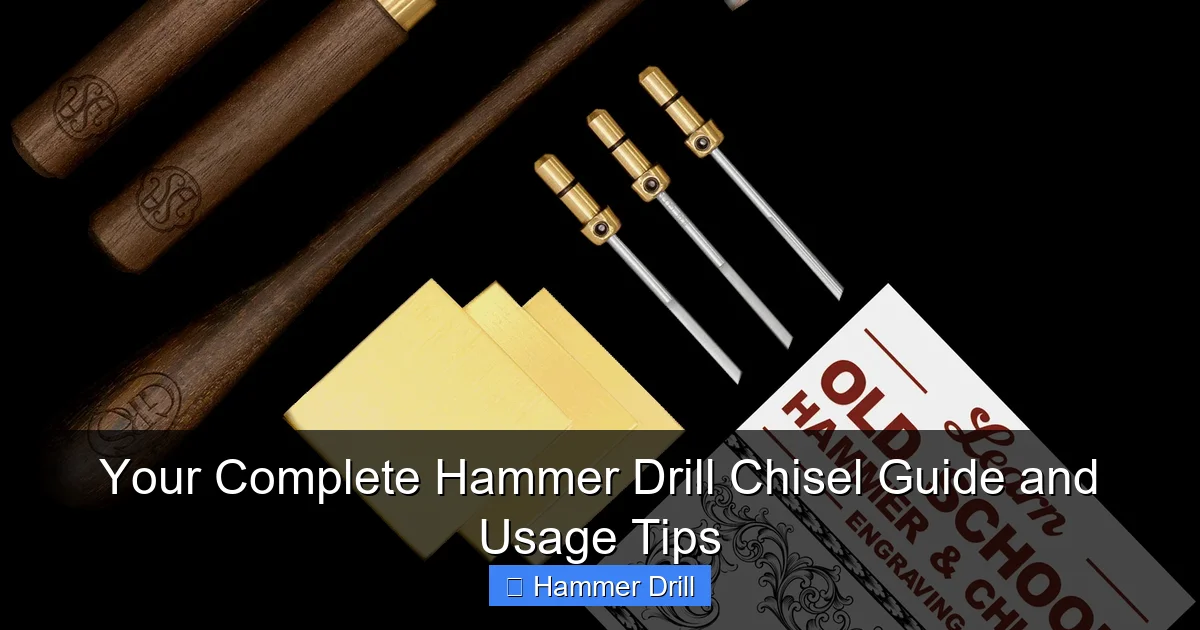
Visual guide about Your Complete Hammer Drill Chisel Guide and Usage Tips
Image source: grs.com
What Makes Hammer Drill Chisels Different
Standard wood chisels would shatter instantly in a hammer drill. The hammering mechanism delivers rapid, powerful blows that would destroy ordinary tool steel. Hammer drill chisels feature:
- Hardened steel construction: Made from high-quality alloy steel that can withstand thousands of impacts per minute
- Reinforced shanks: Specialized shanks that lock securely into hammer drill chucks
- Optimized tip geometry: Angles and edges designed specifically for masonry and concrete
If you’re new to power tools, you might wonder about the difference between a regular drill and a hammer drill. Check out our guide on the difference between a drill and a hammer drill to understand why this distinction matters for chiseling work.
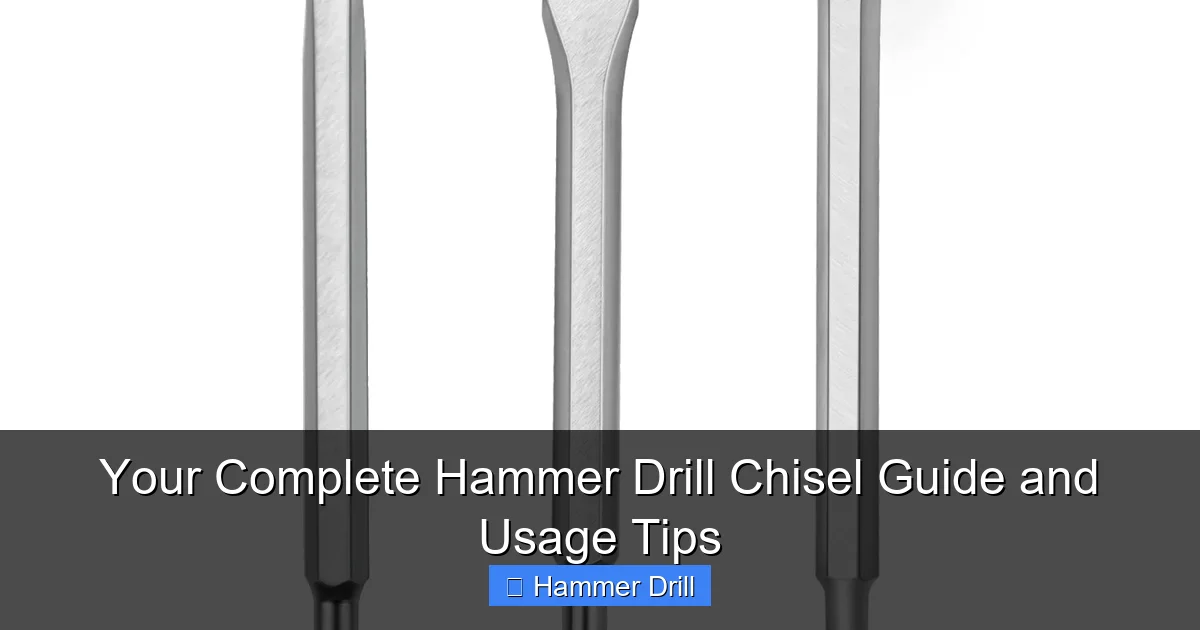
Types of Hammer Drill Chisels
Not all chisels are created equal. Using the wrong type can damage your material, your tool, or worse, cause injury. Here are the four main types you’ll encounter:
Flat Chisels: The workhorse of demolition. These feature a flat, wide tip perfect for breaking up concrete slabs, removing old tile, or chipping away masonry. The flat edge gives you control over the direction of the break.
Pointed Chisels: Think of these as precision instruments for heavier work. The pointed tip concentrates all that hammering force into a small area, making it ideal for drilling starter holes in concrete or breaking through tough materials.
Spade Chisels: These look like flat chisels but with a wider blade and a slight curve. They’re designed for rapid material removal, especially when creating channels for plumbing or electrical work in concrete walls.
Tile Chisels: Specifically designed with a wider, flatter blade to remove tile without damaging the underlying surface. The tip is often slightly beveled to help you get under stubborn tiles.
Choosing the Right Chisel for Your Project
Picking the correct chisel might seem obvious, but many projects require more nuance than you’d expect. Let’s break down exactly what to consider.

Visual guide about Your Complete Hammer Drill Chisel Guide and Usage Tips
Image source: cdn.auschoice.com
Match the Chisel to Your Material
For concrete walls and floors: Use a pointed chisel for breaking through or a flat chisel for surface removal. Start with a pointed chisel to create fracture lines, then switch to flat for larger material removal.
For tile removal: A tile chisel is your best friend. Its wide blade protects the subfloor. If you don’t have a tile-specific chisel, use a flat chisel but be extra careful with your angle.
For masonry work: Pointed chisels work best for shaping bricks or blocks. For cleaning out mortar joints, a narrower flat chisel gives you better precision.
For demolition: Spade chisels remove the most material fastest. Keep one handy for major renovation projects.
Shank Compatibility: The Critical Connection
This is where most beginners make mistakes. Not all chisels fit all hammer drills. The shank is the part that inserts into your drill’s chuck, and there are three main types:
SDS-Plus: The most common type for DIY and light professional use. These have two grooves and lock into place automatically. Most modern hammer drills accept SDS-plus chisels.
SDS-Max: Found on heavier professional hammer drills. These have three grooves and can handle more power. SDS-max chisels won’t fit SDS-plus drills and vice versa.
Hex Shanks: Some chisels come with 1/4″ or 3/8″ hex shanks that require an adapter. These are less common but work if you have the right adapter.
Always check your drill’s manual or look at the existing chuck to determine which shank type you need. Forcing the wrong size can damage both tools.
Length and Size Considerations
Chisel length affects both reach and control. For most DIY projects, a 6-10 inch chisel provides the best balance. Shorter chisels offer more control for precision work, while longer ones give you reach for deep cuts or breaking thick concrete.
When shopping for a new hammer drill, consider our best cordless drill recommendations to ensure you get a tool that can handle chisels effectively.
Essential Safety Precautions
Let’s be real: hammer drill chisels are dangerous tools. They turn solid concrete into dust in seconds. If you respect that power, you’ll stay safe. If you get complacent, you’ll get hurt.
Visual guide about Your Complete Hammer Drill Chisel Guide and Usage Tips
Image source: m.media-amazon.com
Personal Protective Equipment (PPE)
Never skip these items. Not ever.
Eye Protection: Flying chips of concrete or brick can blind you. Use safety glasses with side shields at minimum, but goggles are better for overhead work.
Hearing Protection: Hammer drills produce 90-100 decibels. That’s like a motorcycle engine right next to your ear. Use earplugs or earmuffs. Both is even better for extended use.
Respiratory Protection: Concrete dust contains silica, which can cause permanent lung damage. A basic N95 mask works for short projects, but for serious work, invest in a half-face respirator with P100 filters.
Hand Protection: Heavy-duty work gloves protect your hands from vibration and flying debris. Look for gloves with padded palms to reduce fatigue.
Foot Protection: Steel-toed boots protect your feet from falling debris. The vibration can also cause foot fatigue, so good boots with cushioning are worth the investment.
Work Area Preparation
Your environment matters just as much as your gear.
Clear the space: Remove everything that isn’t nailed down. Cover items you can’t move with heavy plastic sheeting. Hammer drill chisels throw debris surprisingly far.
Secure your workpiece: If you’re chiseling something that isn’t fixed in place, clamp it down. A loose piece can become a projectile.
Check for hidden hazards: Before you start, locate electrical wires, plumbing, and rebar. Use a stud finder with AC detection for walls. Hitting a live wire is extremely dangerous.
Ventilation: Work outdoors whenever possible. If you must work indoors, open doors and windows, and use fans to blow dust out. Consider setting up a HEPA air purifier.
Tool Safety Checks
Take two minutes to inspect everything before starting:
- Check the chisel for cracks or damage
- Ensure the shank is clean and free of debris
- Verify the drill’s chuck is tight and functioning
- Test the drill on a scrap piece first
- Make sure the power cord isn’t in the work area (or use GFCI protection)
Step-by-Step: Using a Hammer Drill Chisel
Now for the moment you’ve been waiting for. Let’s get that chisel installed and start working.
Preparing Your Tool and Workspace
Inserting the Chisel: First, unplug your drill or remove the battery. Press the chuck button and rotate the sleeve to open it. Insert the chisel shank fully into the chuck. You should feel it drop into place and lock. Give it a firm tug to make sure it’s secure. Many SDS chisels have a notch that aligns with a pin in the chuck—make sure these line up.
Adjusting Settings: Most hammer drills have multiple modes. For chiseling, you want the hammer drill mode (usually marked with a drill bit and hammer icon). Some drills have a dedicated “chisel” setting that locks the rotation while allowing hammering. If yours has this, use it. Otherwise, use the standard hammer drill mode.
Set your speed control to the lowest setting initially. You can increase speed as needed once you’re comfortable with the tool’s behavior.
Basic Chiseling Techniques
Starting a Cut: Position the chisel tip where you want to begin. Hold the drill firmly with both hands—one on the handle, one on the side grip. Keep your stance balanced with feet shoulder-width apart. Start with the chisel perpendicular to the surface, then tilt it to a 45-60 degree angle as you begin cutting. Apply light, steady pressure and let the tool do the work. Pressing too hard can overheat the motor and dull the chisel faster.
Maintaining Control: The hammering action creates significant vibration. Keep a firm but not death-grip hold on the tool. Let your arms absorb the shock rather than locking your elbows. If your wrists start to hurt, you’re probably gripping too tightly or working at the wrong angle.
Move the chisel in a controlled pattern. For straight lines, use your body to guide the tool rather than just moving your hands. For curves, pivot from your hips while keeping the chisel angle consistent.
Creating Straight Lines: Need a straight cut? Snap a chalk line or use a straightedge as a guide. For shallow cuts, hold the chisel nearly flat (10-15 degrees). For deeper cuts, increase the angle to 45-60 degrees. Make multiple shallow passes rather than trying to cut deep in one go. This prevents the chisel from binding and gives you cleaner results.
Advanced Techniques for Specific Tasks
Chiseling Concrete: Concrete is tough but brittle. Start by scoring the perimeter of the area you want to remove. Make a shallow cut around the entire section. Then work from the edges inward, gradually deepening your cuts. For thick concrete, create a grid pattern of cuts, then remove the sections between them. This technique prevents large, dangerous chunks from breaking off unexpectedly.
Keep the chisel moving. Holding it in one spot too long can cause the tip to overheat and dull prematurely. If you hit rebar, stop immediately. Trying to chisel through steel reinforcement will damage your chisel and possibly your drill.
Removing Tile: Tile removal is all about protecting the surface underneath. Start at a grout line and insert the tile chisel at a low angle (about 30 degrees). The goal is to get under the tile without gouging the subfloor or wall. Work systematically across the area, lifting tiles as you free them. For stubborn tiles, you may need to score the grout lines first with a manual tile cutter.
Be patient with tile removal. Rushing leads to damaged walls and extra work. If tiles are particularly stubborn, a heat gun can soften the adhesive slightly, making removal easier.
Breaking Through Walls: This is serious demolition work. Start by drilling pilot holes with a masonry bit to establish your cut lines. Then switch to the chisel and work from the center outward. Never start at the edges of a wall where structural integrity might be compromised. For safety, check if your wall contains electrical boxes or plumbing before starting.
When breaking through exterior walls, work from the inside out to avoid creating hazards outside. Have a helper hold a dust shield or plastic sheeting to contain debris.
Troubleshooting Common Issues
Even with perfect technique, problems happen. Here’s how to handle the most common issues.
Chisel Won’t Bite Into Material
If your chisel is just skating across the surface, several things could be wrong. First, check that you’re in hammer drill mode, not regular drill mode. The hammering action is essential for breaking up hard materials.
Next, examine the chisel tip. A rounded or dull tip won’t penetrate effectively. You can sharpen it with a bench grinder, but be careful not to overheat the steel. Some chisels are hardened and can’t be sharpened effectively—check your manufacturer’s guidelines.
Finally, you might be applying too much pressure. Paradoxically, this can prevent the hammering mechanism from working efficiently. Try backing off to light, consistent pressure and let the tool’s weight do the work.
Excessive Vibration
All hammer drills vibrate, but if it feels violent or unusual, stop immediately. Excessive vibration often means the chisel isn’t fully inserted or the shank is damaged. Remove and reinsert the chisel, making sure it locks properly.
Check for debris in the chuck. Concrete dust can build up and prevent proper seating. Clean the chuck with compressed air and a brush. Also inspect the chisel shank for burrs or damage that might prevent a smooth fit.
If the problem persists, the drill’s hammering mechanism might be damaged. This requires professional repair. Continuing to use a tool with excessive vibration can cause injury and further damage.
Chisel Keeps Slipping or Falling Out
This is a serious safety hazard. If your chisel won’t stay in, first verify you have the correct shank type for your drill. SDS-plus chisels in SDS-max chucks (or vice versa) won’t lock properly.
Check the chuck mechanism. Some chucks have a locking pin that must align with a notch in the shank. If this pin is broken or worn, the chisel won’t stay secure. You might need to replace the chuck.
Never tape or otherwise secure a chisel that won’t lock properly. This is a temporary fix that will fail at the worst possible moment. Replace worn components before continuing work.
Motor Overheating
If your drill starts smelling hot or the motor seems to struggle, stop immediately. Overheating can permanently damage your tool. Let it cool for 15-20 minutes before resuming work.
Overheating usually happens when you push the tool too hard. Using a dull chisel or applying excessive pressure forces the motor to work harder. Switch to a sharp chisel and use lighter, more consistent pressure.
Also check that you’re using the right speed setting. Higher speeds generate more heat. For most chiseling work, medium speed provides the best balance of power and cooling.
Maintenance and Care for Long Tool Life
Taking care of your hammer drill chisels extends their life and saves you money. It’s not complicated, but it does require consistency.
Cleaning After Each Use
Concrete and mortar are corrosive and will destroy chisels if left uncleaned. After each use, wipe down the chisel with a damp cloth to remove dust and debris. For stubborn buildup, use a wire brush.
Never use water directly on the drill’s chuck or motor. The moisture can cause rust and electrical issues. Instead, use compressed air to blow dust out of the chuck mechanism.
For the chisel tip, you can use a solvent like acetone to remove any adhesive residue. Dry thoroughly before storage to prevent rust.
Sharpening Techniques
Most hammer drill chisels can be sharpened, but it’s an art. Use a bench grinder with a medium-grit wheel. Hold the chisel at the same angle as the original bevel (usually 30-45 degrees). Dip frequently in water to prevent overheating, which can ruin the temper of the steel.
For field work where a grinder isn’t available, a hand file can work in a pinch. Use a mill bastard file and work in one direction only, maintaining consistent pressure. This takes longer but can restore a serviceable edge.
Remember: sharpening removes material. Each sharpening reduces the chisel’s lifespan. Replace chisels when they become too short or the tip becomes too narrow to be effective.
Proper Storage
Store chisels in a dry place with low humidity. A simple toolbox with silica gel packets works well. Keep them separated so they don’t knock against each other, which can damage the tips.
Consider a dedicated chisel roll or case. These protect the cutting edges and prevent accidental damage. For long-term storage, lightly coat the chisel in oil to prevent rust.
Your hammer drill needs care too. Store it in its case with the battery removed. Keep the chuck clean and lightly lubricated according to the manufacturer’s instructions.
Conclusion: Master Your Hammer Drill Chisel
Using a hammer drill chisel effectively comes down to three things: the right tool, proper technique, and respect for safety. You now know how to select the perfect chisel for any material, install it correctly, and use it with confidence. You understand the safety gear you absolutely must wear and the maintenance that keeps your tools performing.
Start with simple projects to build your skills. Practice on scrap concrete or old bricks before tackling your main project. Each material behaves differently, and experience is the best teacher.
Remember that hammer drills and impact drivers serve different purposes, and choosing the right tool matters. Your hammer drill chisel setup is perfect for masonry, demolition, and renovation work that would be impossible with standard tools.
Keep this guide handy for reference. Bookmark it on your phone so you can check techniques and safety reminders when you’re in the middle of a project. With practice and patience, you’ll be amazed at what you can accomplish with this powerful combination.
Now get out there and start chiseling safely!
🎥 Related Video: Rotary Hammer Curved Chisel Bit Demo 2021- Does it work ?
📺 DIYFans
Get Yours Curved Chisel Bit Now: https://bit.ly/3EzFTAA This multifunctional chisel bit features a premium steel, heavy-duty power …
