
Hammer drill durability depends on proper usage, regular maintenance, and smart storage habits. This guide reveals proven strategies to prevent common damage, optimize performance, and add years to your tool’s lifespan. You’ll learn everything from bit selection to troubleshooting, ensuring your hammer drill remains reliable for every tough concrete and masonry job.
Key Takeaways
- Use the right bits and settings: Always match carbide-tipped bits to masonry work and engage hammer mode only when needed to prevent unnecessary wear.
- Clean air vents weekly: Dust buildup causes overheating and motor failure, so compressed air cleaning is essential for durability.
- Apply steady, moderate pressure: Let the tool do the work; excessive force damages the hammer mechanism and motor.
- Store in a dry, temperature-controlled space: Moisture and extreme temperatures corrode internal components and degrade lubricants.
- Replace carbon brushes proactively: Worn brushes cause motor damage; check them every 50 hours of use.
- Use a side handle for control: Proper grip reduces vibration exposure and prevents accidental drops that crack housings.
- Allow cooling breaks during heavy use: Run the tool for no more than 15 minutes continuously to prevent thermal shutdown and winding damage.
Introduction: Why Hammer Drill Durability Matters
Your hammer drill represents a significant investment in your toolbox. Whether you’re a DIY enthusiast tackling weekend projects or a professional contractor relying on your gear daily, hammer drill durability directly impacts your productivity and budget. A well-maintained hammer drill can last 8-10 years or longer, while neglected tools often fail within 2-3 years.
This comprehensive guide teaches you practical, actionable strategies to extend your hammer drill’s lifespan. You’ll discover the right techniques for using, cleaning, storing, and maintaining your tool. We’ll cover everything from basic operation mistakes that cause premature wear to advanced troubleshooting that saves you repair costs. By following these tips, you’ll maximize performance, reduce downtime, and protect your investment.
Understanding Your Hammer Drill’s Mechanics
Before diving into durability tips, you need to understand what makes your hammer drill tick. This knowledge helps you recognize early warning signs and use the tool correctly.
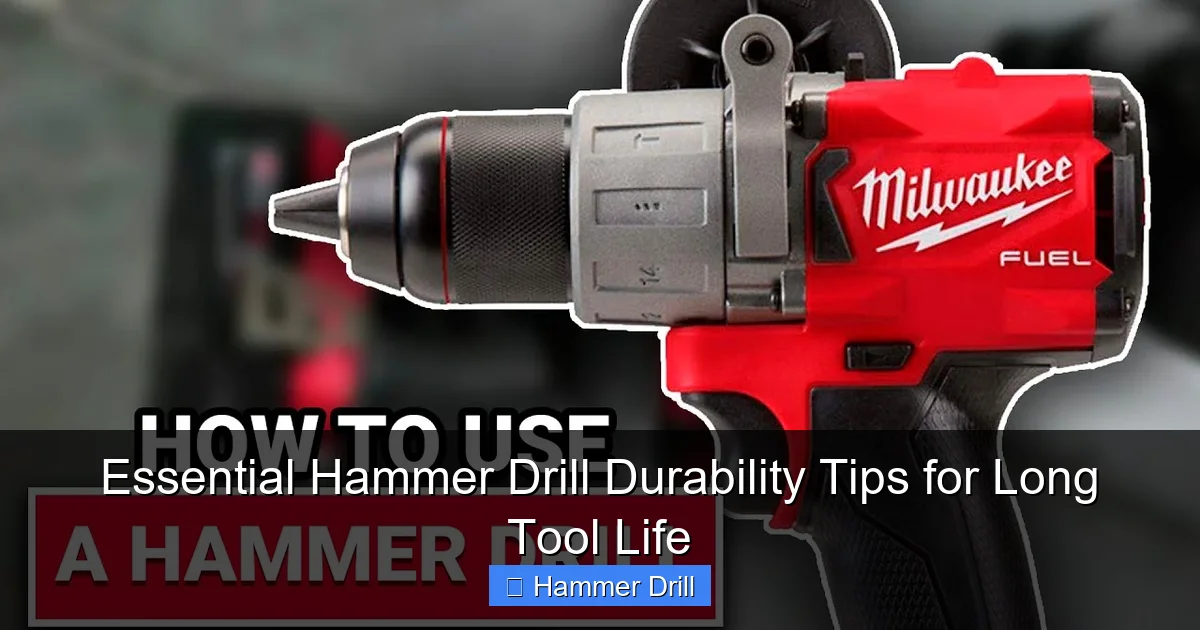
Visual guide about Essential Hammer Drill Durability Tips for Long Tool Life
Image source: i.ytimg.com
The Hammer Mechanism Explained
Hammer drills combine rotational force with a rapid hammering action. The hammer mechanism uses two cam plates that click together and apart at high speeds. This creates the pounding motion that breaks through concrete and masonry. This mechanical action creates significant internal stress, which is why proper technique matters so much for hammer drill durability.
Understanding the difference between a regular drill and hammer drill helps you appreciate why these tools need special care. The hammer mechanism adds complexity that requires specific maintenance routines you won’t need with standard drills.
Key Components That Affect Longevity
Several critical components determine your hammer drill’s lifespan:
- Motor: The heart of your tool, vulnerable to overheating and carbon brush wear
- Gearbox: Transfers power and endures tremendous stress during hammer mode
- Chuck: Grips bits securely; misalignment causes wobbling and damage
- Seals and bearings: Keep dust out and lubrication in
- Electrical components: Switches, cords, and brushes that wear over time
Each component needs specific care. For example, the motor’s carbon brushes typically last 50-100 hours before needing replacement. Ignoring this simple maintenance leads to expensive armature damage.
Proper Usage Techniques for Maximum Durability
How you use your hammer drill has the biggest impact on its lifespan. Many durability problems stem from operator error rather than manufacturing defects.
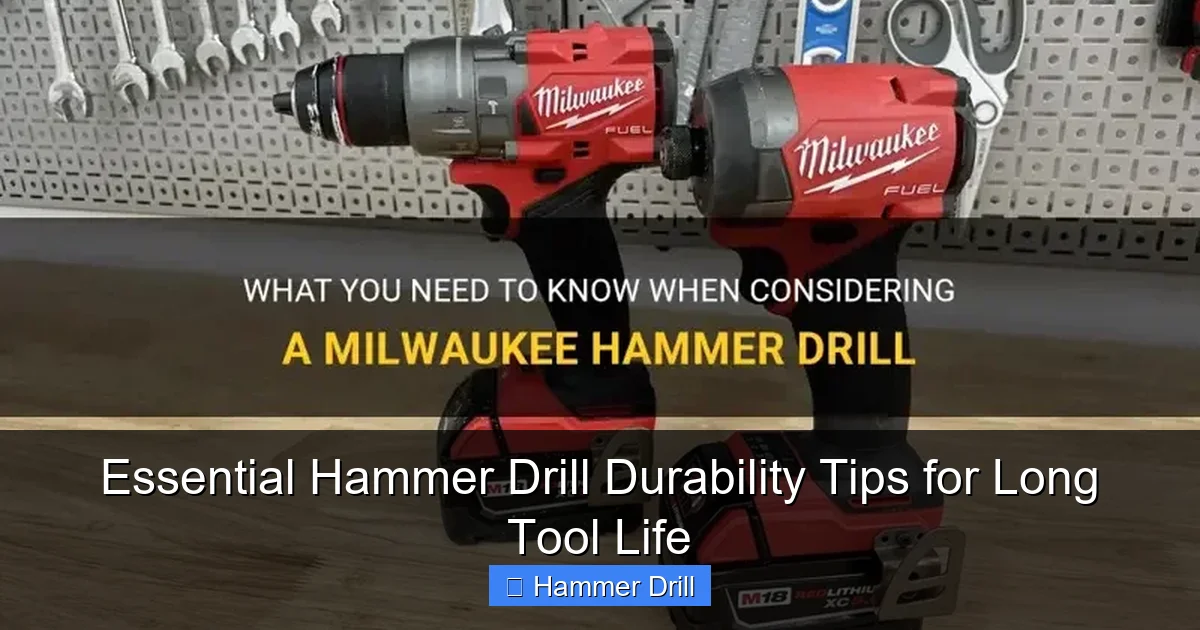
Visual guide about Essential Hammer Drill Durability Tips for Long Tool Life
Image source: shuntool.com
Choosing the Right Bits and Settings
Always use carbide-tipped masonry bits designed for hammer action. Standard drill bits will shatter under hammer mode, sending metal fragments into your tool’s mechanism. Before starting any project, confirm your bit’s diameter matches the job requirements.
Select the correct mode for your material. Use standard drill mode for wood and metal. Switch to hammer drill mode only for concrete, brick, or stone. Running hammer mode unnecessarily creates excessive wear on the cam mechanism and motor. If you’re unsure whether you need hammer mode, check our guide on difference between a drill and a hammer drill for clarification.
Set your speed appropriately. Lower speeds (300-600 RPM) work best for large holes in hard materials. Higher speeds suit smaller bits and softer materials. Using the wrong speed strains the motor and reduces bit life.
Applying Correct Pressure and Technique
Let the hammer drill do the work. Apply steady, moderate pressure—no more than 15-20 pounds of force. Excessive pressure binds the bit, overheats the motor, and damages the hammer mechanism. Think of it like driving a car: you don’t push the gas pedal to the floor constantly.
Keep the bit perpendicular to your work surface. Angled drilling causes bit deflection, which wobbles the chuck and damages bearings. Use both hands: one on the main handle and one on the side handle. This grip gives you control and reduces vibration transfer to your wrists.
Clear dust frequently when drilling deep holes. Retract the bit every 10-15 seconds to blow out debris. This prevents the bit from binding and reduces heat buildup in the hole. A bound bit suddenly grabs and can twist your wrist or damage the gearbox.
Managing Heat and Runtime
Heat is your hammer drill’s worst enemy. Never run the tool continuously for more than 15 minutes under heavy load. After 15 minutes, let it cool for 5-10 minutes. This prevents thermal overload and protects the motor windings.
Watch for signs of overheating: a hot smell, reduced power, or the tool shutting off automatically. These indicate your motor’s thermal protection has activated. Continuing to use an overheated drill will permanently damage the armature.
Work in cooler environments when possible. High ambient temperatures reduce cooling efficiency. If you must work in hot conditions, increase your cooling breaks to every 10 minutes.
Essential Maintenance Routines
Regular maintenance prevents 80% of hammer drill failures. These routines take just minutes but add years to your tool’s life.
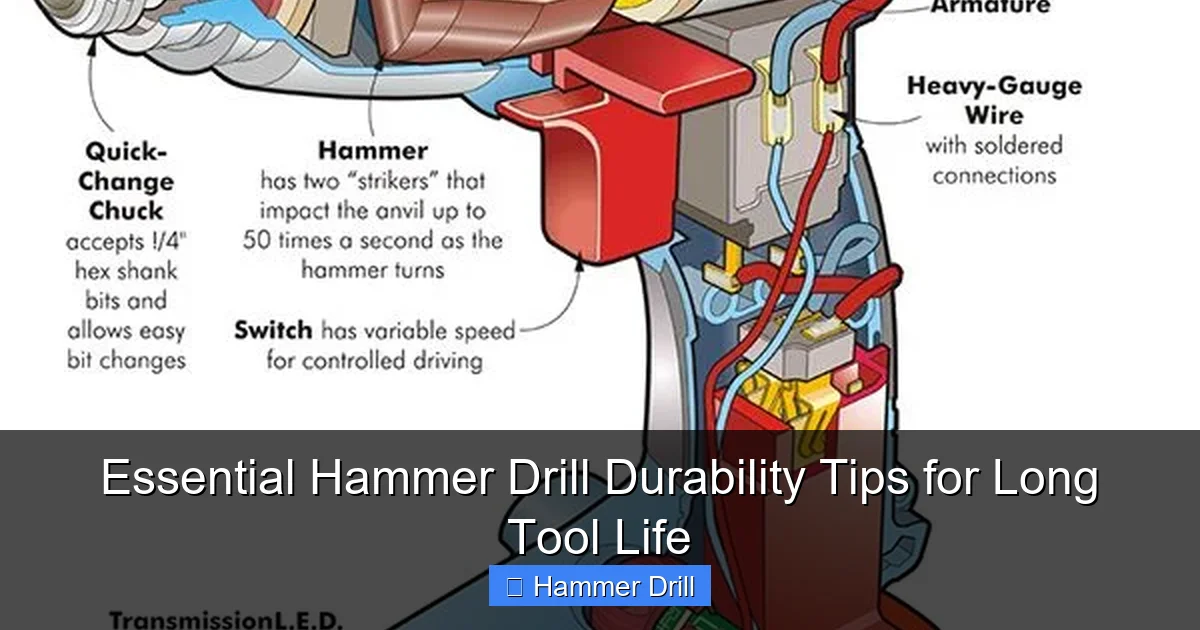
Visual guide about Essential Hammer Drill Durability Tips for Long Tool Life
Image source: i.pinimg.com
Daily Cleaning After Use
Wipe down the housing with a dry microfiber cloth immediately after use. Pay special attention to the chuck and air vents. This removes surface dust that can work its way into seals.
Clean the chuck thoroughly. Open it fully, then use a small brush to remove debris from the jaws and internal threads. Apply a light coat of chuck lubricant every month if you use the tool frequently. A dirty chuck doesn’t grip bits properly, causing slippage and damage.
Blow out air vents with compressed air. Hold the can upright and use short bursts. Never use compressed air directly on the chuck or seals, as this can force dust deeper into the tool. Air vent cleaning prevents overheating and is the single most effective maintenance task for hammer drill durability.
Weekly Deep Cleaning Tasks
Inspect the power cord for cuts, kinks, or exposed wires. Damaged cords are fire hazards and indicate the tool needs servicing. Check the plug for loose prongs or discoloration.
Examine the side handle for cracks or loose fittings. A broken side handle makes the tool unsafe and increases vibration damage. Tighten any loose screws on handles, motor housing, or gearbox.
Test the trigger switch for smooth operation. A sticky trigger can cause the tool to run unexpectedly or not respond properly. If the trigger feels rough, have it serviced immediately.
Monthly Professional Maintenance
Check carbon brush wear monthly if you use your hammer drill regularly. Most tools have brush caps on the motor housing. Remove them and measure the brush length. Replace brushes when they’re shorter than 1/4 inch. Worn brushes cause arcing that ruins the motor commutator.
Lubricate the chuck threads and keyless mechanism. Use a light machine oil, not WD-40. Apply one drop to each jaw area and work the chuck open and closed several times to distribute the oil.
Inspect the hammer mechanism through the chuck hole using a flashlight. Look for metal shavings or unusual wear patterns. Metal debris indicates internal damage that needs professional attention before it becomes catastrophic.
Storage Best Practices
Proper storage protects your hammer drill from environmental damage that occurs even when the tool isn’t running.
Choosing the Right Storage Location
Store your hammer drill in a dry, temperature-controlled space. Basements and garages often have humidity and temperature swings that corrode metal parts and degrade lubricants. Ideal storage temperature is 50-75°F with humidity below 50%.
Keep the tool off concrete floors. Concrete wicks moisture upward. Use a shelf or tool chest instead. If you must store on the floor, place a rubber mat underneath to block moisture.
Avoid storing near chemicals, solvents, or fertilizers. These fumes corrode electrical components and metal parts even through sealed housings.
Preparing Your Tool for Storage
Clean the tool thoroughly before storing it. Never put away a dirty hammer drill. Residual dust and debris will harden and become difficult to remove later. It can also absorb moisture and cause rust.
Remove the battery if you have a cordless model. Store batteries separately in a cool, dry place. Partially charged batteries (around 50%) store best. Never store batteries fully charged or completely dead.
Apply a light coat of corrosion inhibitor to exposed metal parts. This includes the chuck, bit shanks, and any unpainted metal surfaces. Wipe off excess with a clean cloth.
Using Proper Storage Containers
Use the original case whenever possible. These cases are designed with custom foam that holds the tool securely and prevents movement during transport. If you’ve lost the original case, invest in a quality hard-sided tool case with foam inserts.
Never store your hammer drill with bits still in the chuck. The bit can shift and damage the chuck mechanism. It also creates a safety hazard when retrieving the tool.
Include silica gel desiccant packs in your storage case. These absorb moisture and prevent rust during long-term storage. Replace them every 6 months or when they change color.
Common Mistakes That Damage Hammer Drills
Avoiding these errors will dramatically improve your hammer drill durability. Many users unknowingly cause damage through simple oversights.
Using the Wrong Mode for the Material
Running hammer mode on wood or metal is a common mistake. The hammer action serves no purpose on these materials and only stresses the mechanism unnecessarily. It also ruins the hole quality and can splinter wood.
Similarly, using standard drill mode on concrete will overheat your bit and motor quickly. The bit will dull instantly, and the motor will labor under impossible resistance. Always double-check your mode selector before pulling the trigger.
Ignoring Bit Wear and Damage
Using dull bits forces the motor to work harder. Dull carbide tips can’t cut effectively, so the hammer action just pounds the material without progress. This creates excessive heat and vibration that damages internal components.
Never use bent or damaged bits. A bent bit wobbles violently in the chuck, destroying the chuck’s precision and damaging bearings. Inspect bits before each use and replace any that show wear, damage, or dull edges.
Skipping Maintenance Due to Time Constraints
“I’ll clean it later” becomes never. Dust accumulation happens quickly, and once it hardens, it’s much harder to remove. Make cleaning part of your post-project routine, like putting tools away.
Many users only service their tools when they break. This reactive approach costs more in the long run. Preventive maintenance is always cheaper than repairs. Think of it like oil changes for your car—skip them and you’ll face engine failure.
Operating in Extreme Conditions
Using your hammer drill in freezing temperatures makes lubricants thick and reduces battery performance. In extreme heat, motors overheat faster. Avoid operating in temperatures below 32°F or above 100°F when possible.
Working in wet conditions is dangerous and damaging. Water entering the tool causes immediate short circuits and long-term corrosion. Never use a hammer drill in the rain or on wet concrete. If you must work in damp conditions, use ground fault protection and keep the tool elevated.
Troubleshooting Common Durability Issues
Recognizing problems early prevents minor issues from becoming major failures. Here’s how to identify and address common hammer drill problems.
Overheating and Thermal Shutdown
If your hammer drill shuts off during use, it’s likely overheating. First, check the air vents for blockage. Clean them thoroughly with compressed air. If vents are clear, you may be using too much pressure or running too long without breaks.
Listen for unusual noises when the tool restarts. A grinding or whining sound suggests bearing damage from overheating. Have the tool serviced immediately if you hear these noises.
Consider your power source. Underpowered batteries or extension cords cause the motor to work harder, generating excess heat. Use the correct gauge extension cord (14-gauge minimum for 15-amp tools) and fully charged batteries.
Loss of Hammer Action
If your hammer drill stops hammering but still rotates, the hammer mechanism may be jammed with debris. Turn off the tool and remove the chuck. Clean out any dust or metal shavings from the hammer mechanism area.
Worn hammer pads can also cause this issue. These rubber pads wear down over time and need replacement. Inspect them through the chuck opening or during servicing. Replacing hammer pads is a simple, inexpensive fix that restores full functionality.
Check your mode selector switch. If it’s not fully engaging hammer mode, the mechanism won’t activate. Wiggle the switch slightly while turning it to ensure it clicks into position.
Excessive Vibration and Chuck Wobble
Wobble indicates bearing wear or a damaged chuck. First, remove the bit and inspect the chuck for cracks or excessive play. Tighten the chuck onto a hex key and check for wobble by moving it side to side.
If the chuck wobbles, replace it immediately. A wobbling chuck damages bits quickly and can cause injury. Most chucks are held by a single screw and are easy to replace with basic tools.
Excessive vibration can also mean your bit isn’t seated properly. Ensure the bit is fully inserted and tightened. Use the correct bit size for your chuck capacity to avoid slippage.
Electrical Problems and Trigger Failure
If the trigger feels sticky or doesn’t respond smoothly, stop using the tool. Electrical problems can cause the drill to run unexpectedly, creating a serious safety hazard. Have the switch assembly inspected and replaced by a qualified technician.
For cordless models, battery issues often mimic trigger problems. If the tool hesitates or lacks power, try a different battery. If a fresh battery solves the problem, your original battery may have reached its end of life.
Flickering LED lights (if equipped) indicate loose wiring or a failing motor. Unplug the tool immediately and have it serviced. Continuing to use a tool with electrical issues risks shock or fire.
When to Replace vs. Repair
Eventually, every tool reaches the end of its service life. Knowing when to repair versus replace saves you money and frustration.
Assessing Repair Costs
As a general rule, if repair costs exceed 50% of a new comparable model, replacement makes more sense. For a $150 hammer drill, don’t spend more than $75 on repairs. However, if you have a high-end professional model costing $400+, investing $150 in repairs may be worthwhile.
Consider the tool’s age. If your hammer drill is already 7-8 years old, major repairs may not be cost-effective. Technology improves, and newer models offer better efficiency and safety features.
Evaluate the failure type. Worn brushes, chucks, and hammer pads are inexpensive repairs. Motor or gearbox failures are expensive and often indicate the tool has reached its end of life.
Signs Your Hammer Drill Has Reached End of Life
Multiple component failures signal it’s time to replace. If you’re experiencing simultaneous problems—overheating, excessive vibration, and electrical issues—the tool is likely beyond economical repair.
Unusual burning smells that persist after cooling indicate internal insulation breakdown. This is a fire hazard and requires immediate replacement.
When replacement parts become unavailable, the tool is effectively obsolete. Most manufacturers stop supporting tools after 10-12 years. Check parts availability before committing to repairs.
Choosing Your Next Hammer Drill
When replacing, consider investing in a brushless motor model. These last 30-50% longer than brushed models because they eliminate the carbon brush wear point. They’re more expensive upfront but offer better hammer drill durability long-term.
Look for models with metal gearboxes instead of plastic. Metal gears withstand heat and stress better, extending the tool’s lifespan. Also, choose tools with sealed switches and bearings to keep dust out.
Consider your power source carefully. Corded models offer unlimited runtime but limit mobility. Cordless models provide convenience but need battery management. If choosing cordless, invest in extra batteries to rotate them and extend their collective life.
Conclusion: Building a Long-Term Care Routine
Hammer drill durability doesn’t happen by accident. It results from consistent, intentional care that becomes second nature. Create a simple routine: clean after every use, inspect weekly, service monthly, and store properly. These habits add up to years of reliable performance.
Remember that your hammer drill is a precision tool, not a demolition hammer. Treat it with respect, use it correctly, and it will serve you faithfully for a decade or more. The small time investment in maintenance pays huge dividends in avoided repairs and replacement costs.
Start implementing these tips today. Your future self will thank you when your hammer drill still performs like new years from now. For more tool guidance, explore our resources on cordless drill maintenance and proper drilling techniques to expand your knowledge.
