
This guide demystifies the hammer drill’s hammer mode. You’ll learn exactly when and how to use it for tough materials like concrete and brick. We cover tool setup, step-by-step drilling technique, and crucial safety tips to transform your masonry projects from daunting to doable.
Key Takeaways
- Hammer Mode is for Masonry: Only use the hammer function when drilling into brittle materials like concrete, brick, or stone. Using it on wood or metal will damage your tool, bit, and workpiece.
- Use the Right Bit: Always pair hammer mode with carbide-tipped masonry bits. Standard twist bits will be destroyed instantly.
- Start in Drill-Only Mode: Begin drilling a pilot hole without the hammer action to prevent the bit from “walking” and ensure precise hole placement.
- Let the Tool Do the Work: Apply firm, steady pressure, but don’t lean on the drill. Excessive force can overheat the motor and dull the bit prematurely.
- Manage Dust and Heat: Regularly pull the bit out to clear dust from the hole. This prevents binding and allows the bit to stay cool for more efficient drilling.
- Know Your Drill’s Limits: For large or deep holes, work in stages with progressively larger bits. This reduces strain on your hammer drill and yields cleaner results.
- Safety is Non-Negotiable: Always wear safety glasses, a dust mask, and hearing protection. Secure your workpiece and be mindful of hidden wires and pipes.
Ultimate Hammer Drill Hammer Mode Guide for Home Projects
So, you have a hammer drill. That’s awesome. Maybe you got it for a specific project, or perhaps it came in a combo kit. You see that little hammer icon on the collar and wonder, “When do I use that?” You’re not alone. The hammer mode is a powerful feature, but it’s often misunderstood and misused.
This guide is here to change that. We’re going to break down everything you need to know about your hammer drill’s secret weapon. You’ll learn what hammer mode actually does, when to flip that switch, and the step-by-step process to drill clean, precise holes in tough materials like concrete and brick. Whether you’re installing a shelf, mounting a TV, or building a patio, mastering hammer mode will give you the confidence to tackle those projects head-on.
What is Hammer Mode and When Should You Use It?
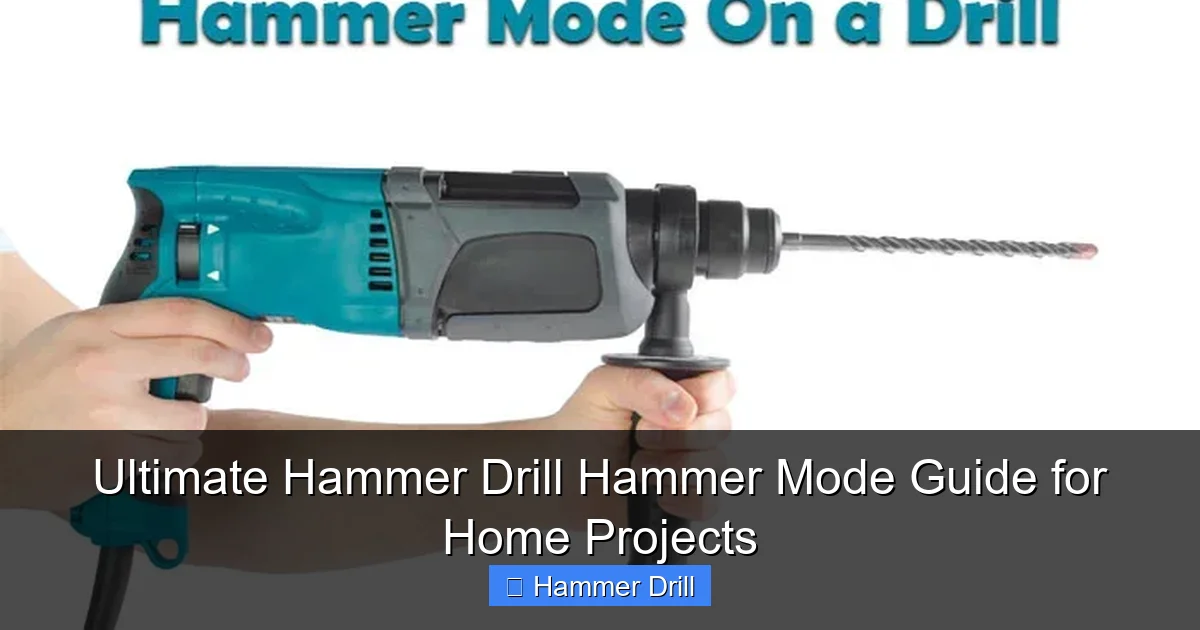
First, let’s clear up a common confusion. A hammer drill is not the same as an impact driver or a regular drill. An impact driver delivers rotational impacts to drive screws, while a hammer drill delivers rapid, pounding impacts forward, along with rotation, to pulverize tough material. If you’re still unsure about the tool in your hand, our article on the difference between a drill and a hammer drill explains it in detail.
Visual guide about Ultimate Hammer Drill Hammer Mode Guide for Home Projects
Image source: toolsadvisers.com
Hammer mode is designed for one family of materials: masonry. This includes:
- Concrete (blocks, poured walls, slabs)
- Brick (common, face, fire)
- Stone (natural, manufactured)
- Mortar (the cement-based filler between bricks or blocks)
These materials are hard and brittle. A standard drill bit just spins and grinds against them, getting hot and dull fast. The hammer action changes the game. As the bit rotates, a mechanical mechanism inside the drill slams it forward thousands of times per minute. This tiny, rapid chiseling action breaks up the material at the tip, while the rotation clears the debris. It’s a one-two punch that gets the job done.
When NOT to use hammer mode: Never use it on wood, metal, plastic, or drywall. The hammering action will shred the material, create a ragged hole, and can seriously damage your drill bit. For those materials, you need a regular drilling or driving action. If your main tasks involve screws, check out our comprehensive guide on using a drill for screws into a wall.
Getting Started: Tool and Workspace Prep
Success with a hammer drill starts long before you pull the trigger. Proper preparation prevents poor performance (and broken tools).
Visual guide about Ultimate Hammer Drill Hammer Mode Guide for Home Projects
Image source: industrialtoolsinfo.com
Step 1: Choose the Right Tool and Bit
Not all hammer drills are created equal. For small, infrequent jobs (like hanging a picture frame in a brick wall), a cordless combi-drill with a hammer function may suffice. For drilling multiple holes or into thick concrete, a dedicated corded hammer drill or a high-torque cordless model is better. Need a recommendation? Our guide to the best cordless drill includes top hammer drill picks.
The bit is non-negotiable: You must use a carbide-tipped masonry bit. These bits have a specially designed tip (often with a flat or spade-like shape) that can withstand the pounding. Using a standard high-speed steel (HSS) bit will ruin it in seconds.
- Bit Size: Match the bit to the size of your wall plug or anchor. The bit should be the same diameter.
- Bit Length: Choose a bit at least 1/2 inch longer than the depth of the hole you need.
Step 2: Personal Protective Equipment (PPE)
Drilling masonry is messy and loud. Protect yourself.
- Safety Glasses/Goggles: Concrete dust and flying chips are a major eye hazard. This is the most important piece of PPE.
- Dust Mask/Respirator: Silica dust from concrete and masonry is harmful to your lungs. A simple dust mask is good; a respirator is better for extended work.
- Hearing Protection: Hammer drills are loud. Use earplugs or earmuffs.
- Gloves: Improve grip and protect your hands from vibration and heat.
Step 3: Prepare Your Workspace
- Secure the Workpiece: Make sure what you’re drilling into is stable. A wobbly concrete block is dangerous.
- Clear the Area: Move anything you don’t want covered in fine, abrasive dust.
- Check for Hazards: Use a stud/multi-scanner to check for electrical wires, plumbing, or rebar behind the surface. Drilling into a live wire or a water pipe is a disaster.
- Plan for Access: If you’re drilling overhead or in a high place, ensure you have a safe, stable platform. For tasks like gutter work, knowing what type of ladder is best is crucial, and you should always follow ladder inspection and safety guidelines.
The Step-by-Step Guide to Using Hammer Mode
Now for the main event. Follow these steps precisely for safe, effective drilling.
Visual guide about Ultimate Hammer Drill Hammer Mode Guide for Home Projects
Image source: shuntool.com
Step 1: Insert the Masonry Bit
Make sure the drill is unplugged or the battery is removed. Open the chuck, insert the bit shank fully, and tighten it securely by hand. For a keyless chuck, grip the collar and twist until it’s very tight. A loose bit will spin inside the chuck, damaging both.
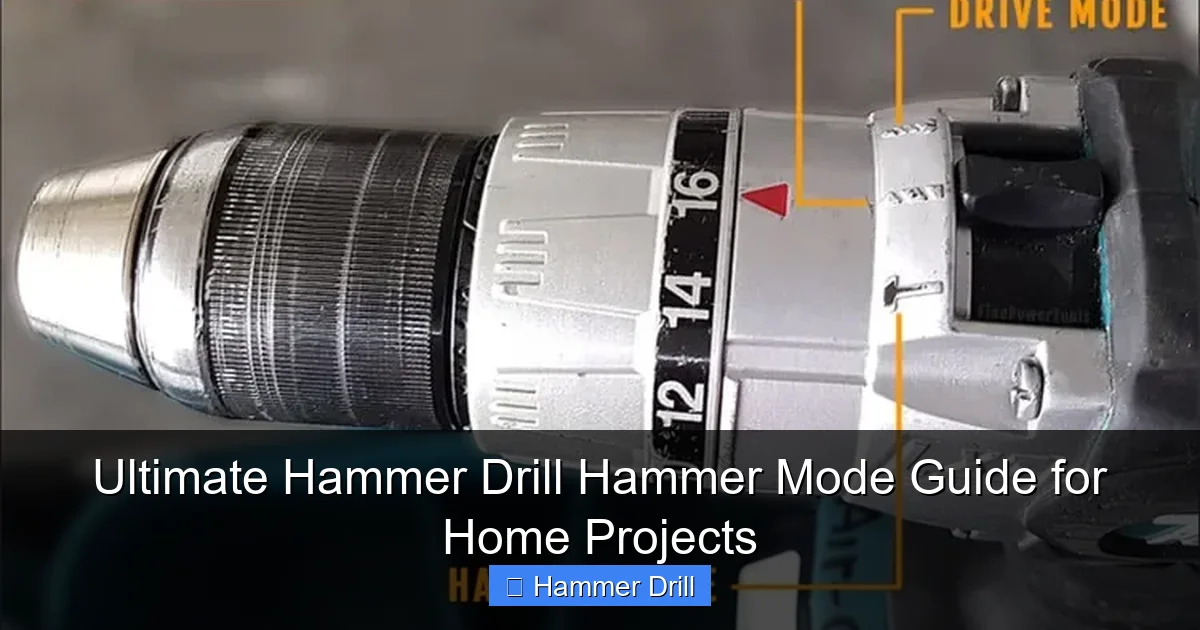
Step 2: Set the Drill to the Correct Mode
Locate the mode selector collar near the chuck. It will have symbols:
A drill bit icon = Drill-only mode (for wood/metal).
A hammer icon = Hammer mode.
Sometimes a combination icon = Hammer mode.
Rotate the collar so the hammer icon aligns with the indicator mark. You should feel or hear a firm click.
Step 3: Mark Your Hole and Set Depth
Use a pencil or marker to make a clear “X” where you want the hole. For precision, you can use a center punch to make a small dent to keep the bit from wandering. If your drill has a depth stop rod, set it to the desired depth. This prevents you from drilling too far.
Step 4: Start Drilling (The Crucial Technique)
- Begin in Drill-Only Mode (Optional but Recommended): Some pros start by switching the drill to standard drill mode (no hammer) and running it at medium speed to create a shallow, precise pilot dimple. This prevents the hammer action from causing the bit to “walk” across the surface.
- Engage Hammer Mode: Switch back to hammer mode if you changed it. Hold the drill with both hands, square to the work surface. Place the tip of the bit exactly on your mark.
- Start Slowly: Squeeze the trigger gently to start at a low speed. Let the hammering action establish itself in the hole.
- Apply Steady, Firm Pressure: Push straight in. You don’t need to lean your whole body into it. Let the tool’s hammer mechanism do the breaking. The right pressure keeps the bit’s carbide tips engaged with the material.
Step 5: Clear Dust and Manage Heat
Every 10-15 seconds, or if you feel the drill starting to bog down, pull the bit completely out of the hole while it’s still spinning. This “pecking” motion pulls out the ground-up dust (masonry flour). A clogged hole creates friction, overheats the bit, and slows progress dramatically. You can blow into the hole or use a vacuum to clear it.
Step 6: Finish the Hole
Continue the process of drilling and clearing until you reach your desired depth. As you near the end, reduce pressure slightly. Once complete, pull the spinning bit out to clean the hole one final time.
Pro Tips and Troubleshooting
Pro Tips for Better Results
- Use a Guide: For perfectly perpendicular holes, use a drill guide or a simple block of wood with a pre-drilled hole as a jig.
- Work in Stages: For holes larger than 1/2 inch, start with a smaller pilot bit, then step up to your final size. This is faster and less stressful on your drill.
- Water is Your Friend (Sometimes): For extensive drilling, a trickle of water into the hole can suppress dust and cool the bit. Only do this with a drill rated for it (often called an “SDS Plus” or “Rotary Hammer”), and never around electricity.
- Battery Management: If using cordless, have a spare battery ready. Hammer mode drains power quickly.
Troubleshooting Common Problems
Problem: The drill bit isn’t biting; it’s just spinning and making dust.
Solution: You’re likely not in hammer mode. Double-check the selector collar. Also, ensure you’re using a masonry bit. A dull bit can also cause this—inspect the carbide tip for wear.
Problem: The drill is overheating or smoking.
Solution: You’re pushing too hard, the bit is clogged, or the drill is underpowered for the task. Ease up on pressure, clear the hole frequently, and consider a more powerful tool for large jobs.
Problem: The bit gets stuck in the hole.
Solution: This is usually due to a clog or drilling at an angle. Don’t force it. Switch the drill to reverse (if it has it) while gently wiggling it. If stuck, you may need to carefully use pliers on the bit shank (with the drill removed). Always clear dust to prevent this.
Problem: The hole is ragged or too big.
Solution: You likely let the bit wander at the start. Always begin with a pilot dimple or use a guide. Using a worn-out bit can also cause this.
Conclusion
Mastering your hammer drill’s hammer mode unlocks a new level of DIY capability. It transforms intimidating tasks like mounting fixtures on a concrete wall or building with brick from professional-only jobs into achievable weekend projects. Remember the golden rules: use it only on masonry with the right bit, start with a pilot dimple, let the tool hammer for you, and always clear the dust. Pair this knowledge with the essential safety gear—glasses, mask, and ear protection—and you’re equipped to handle the toughest materials your home can throw at you. Now, go grab that drill, flip that switch to the hammer icon, and build something solid.
