
This guide teaches you exactly how to use your hammer drill in normal mode for everyday projects. You’ll learn the difference between normal and hammer modes, when to use each setting, and get step-by-step instructions with safety tips. Perfect for DIY beginners who want professional results without damaging materials.
Key Takeaways
- Normal mode is for wood, metal, and plastic: Use this setting for most drilling tasks that don’t require hammering action.
- Switch to hammer mode only for masonry: Hammer mode is specifically designed for concrete, brick, and stone.
- Always start slow: Begin drilling at low speed to create a pilot groove before increasing power.
- Keep the drill perpendicular: Maintain a 90-degree angle for straight, accurate holes every time.
- Use the right bits: High-speed steel bits for metal, wood bits for timber, and masonry bits only in hammer mode.
- Safety first: Wear eye protection and secure your workpiece before drilling.
- Clean bits prevent overheating: Remove drill bits frequently to clear debris and extend bit life.
Introduction: Your First Steps with Hammer Drill Normal Mode
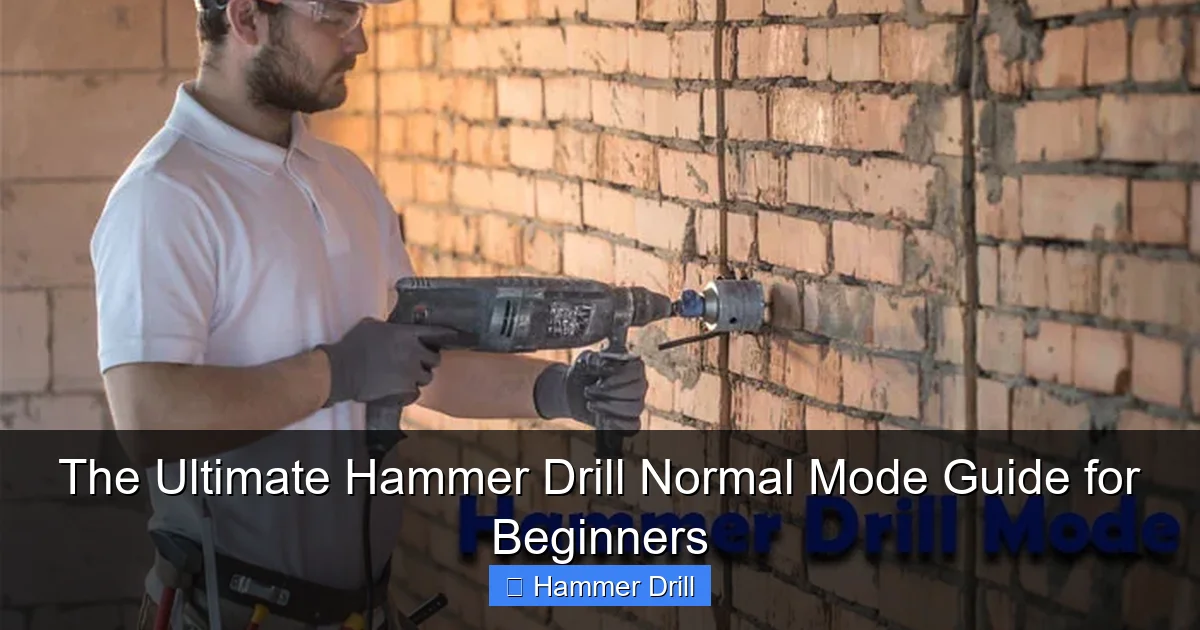
So you’ve got a hammer drill but feel confused about all those settings? You’re not alone. Many beginners think hammer drills are only for tough concrete jobs, but that’s not true at all. Your hammer drill is actually three tools in one. The normal mode turns it into a regular drill perfect for everyday tasks. This guide will walk you through everything you need to know about using hammer drill normal mode safely and effectively. By the end, you’ll confidently drill into wood, metal, and plastic without damaging your materials or your tool.
We’ll cover the basics first: what normal mode actually does, when you should use it, and why it’s different from hammer mode. Then we’ll dive into practical, step-by-step instructions you can follow along with. You’ll learn about safety gear, proper technique, and how to choose the right drill bits. We’ll also troubleshoot common problems and share maintenance tips to keep your drill running smoothly for years. Let’s get started!
What Is Hammer Drill Normal Mode?
Hammer drill normal mode is the standard drilling function that rotates the bit without any hammering action. Think of it as turning your powerful hammer drill into a regular household drill. In this mode, the chuck spins smoothly in a circular motion, just like a standard drill. This rotation cuts through materials by shearing them away, creating clean holes.
Visual guide about The Ultimate Hammer Drill Normal Mode Guide for Beginners
Image source: industrialtoolsinfo.com
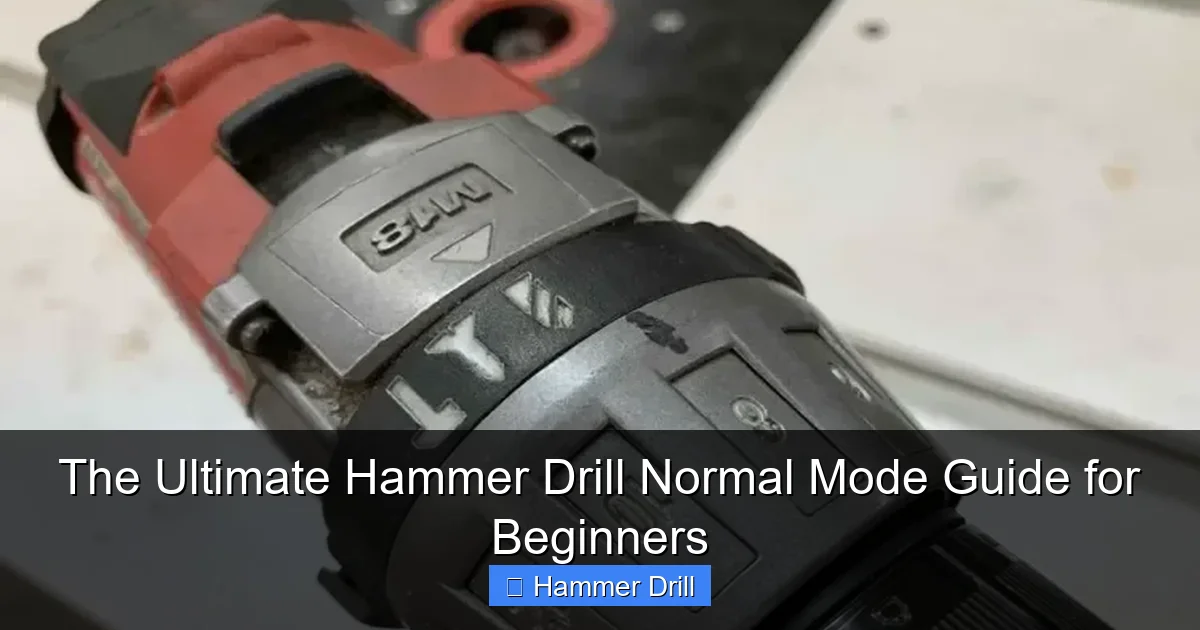
Your hammer drill has a switch, usually near the handle or on top of the motor housing, that lets you select between modes. Normal mode is typically marked with a drill icon or the word “DRILL.” When you select this setting, you disable the hammer mechanism inside. This prevents the drill from pounding against your material, which could cause splintering or cracking.
Understanding this basic function is crucial. Using hammer mode on wood or metal creates unnecessary wear on your tool and can ruin your workpiece. Normal mode gives you precision control for delicate projects. It’s perfect for assembling furniture, hanging shelves on drywall, drilling pilot holes for screws, or working with thin metals. The key is knowing which mode matches your material.
If you’re unsure about your specific drill model, checking the manufacturer’s manual helps. Most modern hammer drills have clear markings, but some have a push-button selector while others use a rotating collar. Take a moment to locate this switch on your drill before starting any project.
When to Use Normal Mode vs. Hammer Mode
Choosing the right mode is the most important decision you’ll make. Use normal mode for wood, metal, plastic, drywall, and thin materials. These materials don’t need the hammering action and actually benefit from the smooth rotation. Wood chips away cleanly, metal gets cut without distortion, and plastic won’t crack or melt.

Visual guide about The Ultimate Hammer Drill Normal Mode Guide for Beginners
Image source: industrialtoolsinfo.com
Hammer mode is designed exclusively for masonry: concrete, brick, stone, and cement backer board. These dense materials require a pounding action to break them apart while the bit rotates. The hammer mechanism inside your drill moves the chuck back and forth rapidly, creating thousands of tiny impacts per minute. This action pulverizes the material while the flutes remove the dust.
Here’s a quick reference guide to help you decide:
- Normal Mode Materials: Pine, oak, plywood, MDF, aluminum, steel, copper, PVC, drywall, tile (with special bits), and plastic composites
- Hammer Mode Materials: Concrete blocks, poured concrete, bricks, natural stone, ceramic tile (on mortar), and cement board
Many beginners make the mistake of using hammer mode on everything because it seems more powerful. This can split wood, strip screw heads, and damage thin metals. It also wears out your drill’s hammer mechanism prematurely. When in doubt, start with normal mode. If the drill bogs down or makes no progress, then switch to hammer mode.
Understanding the difference between a drill and a hammer drill helps you appreciate why mode selection matters. Your hammer drill is versatile, but only when used correctly.
Essential Safety Precautions
Before you touch your drill, let’s talk safety. Eye protection is non-negotiable. Drilling creates tiny chips and dust that can fly into your eyes at high speed. Safety glasses with side shields are the minimum, but goggles provide better protection for metal or wood drilling.
Visual guide about The Ultimate Hammer Drill Normal Mode Guide for Beginners
Image source: toolsadvisers.com
Wear hearing protection too. Even in normal mode, drills can reach 85 decibels or more, which damages hearing over time. A good pair of earplugs or earmuffs makes your work more comfortable and protects your long-term health.
Secure your workpiece properly. Never hold small items in your hand while drilling. Use clamps, a vise, or at least hook your finger in a secure loop on your workbench. A spinning drill bit can catch and twist your hand if the piece moves unexpectedly. This is called “torque kickback” and it’s more dangerous than it sounds.
Check your drill bits before starting. A damaged or dull bit can shatter under pressure. Inspect for cracks, excessive wear, or broken flutes. Make sure the bit is properly seated in the chuck and tightened securely. A loose bit can fly out during operation.
Keep your workspace clean and well-lit. Clutter causes accidents. Good lighting helps you see your mark clearly and maintain proper drill alignment. Unplug your drill when changing bits or making adjustments. It’s easy to accidentally pull the trigger, and that can cause serious injury.
Dust masks are important for certain materials. Drilling into pressure-treated wood or painted surfaces can release toxic dust. A simple N95 respirator protects your lungs. For metal drilling, the dust is less toxic but can still irritate your breathing passages.
Step-by-Step Guide to Using Hammer Drill in Normal Mode
Step 1: Gather Your Materials and Set Up
Collect everything you need before starting. You’ll need your hammer drill, the correct drill bit, safety gear, a scrap piece of wood for testing, clamps, and a pencil for marking. Having everything ready prevents frustrating interruptions mid-project.
Put on your safety glasses and hearing protection first. Then examine your workpiece. Is it thick or thin? Hard or soft? This determines your bit choice and speed setting. Clamp the material securely to your workbench or sawhorses. Leave enough overhang for the drill bit to pass through without hitting the supports.
Mark your drilling location with a pencil and center punch. A center punch creates a small indentation that helps the drill bit start in the right spot. For wood, you can also use an awl or nail to make a starter mark. This prevents the bit from “walking” across the surface when you start drilling.
Step 2: Insert and Secure the Drill Bit
Unplug your drill or remove the battery before changing bits. Open the chuck by rotating it counterclockwise. Most modern drills have keyless chucks you can open by hand. Insert your chosen drill bit into the chuck, making sure it goes in straight and deep enough to be gripped by all three jaws.
Tighten the chuck by rotating it clockwise. For keyless chucks, grip the inner sleeve and outer collar, then twist firmly. Make sure the bit is centered and secure. Give it a gentle tug to confirm it won’t come loose. A loose bit is dangerous and will drill an oversized, wobbly hole.
Choose your bit wisely. For wood, use a brad-point bit for clean holes or a spade bit for larger diameters. For metal, high-speed steel twist bits work best. For plastic, use sharp bits with a high spiral angle to prevent melting. Never use masonry bits in normal mode—they’re too aggressive and will damage your material.
Step 3: Adjust Your Drill Settings
Set your mode selector to normal mode. This is usually a switch marked with a drill icon. Double-check that it’s fully engaged. Some drills have a separate switch for hammer function, while others have a rotating collar. Consult your manual if you’re unsure.
Adjust the speed setting based on your material. Most drills have two speed ranges: low (0-1,000 RPM) for large bits and tough materials, and high (1,000-3,000 RPM) for small bits and softer materials. As a rule, slower speeds for metal and faster speeds for wood and plastic.
Set the torque control if your drill has it. This adjusts how much force the drill applies before the clutch slips. For drilling, set it to the highest number or drill icon. The torque setting is mainly for driving screws, but having it too low can cause the drill to stop prematurely when encountering resistance.
Test the trigger on a scrap piece first. Practice starting and stopping smoothly. Get a feel for the variable speed trigger—pressing lightly gives you low speed, pressing harder increases speed. This control is essential for clean hole starts.
Step 4: Position the Drill and Start Drilling
Hold the drill firmly with both hands. Grip the handle with your dominant hand and place your other hand on the front auxiliary handle if your drill has one. Keep your arms close to your body for stability. Stand with your feet shoulder-width apart for good balance.
Position the drill bit tip on your marked spot. Apply light pressure to keep it in place, but don’t push hard yet. Keep the drill perpendicular to the surface—use a combination square or visual reference to maintain a 90-degree angle. This ensures straight holes.
Start drilling at low speed. Press the trigger gently to begin rotation. Let the bit cut into the material for a few seconds. You should see or hear the bit engaging. Once it’s established a groove, you can gradually increase speed and apply steady, moderate pressure.
Apply just enough pressure to keep the bit cutting, but don’t force it. Let the drill do the work. Forcing the drill can cause the motor to bog down, overheat, or damage the bit. If you feel excessive resistance, stop and check your bit sharpness or speed setting.
Step 5: Maintain Control Through the Hole
As you drill deeper, maintain consistent pressure and speed. Watch your depth gauge if you need a specific hole depth. You can mark your bit with tape or use the drill’s built-in depth stop. This prevents drilling too far.
Periodically pull the bit out to clear debris. This is especially important for deep holes or soft materials like pine that produce lots of chips. Clearing debris prevents the bit from binding and overheating. It also helps you check your progress.
Keep the drill aligned throughout the process. It’s natural for the bit to want to wander, especially in wood grain. Make small corrections by gently adjusting your grip and angle. Don’t jerk the drill—smooth, controlled movements give you the best results.
When you’re nearly through the material, reduce pressure. The bit can catch on the backside and splinter wood or grab and spin thin metal. Support the exit side with a scrap piece of wood if possible. This gives you a clean exit hole.
Step 6: Finish and Clean Up
Release the trigger smoothly as you break through the material. Let the bit come to a complete stop before pulling it out. This prevents damage to both the bit and your workpiece. Pull the bit straight out while it’s still spinning slightly—this clears the flutes.
Inspect your hole. It should be clean and round with minimal tear-out. If the hole is rough or oversized, check your bit sharpness and drill alignment. You can plug and redrill if needed, but prevention is always better.
Clean your drill bit immediately after use. Wipe away any residue with a rag. For metal bits, a light coat of oil prevents rust. Store bits in a case to protect their cutting edges. A clean, organized toolbox extends the life of all your equipment.
Finally, unplug your drill and store it properly. Remove the battery if you won’t use it for a while. This prevents accidental activation and preserves battery life. Store your drill in its case in a dry location to prevent moisture damage.
Choosing the Right Drill Bits for Normal Mode
Using the correct drill bit is just as important as selecting the right mode. Bits are designed for specific materials and applications. Using the wrong bit leads to poor results, broken bits, and potential injury.
For wood drilling, brad-point bits are the gold standard. They have a sharp point that prevents walking and sharp spurs that cut clean edges. Spade bits work for larger holes but leave rougher edges. Twist bits work in a pinch but aren’t ideal for wood.
Metal requires high-speed steel (HSS) twist bits. These bits stay sharp at high temperatures and have a 118-degree point angle that cuts metal efficiently. For thin metals, use a higher speed setting and less pressure. Thick steel needs slower speeds and more pressure. Always use cutting fluid for metal over 1/4 inch thick.
Plastic drilling is tricky. Standard bits can melt plastic from friction. Use sharp bits with a high spiral angle and run at high speed with light pressure. For acrylic or polycarbonate, use specialized plastic bits with polished flutes that prevent melting and chipping.
Never use masonry bits in normal mode. Their carbide tips are designed for hammer action and will tear up wood or metal. The geometry is all wrong for cutting without impact. Save those bits for concrete and brick only.
Bit size matters too. Use the smallest bit practical for your job. Large bits require more torque and can be harder to control. For pilot holes, match the bit to the screw shank, not the head. For clearance holes, match the bit to the screw diameter.
Common Mistakes to Avoid
One of the biggest mistakes beginners make is using hammer mode on everything. This seems logical—more power must be better, right? Wrong. Hammer mode on wood causes splintering and tear-out. On metal, it creates rough holes and can damage thin sheets. Save hammer mode for masonry only.
Forgetting to secure the workpiece is another common error. A loose board can spin violently when the drill catches, causing serious injury. Always clamp your work. For round objects like pipes, use a V-block to hold them steady. This simple step makes your work safer and more accurate.
Applying too much pressure is a frequent problem. Drills work best with steady, moderate pressure. Pushing too hard can break bits, damage the motor, and create oversized holes. Let the cutting edges do the work. Think of it like sawing—you don’t force the saw, you let the teeth cut.
Ignoring drill speed settings is another mistake. High speed in metal creates heat that dulls bits quickly. Low speed in wood causes splintering. Match your speed to the material and bit size. When in doubt, start slower—you can always increase speed if needed.
Skipping the pilot mark is tempting when you’re in a hurry. But bits walk, especially on smooth surfaces. A simple center punch or awl mark keeps your bit on target. This small step saves you from frustration and wasted materials.
Not clearing debris from deep holes causes binding and overheating. Chips packed in the flutes prevent the bit from cutting efficiently. Pull the bit out every 10-15 seconds for deep holes. This simple habit extends bit life and gives you cleaner holes.
Finally, neglecting maintenance ruins drills quickly. Wipe down your drill after each use. Check the chuck for wear. Replace brushes when needed. A well-maintained drill performs better and lasts longer. Think of it as a long-term investment in your DIY capabilities.
Troubleshooting Common Issues
If your drill bit keeps slipping in the chuck, it’s not tight enough or the jaws are worn. Remove the bit, clean the chuck with a degreaser, and retighten. If it still slips, the chuck may need replacement. Worn chucks don’t grip bits securely and are dangerous to use.
When the drill overheats, you’re either pushing too hard or using the wrong speed. Stop immediately and let the motor cool. Check that you’re in the correct speed range for your bit size. For large bits over 1/2 inch, use low speed. Also ensure you’re not blocking the ventilation holes with your hand or debris.
If you’re getting rough, splintered holes in wood, check your bit sharpness. Dull bits tear wood instead of cutting it. Also verify you’re using the right bit type—brad-point bits for wood. Running the drill too fast can also cause splintering. Try reducing speed and applying steady pressure.
Holes that are too large or out of round mean your drill is wobbling. This could be a bent bit, loose chuck, or poor technique. Check that the bit spins true. Hold the drill steady with both hands and keep it perpendicular to the work surface. Practice on scrap first to build muscle memory.
When the drill makes a grinding noise, stop immediately. This could indicate worn gears or a damaged clutch. Continuing to use a damaged drill can cause complete failure. Have it inspected by a professional or contact the manufacturer for repair options.
If the trigger won’t stay on, the switch may be faulty. Don’t try to jury-rig it. A malfunctioning switch is a fire hazard. Have the drill repaired or replaced. Working with faulty electrical tools puts you at serious risk.
For bits that keep breaking, you’re likely using too much pressure or the wrong bit for the material. Thick metal requires slow speed and steady pressure. Thin metal needs even less pressure. Always use the correct bit type and size for your material thickness.
Maintenance Tips for Your Hammer Drill
Regular cleaning is the simplest way to extend your drill’s life. After each use, wipe down the housing with a damp cloth. Use compressed air to blow dust out of the ventilation slots and chuck mechanism. Never spray water directly on the drill—moisture damages electrical components.
Check and lubricate the chuck periodically. Remove the chuck by opening it fully and unscrewing the retaining screw inside. Clean the jaws and apply a light coat of machine oil. This keeps the chuck operating smoothly and prevents rust. Don’t over-lubricate—excess oil attracts dust and grime.
Inspect brushes if your drill has them. Most corded drills and some cordless models have carbon brushes that wear down over time. Remove the brush caps and check the brush length. Replace them when they’re less than 1/4 inch long. Worn brushes cause poor performance and can damage the motor.
Store your drill properly. Keep it in its original case or a dry toolbox. Don’t leave batteries on the charger indefinitely—this reduces battery life. Store batteries at room temperature, not in extreme cold or heat. Remove batteries if you won’t use the drill for several months.
Check all screws and fasteners periodically. Vibration can loosen them over time. Tighten any loose screws with the appropriate driver. This prevents wobble and ensures all components work together smoothly.
Test the mode selector switch occasionally. It should click firmly into position. If it feels loose or slips out of position, have it inspected. A faulty mode selector can engage hammer action unexpectedly, which is dangerous when you’re using normal mode.
Finally, keep a log of your drill’s performance. Note any changes in sound, speed, or power. Early detection of problems prevents costly repairs later. A well-maintained hammer drill can last 10 years or more with proper care.
Conclusion: Mastering Your Hammer Drill Normal Mode
You now have everything you need to use your hammer drill in normal mode like a pro. Remember that normal mode is your go-to setting for wood, metal, plastic, and any material that doesn’t require hammering. It gives you clean, precise holes with full control over the process.
Start every project by selecting the right mode and the right bit. Secure your workpiece, mark your spot, and always prioritize safety. Use steady pressure, appropriate speed, and keep the drill perpendicular to your work. These simple habits will transform your DIY results from frustrating to fantastic.
Practice makes perfect. Try drilling into scrap pieces before tackling important projects. This builds confidence and helps you master the variable speed trigger. Your hammer drill is a versatile tool—understanding when to use normal mode versus hammer mode unlocks its full potential.
Keep this guide handy for reference. Bookmark it on your phone or print the key takeaways. The more you use your hammer drill correctly, the more you’ll appreciate its capabilities. Soon you’ll be tackling projects you never thought possible, all because you took the time to learn the basics properly.
Happy drilling, and remember: the right tool for the right job, used the right way, makes all the difference.
