
Drilling into rebar with a hammer drill requires the right technique and tools. This guide covers essential safety precautions, proper bit selection, and step-by-step methods. You’ll learn how to avoid common mistakes and achieve clean, precise holes in reinforced concrete.
Key Takeaways
- Safety comes first: Always wear eye protection, gloves, and hearing protection when drilling rebar. Concrete chips can fly at high speeds.
- Choose the right drill: Use a hammer drill with at least 7-8 amps for corded or 18V+ for cordless. Variable speed is essential for control.
- Select carbide-tipped bits: Standard masonry bits won’t cut through rebar. You need carbide-tipped or diamond-tipped bits designed for reinforced concrete.
- Start slow and steady: Begin drilling at low speed to create a guide groove. Apply firm, consistent pressure without forcing the tool.
- Use the hammer function wisely: The hammer action helps break up concrete but can damage bits when hitting steel. Switch to drill-only mode if you strike rebar.
- Cool your bit: Pause every 30 seconds to prevent overheating. This extends bit life and prevents motor strain.
- Mark your depth: Use tape on the bit to mark drilling depth. This prevents over-drilling and hitting pipes or wires behind the rebar.
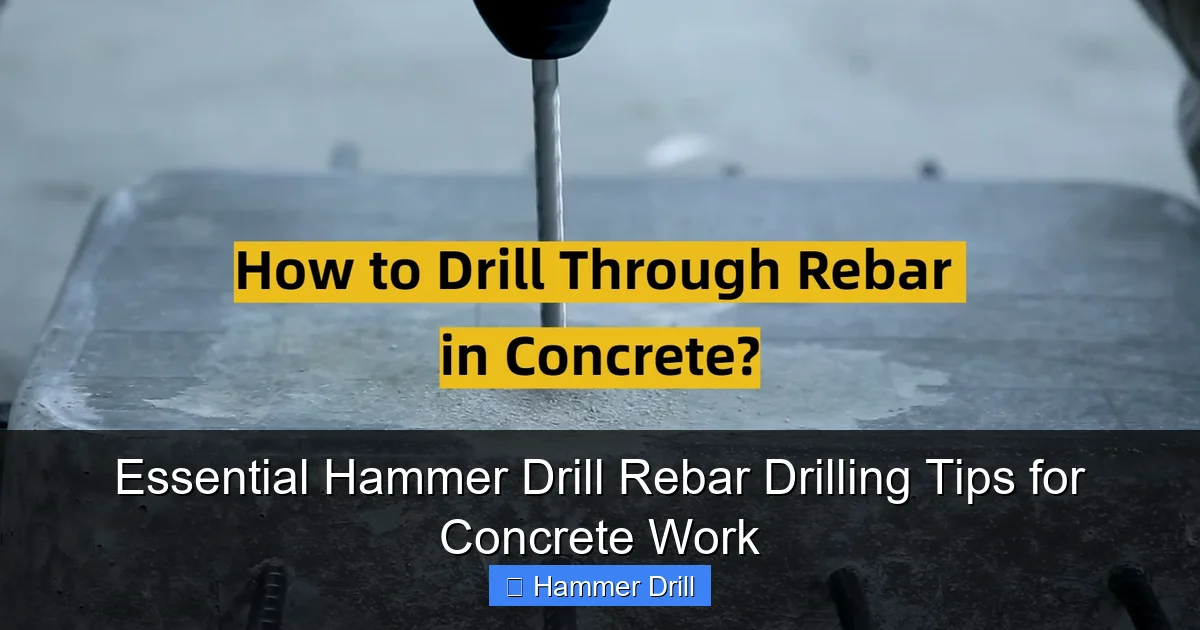
Essential Hammer Drill Rebar Drilling Tips for Concrete Work
Drilling into reinforced concrete presents unique challenges that regular drilling tasks don’t. When you hit rebar, everything changes. Your standard drill bits may dull instantly. Your drill might stall or kick back. This guide walks you through exactly how to handle these situations. You’ll learn the right tools, techniques, and safety steps to drill through rebar successfully. Whether you’re installing anchors, running electrical conduit, or mounting heavy equipment, these tips will save you time and frustration.
Understanding Rebar and Hammer Drill Mechanics
Before you start drilling, you need to understand what you’re working with. Rebar is reinforcing steel bar. It’s embedded in concrete to add tensile strength. The combination creates one of the toughest building materials known to construction. Your regular drill won’t handle this job. You need a hammer drill specifically designed for masonry work.
Visual guide about Essential Hammer Drill Rebar Drilling Tips for Concrete Work
Image source: toolsprofy.com
Hammer drills work differently than standard drills. They add a rapid hammering action that pounds the bit forward while it rotates. This dual action breaks up concrete as the bit chews through it. Think of it like a small jackhammer combined with a drill. The hammering mechanism typically operates at 20,000 to 50,000 blows per minute. That’s why you need special bits and proper technique.
When drilling rebar, the hammer action can be your enemy. Steel is tough on bits. The pounding motion can snap carbide tips or destroy the bit’s cutting edges. That’s why many professionals switch to drill-only mode when they know they’re hitting steel. Understanding this distinction helps you choose the right approach for each stage of your project.
For a deeper understanding of tool selection, check out our guide on the difference between a hammer drill and regular drill. This will help you make the right choice for your specific project needs.
Essential Safety Precautions
Safety isn’t optional when drilling into concrete with rebar. The risks are real and serious. Concrete dust contains silica, which can damage your lungs. Flying chips can blind you. The drill can kick back violently if it catches on steel. Let’s cover the essentials.
Visual guide about Essential Hammer Drill Rebar Drilling Tips for Concrete Work
Image source: m.media-amazon.com
Personal Protective Equipment (PPE)
You need four key pieces of protection. First, safety glasses with side shields. Regular glasses won’t stop a concrete chip traveling at 100 mph. Second, hearing protection. Hammer drills are loud, often exceeding 100 decibels. Third, heavy-duty work gloves. They protect your hands from sharp edges and vibration. Fourth, a dust mask rated N95 or better. For large projects, consider a respirator with P100 filters.
Don’t forget about your clothing. Wear long sleeves and pants. Concrete dust is alkaline and irritates skin. Closed-toe shoes with steel toes are ideal. Roll your sleeves down over your gloves to prevent dust from getting inside.
Workspace Preparation
Clear your work area completely. Remove any tripping hazards. Secure loose materials that could fall. Cover nearby objects with drop cloths to protect them from dust. Ensure good lighting so you can see your drilling point clearly. Poor lighting leads to mistakes.
Check for hidden hazards behind the concrete. Use a stud finder with AC detection to locate electrical wires. Use a metal detector to map rebar patterns. Mark these locations clearly with painter’s tape. Drilling into live wires causes electrocution. Hitting rebar at the wrong angle can cause kickback.
Ventilation matters too. Open windows or use fans to blow dust away from your breathing zone. For enclosed spaces, consider a dust extraction system. Many hammer drills have vacuum attachments that connect directly to the tool.
Tool Safety Checks
Inspect your hammer drill before each use. Check the power cord for fraying. Test the trigger and speed settings. Ensure the chuck is tight and secure. Verify that the hammer function engages and disengages smoothly. A malfunctioning tool is a dangerous tool.
Secure your workpiece whenever possible. Clamp it down or have a helper hold it steady. A moving workpiece can cause the bit to bind. Binding leads to broken bits or injured hands. Never hold small pieces in your hand while drilling.
Choosing the Right Hammer Drill and Bits
Not all hammer drills are created equal. Using the wrong tool dooms your project from the start. Let’s break down what you need.
Visual guide about Essential Hammer Drill Rebar Drilling Tips for Concrete Work
Image source: m.media-amazon.com
Hammer Drill Specifications
For rebar drilling, you need power. Corded hammer drills should deliver at least 7-8 amps. Cordless models need 18 volts or higher. Brushless motors last longer and perform better under load. Look for variable speed triggers. You’ll need low speed for starting holes and high speed for clearing dust.
The hammer mechanism type matters too. SDS (Slotted Drive System) chucks are superior for heavy rebar work. They grip bits more securely than keyless chucks. SDS-plus is the standard for most DIY and professional tools. SDS-max handles larger bits for commercial work. For most rebar projects, SDS-plus is perfect.
Consider the weight and ergonomics. You’ll be holding this tool for extended periods. A lightweight design with a comfortable grip reduces fatigue. Auxiliary handles are essential for control. They give you a second grip point to manage kickback.
If you’re in the market for a new tool, our best cordless drill guide can help you understand key features and top performers for various applications.
Selecting the Correct Drill Bits
Standard masonry bits are useless on rebar. They feature soft carbide tips designed for concrete only. When they hit steel, they dull instantly. You need specialized bits for reinforced concrete.
Carbide-tipped rebar drill bits are the minimum requirement. They have harder carbide grades and reinforced shanks. Look for bits labeled “for rebar” or “reinforced concrete.” These bits typically feature a four-cutter design that handles both concrete and steel.
For heavy-duty work, consider diamond-tipped bits. They’re more expensive but last much longer. Diamond bits grind through rebar instead of cutting it. They maintain their sharpness even after multiple strikes on steel. For occasional DIY projects, carbide-tipped bits are more cost-effective.
Bit diameter matters too. Match your bit size to your anchor or fastener. Common sizes range from 3/16 inch to 3/4 inch. Use a smaller pilot bit first if you’re drilling deep holes. This helps maintain accuracy and reduces bit wander.
Step-by-Step Rebar Drilling Process
Now for the main event. Follow these steps carefully to drill through rebar successfully. Each stage builds on the previous one.
Step 1: Marking and Positioning
Start by marking your drilling point with a pencil or marker. Use a center punch to create a small indentation. This prevents the bit from wandering when you start drilling. Double-check your measurements. Measure twice, drill once.
Position yourself comfortably. Stand with your feet shoulder-width apart. Grip the drill with both hands. Keep your arms close to your body for maximum control. Position your body slightly behind the drill. This stance absorbs kickback better than standing directly in line.
Angle the drill perfectly perpendicular to the surface. Use a square to check your alignment. Drilling at an angle creates an oval hole that won’t hold anchors properly. It also increases the chance of bit breakage.
Step 2: Starting the Hole
Set your hammer drill to low speed. Engage the hammer function. Place the bit tip in the center punch mark. Apply light pressure and pull the trigger. Let the drill do the work. Don’t force it.
Drill for 2-3 seconds to create a small guide groove. This groove helps keep the bit on target. Check your alignment again. Make any needed adjustments now. Once you’re confident, increase pressure slightly.
If you’re drilling near the edge of concrete, start slower than usual. Edge drilling increases the chance of blowout. Blowout happens when concrete chips away from the back side, creating a mess and weakening the structure.
Step 3: Drilling Through Concrete
Continue drilling at medium speed. Apply firm, consistent pressure. The hammer action should sound rhythmic, not strained. If the drill bogs down, reduce pressure. Let the hammer mechanism work for you.
Every 15-20 seconds, pull the bit out partially. This clears dust from the hole. Clearing dust prevents overheating and maintains cutting efficiency. Blow compressed air into the hole if you have it. A vacuum system works even better.
Watch for changes in sound or vibration. These indicate you’re approaching rebar. The drill may slow slightly. The hammer action may sound different. Be ready to adjust your technique.
Step 4: Hitting and Drilling Through Rebar
When you feel the drill hit steel, reduce speed immediately. Switch to drill-only mode if your tool allows it. The hammer action damages bits on steel. Drill through the rebar slowly and steadily.
Apply more pressure on the rebar than on the concrete. Steel requires firm, consistent force. Don’t let the bit skate across the surface. Keep it engaged and cutting. If you hear a high-pitched squeal, you’re not cutting effectively. Increase pressure or check for a dull bit.
Rebar thickness varies. #3 rebar (3/8 inch) takes 5-10 seconds to drill through. Larger sizes take longer. Be patient. Forcing the drill overheats the motor and damages the bit. If the bit gets hot, stop and let it cool.
Once through the rebar, switch back to hammer mode. Resume medium speed drilling through the concrete behind the steel. The hardest part is over.
Step 5: Reaching Final Depth
Wrap tape around your bit at the desired drilling depth. This visual marker prevents over-drilling. Check your depth frequently. Many hammer drills have depth gauges built into the handle.
As you approach your final depth, reduce speed again. This prevents blowout on the backside. Apply steady pressure and maintain alignment. Stop when you reach the tape marker.
Remove the drill slowly while it’s still running. This clears the hole of final dust. Blow out the hole one more time with compressed air. A clean hole is essential for proper anchor installation.
Pro Tips for Success
These advanced techniques separate good results from great ones. Implement them to make your work easier and more precise.
Bit Maintenance
Keep your bits sharp. A dull bit is dangerous and inefficient. Sharpen carbide bits with a diamond sharpening stone. Rotate the stone against the cutting edge at the correct angle. Most bits have a 110-degree point angle. Follow the manufacturer’s specifications.
Store bits properly in a case or organizer. Don’t throw them in a toolbox where they can chip against other tools. Protect the cutting edges. Even small chips ruin performance.
Inspect bits before each use. Look for cracked shanks, chipped carbide, or bent flutes. Damaged bits can break during use. Discard them immediately. The cost of a new bit is nothing compared to medical bills.
Speed and Pressure Control
Let the tool’s weight provide most of the pressure. Add only 5-10 pounds of extra force. Your arms should be relaxed, not locked. Tension in your body transmits to the tool, reducing control.
Use the variable speed trigger to your advantage. Feather the trigger for precision work. Full trigger for faster progress. Practice on scrap concrete first. Learn how your drill responds to different surfaces.
If your drill has multiple speed settings, use low speed for diameters over 1/2 inch. Large bits need slower rotation to maintain cutting force. High speed on large bits causes overheating and premature wear.
Dealing with Difficult Rebar Configurations
Sometimes you encounter multiple layers of rebar. In these cases, drill through the first layer and reassess. Use a borescope or inspection camera if available. This helps you see what’s behind the first layer of steel.
For rebar that’s too close to the surface, reduce your drill angle slightly. This minimizes the chance of spalling the concrete surface. Spalling creates weak spots that compromise anchor strength.
If rebar is at an angle, mark the entry point carefully. Use a larger diameter bit than planned. This gives you room to redirect if needed. It’s better to have a slightly oversized hole than to crack the concrete.
Dust Management
Use a vacuum system whenever possible. Many hammer drills accept dust collection attachments. These attach to the drill body and connect to a shop vac. They capture up to 90% of airborne dust.
For overhead drilling, use a dust tray or catch bag. These attach to the drill and collect falling debris. They protect your face and eyes from dropping dust and chips.
Clean your work area frequently. Don’t let dust accumulate. Sweep or vacuum at regular intervals. This prevents slip hazards and keeps your workspace organized.
Troubleshooting Common Issues
Even with perfect technique, problems happen. Here’s how to handle the most common issues.
Bit Won’t Cut Through Rebar
If your bit skates across steel without cutting, it’s likely dull or the wrong type. Stop immediately. Inspect the tip. If the carbide shows wear or damage, replace the bit. Don’t waste time on a dull bit.
Sometimes the issue is technique, not the bit. Increase pressure slightly. Ensure you’re drilling straight. A crooked approach reduces cutting efficiency. Try drilling at a slightly different angle to find a fresh cutting edge on the steel.
If the bit is new and still won’t cut, it may be the wrong hardness. Some rebar is heat-treated and extremely hard. You may need a diamond-tipped bit for these situations. This is rare in residential construction but common in bridges and industrial buildings.
Drill Motor Overheats
Overheating happens when you push too hard or drill too long without breaks. If you smell burning, stop immediately. Let the motor cool for 15-20 minutes. Check for dust clogging the vents. Clean vents with compressed air.
Prevent overheating by taking breaks every 30 seconds. Pull the bit out partially to clear dust. This also cools the bit and reduces motor load. Use the correct speed for your bit size. Large bits at high speed generate excessive heat.
If your drill overheats repeatedly, it may be underpowered for the job. Consider upgrading to a higher amp or voltage model. A 6-amp drill won’t handle continuous rebar drilling. Step up to 8 amps or more for professional results.
Hole Is Out of Position
Bit wander is frustrating but fixable. If you catch it early, stop drilling. Back out the bit and reposition. Use a center punch to create a new guide mark. Sometimes you can drill a small pilot hole first. Then enlarge it with your final bit size.
For holes that are slightly off but usable, you have options. Use a larger anchor that fits the oversized hole. Or fill the hole with epoxy and redrill in the correct position. Epoxy anchors work well in oversized holes.
Prevent bit wander by starting slow. Let the hammer action create a small groove before increasing speed. Use a drill guide if available. These attach to the surface and keep the bit aligned.
Excessive Vibration or Kickback
Kickback occurs when the bit binds in the hole. It’s dangerous and can break bits or wrists. If you feel the drill twisting, release the trigger immediately. Keep both hands on the tool. Don’t try to stop it with one hand.
Binding usually happens when you’re not drilling straight. Check your alignment frequently. Use the auxiliary handle for better control. Apply steady pressure, not sudden force. Sudden pressure can catch the bit’s flutes on rebar.
Reduce kickback by using sharp bits. Dull bits require more force, which increases binding risk. Keep bits clean and free of concrete buildup. Buildup on the shank can catch in the hole.
Concrete Spalling or Cracking
Spalling happens when concrete chips away from the surface. It’s unsightly and weakens the structure. To prevent it, reduce speed near the surface. Don’t use maximum hammer action until you’re fully engaged in the material.
For overhead drilling, spalling is less common but still possible. Use a lower hammer setting if your drill has adjustable impact energy. Some models let you dial back the hammer force for delicate work.
If spalling occurs, repair it before installing anchors. Use a concrete patching compound. Follow the manufacturer’s instructions for proper curing. Don’t install anchors in fresh patch material.
Conclusion
Drilling into rebar with a hammer drill is a skill that improves with practice. Start with these essential tips and build your expertise. Always prioritize safety over speed. Choose the right tools for your specific project. Take your time and let the equipment work for you.
Remember that every concrete slab is different. Rebar size, spacing, and depth vary. What works perfectly on one project might need adjustment on the next. Stay flexible and adapt your technique as needed.
With the right preparation and these proven methods, you’ll drill clean, accurate holes through reinforced concrete. Your projects will be stronger and more professional. Keep this guide handy for reference on future jobs.
