
Hammer drills are powerful tools that need proper maintenance to last. This guide covers the most common problems like overheating, chuck issues, and power failures. You’ll learn simple DIY repair tips that save money and extend your tool’s life.
Key Takeaways
- Regular cleaning prevents 80% of hammer drill problems: Dust and debris cause most malfunctions. Clean your tool after every use.
- Overheating signals brush or ventilation issues: Check carbon brushes and air vents first when your drill gets too hot.
- Chuck problems are usually fixable: Stuck or slipping chucks often need cleaning and lubrication, not replacement.
- Power loss often comes from worn brushes: Replacing carbon brushes is a cheap, easy fix for most power issues.
- Safety first during repairs: Always unplug the tool and wear eye protection when working on your hammer drill.
- Know your limits: Some problems need professional repair. Don’t risk your safety on complex electrical issues.
- Prevention beats repair: Regular maintenance costs less than major repairs and extends tool life by years.
Introduction: Save Money with DIY Hammer Drill Repair
Hammer drills are workhorse tools that handle tough masonry jobs with ease. But like any power tool, they develop problems over time. The good news? Most common issues are easy to fix yourself. This guide teaches you practical hammer drill repair tips that save you money and keep your tool running strong. You don’t need to be a professional to handle basic repairs. With some simple tools and a bit of patience, you can solve 80% of hammer drill problems at home. Let’s get started with everything you need to know about maintaining and fixing your hammer drill.
Understanding Your Hammer Drill Before Repairs
Before diving into repairs, it helps to understand how your hammer drill works. A hammer drill combines rotation with a rapid hammering action. This dual motion breaks through concrete and brick like a pro. The mechanism uses a special clutch system that creates the hammering effect. Inside, you’ll find carbon brushes that transfer electricity to the motor. These wear down over time and cause many common problems. The chuck is another critical component that holds your drill bits securely. Understanding the difference between a standard drill and a hammer drill helps you identify issues faster. Hammer drills have more complex internal parts than regular drills. This means more potential problems, but also more opportunities for simple fixes. Always refer to your user manual for specific details about your model.
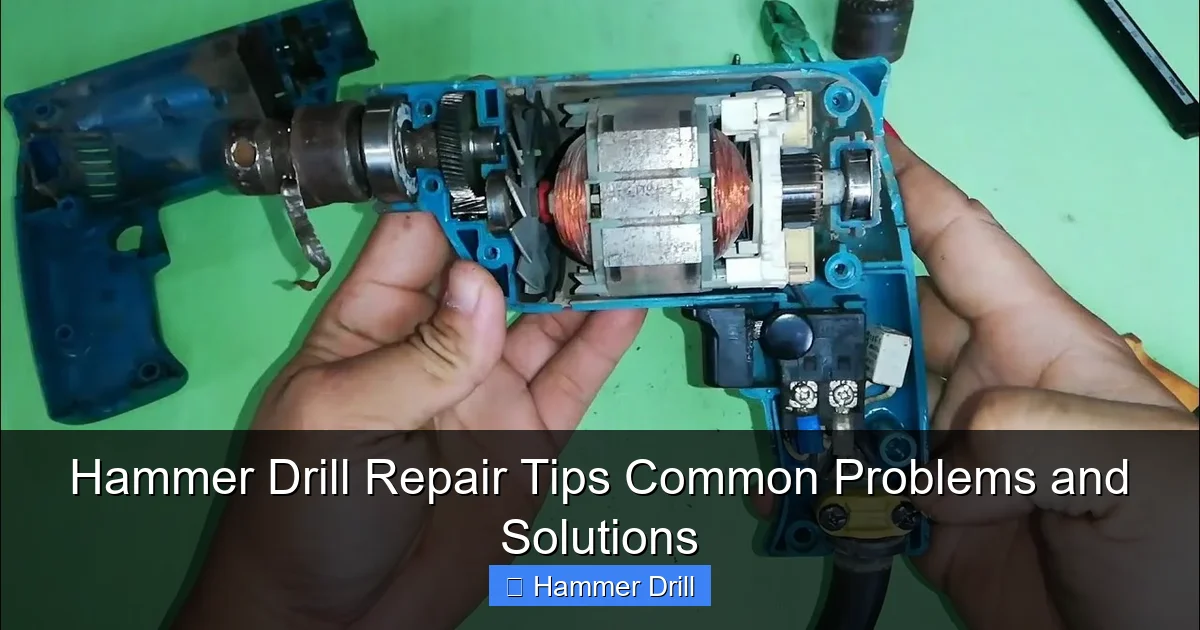
Visual guide about Hammer Drill Repair Tips Common Problems and Solutions
Image source: i.ytimg.com
Essential Safety Precautions for Hammer Drill Repair
Safety must come first when working on any power tool. Always unplug your hammer drill before starting any repair. For cordless models, remove the battery completely. This simple step prevents accidental starts and serious injuries. Wear safety glasses to protect your eyes from dust and metal shavings. Work in a well-lit area so you can see small parts clearly. Use a clean, organized workspace to avoid losing screws and components. Keep small parts in a container or magnetic tray. Never force a component during disassembly. If something won’t budge, stop and reassess. For electrical testing, use a multimeter carefully and follow proper procedures. When in doubt, consult a professional. Your safety is worth more than any tool repair.
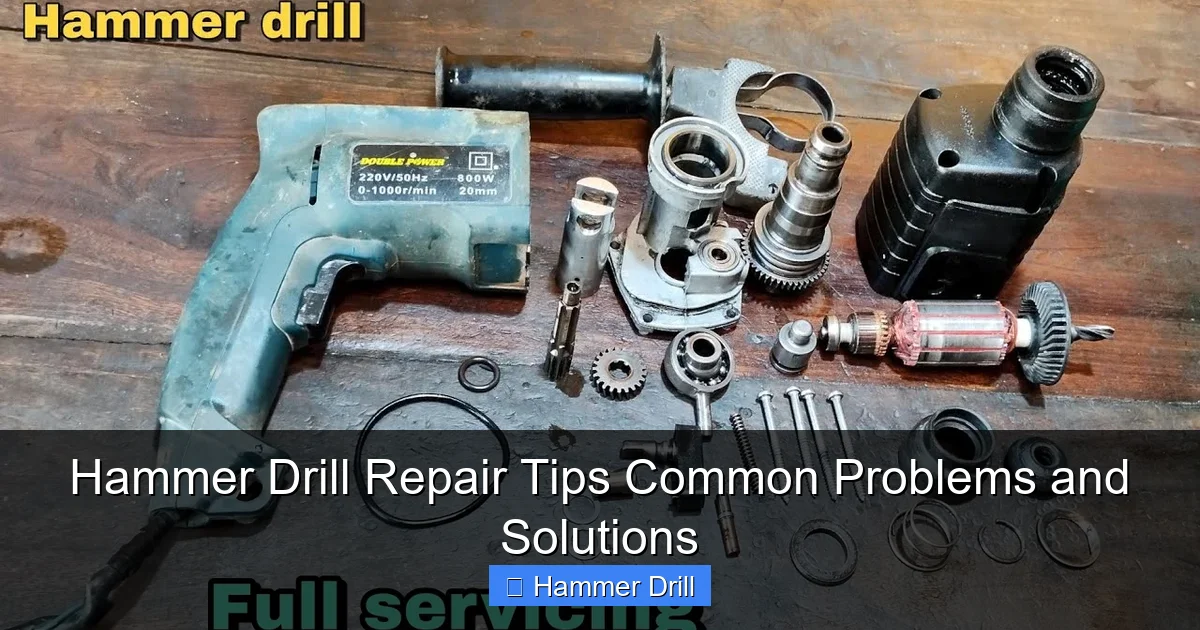
Visual guide about Hammer Drill Repair Tips Common Problems and Solutions
Image source: i.ytimg.com
Common Hammer Drill Problems and Solutions
1. Hammer Drill Won’t Start or Loses Power
This is the most frustrating problem. Your drill either doesn’t start at all or loses power during use. The causes are usually simple and fixable.

Visual guide about Hammer Drill Repair Tips Common Problems and Solutions
Image source: i.ytimg.com
Check the Power Source First
Start with the basics. Test the outlet with another device to ensure it’s working. For cordless drills, charge the battery fully. Sometimes a battery shows charge but can’t deliver enough power under load. Try a second battery if you have one. Examine the power cord for visible damage like cuts or kinks. A damaged cord can cause intermittent power loss. If you find damage, replace the cord or use electrical tape for temporary fixes on small nicks.
Inspect and Replace Carbon Brushes
Worn carbon brushes cause most power issues. These small blocks transfer electricity to the motor. Over time, they wear down and stop making proper contact. To check them, locate the brush caps on the sides of your drill’s motor housing. Remove the caps with a screwdriver. Take out the brushes and measure their length. If they’re shorter than 1/4 inch, replace them immediately. New brushes cost just a few dollars and are easy to install. Simply slide them back into place and replace the caps. This simple fix often restores full power to your hammer drill.
Test the Trigger Switch
If brushes are fine, the trigger switch might be faulty. This switch controls power delivery to the motor. Over time, internal contacts wear out or get dirty. To test it, you’ll need a multimeter. Disconnect the drill and remove the switch housing. Check for continuity when the trigger is pressed. If the switch shows no continuity, replace it. Trigger switches are model-specific, so order the exact part for your drill. Installation is usually straightforward—just connect the same wires to the new switch.
2. Overheating Issues
Overheating can damage your hammer drill’s motor and internal components. It’s usually caused by blocked ventilation or excessive use.
Clean the Air Vents
Air vents allow cooling air to circulate around the motor. Dust and debris block these vents over time. When blocked, the motor overheats quickly. Use compressed air to blow dust out of the vents. Do this regularly, especially if you work in dusty conditions. You can also use a small brush to gently clean the vents. Never use water or cleaning solvents near the vents. For stubborn dirt, remove the housing and clean with a dry cloth. Ensure all vents are clear before reassembling.
Check for Motor Windings Issues
If cleaning vents doesn’t help, the motor windings might be damaged. This is more serious but still fixable. Look for a burning smell or visible damage to the motor housing. Test the motor with a multimeter for continuity. If the windings are shorted or open, the motor needs rewinding or replacement. For most DIYers, replacing the motor is easier than rewinding it. Motor replacement kits are available for most popular models. Follow the manufacturer’s instructions carefully when installing a new motor.
Allow Proper Cooling Time
Sometimes overheating is simply due to overuse. Hammer drills need breaks during heavy use. Run the tool for 15-20 minutes, then let it cool for 10 minutes. This prevents excessive heat buildup. If you need continuous drilling, consider buying a second drill to rotate between tools. This gives each drill time to cool down. Also, avoid using maximum speed for extended periods unless absolutely necessary. Lower speeds generate less heat and extend motor life.
3. Chuck Problems (Won’t Hold Bits or Stuck Chuck)
Chuck issues are extremely common and usually easy to fix. A slipping or stuck chuck makes your drill useless for serious work.
Clean and Lubricate the Chuck
Dirt and rust cause most chuck problems. Remove the chuck by opening it fully and unscrewing the retaining screw inside. This screw is usually reverse-threaded, so turn it clockwise to loosen. Once removed, clean the chuck jaws and internal threads with a degreaser. Remove all old grease, dirt, and metal shavings. After cleaning, apply a light coat of lithium grease to the moving parts. Reassemble the chuck and test it. This simple process fixes 90% of chuck issues.
Replace Worn Chuck Jaws
If cleaning doesn’t help, the chuck jaws might be worn. Worn jaws won’t grip bits properly, causing slipping. Inspect the jaws for grooves or flat spots. If you see damage, replace the entire chuck. Chuck replacement is straightforward. Most chucks unscrew from the drill spindle. Use the correct size wrench and hold the spindle steady. Install the new chuck by threading it on and tightening securely. Ensure it’s aligned properly before final tightening.
Free a Stuck Chuck
Sometimes the chuck gets stuck in one position. To free it, clamp the drill in a vise with the chuck jaws pointing up. Apply penetrating oil to the stuck area. Let it sit for 10-15 minutes. Use a sturdy wrench to gently work the chuck back and forth. Don’t force it too hard, as you might damage the gears. If it won’t budge, apply heat carefully with a heat gun. The metal expands slightly, breaking the rust bond. Once free, clean and lubricate the chuck thoroughly.
4. Excessive Vibration or Unusual Noises
Strange noises or vibrations indicate internal problems. These issues worsen over time if ignored.
Check for Loose Components
Start by tightening all visible screws and bolts. Vibration during use can loosen internal components. Remove the housing and inspect the gear assembly. Look for loose gears, worn bearings, or damaged clutch plates. Tighten any loose parts you find. Replace worn bearings and gears as needed. These parts are available in repair kits for most models. Ensure all components spin freely without binding.
Inspect the Hammer Mechanism
The hammer mechanism creates the pounding action. If it’s damaged, you’ll hear loud knocking or grinding noises. Remove the mechanism and inspect the clutch plates and hammer bits. Look for cracks, chips, or excessive wear. Worn clutch plates slip during use, reducing hammering action. Replace damaged parts immediately. The hammer mechanism is a precision assembly. Don’t force parts during reassembly. Follow your manual’s instructions exactly.
Balance the Drill Bit
Sometimes the problem isn’t the drill but the bit itself. A bent or unbalanced bit causes vibration. Inspect your bits for straightness. Spin them in a drill to check for wobble. Replace any bent bits. Also, ensure you’re using the right bit for the material. Using a wood bit in concrete or vice versa causes strain and noise. Proper bit selection and technique reduces stress on your hammer drill and prevents many problems.
5. Hammer Mechanism Failure
When the hammering action stops, your drill loses its main function. This is often due to worn internal components.
Test Hammer Mode Operation
First, confirm the problem. Switch to hammer mode and drill into a test surface. You should feel and hear the hammering action. If it’s weak or absent, the mechanism needs attention. Check the mode selector switch to ensure it’s engaging properly. Sometimes the switch gets stuck or fails internally. Clean the switch contacts with electrical cleaner. If that doesn’t work, replace the switch assembly.
Replace Worn Clutch Plates
Clutch plates transfer the hammering motion from the motor to the chuck. These plates wear out over time. When worn, they slip and the hammering stops. To replace them, remove the hammer mechanism from the drill. Disassemble the mechanism carefully, noting the order of parts. Replace the clutch plates with new ones. These are usually sold as a set. Reassemble the mechanism and reinstall it in the drill. Test the hammer action before final reassembly.
Check the Mode Selector
The mode selector switch chooses between drill, drive, and hammer modes. If it’s damaged, hammer mode won’t work. Inspect the switch for physical damage or wear. Test it with a multimeter for proper operation. If faulty, replace the entire switch assembly. This is a common failure point on many hammer drills. Replacement switches are inexpensive and easy to install. Just disconnect the old wires and connect them to the new switch in the same order.
Preventive Maintenance Tips
Prevention is always better than repair. Regular maintenance keeps your hammer drill running smoothly for years.
Clean After Every Use
Make cleaning part of your routine. After each job, blow dust out of the vents and chuck. Wipe down the housing with a clean cloth. Don’t use compressed air directly on the chuck, as it can force dirt inside. For deep cleaning, disassemble the housing every few months. Clean all internal parts with a dry brush. This prevents buildup that causes overheating and wear.
Inspect Brushes Regularly
Check carbon brushes every 50 hours of use. Some drills have brush indicators that show when replacement is needed. Mark your calendar or keep a usage log. Replace brushes at the first sign of wear. Having spare brushes on hand saves downtime. When replacing brushes, clean the brush holders too. Dust buildup in the holders can cause poor contact even with new brushes.
Lubricate Moving Parts
Proper lubrication reduces wear on moving parts. Apply grease to the chuck threads monthly. Use a light machine oil on the mode selector switch. Don’t over-lubricate, as excess oil attracts dirt. For the hammer mechanism, use the specific grease recommended by the manufacturer. Too much grease can cause the mechanism to slip. Too little causes excessive wear. Follow the manual’s lubrication schedule.
Store Properly
Store your hammer drill in a clean, dry place. Use the original case or a sturdy tool box. Keep it away from moisture and extreme temperatures. Before storing, clean the tool thoroughly and apply a light coat of oil to metal parts. This prevents rust during long storage periods. Store drill bits separately to avoid damage. Keep the battery charged to about 50% for long-term storage. Recharge it every few months to maintain battery health.
When to Seek Professional Repair
Not all repairs are DIY-friendly. Some problems require professional tools and expertise.
Complex Electrical Issues
If your multimeter tests show complex electrical problems, seek professional help. Issues with the motor windings, internal wiring, or electronic speed control need special equipment. Professional repair shops have the tools to test and repair these components safely. They can also source parts that aren’t available to consumers. The cost is often less than you think, especially compared to buying a new drill.
Major Mechanical Failures
When the main gear assembly or hammer mechanism is severely damaged, professional repair might be best. These components require precise assembly and special tools. If you’ve tried basic repairs and the problem persists, it’s time to call a pro. They can diagnose the issue quickly and recommend the most cost-effective solution. Sometimes a professional rebuild is cheaper than a new tool.
Warranty Considerations
Check your warranty before attempting any repair. Many manufacturers void warranties if you disassemble the tool yourself. If your drill is still under warranty, contact the manufacturer for authorized service. This ensures the repair is done correctly and maintains your warranty coverage. Keep all receipts and service records for warranty purposes.
Cost-Benefit Analysis
Compare repair costs to replacement costs. If repairs exceed 50% of a new drill’s price, consider buying new. New drills have updated features and full warranties. For older drills with multiple problems, replacement often makes more sense. However, for a single, simple problem on a quality drill, repair is usually the better choice. Quality hammer drills last 10+ years with proper care.
Conclusion: Keep Your Hammer Drill Running Strong
Hammer drill repair doesn’t have to be intimidating. Most common problems have simple, affordable solutions. Regular maintenance prevents 80% of issues before they start. Clean your drill after every use. Check brushes every 50 hours. Lubricate moving parts monthly. When problems arise, start with the basics: power source, brushes, and ventilation. These cause most failures. Remember safety first—always unplug the tool and wear protection. Understanding your tool’s specific functions helps you diagnose problems faster. Know when to DIY and when to call a professional. With these tips, your hammer drill will serve you reliably for many years. The money you save on repairs adds up quickly. Plus, there’s satisfaction in fixing your own tools. Happy drilling!
