
Hammer drill safety tips are essential for preventing injuries when drilling into tough materials like concrete and masonry. This guide covers seven critical rules including proper PPE, equipment inspection, correct bit selection, and hazard awareness. Whether you’re a DIYer or professional, following these guidelines will keep you safe on the job.
Key Takeaways
- Always wear PPE: Safety glasses, dust masks, and hearing protection are mandatory when operating a hammer drill.
- Inspect before use: Check cords, batteries, and the chuck for damage to prevent accidents.
- Select correct bits: Use masonry bits for concrete and ensure they’re properly seated in the chuck.
- Secure your workpiece: Clamp materials instead of holding them by hand to maintain control.
- Check for hidden hazards: Scan walls for wires, pipes, and structural elements before drilling.
- Maintain proper stance: Use a stable, balanced position with both hands on the tool for maximum control.
- Clean up safely: Manage dust and debris properly to avoid respiratory issues and slips.
Introduction: Why Hammer Drill Safety Matters
Hammer drills pack serious power. These tools chew through concrete, brick, and stone with ease. But that power comes with risk. Without proper precautions, you could face eye injuries, hearing damage, or worse. Many DIYers grab a hammer drill without understanding its unique dangers. This guide changes that. You’ll learn seven critical rules that prevent accidents and keep you working safely. Whether you’re hanging shelves or tackling a major renovation, these hammer drill safety tips are your blueprint for success.
Before we dive in, let’s clarify what we’re working with. A hammer drill uses a rapid hammering action while spinning. This dual motion breaks up hard materials. It’s different from a regular drill. If you’re unsure about the distinction, check out our guide on the difference between a hammer drill and regular drill. Understanding your tool is the first step to using it safely.
Rule 1: Wear Proper Personal Protective Equipment (PPE)
Your safety gear is your last line of defense. Hammer drills create flying debris and hazardous dust. Skipping PPE is a gamble you can’t afford. Let’s break down what you need.
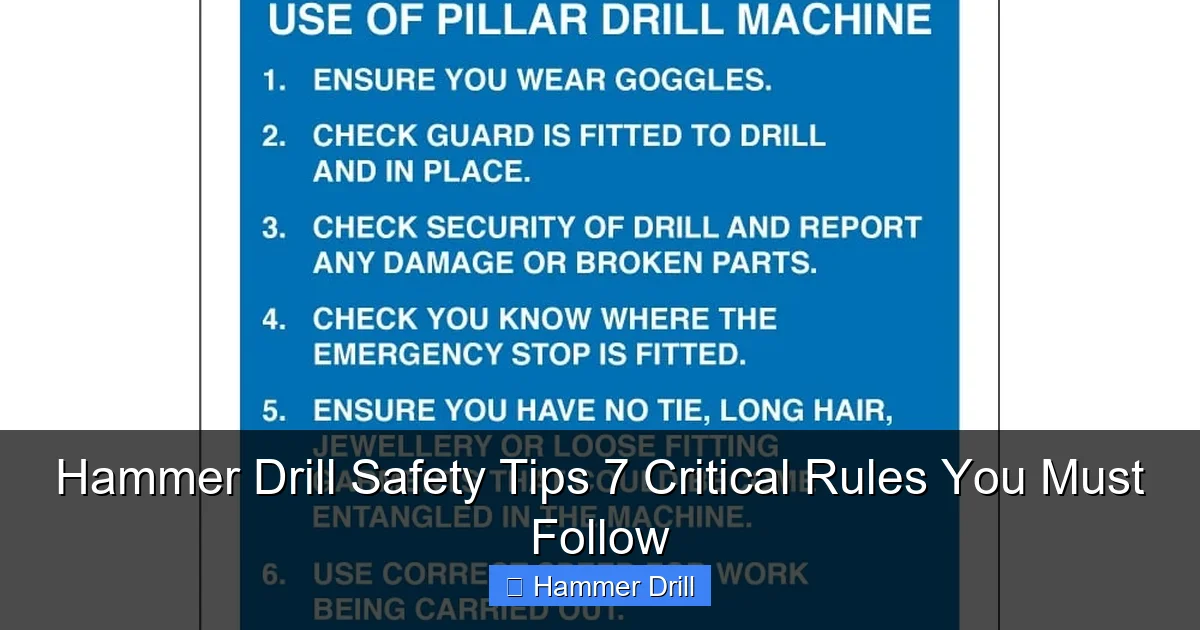
Visual guide about Hammer Drill Safety Tips 7 Critical Rules You Must Follow
Image source: keysigns.co.uk
Eye Protection is Non-Negotiable
Concrete chips fly fast. A single fragment can cause permanent eye damage. Always wear safety glasses with side shields. For heavy-duty work, upgrade to goggles. They provide a tighter seal against dust. Regular glasses won’t cut it. They can shatter on impact. Make sure your eye protection meets ANSI Z87.1 standards. This certification ensures it can handle high-velocity debris.
Protect Your Lungs from Hazardous Dust
Concrete dust contains silica. Breathing it causes serious lung disease. A simple dust mask won’t protect you. You need an N95 respirator at minimum. For prolonged work, consider a half-face respirator with P100 filters. These capture 99.97% of particles. Replace filters regularly. Never reuse disposable masks. Wet drilling reduces dust. But don’t rely on water alone. Respiratory protection is still essential.
Hearing Protection for High-Impact Work
Hammer drills are loud. They can exceed 100 decibels. That’s like standing next to a motorcycle. Prolonged exposure causes hearing loss. Foam earplugs offer basic protection. They’re cheap and effective. For better comfort, try over-ear muffs. Many pros use both. This dual protection is called “dual hearing protection.” It adds an extra safety margin. Keep spare earplugs in your toolbox. You never know when you’ll need them.
Hand and Foot Safety
Heavy vibration affects your hands. Wear work gloves with good grip. But don’t wear them too loose. They could get caught in the chuck. Anti-vibration gloves reduce fatigue. Steel-toe boots protect your feet from dropped tools. They also provide stability on ladders. If you’re working overhead, a hard hat is smart. Falling debris is always a risk.
Rule 2: Inspect Your Hammer Drill Before Every Use
A damaged tool is dangerous. Five minutes of inspection prevents 90% of tool-related accidents. Make this a non-negotiable habit.
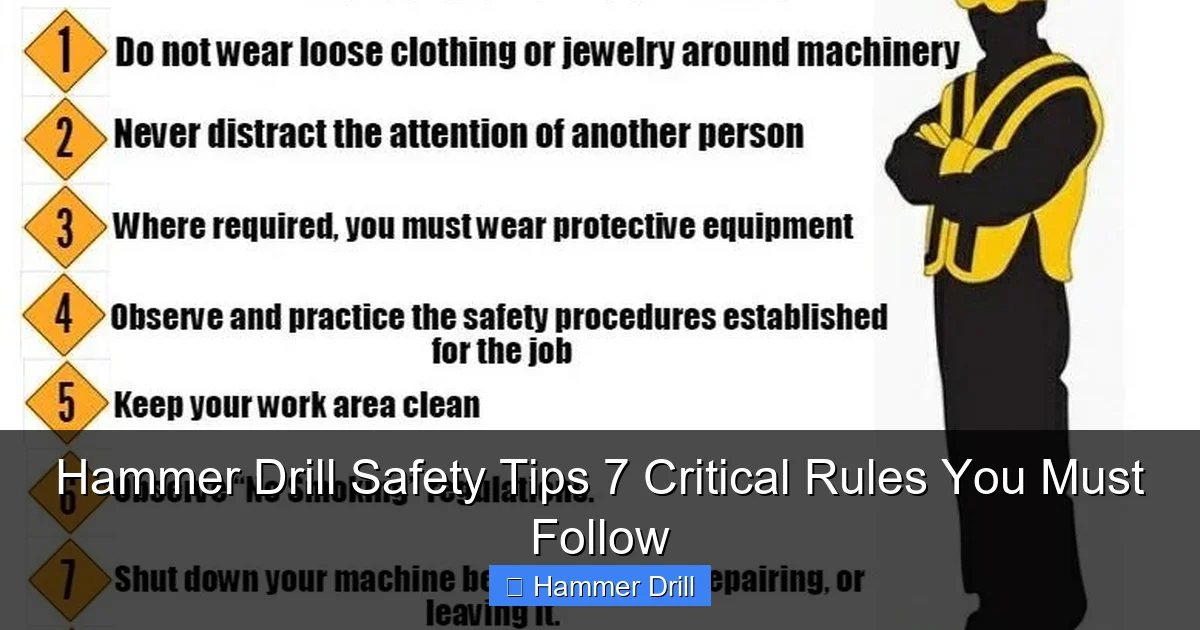
Visual guide about Hammer Drill Safety Tips 7 Critical Rules You Must Follow
Image source: i.pinimg.com
Check the Power Cord and Battery
For corded drills, examine the cord thoroughly. Look for fraying, cuts, or exposed wires. Check the plug prongs. They should be straight and undamaged. For cordless models, inspect the battery. Look for cracks, swelling, or leaks. A swollen battery is a fire hazard. Never use a damaged battery. Remove it from service immediately. Check the battery contacts in the drill. They should be clean and free of debris. Dirty contacts cause poor performance and overheating.
Examine the Chuck and Bit Holder
The chuck holds your bit securely. A loose chuck slips during operation. This can damage the bit or worse. Remove the bit and inspect the chuck jaws. They should move smoothly and grip tightly. Look for wear or damage. Replace worn jaws immediately. Check the chuck key. Keep it nearby but never leave it in the chuck. A spinning chuck key can become a projectile. Some drills have keyless chucks. These need extra attention. Make sure they’re fully tightened by hand.
Test the Trigger and Settings
Before drilling, test the trigger. It should move smoothly without sticking. The lock-on button (if present) should engage and release easily. Switch between modes: drill only, hammer drill, and any other settings. The switch should click positively into place. If it’s loose or ambiguous, don’t use the tool. Have it repaired. Check the speed settings. Hammer drills need variable speed triggers. Test slow and fast speeds. The motor should respond smoothly to trigger pressure.
Rule 3: Choose the Right Bit and Correct Settings
Using the wrong bit ruins your work and risks injury. It’s like using a screwdriver as a hammer. It might work once, but it will fail spectacularly.
Visual guide about Hammer Drill Safety Tips 7 Critical Rules You Must Follow
Image source: cdn2.momjunction.com
Match the Bit to Your Material
Masonry bits are designed for hammer drills. They have a carbide tip that withstands impact. Wood and metal bits will shatter in concrete. Using them can cause dangerous kickback. For concrete, brick, or stone, always use masonry bits. The size matters too. Match the bit diameter to your anchor or screw. A bit that’s too large won’t hold properly. One that’s too small won’t fit. Check the bit’s shank. Hammer drills need bits with a specific shank type. Most use SDS or standard chucks. Know your drill’s requirements.
Understand Hammer Drill Modes
Most hammer drills have three settings: drill, hammer drill, and sometimes a dedicated hammer mode. Drill mode spins without hammering. Use this for wood and metal. Hammer drill mode combines spinning with hammering. This is for masonry work. The dedicated hammer mode (if present) hammers without spinning. Use this for chiseling. Never use hammer mode on wood. It will tear the material apart. If you’re confused about when to use each tool, our article on impact driver vs hammer drill clarifies the differences. Using the wrong mode damages your material and your tool.
Secure the Bit Properly
A loose bit can fly out during operation. That’s a serious hazard. Insert the bit fully into the chuck. For keyless chucks, tighten firmly with both hands. For keyed chucks, use the key to tighten each jaw. Give the bit a firm tug to test the grip. It shouldn’t pull out. Some bits have depth markings. Set your depth stop if your drill has one. This prevents drilling too deep. It also protects pipes and wires behind the surface.
Rule 4: Secure Your Workpiece Like a Pro
An unsecured workpiece moves. This causes inaccurate holes and potential injury. Proper clamping is a simple but critical step.
Clamp Down Loose Materials
Always clamp your workpiece to a stable surface. Use C-clamps or bar clamps. Position them away from your drilling area. This prevents interference with the bit. For irregular shapes, use a vise. A bench vise holds items securely at your workbench. If you’re drilling directly into a wall or floor, ensure it’s structurally sound. Hollow walls need special anchors. Test the wall by tapping. A hollow sound means you need toggle bolts. Never drill into cracked concrete. It can split further and weaken your anchor.
Mark Your Drilling Spot
Measure twice, drill once. Use a pencil or marker to mark your spot. For precision, make a small pilot hole with a nail. This prevents the bit from wandering. Use a center punch for metal surfaces. It creates a divot for the bit tip. When drilling into tile, score the surface first. This prevents chipping. Use masking tape over your mark. It reduces surface chipping and helps the bit grip.
Avoid Holding Small Pieces by Hand
Never hold a small item in your hand while drilling. If the bit catches, the workpiece can spin violently. This causes severe cuts or bruises. Always clamp anything smaller than your hand. For very small items, use a clamp or vise. If you must hold something, use pliers with locking jaws. But clamping is always better. This is one of the most ignored hammer drill safety tips because it seems inconvenient. But convenience isn’t worth injury.
Rule 5: Maintain Proper Body Position and Stance
Your body position determines control. A poor stance leads to fatigue and mistakes. Think of it like a boxer’s stance. Balanced, ready, and in control.
Stance Matters for Control
Stand with your feet shoulder-width apart. Distribute your weight evenly. This gives you a stable base. For overhead work, position yourself directly under the drilling spot. Don’t reach awkwardly. For floor work, kneel or squat. Avoid bending at the waist. Keep your back straight. For vertical surfaces, stand to the side slightly. This avoids standing directly in the debris path. Never stand on a ladder while using a hammer drill. The vibration can cause falls. If you must drill from height, use a stable platform or scaffolding. For more on working at height, see our ladder safety tips.
Keep a Firm Grip
Use both hands on the drill. One hand on the main handle. The other on the auxiliary handle. This handle is usually on the front of the drill. It provides counterforce against rotation. Grip firmly but don’t squeeze too hard. White knuckles mean you’re tense. Relax your grip slightly. Let the drill do the work. Keep your fingers away from the trigger when repositioning. This prevents accidental starts.
Use Your Body Weight, Not Just Your Arms
Let gravity help. Lean into the drill slightly. This provides steady pressure. Don’t force it with your arms alone. Arm fatigue leads to loss of control. For deep holes, advance slowly. Let the bit clear debris periodically. This prevents binding. If the drill binds, it can twist violently in your hands. This is called kickback. Maintaining steady, moderate pressure reduces this risk. Never use excessive force. If the bit isn’t cutting, it’s dull or the wrong type.
Rule 6: Watch for Hidden Hazards
Walls hide dangers. A single mistake can cause electrocution, flooding, or gas leaks. Smart drilling means checking before you connect.
Scan for Electrical Wires
Always assume wires are present. Use a reliable stud finder with AC detection. These devices sense live wires behind walls. Scan the entire drilling area. Move the detector slowly. Mark any wires you find. If you detect power, stop. Call an electrician. Never drill near marked wires. Keep a safe distance of at least 2 inches. For extra safety, turn off the circuit at the breaker. Use a non-contact voltage tester at the wall. It beeps when near live wires. This is a double-check method. Don’t rely on just one tool.
Check for Plumbing and Gas Lines
Plumbing pipes are common in walls. They’re usually copper or PVC. A stud finder won’t detect PVC. Know your home’s layout. Check building plans if available. Avoid drilling near sinks, toilets, or showers. These areas have dense plumbing. For gas lines, the risk is higher. Gas is odorized for detection. If you smell rotten eggs, leave immediately. Don’t use any tools. Call your gas company. When in doubt, drill shallow test holes first. Use a small bit to check for hollow spaces behind walls.
Be Aware of Structural Elements
Never drill into load-bearing walls without professional advice. You could compromise the structure. Avoid drilling near joists or beams. These are structural elements. If you must drill through a stud, use the smallest bit possible. Center it in the stud. Don’t drill near the edges. This weakens the wood. For concrete, check for rebar. A stud finder can sometimes detect metal rebar. If you hit rebar, stop. Drilling through rebar damages bits and can cause injury.
Rule 7: Keep Your Workspace Clean and Organized
A messy workspace causes accidents. Good housekeeping is a safety tool itself. It reduces tripping hazards and improves focus.
Clear the Area Before Starting
Remove clutter from your work area. Put tools on a clean, dry surface. Keep the floor clear of debris. Sweep up dust and chips. A clean floor prevents slips. Keep cords organized. Don’t let them tangle. Use cord hooks or ties. This prevents tripping. Good lighting is part of housekeeping. Poor lighting causes mistakes. Use a work light if needed. Ensure your work area is well-ventilated. This disperses dust and fumes.
Manage Cords and Tripping Hazards
For corded drills, plan your cord route. Keep it behind you, not in front. This prevents running over it with the drill. Use cord covers if crossing walkways. For cordless drills, keep spare batteries charged and ready. Store them in a cool, dry place. Don’t leave batteries in direct sunlight. They can overheat. Keep the battery compartment clean. Wipe it with a dry cloth.
Clean Up Dust Properly
Concrete dust is hazardous. Don’t sweep it dry. This kicks up silica into the air. Use a shop vacuum with a HEPA filter. These capture fine particles. Wet the dust before cleanup if possible. This suppresses airborne particles. Dispose of dust in sealed bags. Don’t empty shop vacs indoors. Do it outside. Wash your hands and face thoroughly after cleanup. Change your clothes if they’re covered in dust. This prevents tracking silica into your home.
Troubleshooting Common Hammer Drill Safety Issues
Even with precautions, problems happen. Knowing how to respond keeps you safe.
The drill is overheating. Stop immediately. Let it cool for 15 minutes. Check for blocked vents. Clean them with compressed air. Overheating can cause motor damage or fire.
The bit keeps slipping. Turn off the drill. Remove the bit. Check the chuck for wear. Clean the chuck and bit shank. Reinsert the bit and tighten firmly. If it still slips, replace the chuck.
Excessive vibration. This indicates a problem. Check if the bit is bent or damaged. Replace it. Check if the bit is seated properly. Ensure you’re using the correct mode for your material. If vibration continues, have the drill serviced.
The drill won’t start. Check the power source first. Is the outlet working? Is the battery charged? If corded, check the circuit breaker. If cordless, try another battery. If it still won’t start, don’t force it. Have it professionally inspected.
Kickback during drilling. This is dangerous. Maintain a firm grip with both hands. Ensure the bit is sharp and appropriate for the material. Don’t force the drill. Let it cut at its own pace. If kickback happens, release the trigger immediately. Reposition and try again with lighter pressure.
Conclusion: Make Safety Your Top Priority
These seven hammer drill safety tips aren’t suggestions. They’re rules for survival. Power tools don’t forgive mistakes. A moment of carelessness can change your life forever. Make safety a habit, not an afterthought. Inspect your gear. Wear your PPE. Check for hidden dangers. Secure your workpiece. Maintain your stance. Keep your workspace clean. These steps take minutes. The consequences of skipping them last a lifetime.
Remember, you’re not just drilling a hole. You’re protecting your health, your safety, and your future. Share these tips with your crew. Teach them to your kids. Make safety contagious. Your hammer drill is a powerful ally. Treat it with respect, and it will serve you well. Now get out there and drill safely.
🎥 Related Video: “Why Machine Guarding Matters: Essential Safety Measures for the Workplace” #ehs #healthandsafety
📺 EHSTree
In this informative video, we explore the critical importance of machine guarding in maintaining a safe and efficient workplace.
