
This guide demystifies the spinning function of a hammer drill. You will learn how its dual-action mechanism works, when to use spinning versus hammer-only mode, and how to troubleshoot common problems. Understanding this is key to drilling efficiently into masonry and other tough materials.
Key Takeaways
- The Spin is for Drilling: The rotating action is what actually cuts through material, while the hammering action pulverizes it.
- Three Modes Are Essential: Most hammer drills have “Drill-Only,” “Hammer-Only,” and “Hammer Drill” modes for maximum versatility.
- Chuck Issues Cause Unwanted Spin: A worn-out or dirty chuck is the most common reason a hammer drill won’t stop spinning when it should.
- Use the Right Mode for the Job: Spinning is useless in “Hammer-Only” mode for chiseling, and “Hammer Drill” mode is overkill for wood or metal.
- Cordless Models Offer Convenience: Modern cordless hammer drills provide excellent power and are perfect for most DIY tasks without the cord hassle.
- It’s Not an Impact Driver: The spinning force in a hammer drill is constant rotation, unlike the rotational impacts of an impact driver used for driving screws.
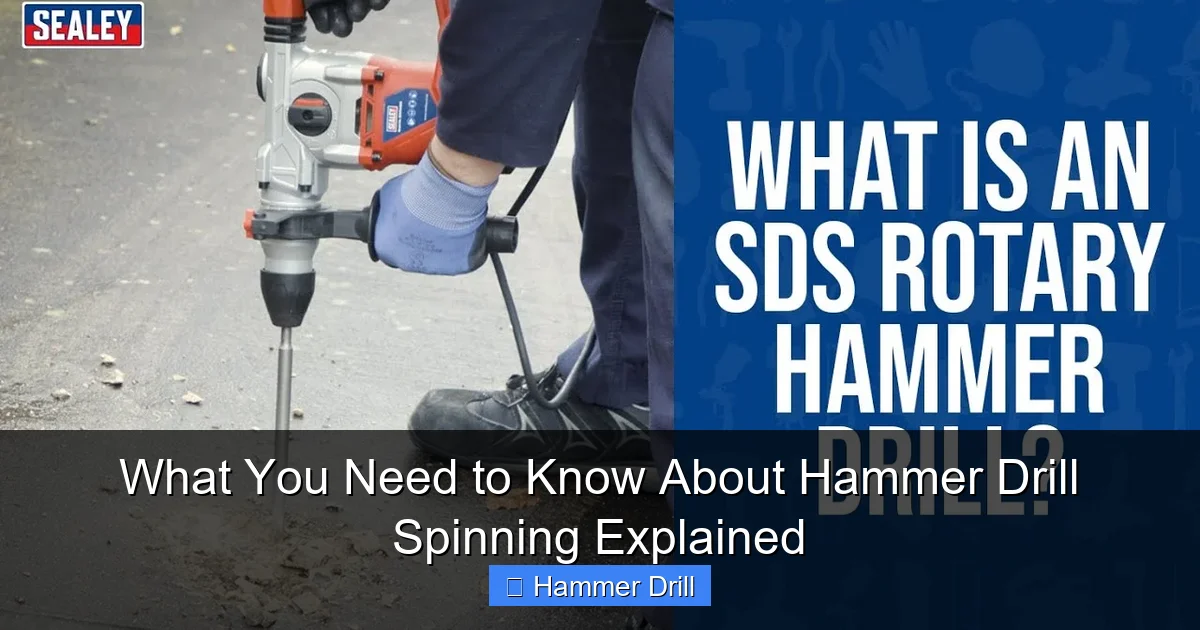
What You Need to Know About Hammer Drill Spinning Explained
Ever picked up a hammer drill, squeezed the trigger, and wondered, “Why is it spinning?” Or maybe you’ve had the opposite problem—it won’t spin when you need it to. You’re not alone. The spinning function is at the heart of what makes a hammer drill so powerful and, at times, confusing.
This guide will break it all down. We’ll look inside the tool to see how the spinning mechanism works with the hammering action. You’ll learn when to use the spin and when to turn it off. We’ll also cover common problems and fixes. By the end, you’ll use your hammer drill with confidence and skill. Let’s get started.
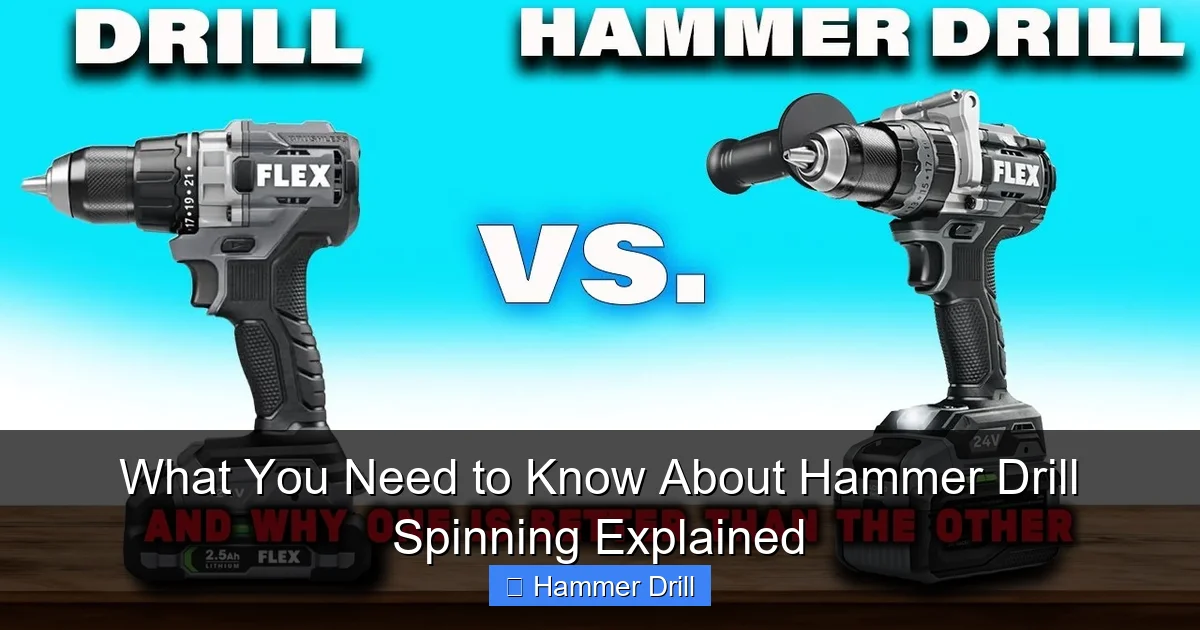
How a Hammer Drill Works: The Spin and The Slam
To understand the spin, you first need to understand the “hammer” part. A standard drill only spins. A hammer drill does two things at once: it spins and it hammers.
Visual guide about What You Need to Know About Hammer Drill Spinning Explained
Image source: i.ytimg.com
Think of trying to dig a hole in concrete with just a twist of your wrist. It’s nearly impossible. Now, imagine hitting the concrete with a hammer and chisel while also turning the chisel. That’s the magic. The spinning drill bit bores into the material, while the rapid, forward hammering blows break it up into tiny pieces. The debris is then carried out by the flutes (spirals) of the bit.
This is the core difference between a drill and a hammer drill. The added hammering action is what makes it a specialist for masonry, brick, stone, and concrete.
The Two Main Mechanisms
There are two common designs that create this hammer-and-spin action:
- The Cam/Plate System (Common in Corded & DIY Cordless): Inside the drill, two ribbed metal plates sit against each other. One plate is connected to the motor and spins. The other is connected to the chuck. As the motor plate spins, its ribs ride up and over the ribs on the chuck plate. This causes the chuck (and your bit) to pulse forward thousands of times per minute while also rotating. It’s a simple, effective pounding action.
- The Piston System (Common in Rotary Hammers): For heavier-duty tools, a piston system is used. The motor turns a crank that drives a piston inside a cylinder. This creates compressed air, which drives a second piston (the striker) that hits the back of the bit or an anvil. This system delivers much more powerful blows. The spinning mechanism is separate but happens simultaneously.
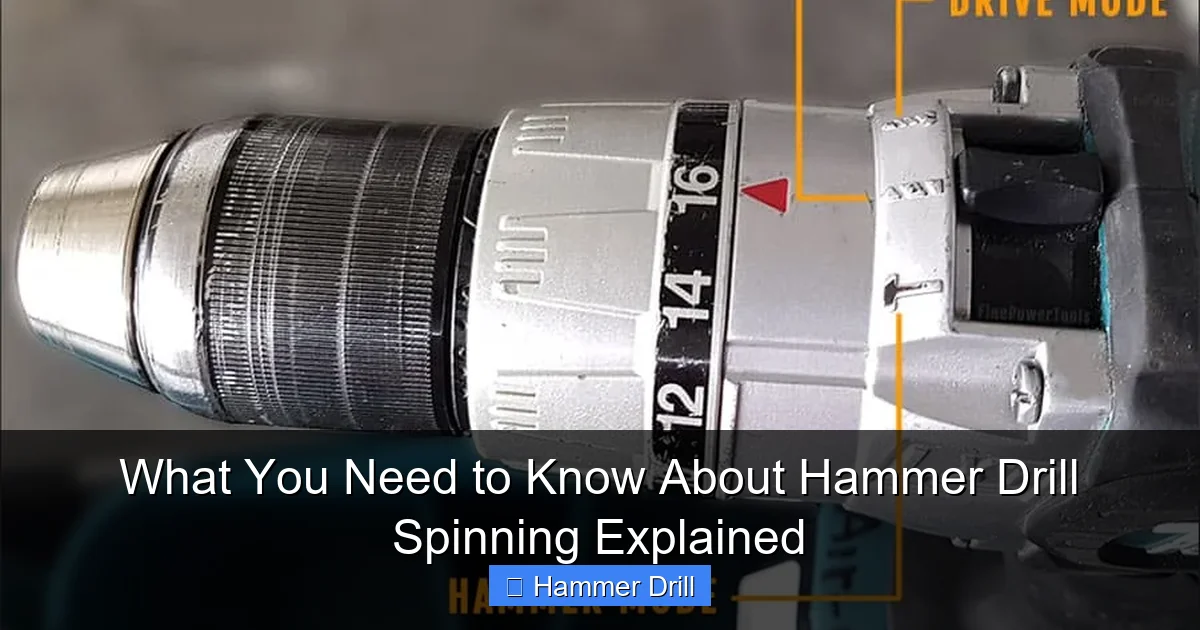
Your Hammer Drill’s Control Settings: Mastering the Spin
This is where you take control. The collar near the chuck of your hammer drill isn’t just for looks. It selects the mode, determining if and how your drill spins.
Visual guide about What You Need to Know About Hammer Drill Spinning Explained
Image source: finepowertools.com
Mode 1: Drill-Only (Symbol: usually a drill bit)
In this mode, the hammer mechanism is completely disengaged. Your tool acts like a standard power drill. It only spins. Use this for all your basic drilling tasks in wood, metal, plastic, or driving screws. Never use the hammer modes on these materials, as it will damage both the material and your drill bit.
Mode 2: Hammer Drill (Symbol: a drill bit with a hammer)
This is the primary mode for the job the tool is named for. Both the spinning and hammering actions are active. This is the setting you use for drilling into masonry, concrete, brick, or stone. The combined force makes quick work of tough materials.
Mode 3: Hammer-Only or Chisel Mode (Symbol: just a hammer)
In this mode, the spinning mechanism is disengaged. The tool only hammers in a straight line, back and forth. This turns your hammer drill into a mini jackhammer. It’s used for light chiseling, demolition, scraping tile, or breaking up small amounts of concrete. You must use specially designed flat chisels or pointed chisels that lock into the chuck but are not meant to rotate.
Understanding these modes is the first step to using the tool correctly. If you’re still unsure about when to choose a hammer drill over other tools, our guide on the difference between a hammer drill and regular drill can help clarify.
Step-by-Step: How to Operate the Spinning Functions
Let’s walk through a typical project: installing a wall anchor into a concrete block.
Visual guide about What You Need to Know About Hammer Drill Spinning Explained
Image source: i.ytimg.com
Step 1: Select the Right Bit and Mode
Always use a carbide-tipped masonry bit. Insert it into the chuck and tighten it securely. Now, look at your mode selector. Rotate the collar to the “Hammer Drill” symbol. This ensures both spinning and hammering will occur.
Step 2: Start Drilling
Hold the drill firmly with both hands. Place the tip of the bit on your marked spot. Start the drill at a slow speed to create a small pilot dent. This keeps the bit from “walking” away from your mark.
Step 3: Apply Proper Pressure and Manage Spin
Once the bit is started, you can increase speed. Apply steady, firm pressure. Let the tool do the work—don’t lean your whole body weight on it. You will feel and hear the distinctive “BRRRRRR” sound of the spinning combined with the rapid “TAT-TAT-TAT” hammer blows. The spin is continuously clearing the crushed material from the hole.
Pro Tip: Occasionally pull the bit partially out of the hole while still spinning (but not hammering) to help clear dust and prevent the bit from getting stuck.
Step 4: Finishing and Switching Modes
Once the hole is deep enough, release the trigger. Before pulling the bit out, switch the mode back to “Drill-Only.” Now you can spin the bit freely to clean out any remaining dust from the hole. This simple step ensures your anchor or plug will sit perfectly.
Troubleshooting Spinning Problems
Sometimes, the spin doesn’t work as expected. Here are common issues and their fixes.
Problem 1: Drill Spins in Hammer-Only Mode
This is a serious safety issue. If the chuck is spinning when you have it in the hammer/chisel-only setting, you could break your chisel or cause an injury.
- Cause & Fix: The most likely culprit is a dirty, greasy, or worn-out mode selector collar or internal cam plate. Try rotating the collar back and forth through all settings several times. If it persists, the internal mechanism may be damaged, and the tool likely needs professional service.
Problem 2: No Spinning in Drill-Only or Hammer Drill Mode
You pull the trigger and hear the motor, but the chuck doesn’t turn.
- Cause & Fix 1 (Brushed Motors): The carbon brushes might be worn out. These are small conductive blocks that transfer electricity to the motor’s armature. They are a common wear item and are usually user-replaceable. Check your manual.
- Cause & Fix 2: For cordless models, the battery may be too weak to provide enough power for the motor to overcome resistance. Try a fully charged, known-good battery.
- Cause & Fix 3: The gearbox or clutch may be severely damaged. This requires a repair shop.
Problem 3: Chuck Spins Freely Without Power (Spin-Drive)
You can rotate the chuck with your hand even when the tool is off, and it offers no resistance.
- Cause & Fix: This is often normal for many hammer drills, especially when in “Hammer Drill” mode, due to the design of the cam plates. However, if it happens in “Drill-Only” mode and the drill won’t drive a screw, the clutch or gear assembly may be broken.
Tips for Optimal Use and Safety
- Always Wear Safety Gear: Safety glasses are non-negotiable. Dust mask and hearing protection are highly recommended for masonry work.
- Use Sharp, High-Quality Bits: A dull bit will spin without making progress, creating excessive heat and wearing out your drill.
- Don’t Force It: If the drill stops spinning or the motor bogs down, you’re pushing too hard or using a dull bit. Ease up.
- Consider Going Cordless: For most household tasks, a modern best cordless drill with hammer function offers more than enough power and incredible convenience without tripping over a cord.
- Know What It’s Not: Remember, the spinning force here is constant rotation. For driving long screws or lag bolts into wood, an impact driver is a better tool than a hammer drill, as it delivers concussive rotational blows to prevent cam-out.
Conclusion: Spin with Confidence
The spinning action of a hammer drill is what turns it from a simple pounder into a precise drilling machine. By understanding the three modes—Drill, Hammer Drill, and Hammer-Only—you unlock the full potential of this versatile tool. You now know that the spin is for cutting and clearing, while the hammer is for breaking. You can troubleshoot a stuck chuck and drill a clean hole in concrete safely. Grab your hammer drill, select the right mode for the job, and put that powerful spin to work.
