
Mastering hammer drill tile drilling requires the right technique and tools to avoid costly cracks. This guide reveals professional tips for choosing bits, controlling speed, and drilling clean holes in any tile type. Discover step-by-step instructions and troubleshooting solutions for perfect results every time.
Key Takeaways
- Choose the right bit: Always use carbide-tipped or diamond-tipped masonry bits designed specifically for tile drilling.
- Start without hammer mode: Begin drilling at low speed without hammer action to create a guide groove, then switch to hammer mode.
- Use masking tape: Apply painter’s tape over drill points to prevent bit slippage and reduce surface chipping.
- Apply gentle pressure: Let the drill do the work. Excessive force is the main cause of tile cracks and fractures.
- Keep bits cool: Periodically dip bits in water to prevent overheating and extend their lifespan.
- Work from back to front: Drill from the backside of tile when possible for cleaner exit points and less visible damage.
- Select proper speed: Use low RPM settings (300-500) for tile drilling to maintain control and prevent damage.
Introduction: Why Hammer Drill Tile Drilling is Different
Drilling into tile isn’t like drilling into wood or drywall. Tile is brittle, hard, and unforgiving. One wrong move can crack your beautiful backsplash or shower wall. That’s why understanding hammer drill tile drilling techniques is essential for DIYers and pros alike.
In this guide, you’ll learn exactly how to use a hammer drill to create clean, precise holes in ceramic, porcelain, and natural stone tiles without damage. We’ll cover tool selection, safety prep, step-by-step techniques, and pro troubleshooting tips that save time and money.
Whether you’re installing showerheads, mounting shelves, or adding electrical outlets, these expert tips will transform your approach to tile work.
Understanding Your Hammer Drill for Tile Work
Before you touch your drill to tile, you need to understand how these powerful tools work and why they’re different from regular drills.
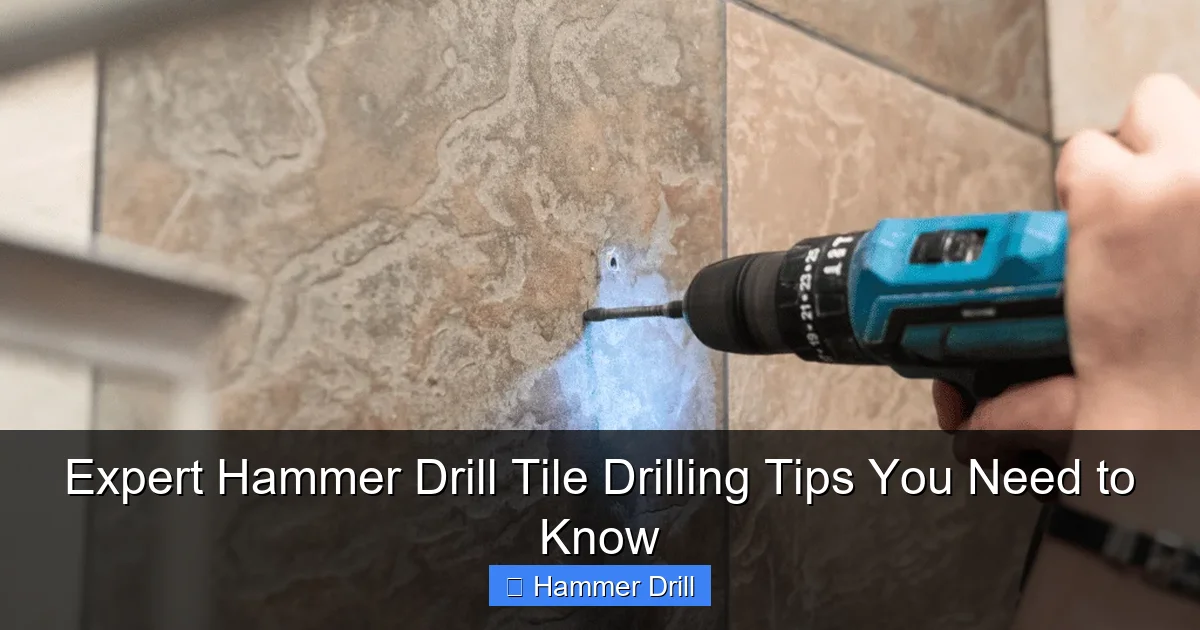
Visual guide about Expert Hammer Drill Tile Drilling Tips You Need to Know
Image source: ceramiccity.ie
The Difference Between Hammer Drills and Regular Drills
A hammer drill combines rotation with a rapid hammering action. This percussive motion helps break up hard materials like concrete and stone. For tile drilling, this feature is both essential and potentially dangerous if misused. The difference between a drill and a hammer drill comes down to this hammering mechanism, which you can typically turn on or off.
Most modern hammer drills have three settings: drill only, hammer drill, and sometimes an impact driver mode. For tile work, you’ll need the hammer drill function, but you must know when to engage it.
Choosing the Right Hammer Drill Model
Not all hammer drills are created equal for tile work. Look for models with variable speed control and adjustable torque settings. Cordless models offer convenience but ensure you have a fully charged battery. The best cordless drill for tile work typically has at least 18 volts and precise speed control.
For serious tile projects, consider a hammer drill with a brushless motor. These run cooler, last longer, and provide more consistent power delivery—critical when working with brittle materials.
Essential Safety Equipment and Workspace Prep
Tile drilling creates fine dust and sharp fragments. Proper protection prevents injuries and ensures better results.
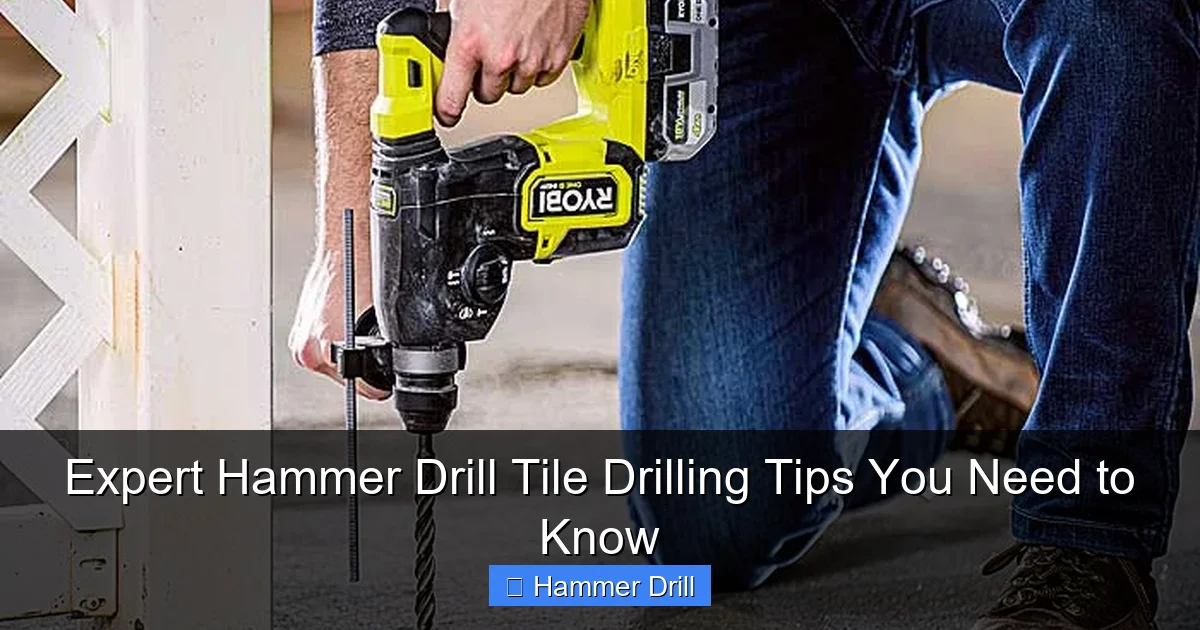
Visual guide about Expert Hammer Drill Tile Drilling Tips You Need to Know
Image source: toolsfinest.com
Personal Protective Gear
Always wear safety glasses with side shields. Tile chips can fly in any direction. A dust mask or respirator is non-negotiable—tile dust is harmful to breathe. Wear hearing protection too; hammer drills are loud. Consider a pair of work gloves to protect your hands, but ensure they don’t interfere with your grip on the tool.
Preparing Your Workspace
Clear the area around your drilling site. Remove any objects that could vibrate loose. Place a drop cloth or towel behind the tile to catch dust and prevent damage to what’s behind it. If you’re working on a ladder, follow essential ladder safety tips to maintain stability while drilling overhead or at height.
Ensure good lighting. Shadows can hide important details and lead to drilling errors. A bright LED work light makes a huge difference in accuracy.
Choosing the Perfect Drill Bits for Tile
The wrong bit will destroy your tile instantly. The right bit makes the job effortless.

Visual guide about Expert Hammer Drill Tile Drilling Tips You Need to Know
Image source: i.ytimg.com
Carbide-Tipped Masonry Bits
These are the standard for most tile drilling. Look for bits labeled for porcelain or ceramic tile. The carbide tip is extremely hard and stays sharp longer than steel. For best results, choose bits with a spear-point tip design. These have a sharp center point that bites into the glaze and prevents walking.
Diamond-Tipped Bits for Tough Tile
Porcelain tile, especially through-body porcelain, requires diamond-tipped bits. These are more expensive but essential for professional results. Diamond bits grind rather than cut, making them perfect for the hardest tile surfaces. They’re slower but produce cleaner holes with minimal chipping.
Bit Size Selection
Match your bit size to the anchor or screw you’ll use. For small tiles, start with a 1/8-inch bit for pilot holes. For larger fixtures, use 1/4-inch or 3/8-inch bits. Always check the manufacturer’s recommendations for your specific tile type.
Preparing the Tile Surface for Drilling
Proper preparation prevents most common drilling problems. This step takes seconds but saves hours of frustration.
Clean and Dry the Surface
Wipe the tile with a clean, dry cloth. Remove soap scum, grease, or any residue. A clean surface ensures your markings are visible and your bit can grip properly. Moisture can make masking tape less effective, so ensure the tile is completely dry.
Mark Your Drill Points Accurately
Use a pencil or marker to mark your hole location. For precision, use a center punch or awl to create a small indentation. This tiny divot gives the drill bit a place to start and prevents it from wandering. Measure twice, drill once.
The Masking Tape Trick
This is the most important tip in hammer drill tile drilling. Apply a small piece of blue painter’s tape over your mark. The tape does three things: it prevents the bit from slipping, reduces surface chipping, and helps the bit stay cool. Press the tape firmly so it adheres well to the glaze.
Step-by-Step Drilling Technique
Now comes the moment of truth. Follow these steps for perfect holes every time.
Starting with a Pilot Hole
Set your hammer drill to low speed (under 500 RPM) with the hammer action turned OFF. Place the tip of your bit on the tape-covered mark. Hold the drill at a 90-degree angle to the tile surface. Start drilling with gentle pressure, creating a small groove or pilot hole about 1/8-inch deep. This step establishes your hole location and prevents the bit from walking when you increase speed.
Engaging Hammer Mode Correctly
Once you have your pilot groove, increase the speed slightly and turn ON the hammer action. Keep the drill perpendicular to the tile. Apply steady, moderate pressure—let the hammer action do the work. Don’t force it. The drill should move forward slowly, almost as if it’s tapping its way through.
Maintaining Control and Angle
Keep both hands on the drill if possible. Use the side handle for maximum stability. Watch the drill’s angle constantly. Even a slight tilt can cause the bit to slip or create an oversized hole. If you feel the drill starting to wander, stop immediately and reposition.
Cooling Your Bit
Drill for about 10-15 seconds, then pull the bit out and dip it in a cup of water for 5 seconds. This prevents overheating, which dulls bits quickly and can crack tile from thermal stress. Repeat this process until you’ve drilled through completely.
Advanced Tips for Different Tile Types
Not all tiles respond the same way to drilling. Adjust your technique based on the material.
Drilling Ceramic Tile
Ceramic tile is relatively soft and forgiving. Use standard carbide bits at moderate speed. The glaze is the tricky part—once through the glaze, drilling becomes easier. Don’t rush this transition. You’ll feel the drill break through; immediately reduce pressure to avoid blowing out the back of the tile.
Conquering Porcelain Tile
Porcelain is dense and hard. Use diamond-tipped bits at low speed with frequent cooling. Porcelain requires more patience. Drill in short bursts, allowing the bit to clear dust each time. Consider using a spray bottle with water to continuously cool the bit and reduce dust.
Working with Natural Stone
Stone tiles like marble, granite, or slate require special care. Use carbide bits designed for stone. Drill at the lowest possible speed with minimal hammer action. Stone can split or crack easily. For polished stone, the masking tape trick is absolutely critical to prevent chipping the finish.
Troubleshooting Common Problems
Even with perfect technique, issues can arise. Here’s how to handle them.
Tile Cracking and Chipping
If your tile cracks, you’re likely using too much pressure or too high a speed. Stop immediately. For small chips, you might be able to fill them with matching caulk. Prevention is always better. Ensure you’re using sharp bits—dull bits require more pressure and create more heat, both of which cause cracks.
Drill Bit Slipping
Bit slippage usually means your pilot groove isn’t deep enough or your masking tape has come loose. Stop and re-tape the area. Use a center punch to create a deeper starting point. Hold the drill at a slight angle initially, then straighten it once the bit bites.
Overheating Issues
If your bit gets too hot, it loses hardness and dulls quickly. You’ll smell burning and see discoloration. Always cool bits regularly. If you’re drilling multiple holes, have two bits ready—one drilling, one cooling. Store bits in water between uses.
Slow Progress
If drilling is painfully slow, you might have the wrong bit type or your bit is dull. Check that you’re using a masonry bit, not a wood bit. For porcelain, ensure you have a diamond bit. Sometimes simply increasing the hammer action setting slightly can help, but don’t exceed 700 RPM for tile.
Final Pro Tips for Perfect Results
These finishing touches separate amateur work from professional installations.
Working from the Backside
When possible, drill from the back of the tile. This produces a cleaner hole on the visible side. The drill bit typically creates a small blowout on the exit side. If you must drill from the front, plan your hole placement so any minor chipping occurs where fixtures will cover it.
Using the Right Anchor
Once your hole is drilled, use the appropriate anchor for your tile and wall type. For hollow walls behind tile, use toggle bolts or molly bolts. For solid backing, plastic expansion anchors work well. Never use a screw directly into tile without an anchor—it will crack under pressure.
Cleaning Up After Drilling
Remove masking tape carefully. Clean dust from the hole with a vacuum or brush. Wipe the tile surface with a damp cloth to remove any residue. This ensures your anchors seat properly and your fixtures look clean.
Conclusion: Practice Makes Perfect
Mastering hammer drill tile drilling takes practice, but these tips will get you professional results on your first project. Remember the key principles: use sharp bits, start slow without hammer action, keep everything cool, and let the drill do the work.
Start with scrap tile to test your technique before working on your actual installation. This simple step builds confidence and prevents costly mistakes. With the right tools, proper preparation, and controlled drilling, you can tackle any tile project successfully.
Now that you know these expert hammer drill tile drilling tips, you’re ready to install that shower shelf, mount your TV bracket, or add lighting to your tiled bathroom with confidence.
