
Hammer drill tile drilling doesn’t have to end in cracked tiles. This guide reveals the exact techniques pros use to drill clean holes in ceramic, porcelain, and stone tiles without damage. You’ll learn when to use hammer mode, which bits work best, and the step-by-step process for perfect results.
Key Takeaways
- Use hammer mode sparingly: For most tiles, start without hammer action and only engage it for the wall behind, if needed.
- Masking tape is magic: A small piece over your mark prevents bit slippage and tile chipping.
- Start slow: Low speed and gentle pressure create a pilot groove before increasing power.
- Right bit matters: Diamond-tipped or carbide drill bits are essential for clean tile holes.
- Keep it cool: Periodically dip the bit in water to prevent overheating and extend bit life.
- Angle perfectly: Hold the drill at exactly 90 degrees to avoid wandering or cracking.
- Backing board saves: Use a scrap wood behind the tile to prevent blow-out on the backside.
Introduction: Why Hammer Drill Tile Drilling Is Different
You wouldn’t use a sledgehammer to crack an egg. Yet many DIYers grab their hammer drill for tile work without understanding the damage they might cause. Hammer drill tile drilling requires a delicate touch and specific techniques that differ from drilling into wood or metal. This guide will transform you from a tile-cracking novice into a confident pro who gets perfect holes every single time.
We’ll cover everything from tool selection to advanced techniques for porcelain, ceramic, and natural stone tiles. You’ll discover when to use that hammer action and, more importantly, when to turn it off completely. By the end, you’ll know the exact steps that actually work, not just the theory.
Understanding Your Hammer Drill for Tile Work
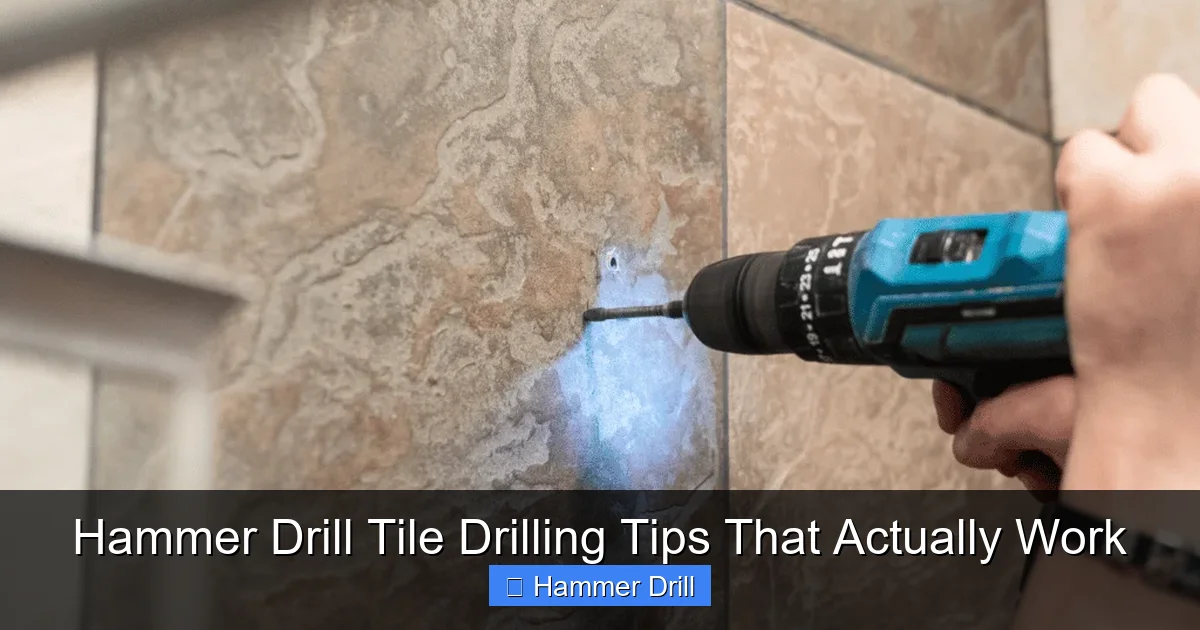
Before you touch a tile, you need to understand what makes a hammer drill unique. A regular drill simply spins. A hammer drill adds a rapid forward-and-back pounding motion. This hammer action works great for concrete and masonry but can shatter brittle tile surfaces.

Visual guide about Hammer Drill Tile Drilling Tips That Actually Work
Image source: i.ytimg.com
If you’re unsure about your tool’s capabilities, check out our guide on the difference between a drill and a hammer drill. This knowledge will help you make smarter decisions on the job.
When to Use Hammer Mode on Tile
Here’s the golden rule: Never use hammer mode directly on tile surfaces. The percussive action will almost certainly crack or chip your tile. Instead, use your hammer drill in regular drill mode for the tile itself. Save the hammer action for when you hit the wall substrate behind the tile—usually drywall, cement board, or concrete.
For thin tiles under 6mm, you might not need hammer mode at all. For thicker porcelain tiles, you’ll need to drill through the tile first, then switch to hammer mode for the backing material.
Speed Settings Are Your Best Friend
Your hammer drill likely has multiple speed settings. For tile drilling, you want the slowest speed possible—usually the first gear on most models. High speeds create heat and vibration that cracks tiles. Think of it like driving in a school zone: slow and steady wins the race.
Essential Tools and Materials
Success starts with having the right gear. Don’t skip these items or you’ll end up with a mess and broken tiles.
Visual guide about Hammer Drill Tile Drilling Tips That Actually Work
Image source: ceramiccity.ie
Must-Have Drill Bits
Regular twist bits will not work on tile. You need specialized bits designed for hard, brittle materials:
- Diamond-tipped drill bits: Best for porcelain and natural stone. They last longer and cut cleaner.
- Carbide-tipped masonry bits: Good for ceramic tiles and occasional porcelain work. More affordable but wear faster.
- Spear-pointed carbide bits: Excellent for starting holes in glazed tiles without slipping.
For holes larger than 1/2 inch, use a hole saw with a diamond or carbide edge. Always match your bit size to the anchor you’ll be using.
Supporting Supplies
These simple items make a huge difference:
- Masking tape: Creates a “grip” surface for your drill bit
- Spray bottle with water: For cooling the bit and reducing dust
- Center punch or nail set: Makes a small divot to guide your bit
- Variable speed trigger or external switch: Gives you better speed control
- Scrap wood backing: Prevents backside blowout
- Safety glasses and dust mask: Non-negotiable protection
Step-by-Step Hammer Drill Tile Drilling Guide
Follow these steps exactly. Each one serves a purpose and skipping any can lead to cracked tiles or failed holes.
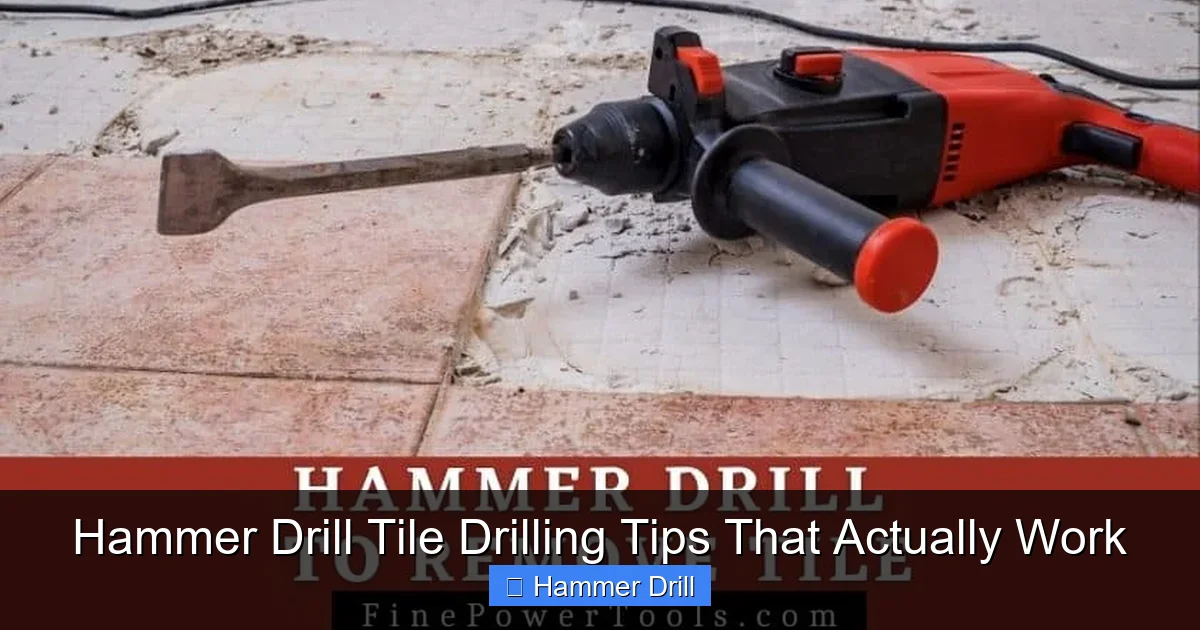
Visual guide about Hammer Drill Tile Drilling Tips That Actually Work
Image source: finepowertools.com
Step 1: Mark and Prepare Your Surface
Measure twice, drill once. Use a pencil or marker to make your exact hole location. Then, place a small piece of masking tape over the mark. This serves two purposes: it prevents the drill bit from wandering, and it reduces surface chipping.
Press the tape firmly so it adheres well. If you’re drilling multiple holes, use a template or spacer to keep everything aligned. For plumbing or electrical work behind the tile, turn off the power or water supply first.
Step 2: Create a Pilot Guide
Take a center punch or nail set and make a small indentation in the center of your taped mark. This gives your drill bit a place to “bite” and stay put. Don’t hit it too hard—just enough to create a slight dimple in the tile glaze.
Some pros skip this step, but for beginners, it’s essential. Without a pilot guide, your bit will skate across the slick tile surface, leaving scratches and making you start over.
Step 3: Start with Low Speed and Gentle Pressure
Set your hammer drill to the lowest speed setting. Make sure the hammer action is OFF. Position the bit at a 45-degree angle to the tile surface, then gently touch the tip to your pilot mark.
Slowly straighten the drill to 90 degrees as the bit begins to cut. Apply light, steady pressure—let the bit do the work. Imagine you’re holding a baby bird: firm enough to keep it safe, but gentle enough not to hurt it. Too much pressure forces the bit and cracks the tile.
Drill for about 5-10 seconds, then stop. Check your progress and cool the bit by dipping it in water. This prevents overheating, which can dull the bit and damage the tile.
Step 4: Master the Angle and Technique
Keeping your drill perfectly perpendicular to the tile is critical. Use the edge of the tile as a visual guide. Some drills have built-in angle guides, or you can buy an inexpensive drill guide attachment.
If you notice the bit starting to wander, stop immediately. Increase the pressure slightly on the masking tape side or add another small piece of tape. Never try to correct a wandering bit by jerking the drill—this is how tiles crack.
For larger holes, start with a small pilot bit (1/8 inch), then gradually step up to your final size. This technique reduces stress on the tile and gives you more control.
Step 5: Drilling Through to the Wall
Once you’ve drilled through the tile itself (usually 1/8 to 1/4 inch deep), you’ll feel the resistance change. This is where most people make mistakes. If you’re drilling into cement board or concrete behind the tile, now you can switch to hammer mode.
Stop the drill, change the setting to hammer drill mode, and reset your speed to low-medium. Start drilling again with gentle pressure. The hammer action will help break through the masonry without you having to push excessively hard.
Be aware of what’s behind your tile. If you’re drilling into drywall, keep hammer mode off. Hammering drywall just makes a bigger hole and damages the wall.
Step 6: Finishing the Hole Cleanly
When you’re almost through the backing material, reduce your pressure again. The last bit of material can cause the bit to grab and spin, which might crack your tile. Keep the drill steady and let it cut through at its own pace.
Remove the drill while it’s still spinning. This prevents the bit from catching on the edge of the hole. Clean out any dust with a vacuum or brush. If you used masking tape, peel it off carefully. You should have a clean, chip-free hole ready for your anchor.
Pro Tips for Specific Tile Types
Not all tiles are created equal. Your technique needs to adapt to the material you’re working with.
Ceramic Tile
Ceramic is relatively soft but still prone to chipping. Use carbide bits at low speed. The glaze on ceramic can be slick, so extra masking tape is wise. If you’re drilling near the edge of a ceramic tile, place a piece of scrap wood behind it to support the structure and prevent cracking.
Porcelain Tile
Porcelain is dense and hard. Diamond-tipped bits are almost mandatory. Use the slowest speed possible and keep the bit cool with frequent water dips. Porcelain generates more heat than ceramic, so don’t rush. Some professionals use a small hammer and chisel to score the glaze first, then drill.
Natural Stone Tile
Stone tiles like marble, granite, or slate require extra care. They’re brittle and can split. Use diamond bits and the slowest speed. Apply even less pressure than with ceramic. For marble, consider using a diamond hole saw for larger holes—it’s slower but much safer. Always support the tile from behind with scrap wood.
Mosaic Tile Sheets
Drilling into mosaics is tricky because you might hit grout joints or multiple small tiles. Find a tile center, not a grout line. Place a straightedge across the sheet to guide your drill angle. Go extra slow and use a backing board to prevent individual tiles from popping loose.
Common Mistakes to Avoid
Learn from others’ failures. These mistakes crack more tiles than anything else.
Using Too Much Speed
High RPMs create heat and vibration. Both crack tiles. Your drill should sound like it’s struggling slightly—that’s normal. If it sounds like it’s whining or cutting too easily, you’re going too fast.
Skipping the Masking Tape
This simple step prevents 90% of bit-slip incidents. Don’t be lazy. The tape costs pennies and saves you from ruining a $50 tile.
Forgetting to Cool the Bit
A hot bit dulls quickly and transfers heat to the tile, causing thermal stress cracks. Dip it in water every 10-15 seconds. It takes an extra minute but saves your project.
Drilling Too Close to Edges
Never drill within 1/2 inch of a tile edge unless absolutely necessary. The structural integrity is weakest there. If you must, use a backing board and go slower than usual.
Ignoring What’s Behind the Tile
Always know what’s behind your tile before you drill. Hitting a pipe or wire can be dangerous and expensive. Use a stud finder with AC detection or a borescope camera for critical applications.
Troubleshooting Guide
When things go wrong—and they might—here’s how to fix it or prevent further damage.
Bit Won’t Bite Into the Tile
If your bit is skating across the surface despite tape and a pilot mark, the glaze might be too hard. Try using a nail set to make a deeper starter hole. Or, place a piece of sandpaper between the tape and tile for extra grip. You can also try a different bit—sometimes a slightly dull bit works better on ultra-hard glazes.
Tile Cracks While Drilling
Stop immediately. If the crack is small, you might be able to epoxy it, but the tile is compromised. For future holes, reduce your pressure by half and slow your speed further. Consider using a step bit that gradually increases in size rather than one large bit.
Bit Gets Stuck
Reverse the drill slowly while pulling back. Never yank it. If it won’t release, stop the drill and let it cool. Sometimes thermal expansion causes binding. Lubricate with water if you haven’t been cooling it regularly.
Hole Is Larger Than Expected
This usually means the bit wandered. For your next hole, use more tape, a deeper pilot mark, and lighter pressure. If you need to fix an oversized hole, fill it with epoxy, let it cure, then redrill the correct size.
Excessive Chipping on the Backside
You’re not supporting the tile properly. Always use a backing board—a piece of scrap wood placed behind the tile. This supports the material and prevents blow-out when the bit exits.
Safety First: Protecting Yourself and Your Work
Tile drilling creates fine dust that’s harmful to breathe. Always wear a NIOSH-approved dust mask (N95 minimum). Safety glasses are mandatory—flying chips can blind you. Work in a well-ventilated area or use a shop vac with a HEPA filter.
If you’re working on a ladder to reach high tiles, safety becomes even more critical. Check out our essential safety tips for climbing ladders to avoid falls and injuries.
Keep your work area clean. Wipe up water spills immediately to prevent slipping. Unplug your drill when changing bits. These simple habits prevent most accidents.
Conclusion: Practice Makes Perfect
Hammer drill tile drilling is a skill that improves with practice. Before tackling your main project, drill a few test holes in a spare tile or piece of scrap. This gives you confidence and helps you dial in your technique.
Remember the key points: tape your surface, start slow, keep it cool, use the right bit, and support the tile from behind. Most importantly, know when to use hammer mode and when to leave it off. Your hammer drill is a versatile tool, but it needs to be tamed for delicate tile work.
With these tips, you’ll drill perfect holes that look professional and hold your fixtures securely. No more cracked tiles, no more frustration, and no more expensive call-backs. You’ve got this.
Final Checklist Before You Start
- ✅ Tile is properly supported from behind
- ✅ Masking tape applied over drill point
- ✅ Pilot mark created in tile glaze
- ✅ Correct drill bit selected (diamond for porcelain, carbide for ceramic)
- ✅ Hammer mode turned OFF for tile surface
- ✅ Drill speed set to LOW
- ✅ Safety glasses and dust mask on
- ✅ Water ready for cooling
- ✅ Know what’s behind the tile
Follow this checklist and these steps, and you’ll master hammer drill tile drilling in no time. Happy drilling!
