
Choosing between a hammer drill and regular drill depends entirely on your project material. This guide breaks down exactly when to use each tool for optimal results. You’ll learn the mechanical differences, practical applications, and how to avoid damaging surfaces or wasting money on the wrong equipment.
Key Takeaways
- Regular drills work perfectly for wood, metal, plastic, and drywall using standard drill bits
- Hammer drills are essential for masonry, concrete, brick, and stone with their hammering action
- You can use a hammer drill as a regular drill by turning off hammer mode, but not vice versa
- Hammer drills are heavier, noisier, and more expensive due to their specialized mechanism
- For occasional concrete projects, renting a hammer drill beats buying one you’ll rarely use
- Always match your drill to the material to prevent damage and ensure clean, efficient holes
- Modern cordless hammer drills offer versatility for both DIY enthusiasts and professionals
Introduction: Making the Right Choice Between Hammer Drill vs Regular Drill
You’re standing in the hardware store, staring at two similar-looking power tools. Both have handles, triggers, and chucks for bits. But one costs more, sounds more aggressive, and has confusing symbols on its switch. Which do you buy? This guide eliminates that confusion forever.
We’ll walk through exactly what makes these tools different, when you absolutely need a hammer drill, and when a regular drill will save you time and money. By the end, you’ll know precisely which tool to grab for your next project.
What Is a Regular Drill? Understanding the Basics
A regular drill (also called a standard drill or just “drill”) is your everyday power tool for creating holes and driving screws. It’s the Swiss Army knife of drilling tools—versatile, lightweight, and essential for most projects.
Visual guide about Hammer Drill vs Regular Drill Guide When to Use Which
Image source: cordlessrotaryhammer.com
How It Works: Simple Rotational Force
Regular drills use pure rotational motion. When you pull the trigger, the motor spins the chuck, which turns your drill bit in a circle. This spinning action cuts through materials by shearing and scraping.
The mechanism is straightforward: motor to gears to chuck. No fancy hammering, no percussive action. Just clean, controlled rotation that works on most surfaces you’ll encounter at home.
Best Materials for Regular Drills
Regular drills shine on soft to medium materials. Wood is their best friend—whether you’re drilling pilot holes for deck screws or making dowel joints. They handle plywood, hardwood, and softwood with equal ease.
Metal works well too, especially when you use sharp metal drill bits and go slow. Sheet metal, aluminum, and even steel become manageable with the right speed setting.
Plastic and drywall pose no challenge. These materials require minimal force and produce clean holes without tear-out. For drywall, you’ll appreciate the gentle touch of a regular drill when installing shelves or TV mounts.
What Is a Hammer Drill? The Concrete Specialist
A hammer drill looks like a regular drill’s bigger, tougher sibling. It has the same basic components but adds one crucial feature: a hammering mechanism that pounds the bit while it spins.
Visual guide about Hammer Drill vs Regular Drill Guide When to Use Which
Image source: thesawguy.com
This dual action makes it the go-to tool for hard materials that would laugh at a regular drill. Think concrete, brick, stone, and masonry—surfaces where you need serious impact force.
How It Works: Hammer and Spin Combined
Here’s the magic: inside a hammer drill, two plates (called ratcheting plates) click together and apart as the motor runs. This creates a rapid hammering motion—up to 50,000 blows per minute on high-end models.
While the bit hammers forward, it continues spinning. This combination pulverizes hard materials while the rotation clears away dust. It’s like having a tiny jackhammer and drill working together in one tool.
Most hammer drills let you switch between modes: drill-only (like a regular drill), hammer-only, or hammer-drill (both actions together). This versatility makes them useful for a wider range of projects.
When Hammer Mode Is Absolutely Necessary
You need hammer mode when working with concrete, brick, cinder block, natural stone, or tile. These materials are too dense and brittle for standard drilling.
Without hammer action, a regular drill bit would just skate across the surface, overheat, and dull instantly. The hammering action breaks up the material, allowing the bit’s cutting edges to bite in and remove debris.
Even for small projects—like installing a mailbox post or hanging a heavy mirror on a brick wall—a hammer drill is non-negotiable. Using anything else is frustrating, wasteful, and often impossible.
Key Differences Compared Side by Side
Let’s break down the hammer drill vs regular drill comparison into clear categories so you can see exactly how they differ.
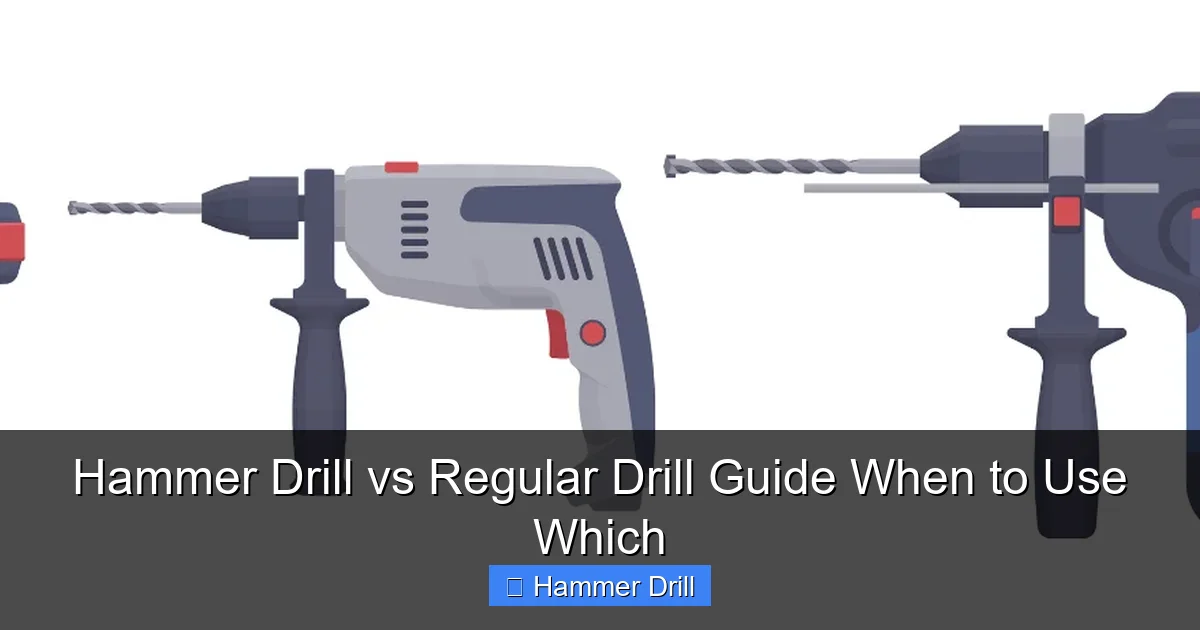
Visual guide about Hammer Drill vs Regular Drill Guide When to Use Which
Image source: images.surferseo.art
Mechanism Differences: Why They Perform Differently
The core difference is the hammering mechanism. Regular drills have a simple gear train that converts motor rotation to chuck rotation. Hammer drills add a cam mechanism that creates that crucial forward-backward pounding motion.
This mechanical complexity means hammer drills have more moving parts, which translates to higher manufacturing costs and potentially more things that could break. But for masonry work, you simply can’t replicate this action with a regular drill, no matter how hard you push.
Performance Differences: Speed and Power
Hammer drills typically have higher RPM ranges but lower torque than regular drills. They’re built for speed and impact, not for driving long screws or mixing paint.
Regular drills offer more torque at lower speeds, making them better for screwdriving and applications where you need to control the tool precisely. They’re also gentler on your wrists during extended use.
For pure hole-making speed in hard materials, hammer drills win every time. They can drill a 1/4-inch hole in concrete in seconds versus minutes (or never) with a regular drill.
Size and Weight Differences: Handling Matters
Hammer drills are noticeably heavier—often 2-3 pounds more than comparable regular drills. This weight helps drive the hammering action but makes them tiring to hold overhead or for long periods.
The extra bulk comes from the hammer mechanism and heavier-duty construction. If you’re working on a ladder or doing precision work, a regular drill’s lighter weight gives you better control and less fatigue.
For most DIY projects, this weight difference matters less than having the right tool for the job. But if you’re doing repetitive work, consider it carefully.
Noise and Vibration Levels: The User Experience
Hammer drills are loud. They sound like a small jackhammer, and the vibration travels up your arms. You’ll want hearing protection and maybe gloves for extended use.
Regular drills are quiet by comparison. They hum and whir but don’t shake your bones. For indoor projects or shared spaces, this makes a big difference in neighbor and family relations.
The vibration difference also affects accuracy. Regular drills let you place holes precisely, while hammer drills require a firm grip and acceptance that your holes might be slightly less perfect.
When to Use a Regular Drill: Your Go-To Projects
Your regular drill should be your first choice for 90% of household projects. Here’s exactly when to reach for it.
Woodworking Projects: From Furniture to Framing
Wood is where regular drills excel. Whether you’re building a bookshelf, framing a wall, or installing trim, a regular drill gives you the control you need.
Use it for pilot holes before screws—this prevents splitting and makes driving easier. For joinery, you’ll appreciate the precision and clean hole walls.
When working with delicate wood like veneer or antique furniture, a regular drill’s gentle touch prevents tear-out and damage. You can dial down the speed for extra finesse.
Metal Drilling: Clean Holes in Steel and Aluminum
Drilling metal requires patience and the right bit, but a regular drill handles it perfectly. Use sharp high-speed steel bits, clamp your workpiece, and go slow with steady pressure.
The key is speed control. Too fast, and you’ll overheat the bit and work-harden the metal. Too slow, and the bit won’t cut. Most regular drills have variable speed triggers that let you find the sweet spot.
For sheet metal, start with a pilot hole to prevent the bit from wandering. The result is a clean, accurate hole that won’t require much cleanup.
Plastic and Drywall: Gentle Touch Required
Soft materials like plastic and drywall need a light touch. Regular drills provide exactly that. Use a low speed setting to prevent melting plastic or tearing drywall paper.
For drywall, you can even use a drywall bit that’s designed to stop when it hits the stud. This prevents you from drilling too deep and damaging pipes or wires behind the wall.
When installing plastic anchors for light fixtures, a regular drill gives you the finesse to avoid cracking the anchor or the wall.
Screwdriving Tasks: The Real Powerhouse
Here’s where regular drills truly shine. While hammer drills can drive screws, they’re not optimized for it. Regular drills have the torque and speed control needed for driving dozens of screws without stripping them.
Use a hex-shank screwdriver bit and the right clutch setting. The clutch stops the drill when it reaches the preset torque, preventing overdriving and damaging your material.
For deck building, drywall installation, or any project with many screws, a regular drill will save your wrists and produce better results than a hammer drill.
When to Use a Hammer Drill: The Must-Have Applications
When you hit a material that resists standard drilling, it’s time for the hammer drill. Here are the projects where it’s essential.
Masonry and Concrete: The Primary Use Case
Concrete, brick, cinder block, and stone require hammer action. These materials are dense and brittle—perfect for hammer drilling but terrible for regular drills.
Use carbide-tipped masonry bits designed for hammer drills. The carbide tip stays sharp against concrete, while the flutes remove dust efficiently.
For installing anchors, conduit, or anything structural in concrete, a hammer drill is mandatory. Trying to use a regular drill is like using a spoon to dig a hole—it might work eventually, but you’ll waste time and energy.
Tile Installation: Breaking Through the Hard Surface
Tiling a bathroom or kitchen backsplash? You need a hammer drill for the backer board and any tile over concrete. Even though tile itself is brittle, the hammer action helps you drill through the hard substrate underneath.
Start with a small pilot hole using a tile bit, then switch to your final size. The hammer action prevents the bit from wandering and cracking your tile.
For porcelain tile, which is extremely hard, a hammer drill with a diamond-tipped bit is the only practical way to make clean holes for plumbing fixtures.
DIY Concrete Projects: Mailboxes, Shelves, and More
Homeowners often underestimate how often they need a hammer drill. Installing a mailbox post, hanging heavy shelves on basement walls, or mounting a TV on a concrete wall all require this tool.
For small projects, you might consider renting instead of buying. Many hardware stores rent hammer drills for a day or weekend at reasonable rates. This makes sense if you’ll only use it once or twice a year.
But if you own your home and plan ongoing projects, a cordless hammer drill gives you convenience and power without being tethered to an outlet.
Electrical and Plumbing Work: Running Wires and Pipes
Electricians and plumbers rely on hammer drills for drilling through concrete floors and walls. Running conduit through a basement slab or drilling holes for pipe penetrations requires the hammer action.
The precision of a hammer drill lets you place holes exactly where you need them, avoiding rebar and other obstacles. Use a stud finder first to map out safe drilling zones.
For large electrical boxes in concrete walls, start with a small hole to locate the exact position, then enlarge it with hole saws designed for hammer drills.
Can You Use a Hammer Drill as a Regular Drill?
Yes! Most hammer drills have a mode switch that lets you turn off the hammer action. This makes them function like a regular drill for wood, metal, and other soft materials.
Using Hammer Drill Without Hammer Mode
Switch your hammer drill to “drill only” mode (usually marked with a drill bit symbol, not a hammer symbol). This disengages the ratcheting plates, leaving you with pure rotation.
You can now use standard drill bits and drive screws just like with a regular drill. The weight and power are still there, but the hammering action is silent.
This versatility makes a hammer drill a smart investment if you need both tools but have limited storage space or budget.
Limitations and Considerations
Even in drill-only mode, hammer drills are heavier and bulkier than regular drills. For precision work or extended use, this can be tiring.
They also tend to have higher RPMs and lower torque than dedicated drills. This means they’re not ideal for driving long screws or mixing materials like paint or mortar.
For occasional use on soft materials, a hammer drill works fine. But if you do a lot of woodworking or screwdriving, you’ll appreciate having a lightweight regular drill for those tasks.
Choosing the Right Tool for Your Project: A Practical Guide
Let’s make this decision concrete with a step-by-step assessment process.
Project Assessment Checklist
Ask these questions before choosing your tool:
- What material am I drilling? (Wood, metal, concrete, brick?)
- How many holes do I need to drill? (One anchor or 50?)
- How big are the holes? (Small pilot hole or 2-inch conduit?)
- How often will I do this type of work? (One-time project or weekly use?)
- Do I already own either tool? (Can I borrow or rent?)
If you answered “concrete, brick, or stone” to the first question, you need a hammer drill. For everything else, a regular drill is likely sufficient.
Budget Considerations: Rent vs Buy
Hammer drills cost $50-$200 for decent models, while regular drills run $30-$150. If you only need a hammer drill once or twice, renting for $20-$40 per day makes financial sense.
But if you own your home and plan DIY projects, buying a cordless hammer drill gives you convenience and power whenever you need it. Look for combo kits that include both drill and impact driver for maximum versatility.
Regular drills are cheaper and should be your first purchase. Add a hammer drill later as your projects demand it.
Storage and Portability: Space Matters
Hammer drills are larger and heavier. If storage is tight, a combo approach might work: one hammer drill that can switch modes, plus a compact regular drill for precision work.
Cordless models solve many portability issues. Modern lithium-ion batteries provide plenty of power without the cord. Consider buying into a battery platform you already use for other tools.
For job sites or workshops, a regular drill is easier to carry around all day. Keep the hammer drill for specific masonry tasks.
Versatility vs Specialization: The Tool Philosophy
Here’s the key decision: do you want one tool that does many things okay, or the right tool for each job?
A hammer drill in drill-only mode is a capable but not ideal regular drill. It’s heavier, less precise, and more expensive. But it saves you from buying two tools.
A dedicated regular drill is lighter, cheaper, and better for most tasks. Add a hammer drill for masonry work, and you have the perfect combination.
For most homeowners, buying a regular drill first and adding a hammer drill later is the smart approach.
Safety Tips for Both Tools: Protect Yourself
Both tools require respect and proper safety gear. Here’s how to stay safe.
Protective Gear: Non-Negotiable Items
Always wear safety glasses. Drilling creates flying debris that can damage eyes permanently. For hammer drills, add hearing protection—they’re loud enough to cause hearing damage with prolonged exposure.
When drilling concrete or masonry, wear a dust mask. Concrete dust contains silica, which is hazardous when inhaled. For large projects, consider a respirator with P100 filters.
Work gloves protect your hands from vibration and sharp edges. But make sure they’re snug—loose gloves can get caught in the drill chuck.
Proper Handling Techniques: Control Is Key
Hold both drills with both hands when possible. One hand on the handle, one supporting the body. This gives you maximum control and reduces fatigue.
For hammer drills, brace yourself. The hammering action can kick back unexpectedly. Stand with your feet shoulder-width apart and let the tool do the work—don’t force it.
Keep the cord or battery pack clear of your work area. Tripping over a cord is a common accident. For cordless tools, make sure the battery is fully seated before starting.
Surface Preparation: Set Up for Success
Mark your drilling spot with a pencil and center punch. This creates a small indentation that keeps the bit from wandering when you start drilling.
Clamp your workpiece whenever possible. A moving piece is dangerous and makes accurate drilling nearly impossible. For walls, use a stud finder to locate studs or avoid pipes and wires.
Start with a small pilot hole for large holes. This guides the larger bit and prevents it from walking across the surface. For masonry, start at a low speed to set the bit, then increase speed and apply steady pressure.
Troubleshooting Common Issues: When Things Go Wrong
Even with the right tool, problems happen. Here’s how to fix them.
Bit Slipping or Not Drilling
If your bit spins but doesn’t cut, it’s dull or the wrong type. For concrete, you need carbide-tipped masonry bits. For wood, use brad point bits. Replace dull bits immediately—they’re dangerous and inefficient.
If the bit wanders across the surface, you probably didn’t use a center punch or start at low speed. Stop, create a starter indentation, and try again with slower speed.
For hammer drills, make sure hammer mode is actually engaged. Some models have separate switches that are easy to miss. Listen for the clicking sound that indicates hammer action is working.
Overheating Problems
Drills overheat when you push too hard or use too high a speed for the material. If you smell burning or see smoke, stop immediately. Let the tool cool for 10-15 minutes.
For metal drilling, use cutting oil to lubricate the bit and reduce heat. For wood, clear chips frequently to prevent clogging and friction buildup.
Check your drill’s vents for blockage. Dust and debris can clog cooling vents, causing the motor to overheat. Clean vents with compressed air regularly.
Excessive Vibration
Too much vibration usually means a bent bit or worn chuck. Inspect your bits for straightness and replace any that are bent or damaged. A worn chuck won’t hold bits securely, causing wobble.
For hammer drills, some vibration is normal, but if it feels violent or uncontrolled, the hammer mechanism might be damaged. Have it serviced by a professional.
Using the wrong speed can also cause vibration. For large bits, use lower speeds. For small bits, higher speeds work better. Match the RPM to the bit size and material.
Conclusion: Making the Smart Choice
The hammer drill vs regular drill decision boils down to one simple factor: what material are you working with? For wood, metal, plastic, and drywall, a regular drill is your best friend—lightweight, precise, and affordable.
For concrete, brick, stone, and masonry, nothing beats a hammer drill. Its unique hammering action makes these hard materials manageable and saves you hours of frustration.
Most homeowners will benefit from owning both tools eventually. Start with a regular drill for everyday projects, then add a hammer drill when your projects demand it. Or choose a hammer drill with a drill-only mode for maximum versatility in one tool.
Remember: using the wrong drill damages your bits, ruins your project, and wastes your time. Choose wisely, use safely, and you’ll get perfect holes every time.
Additional Resources
Understanding the difference between a hammer drill and regular drill helps you make informed purchases. If you’re installing shelves or TV mounts, our guide on how to use a drill for screws into a wall provides step-by-step instructions. For more tool comparisons, check out our article on impact driver vs hammer drill to understand which tool handles driving tasks best. When you’re ready to buy, our best cordless drill recommendations help you find the right model for your needs.
