
Key Takeaways
- Choose the right mode: Always switch to hammer drill mode for masonry work. Regular drill mode won’t work on concrete.
- Use proper bits: Always use carbide-tipped masonry bits. Regular drill bits will break or overheat.
- Apply steady pressure: Let the hammer drill do the work. Forcing it can damage both the tool and the material.
- Clear dust regularly: Pull the bit out every few seconds to remove dust and prevent overheating.
- Safety is mandatory: Wear eye protection, a dust mask, and ear protection. Concrete dust is harmful.
- Start slow: Begin at low speed to create a pilot groove, then increase speed for faster drilling.
- Mind the depth: Use depth stops or tape markers to avoid drilling too deep for your anchors.
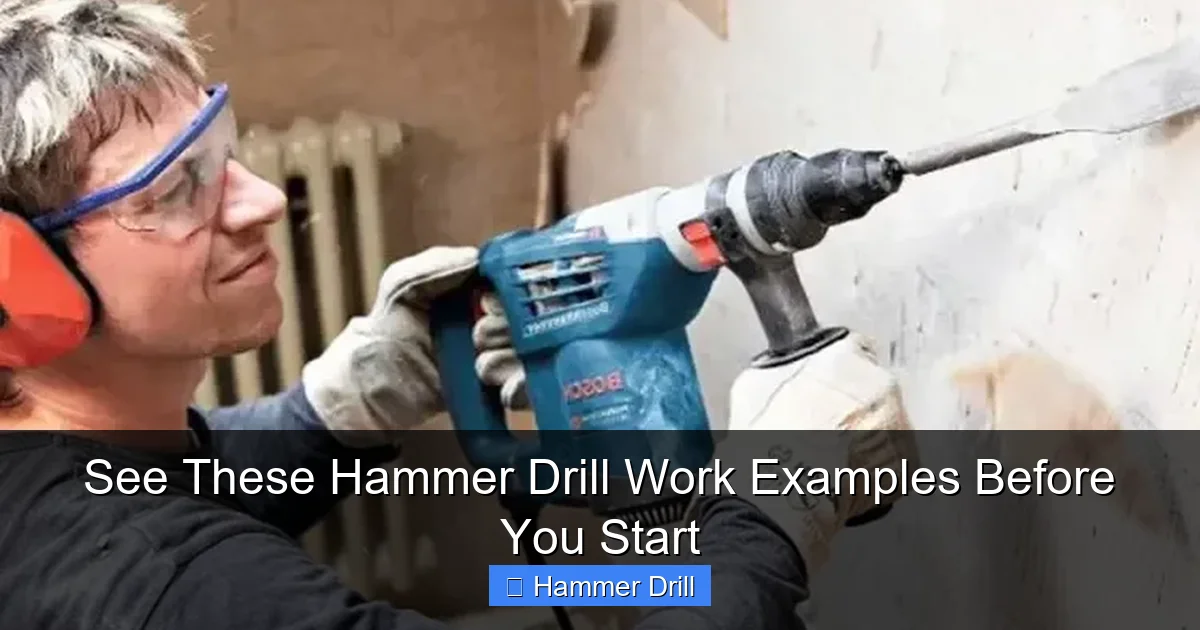
See These Hammer Drill Work Examples Before You Start
You’ve got a project. It involves concrete, brick, or stone. You know you need a hammer drill, but you’re not sure exactly how to use it. Maybe you’ve tried before and the bit slipped, the tool overheated, or the hole came out messy. We’ve been there. This guide shows you real hammer drill work examples so you can start with confidence.
We’ll walk through everything from basic concrete drilling to advanced installations. You’ll learn the exact steps, the right techniques, and how to avoid common mistakes. Let’s get started.
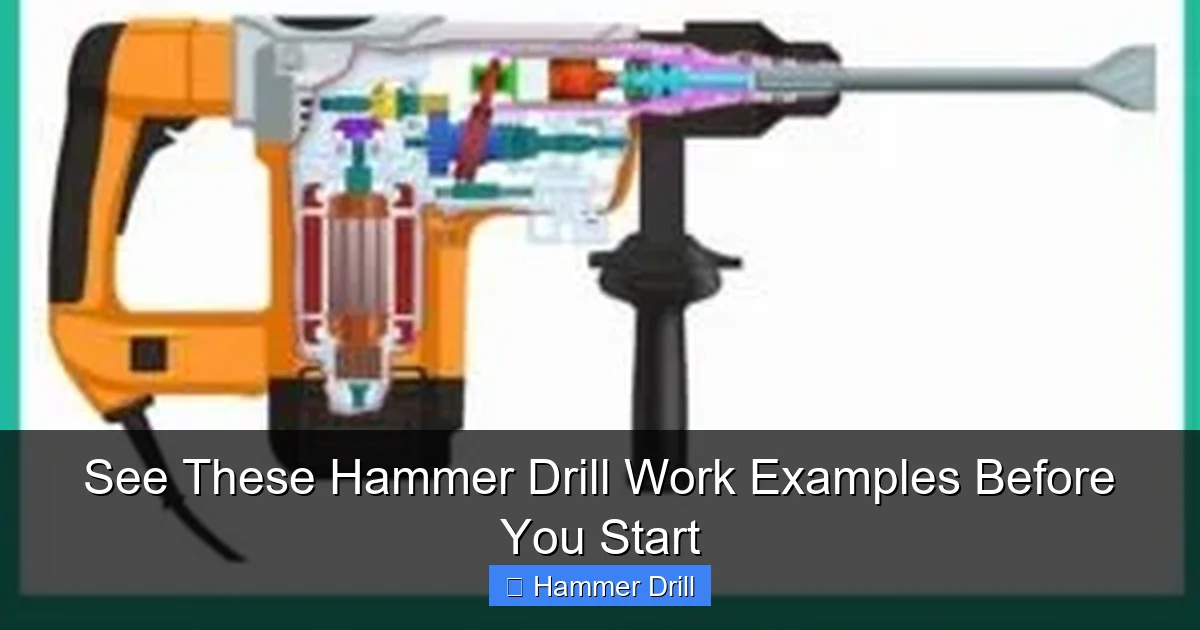
Understanding Your Hammer Drill
Before you tackle any project, you need to know your tool. A hammer drill is not the same as a regular drill. It combines rotation with a rapid hammering action. This dual motion breaks up hard materials as you drill.
Visual guide about See These Hammer Drill Work Examples Before You Start
Image source: toolsadvisers.com
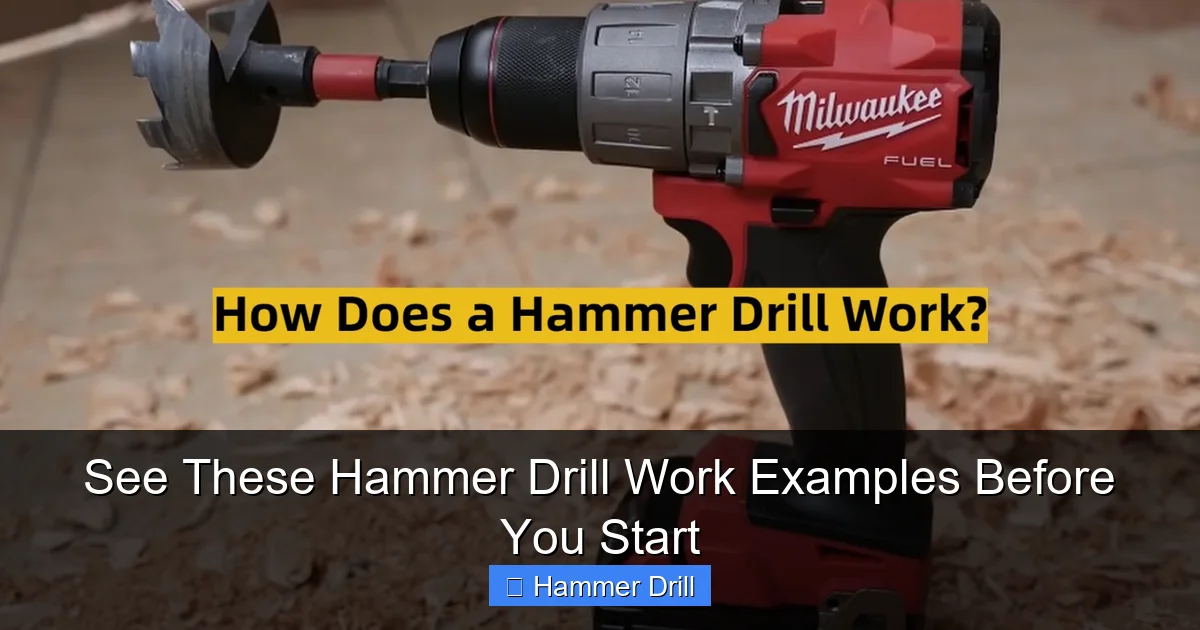
How Hammer Drills Work
Inside a hammer drill, two plates spin against each other. This creates a hammering action that moves the bit forward in quick bursts. The hammering happens at an incredible speed—often 20,000 blows per minute or more. This is why it can chew through concrete while a regular drill just spins helplessly.
Most hammer drills have two modes: regular drill mode and hammer drill mode. Some even have a hammer-only mode for chiseling. For masonry work, you must use hammer drill mode. Using regular mode on concrete will overheat the motor and won’t get the job done.
Understanding the difference between a hammer drill and a regular drill is crucial. If you’re unsure which tool you have, check for a hammer icon on the mode selector. If you only see a drill icon, you have a regular drill.
Key Features to Know
Variable Speed: This lets you control the drilling speed. Start slow to position the bit, then increase speed.
Depth Stop: A rod that adjusts to stop the drill at a specific depth. Essential for consistent holes.
Side Handle: Most hammer drills come with a side handle for better control. Always use it. The hammering action creates strong vibration.
Chuck Type: Most use a keyless chuck. Some heavy-duty models use a keyed chuck for extra grip on larger bits.
Power Source: Corded models deliver consistent power for long jobs. Cordless models offer mobility but need high-voltage batteries (18V or more) for masonry work.
Safety First: Non-Negotiable Precautions
Hammer drilling creates concrete dust. This dust contains crystalline silica, which is dangerous when inhaled. It can cause silicosis, a serious lung disease. You need proper protection.
Visual guide about See These Hammer Drill Work Examples Before You Start
Image source: toolsprofy.com
Essential Safety Gear
Eye Protection: Always wear safety glasses or goggles. Concrete chips fly everywhere.
Dust Mask: At minimum, use an N95 respirator. For heavy work, use a half-face respirator with P100 filters.
Hearing Protection: Hammer drills are loud. Use earplugs or earmuffs. The noise level often exceeds 85 decibels.
Work Gloves: Protect your hands from vibration and sharp edges. Use padded gloves designed for power tools.
Long Sleeves and Pants: Wear durable clothing to protect your skin from dust and debris.
Workspace Preparation
Clear the area around your drilling spot. Remove anything that could get damaged by falling debris. Cover nearby objects with a drop cloth.
Check for hidden hazards. Use a stud finder with AC detection to locate wires and pipes behind walls. Drilling into electrical wiring can be deadly.
Secure your workpiece. Clamp it down if possible. Never hold small pieces in your hand while drilling. The hammer action can twist the material violently.
Keep a vacuum or brush nearby. You’ll need to clean dust from the hole frequently during drilling.
Basic Hammer Drill Work Examples
Let’s look at the three most common materials you’ll drill into with a hammer drill.
Visual guide about See These Hammer Drill Work Examples Before You Start
Image source: drillvilla.com
Drilling into Concrete
Concrete is the most common material for hammer drill work. Follow these steps:
Step 1: Mark Your Spot
Use a pencil or marker to make a clear X where you want the hole. Place a small piece of masking tape over the mark. This prevents the drill bit from slipping when you start.
Step 2: Choose the Right Bit
Select a carbide-tipped masonry bit. The size should match your anchor diameter. The bit flute (spiral part) should be long enough to reach your desired depth plus an extra half-inch.
Step 3: Set Your Drill
Insert the bit into the chuck and tighten it securely. Switch to hammer drill mode. Set the depth stop if your drill has one. Apply a piece of masking tape on the bit as a depth marker if not.
Step 4: Start Drilling
Position the bit at a 90-degree angle to the surface. Start at low speed to create a pilot groove. Apply steady, moderate pressure. Let the hammer mechanism do the work—don’t force it.
Step 5: Clear the Dust
Every 5-10 seconds, pull the bit out completely to remove dust from the hole. This prevents overheating and ensures the bit can reach full depth.
Step 6: Finish the Hole
Once you reach your depth mark, continue drilling for a few more seconds at low speed. This cleans up the bottom of the hole. Slowly withdraw the bit while the drill is still running.
Drilling into Brick
Brick is softer than concrete but can be brittle. The technique is similar but requires a gentler touch.
Step 1: Locate the Mortar Joint
Whenever possible, drill into the mortar between bricks rather than the brick itself. Mortar is softer and less likely to crack.
Step 2: Use Less Pressure
Apply about half the pressure you would use for concrete. Too much force can cause the brick to spall or crack.
Step 3: Watch for the Void
Many bricks are hollow. When you hit the void inside, you’ll feel the drill suddenly drop. Reduce pressure immediately to avoid breaking through the other side.
Step 4: Clear Dust Frequently
Brick dust is very fine. Clear it every 3-5 seconds to prevent clogging.
Drilling into Stone
Stone varies from soft sandstone to extremely hard granite. Test your bit on a scrap piece first if possible.
Step 1: Start at Low Speed
Begin drilling at the slowest speed setting. High speed can cause the bit to slip or damage the stone surface.
Step 2: Use Light Pressure
Let the weight of the drill do most of the work. Pushing hard can crack or split the stone.
Step 3: Keep the Bit Cool
Drill in short bursts. Overheating can damage both the bit and the stone. If the bit gets too hot, dip it in water to cool it (only if your drill is not running).
Advanced Hammer Drill Applications
Now that you know the basics, let’s look at specific project examples.
Creating Holes for Anchors
Anchors are the most common reason people use hammer drills. Here’s the right way to do it:
Choose the Correct Anchor Size
Your anchor diameter must match the hole diameter exactly. A 1/4″ anchor needs a 1/4″ hole. Using the wrong size anchor will result in a loose, unsafe installation.
Drill the Right Depth
The hole should be 1/4″ to 1/2″ deeper than the anchor length. This gives dust a place to go and ensures the anchor sits flush.
Clean the Hole Thoroughly
After drilling, use a wire brush, vacuum, or compressed air to remove all dust. Tap the anchor into the hole to verify it goes in smoothly.
Insert the Anchor
Tap the anchor gently with a hammer until it’s fully seated. Then insert your screw or bolt.
Running Electrical Conduit
Electricians use hammer drills to run conduit through concrete walls. This is precise work.
Check for Wires First
Use a dedicated circuit tester to ensure no live wires are in your drilling path. This is critical for safety.
Use a Long Bit
For through-wall drilling, you need a bit that’s at least 12″ long. Most masonry bits come in 4″, 6″, and 12″ lengths.
Drill from Both Sides
For thick walls, drill from one side until you feel breakthrough, then finish from the other side. This prevents blowout on the far side.
Use a Vacuum
Electrical work requires a clean hole. Use a shop vacuum to keep dust out of the wall cavity.
Plumbing Installations
Drilling for plumbing pipes requires extra care to avoid water lines.
Know Your Pipe Size
Drill a hole 1/4″ larger than the pipe diameter to allow for movement and insulation.
Angle Your Drill
For drain pipes, drill at a slight downward angle to maintain proper slope.
Protect Against Water
Place a bucket under the hole area. Have a helper ready with a wet/dry vacuum if drilling near existing plumbing.
Step-by-Step Project Guides
Let’s put it all together with three common DIY projects.
Installing a Wall Shelf
Tools Needed: Hammer drill, masonry bits, anchors, level, tape measure, pencil, stud finder, safety gear.
Step 1: Find Studs
Use a stud finder to locate wall studs. Mark their edges with a pencil. Mounting into studs provides the strongest hold.
Step 2: Mark Bracket Positions
Hold the shelf bracket against the wall at your desired height. Use a level to ensure it’s perfectly horizontal. Mark the screw holes with a pencil.
Step 3: Drill Pilot Holes
Put masking tape over each mark. Drill pilot holes at low speed. Start with a small bit (like 1/8″) if your wall is particularly hard.
Step 4: Drill Anchor Holes
Switch to the correct size bit for your anchors. Drill to the proper depth. Clear dust thoroughly.
Step 5: Insert Anchors
Tap anchors into place with a hammer. If hitting a stud, you may not need anchors—just drill pilot holes for screws.
Step 6: Attach Bracket
Line up the bracket with the holes. Insert screws and tighten with a screwdriver or drill.
Mounting a TV Bracket
TV mounting requires absolute precision. A mistake can mean a broken TV.
Step 1: Check Wall Type
Determine if you have drywall over studs, concrete block, or solid concrete. This changes your approach.
Step 2: Locate Studs or Reinforcement
For drywall, find studs. For concrete, use a stud finder to locate rebar, but plan to drill into the concrete itself for maximum strength.
Step 3: Mark Carefully
Hold the bracket level against the wall. Mark every hole. Double-check measurements. Measure twice, drill once.
Step 4: Drill One Hole at a Time
Don’t drill all holes at once. Drill one, insert the anchor, and attach the bracket temporarily. This ensures perfect alignment.
Step 5: Use the Right Anchors
For TV brackets, use heavy-duty anchors like wedge anchors or sleeve anchors. They must support at least 50 pounds per anchor.
Step 6: Torque Properly
Tighten bolts to the bracket manufacturer’s specifications. Over-tightening can strip the anchor.
Building a Garden Planter
This outdoor project shows how to drill into concrete for drainage.
Step 1: Plan Drainage Holes
Mark where drainage holes will go on the bottom of your planter. Space them 6-8 inches apart.
Step 2: Clamp the Planter
Secure the planter upside down in a vise or with clamps. This keeps it stable during drilling.
Step 3: Start with a Small Bit
Begin with a 1/4″ bit. Drill through the planter bottom. This creates a guide hole.
Step 4: Switch to Larger Bit
Change to a 1″ or 1.5″ spade bit for the actual drainage hole. Use hammer drill mode at low speed to prevent cracking the planter.
Step 5: Smooth the Edges
Use a file or sandpaper to smooth any rough edges around the hole. This prevents root damage.
Troubleshooting Common Issues
Even with the right technique, problems happen. Here’s how to fix them.
Drill Bit Slipping
Problem: The bit skids across the surface instead of biting in.
Solution: You’re likely not using hammer drill mode. Double-check your mode selector. Also, ensure you have a fresh, sharp bit. Dull bits slip more easily. Apply masking tape and start at the slowest speed.
Overheating Problems
Problem: Your drill gets hot quickly, smells like burning, or shuts off.
Solution: You’re probably pushing too hard or not clearing dust enough. Reduce pressure. Clear dust every 5 seconds. Take breaks every 30 seconds of drilling. If your drill has a thermal cutoff, let it cool for 10 minutes before continuing.
Poor Performance in Hard Materials
Problem: The drill makes slow progress in concrete or stone.
Solution: Your bit may be dull. Replace it with a fresh carbide-tipped bit. Check that you’re using hammer drill mode. Some materials like post-tension concrete have steel cables. If you hit steel, stop immediately to avoid damaging the bit.
Also consider the difference between tools. If you’re using a regular drill by mistake, it simply won’t work. Learn about the difference between an impact driver and hammer drill to ensure you have the right tool.
Hole Not Deep Enough
Problem: You can’t reach your desired depth.
Solution: The bit may be too short. Measure needed depth and add 1/2″ for dust clearance. Also, dust buildup can prevent deeper drilling. Clear the hole completely and try again with fresh bit.
Excessive Vibration
Problem: The drill shakes violently in your hands.
Solution: The bit may be bent or damaged. Replace it. Also, ensure the chuck is tight. Using the side handle properly reduces vibration by 50%.
Maintenance Tips for Long Tool Life
A well-maintained hammer drill lasts for years. Neglect it, and it fails when you need it most.
Cleaning Your Hammer Drill
After every use, blow out dust from the vents and chuck. Use compressed air or a small brush. Never spray water on your drill. Wipe the housing with a damp cloth if needed.
Check the air vents weekly. Blocked vents cause overheating. Clean them with a toothpick or small brush.
Replacing Carbon Brushes
Carbon brushes wear out over time. Most hammer drills have a brush indicator that shows when replacement is needed. Symptoms of worn brushes include sparking, reduced power, or intermittent operation.
Unplug the drill. Remove the brush caps (usually on the sides of the motor housing). Take out the old brushes and insert new ones. This simple task can add years to your drill’s life.
Lubrication Needs
Some hammer drills require periodic greasing of the gears. Check your manual. Most consumer models are sealed and don’t need lubrication. Professional models often have grease fittings.
Apply grease sparingly. Too much attracts dust and clogs the mechanism.
Choosing the Right Hammer Drill for Your Needs
Not all hammer drills are created equal. Here’s what to consider before buying.
Amperage (Corded): 6-8 amps is sufficient for DIY work. 9+ amps for professional use.
Battery Voltage (Cordless): 18V minimum. 20V or higher recommended for concrete.
Blows Per Minute (BPM): Higher is better for masonry. Look for 30,000+ BPM.
Variable Speed: Essential for control. Look for at least two speed settings.
SDS vs. Standard Chuck: SDS bits lock in place better for heavy work. Standard chucks work fine for most DIY projects.
Conclusion
Hammer drills open up a world of possibilities for DIYers and professionals alike. Whether you’re hanging a shelf, running wiring, or building a planter, the right technique makes all the difference.
Remember these key points: always use hammer drill mode, clear dust frequently, apply steady but not excessive pressure, and wear proper safety gear. Your success depends on preparation and patience.
Start with a test hole in scrap material if you’re unsure. Practice makes perfect. And when in doubt, consult your drill’s manual or call a professional for complex installations.
Now you’re ready to tackle any project with confidence. Your hammer drill is a powerful tool. Treat it right, use it properly, and it will serve you for years to come.
Final Checklist Before You Drill
- Are you in hammer drill mode?
- Is your bit the right type and size?
- Is the bit fully inserted and tight?
- Are you wearing eye, ear, and respiratory protection?
- Have you checked for wires and pipes?
- Is your workpiece secure?
- Do you have your depth marked?
- Is the side handle attached and positioned for comfort?
Answer yes to all these questions, and you’re ready to drill.
