
To change the blade on a circular saw, first unplug the saw for safety. Then, use the appropriate tool to loosen the blade bolt and replace the blade.
Changing the blade on a circular saw is essential for maintaining cutting efficiency. A dull blade can lead to poor performance and increased risk of accidents. Regularly replacing the blade ensures clean, precise cuts, making your projects easier and safer.
Understanding the process can save time and improve your overall woodworking experience. This guide will walk you through the necessary steps, providing tips for a hassle-free blade change.
Whether you’re a novice or an experienced user, knowing how to properly change a blade can enhance your skills and extend the life of your circular saw.
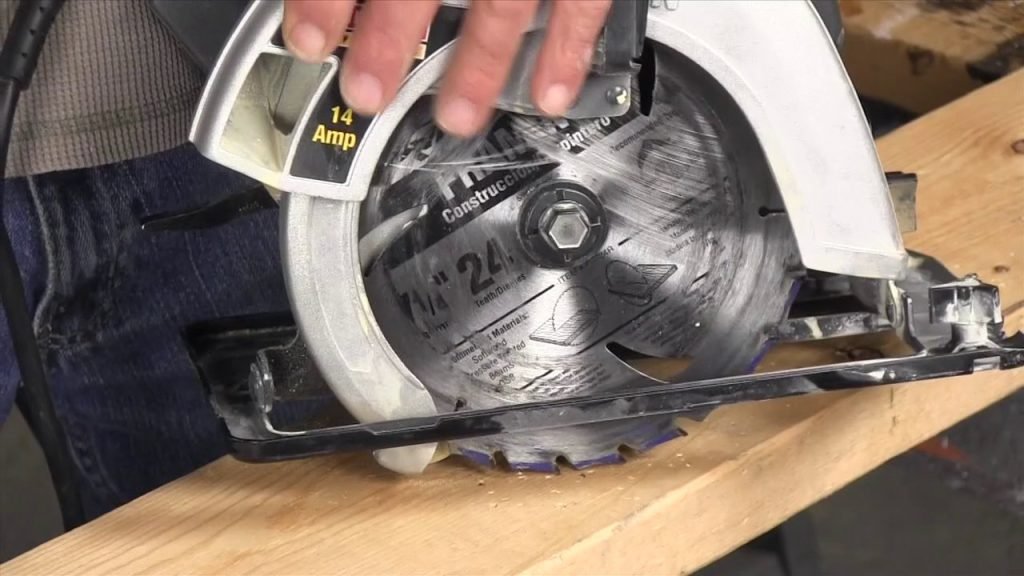
Credit: thegardenfrog.wordpress.com
Introduction To Circular Saws
A circular saw is a powerful tool. It is essential for many woodworking projects. This tool uses a toothed blade to cut through various materials. Wood, metal, and plastic are common materials for cutting.
Understanding how to use a circular saw safely is crucial. Regular maintenance keeps your saw in top shape. One key maintenance task is changing the blade. A sharp blade improves cutting efficiency and safety.
The Importance Of A Sharp Blade
A sharp blade is vital for effective cutting. Here are some reasons why:
- It provides cleaner cuts.
- It reduces the risk of kickback.
- It requires less effort to operate.
- It extends the life of the saw.
Dull blades can cause frustration. They lead to uneven cuts and potential accidents. Always check the blade’s sharpness before starting your project.
Safety First: Preparing For The Change
Safety is paramount when changing the blade. Follow these steps to ensure a safe process:
- Unplug the circular saw.
- Wear safety goggles and gloves.
- Find a clean, flat workspace.
- Use a wrench to loosen the blade screw.
Keep all tools within reach. Avoid distractions while working. Always double-check that the saw is unplugged before proceeding.
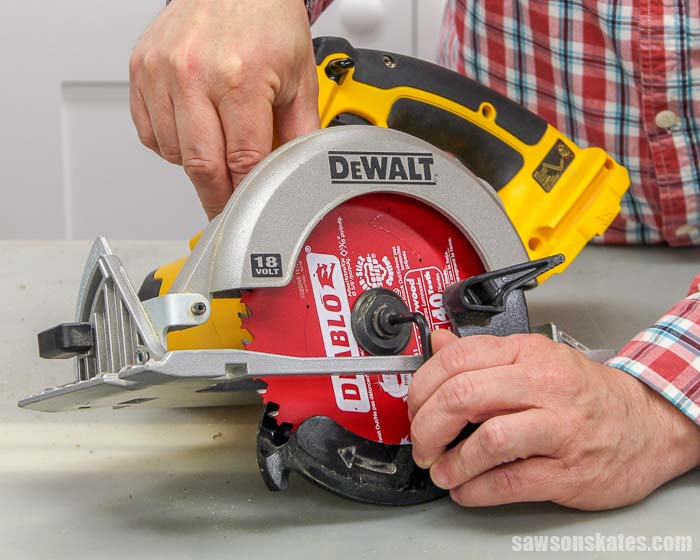
Credit: sawsonskates.com
Tools And Materials Needed
Changing the blade on a circular saw requires a few basic tools and materials. Gathering the right items ensures safety and efficiency. Here’s what you need to get started.
Gathering The Essentials
- Circular Saw – The tool you will be working on.
- Replacement Blade – Choose the right type for your work.
- Wrench or Spanner – Used to loosen the blade bolt.
- Screwdriver – Helpful for some saw models.
- Safety Gear – Include goggles and gloves for protection.
- Work Surface – A stable area to work safely.
Substitutes For Specialized Tools
If you don’t have certain tools, use these substitutes:
| Specialized Tool | Substitute |
|---|---|
| Blade Wrench | Adjustable Wrench |
| Torque Wrench | Regular Wrench with a Torque Limit |
| Wood Block | Any Sturdy Material to Support the Saw |
These substitutes can help in a pinch. Always prioritize safety. Ensure your substitutes are sturdy and reliable.
Pre-change Preparation
Before changing the blade on your circular saw, proper preparation is essential. This ensures safety and makes the task easier. Follow these steps to get ready.
Disconnecting Power
Safety is the top priority. Always disconnect the power before working on your saw. Follow these steps:
- Unplug the circular saw from the wall outlet.
- If using a battery-powered saw, remove the battery.
Check the power switch. Make sure it is in the off position. This helps prevent accidental starts.
Securing The Saw
Stability is key when changing the blade. Ensure your saw is secure by following these guidelines:
- Place the saw on a flat surface.
- Use a workbench or table for better support.
- Clamp the saw down if possible.
Secure the area around you. Keep distractions away. This makes the process smoother and safer.
Removing The Old Blade
Changing the blade on your circular saw is essential. Removing the old blade is the first step. Follow these steps carefully to ensure safety and efficiency.
Unlocking The Blade Guard
The blade guard protects you from the sharp edge. To start, unlock the blade guard.
- Locate the guard release lever.
- Press the lever to free the guard.
- Lift the guard to expose the blade.
Ensure the guard is fully lifted before proceeding. This allows safe access to the blade.
Loosening The Arbor Nut
The arbor nut holds the blade tightly in place. You need to loosen it before removing the blade.
- Use the correct wrench for your saw.
- Turn the arbor nut counterclockwise.
- Hold the blade steady to prevent movement.
Keep applying pressure until the nut loosens. Once loose, you can easily remove it.
After loosening the arbor nut, the blade will be free. Carefully take off the old blade. Always handle blades with care to avoid cuts.
Choosing The Right Blade
Choosing the right blade for your circular saw is essential. A suitable blade makes cutting easier and safer. Different blades serve different purposes. Knowing your options helps you select the best one.
Blade Types And Their Uses
Various blade types exist, each designed for specific tasks. Here are some common blade types:
| Blade Type | Uses |
|---|---|
| General Purpose Blade | Versatile cuts in wood, plywood, and some plastics. |
| Crosscut Blade | Ideal for cutting across the grain of wood. |
| Rip Blade | Designed for cutting along the grain of wood. |
| Finish Blade | Provides smooth cuts, perfect for fine woodworking. |
| Metal Cutting Blade | Used for cutting aluminum and other metals. |
Matching Blade To Material
Selecting the right blade depends on the material. Different materials require specific blade features.
- Wood: Use general-purpose, crosscut, or rip blades.
- Plywood: Choose a finish blade for smooth cuts.
- Metal: Use a metal cutting blade for aluminum or steel.
- Plastic: A general-purpose blade works best.
Consider these factors:
- Thickness of the material.
- Type of cut you need.
- Desired finish quality.
Choose wisely. A good blade ensures better results and safety.
Installing The New Blade
Installing a new blade on your circular saw is crucial. A sharp blade cuts better and safer. Follow these steps to ensure proper installation.
Aligning The Blade
Alignment is key for effective cutting. Here’s how to align the blade correctly:
- First, place the new blade on the arbor.
- Ensure the teeth of the blade face the front.
- Check that the blade is flat against the saw’s base.
- Rotate the blade by hand to ensure it spins freely.
Proper alignment prevents binding and enhances performance. Always double-check the position before tightening.
Tightening The Arbor Nut
Secure the blade with the arbor nut. Follow these steps:
- Use the wrench to hold the arbor in place.
- Thread the arbor nut onto the arbor.
- Hand-tighten the nut first.
- Then, use the wrench to tighten it further.
Ensure it’s snug but do not overtighten. A well-secured blade enhances safety and cutting efficiency.
Remember, safety first! Always disconnect the power source before changing blades.
Post-change Checks
After changing the blade on your circular saw, perform essential checks. These checks ensure safety and proper operation. Skipping this step can lead to accidents or damage.
Ensuring Tightness And Alignment
First, check the blade’s tightness. A loose blade can cause vibration or wobbling. Follow these steps:
- Unplug the saw or remove the battery.
- Use the appropriate tool to check the blade bolt.
- Ensure the blade is tightly secured.
Next, confirm the blade’s alignment.
- Check if the blade is parallel to the base plate.
- Use a square to verify alignment.
- Adjust if necessary.
Proper alignment prevents uneven cuts and improves precision.
Safety Test Run
Conduct a safety test run before actual cutting. This step ensures everything is functioning correctly.
- Plug in the circular saw or reinsert the battery.
- Stand clear of the blade’s path.
- Turn on the saw and let it run for a few seconds.
Listen for unusual sounds. Check for vibrations or movement. If anything seems off, turn off the saw immediately.
Always prioritize safety. A well-maintained saw is crucial for effective woodworking.
Maintenance Tips
Regular maintenance keeps your circular saw in top shape. Proper care extends its lifespan. Follow these essential tips to ensure your tool performs well.
Regular Cleaning
Cleaning your circular saw is crucial. Dust and debris can affect performance. Here are steps for effective cleaning:
- Unplug the saw before cleaning.
- Use a soft brush to remove dust.
- Wipe the base and body with a damp cloth.
- Check and clean air vents.
- Inspect the blade for any buildup.
Keep the blade free of resin and pitch. This improves cutting efficiency. Regular cleaning should be part of your routine.
Blade Sharpening Vs. Replacement
Choosing between sharpening and replacing your blade is vital. Each option has pros and cons.
| Factor | Sharpening | Replacement |
|---|---|---|
| Cost | Lower cost | Higher cost |
| Time | Quick process | Requires more time |
| Performance | Restores cutting edge | New blade efficiency |
| Frequency | Regular maintenance | Used when damaged |
Sharpening is ideal for minor wear. Replace the blade for major damage. Assess the blade condition regularly. This ensures optimal performance.
Frequently Asked Questions
- How Do I Safely Change A Circular Saw Blade?
To change a circular saw blade safely, unplug the saw, use the blade wrench, and securely hold the blade.
- What Tools Do I Need To Change A Blade?
You will need a wrench, safety gloves, and possibly a flathead screwdriver to change the blade effectively.
- How Often Should I Change My Circular Saw Blade?
Change your circular saw blade every 10-20 hours of use or when you notice a decline in cutting efficiency.
- Can I Use Any Blade On My Circular Saw?
No, always use blades that are compatible with your specific circular saw model for optimal performance and safety.
- What Are The Signs Of A Dull Blade?
Signs include burning wood, uneven cuts, and increased effort required to push the saw through the material.
Conclusion
Changing the blade on your circular saw is a straightforward task. Regular maintenance ensures optimal performance and safety. Always prioritize safety by wearing protective gear.
A sharp blade enhances cutting efficiency and precision. Follow these steps, and you’ll be ready for your next project in no time.
Happy cutting!