
To cut a 60-degree angle on a table saw, set the bevel angle to 60 degrees. Use a protractor or angle gauge for accuracy.
Cutting precise angles is crucial in woodworking projects. A 60-degree angle can create unique shapes and designs, enhancing your craftsmanship. Whether you’re making furniture, frames, or decorative pieces, the right angle makes all the difference.
This guide will walk you through the steps to achieve a clean and accurate cut on your table saw.
Understanding the setup and technique ensures you produce professional results. With the right tools and careful measurements, you can master this skill.
Let’s dive into the details and equip you with the knowledge to cut a perfect 60-degree angle effortlessly.
Introduction To Precision Cutting
Precision cutting is vital for woodworking projects. Accurate angles ensure perfect fits and strong joints. A 60-degree angle is common in many designs. Mastering this skill enhances your woodworking capabilities.
Importance Of Accurate Angles
Accurate angles play a significant role in woodworking. They affect the overall quality of your project. Here are some key points:
- Improved Fit: Accurate angles ensure pieces fit together snugly.
- Aesthetic Appeal: Clean angles enhance the visual appeal of your work.
- Structural Integrity: Precise cuts improve the strength of joints.
- Reduced Waste: Better accuracy means less material wasted.
Tools You’ll Need
Gather these essential tools for cutting a 60-degree angle:
| Tool | Purpose |
|---|---|
| Table Saw | Main tool for cutting angles accurately. |
| Protractor | Measures and sets the desired angle. |
| Square | Ensures cuts are straight and true. |
| Clamp | Secures the workpiece while cutting. |
| Safety Gear | Protects eyes and ears while working. |
Using the right tools makes cutting easier and safer. Prepare your workspace for optimal results.
Credit: www.youtube.com
Safety First
Cutting a 60-degree angle on a table saw can be rewarding. Safety is crucial in this process. Proper precautions ensure a safe and efficient work environment.
Personal Protective Equipment
Wearing the right protective gear is essential. Always use the following equipment:
- Safety goggles: Protects your eyes from flying debris.
- Hearing protection: Reduces the noise from the saw.
- Dust mask: Prevents inhalation of sawdust and particles.
- Gloves: Use cut-resistant gloves to protect your hands.
- Non-slip shoes: Ensures a stable footing while working.
Table Saw Safety Precautions
Follow these safety precautions to operate your table saw correctly:
- Read the manual: Familiarize yourself with your saw’s features.
- Check for damage: Inspect the saw before use.
- Use a push stick: Keep your hands away from the blade.
- Adjust blade height: Set it just above the material thickness.
- Keep the area clear: Remove any clutter near the saw.
- Secure loose clothing: Avoid anything that may get caught.
- Stay focused: Avoid distractions while operating the saw.
Follow these guidelines to ensure your safety while cutting angles. Stay alert and always prioritize safety first.
Setting Up Your Table Saw
Setting up your table saw is crucial for cutting a precise 60-degree angle. Proper setup ensures safety and accuracy. Follow these steps to get your saw ready.
Calibrating The Saw Blade
Calibrating the saw blade is the first step. A well-calibrated blade cuts accurately. Here’s how to do it:
- Turn off the saw and unplug it.
- Use a square to check the blade’s angle.
- Adjust the blade to 60 degrees using the angle indicator.
- Recheck with the square for precision.
Make sure the blade is tight before starting. This ensures no movement during the cut.
Adjusting The Miter Gauge
The miter gauge helps maintain the correct angle. Adjust it for a perfect 60-degree cut:
- Locate the miter gauge on the saw.
- Loosen the lock knob to adjust the angle.
- Set the miter gauge to 60 degrees.
- Tighten the lock knob firmly.
Check the alignment before making cuts. This prevents mistakes and ensures clean edges.
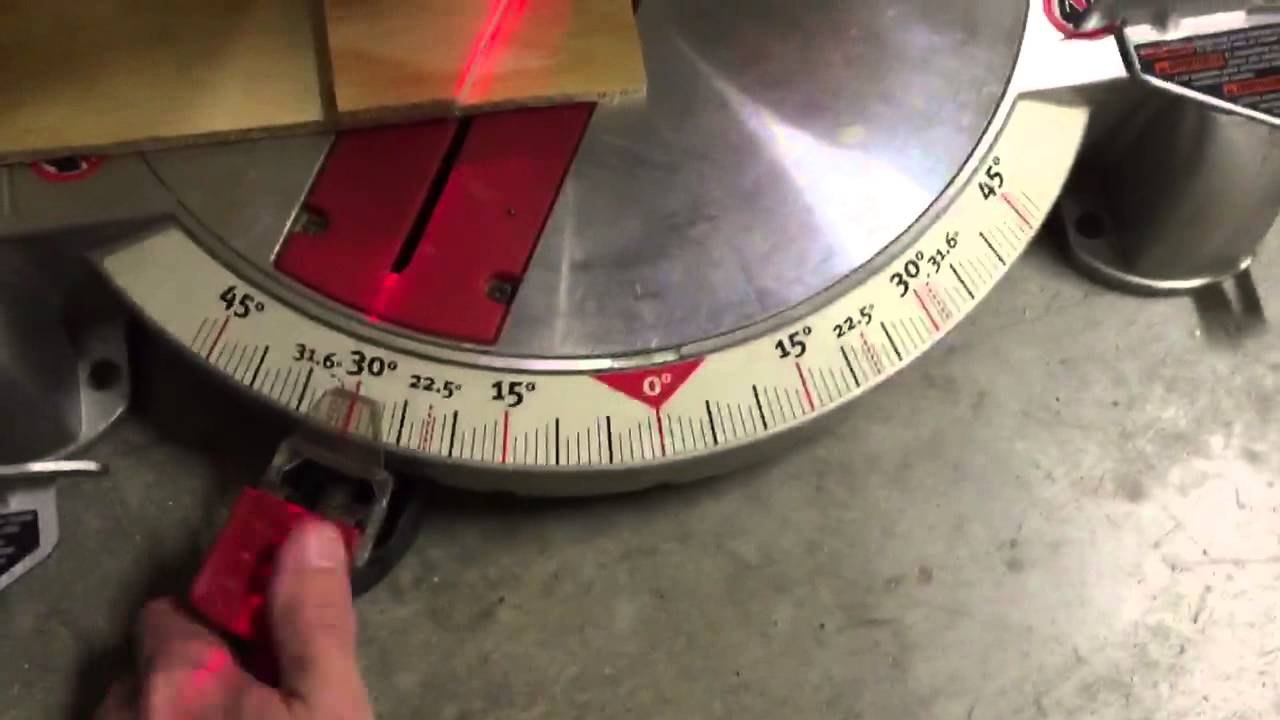
Measuring For The 60 Degree Angle
Measuring for a 60-degree angle is crucial for precise cuts. Accurate measurements lead to perfect pieces. Use the right tools to ensure accuracy.
Using A Protractor For Accuracy
A protractor helps measure angles clearly. Follow these steps:
- Place the protractor on the wood.
- Align the center point with the edge of the board.
- Locate the 60-degree mark on the protractor.
- Make a small mark at the 60-degree point.
Check your mark. Ensure it lines up with the protractor’s edge. This step guarantees accuracy.
Marking The Wood
After measuring, it’s time to mark the wood.
- Use a pencil for clear visibility.
- Draw a line from the mark to the edge of the board.
- Ensure the line is straight and visible.
Double-check your markings. Accurate markings lead to clean cuts. Always use a straight edge for better precision.
The Cutting Process
Cutting a 60-degree angle on a table saw requires precision and care. Follow these steps to achieve clean and accurate cuts. The process involves two main parts: aligning the wood and executing the cut.
Aligning The Wood
Proper alignment is key to achieving a precise angle. Here’s how to do it:
- Start with a straight edge on the wood piece.
- Measure and mark a 60-degree line using a protractor.
- Use a square to ensure the mark is accurate.
- Position the wood against the fence of the table saw.
Check the alignment before cutting. Use clamps to secure the wood. This prevents movement during the cut.
Executing The Cut
Once aligned, it’s time to cut. Follow these steps:
- Set the table saw blade to a 60-degree angle.
- Turn on the saw and let it reach full speed.
- Feed the wood slowly into the blade.
- Keep your hands away from the blade at all times.
Maintain a steady pressure as you push the wood through. Ensure the wood moves smoothly along the fence.
After cutting, inspect the angle. It should be clean and precise. If necessary, repeat the process to achieve the desired result.

Credit: www.anikasdiylife.com
Finishing Touches
After cutting a perfect 60-degree angle on your table saw, focus on the finishing touches. These steps enhance the quality of your cut and ensure a smooth finish. Pay attention to sanding and checking the angle for the best results.
Sanding The Edges
Sanding makes your cut edges smooth. Follow these simple steps:
- Choose the right sandpaper. Use 120-grit for rough sanding.
- Progress to 220-grit for finer sanding.
- Sand along the edge, not against it.
- Use a sanding block for even pressure.
- Wipe off dust with a clean cloth.
Consider using a power sander for larger pieces. It saves time and effort. Always wear a mask to avoid inhaling dust.
Checking The Angle
Verify the angle for accuracy. Here’s how:
- Use a protractor or a digital angle finder.
- Place it against the cut edge.
- Ensure the reading shows exactly 60 degrees.
If the angle is off, adjust your table saw. Retest until you achieve the correct angle.
These finishing touches will enhance your woodworking projects. Proper sanding and angle checks lead to professional results.
Advanced Tips
Cutting a 60-degree angle on a table saw requires skill. These advanced tips will enhance your accuracy and efficiency. Let’s explore how to deal with hardwood and ensure consistent angles.
Dealing With Hardwood
Hardwood can be challenging. Here are some tips to manage it effectively:
- Use a Fine-Tooth Blade: A blade with more teeth cuts smoother.
- Slow Down: Feed the wood slowly for cleaner cuts.
- Consider a Zero-Clearance Insert: It reduces tear-out.
- Stabilize the Wood: Use clamps to hold the piece securely.
These strategies help you achieve clean cuts on hardwood. Always wear safety gear while working.
Repeating Angles Consistently
Consistency is vital for perfect cuts. Follow these steps:
- Set Up a JIG: A jig helps maintain the angle.
- Mark the Wood: Use a pencil for clear guidelines.
- Measure Twice: Ensure accuracy before cutting.
- Practice: Make test cuts on scrap wood first.
Using these methods ensures you repeat angles accurately every time. Save time and reduce waste with precision.
Troubleshooting Common Issues
Cutting a perfect 60-degree angle on a table saw can be tricky. Common issues may arise during this process. Knowing how to troubleshoot these problems helps achieve better results.
Adjusting For Blade Drift
Blade drift occurs when the saw blade does not cut straight. This can lead to inaccurate angles. Here are steps to adjust for blade drift:
- Check Blade Alignment: Ensure the blade is parallel to the miter slot.
- Use a Square: Place a square against the blade. Adjust as needed.
- Test Cuts: Make a test cut and measure the angle.
- Re-adjust: Repeat adjustments until the blade cuts straight.
Regular maintenance can help reduce blade drift. Ensure your saw is clean and well-maintained.
When Cuts Aren’t Clean
Rough edges or splintered cuts can occur for several reasons. Identifying the cause helps improve cut quality. Here are common issues and solutions:
| Issue | Solution |
|---|---|
| Dull Blade: The blade may need sharpening. | Sharpen or Replace: Keep blades sharp for clean cuts. |
| Incorrect Feed Rate: Feeding wood too fast causes rough cuts. | Slow Down: Feed wood steadily and evenly. |
| Ply Wood Type: Low-quality plywood splinters easily. | Choose Quality: Use higher-grade plywood for better results. |
| Improper Setup: Not securing the wood can lead to movement. | Secure Wood: Use clamps or hold-downs to stabilize material. |
Checking these factors can significantly improve your cuts. Always ensure your workspace is organized and safe.
Maintenance And Care
Proper maintenance and care for your table saw ensure optimal performance. Regular upkeep extends the life of your equipment. Follow these steps for a well-maintained saw.
Cleaning The Saw
Keeping your table saw clean is crucial. Dust and debris can affect its performance. Here are some steps for effective cleaning:
- Turn off and unplug the saw.
- Remove any sawdust from the table.
- Use a soft brush to clean the crevices.
- Wipe down the surface with a damp cloth.
- Check and clean the blade guard.
Regular cleaning prevents rust and keeps the saw running smoothly. Make it a habit to clean after each use.
Sharpening The Blade
A sharp blade cuts better and reduces strain on the motor. Regularly check the blade for dullness. Here’s how to sharpen it:
- Turn off and unplug the saw.
- Remove the blade using the appropriate tools.
- Inspect the blade for damage or wear.
- Use a sharpening stone or file to sharpen each tooth.
- Reinstall the blade securely and check alignment.
Sharpening the blade enhances cutting precision. Aim to sharpen after every few uses. This practice promotes safety and efficiency.
Projects To Practice
Learning to cut a 60-degree angle on a table saw can be fun. It opens up many creative possibilities. Start with simple projects to gain confidence. Here are two great project ideas.
Creating Hexagons And Triangles
Hexagons and triangles are excellent shapes for practice. Cutting these shapes helps improve your skills. Here’s how to make them:
- Hexagons:
- Start with a square piece of wood.
- Set the saw to 30 degrees.
- Cut the first angle.
- Rotate the wood and cut the next angle.
- Repeat until you have six sides.
- Triangles:
- Use a straight piece of wood.
- Set the saw to 30 degrees.
- Cut one angle.
- Rotate and cut the second angle.
- Cut the last angle to complete the triangle.
Diy Home Decor Ideas
Use your new skills to create unique home decor. These ideas will inspire you:
| Project | Materials Needed | Skills Practiced |
|---|---|---|
| Hexagon Shelf | Wood, screws, brackets | Cutting hexagons, assembly |
| Triangle Wall Art | Wood, paint, nails | Cutting triangles, finishing |
| Geometric Coasters | Wood, sandpaper, sealant | Precision cuts, sanding |
Try these projects to enhance your skills. Enjoy the process of creating. Each piece adds charm to your home.
Frequently Asked Questions
- How Do I Set A Table Saw To 60 Degrees?
Adjust the bevel angle on your table saw to 60 degrees using the built-in adjustment handle.
- What Is The Best Blade For Cutting 60 Degrees?
A high-quality carbide-tipped blade is ideal for clean cuts at a 60-degree angle on a table saw.
- Can I Cut A 60-degree Angle Without A Protractor?
Yes, you can use the saw’s bevel gauge or a digital angle finder for accurate angle settings.
- What Materials Can I Cut At 60 Degrees?
Common materials include plywood, MDF, and softwood. Always check the blade compatibility for harder woods.
- Is Safety Important When Cutting Angles?
Absolutely! Always wear safety gear and ensure proper setup to prevent accidents while cutting angles. “`
Conclusion
Mastering the art of cutting a 60-degree angle on your table saw enhances your woodworking skills. With the right techniques and tools, you can achieve precise and clean cuts.
Remember to prioritize safety and practice regularly. This will ensure consistent results and boost your confidence in every project.
Happy woodworking!