
To fix rusty pliers, start by soaking them in vinegar for a few hours. Scrub with a wire brush or steel wool to remove rust.
Rusty pliers can hinder your tasks and reduce effectiveness. Ignoring rust can lead to further corrosion and eventual tool failure. Regular maintenance is essential to prolong the life of your tools. Rust not only affects performance but can also pose safety risks.
Fortunately, fixing rusty pliers is a straightforward process. With a few household items, you can restore their functionality and extend their lifespan. This guide will walk you through effective steps to tackle rust, ensuring your pliers are ready for any project.
Keeping your tools in good shape enhances your work efficiency and ensures safety during use.
Introduction To Plier Restoration
Rusty pliers can be a common problem. They are often neglected. However, restoring them is simple and rewarding. A little effort can bring them back to life.
Why Bother With Rust?
Rust is more than a cosmetic issue. It affects the performance of your tools. Here are some reasons to fix rusty pliers:
- Improved Functionality: Rust can hinder movement.
- Increased Longevity: Restored tools last longer.
- Cost-Effective: Fixing tools is cheaper than buying new ones.
- Eco-Friendly: Reduces waste and saves resources.
The Importance Of Maintaining Tools
Maintaining tools is crucial for their effectiveness. Here are key points to consider:
- Safety: Well-maintained tools prevent accidents.
- Efficiency: Proper tools save time and effort.
- Performance: Tools work better when clean and rust-free.
- Value: Good care increases tool value over time.
Regular maintenance can prevent rust. Simple steps keep your tools in top shape.
Credit: www.reddit.com
Identifying Rust Types On Pliers
Rust can damage tools like pliers. Understanding the type of rust helps in choosing the right fix. Two main types of rust exist: surface rust and deep corrosion. Let’s explore these types to aid in restoration.
Surface Rust Vs. Deep Corrosion
Surface rust appears as a flaky, reddish-brown layer. It forms from moisture exposure. This rust is usually easy to remove. Common methods include:
- Using sandpaper
- Applying vinegar or baking soda
- Using a wire brush
Deep corrosion penetrates the metal. This rust results from prolonged exposure to moisture. It may cause pitting or structural weakness. Removing deep corrosion requires:
- Severe sanding
- Rust converter chemicals
- Replacement of the pliers if needed
Identify rust depth before starting repairs. This step ensures proper treatment and tool longevity.
Assessing Damage Before Restoration
Check your pliers for rust and damage. This assessment helps decide on the restoration method. Follow these steps:
- Inspect the jaws and handles.
- Look for rust spots or discoloration.
- Check for cracks or breaks.
Use a magnifying glass for better visibility. Note the areas with deep corrosion. Document your findings for reference.
Here’s a simple table to help assess damage:
| Damage Type | Description | Recommended Action |
|---|---|---|
| Surface Rust | Flaky, reddish-brown layer on metal | Clean with sandpaper or vinegar |
| Deep Corrosion | Pitting or stru |
Gathering Your Restoration Toolkit
Restoring rusty pliers is a rewarding task. Start with the right tools and materials. This section will guide you through gathering your restoration toolkit.
Essential Supplies And Materials
Gather these essential supplies to fix your rusty pliers:
- Rust remover: Choose a chemical or homemade solution.
- Steel wool: This helps scrub off rust.
- Sandpaper: Fine and coarse grits work well.
- Lubricating oil: This keeps the pliers moving smoothly.
- Cloth or rag: Use this for cleaning.
- Bucket or container: For soaking the pliers.
Safety Gear And Precautions
Safety is crucial during restoration. Wear the following protective gear:
- Safety goggles: Protect your eyes from splashes.
- Gloves: Use rubber or latex gloves to avoid skin contact.
- Mask: Wear a mask for safety when using chemicals.
Follow these precautions:
- Work in a well-ventilated area.
- Keep tools away from children.
- Dispose of chemicals properly.
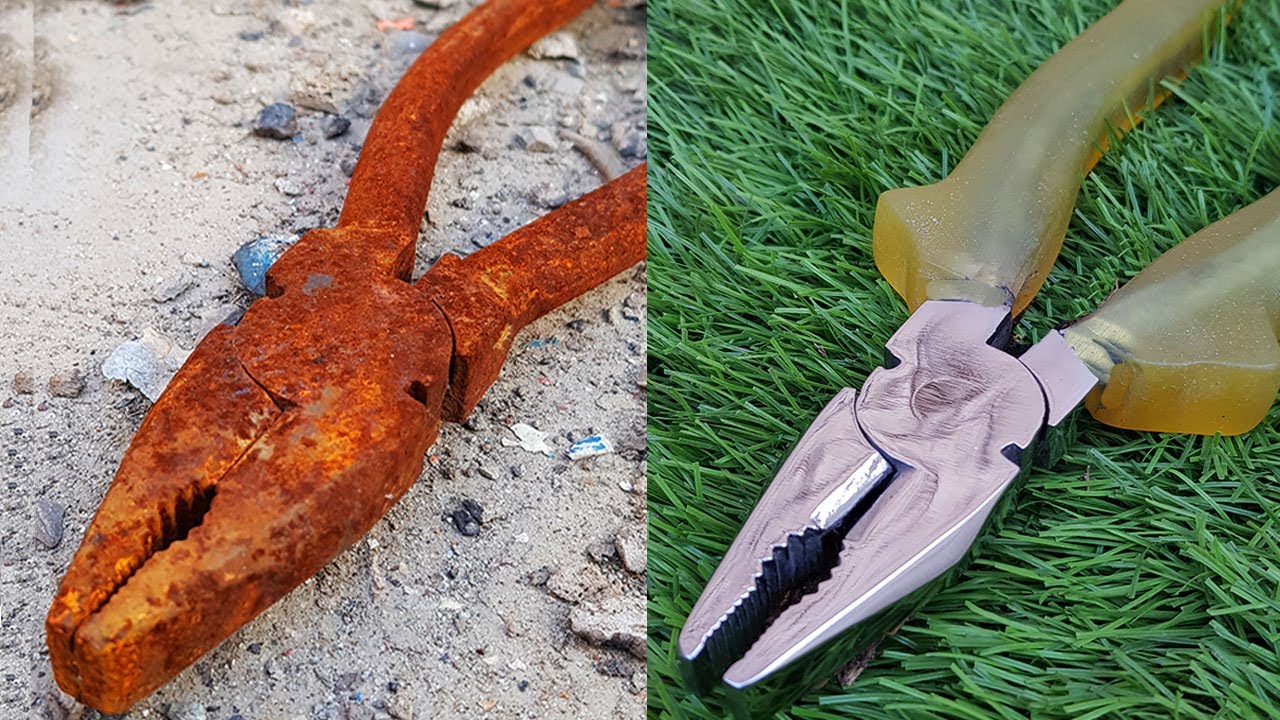
Credit: m.youtube.com
Initial Cleaning Process
Cleaning rusty pliers is the first step to restore their function. Remove dirt and grease before tackling rust. This process sets the stage for effective rust removal.
Removing Dirt And Grease
Start by removing any dirt and grease from your pliers. This step is crucial for better rust treatment. Follow these simple steps:
- Gather supplies: soap, water, and a scrub brush.
- Mix soap with warm water in a bowl.
- Soak a cloth in the soapy water.
- Wipe down the pliers thoroughly.
- Use a scrub brush for tough spots.
- Rinse the pliers with clean water.
- Dry the pliers with a clean towel.
This process removes grime and prepares the pliers for rust removal.
Preparing Pliers For Rust Removal
Once dirt and grease are gone, prepare the pliers for rust removal. Follow these steps:
- Inspect the pliers for rust areas.
- Choose a rust remover: vinegar, baking soda, or a commercial product.
- Apply the rust remover according to the product instructions.
- Let the remover sit for the recommended time.
- Scrub the rust with a brush or steel wool.
- Rinse the pliers again to remove residue.
Proper preparation enhances the effectiveness of rust removal methods.
Rust Removal Techniques
Rusty pliers can be frustrating. Fortunately, several effective techniques exist for removing rust. Choose the method that suits your needs best. Let’s explore mechanical methods, chemical solutions, and natural remedies.
Mechanical Methods
Mechanical methods involve physical actions to remove rust. Here are some effective techniques:
- Wire Brush: Use a wire brush to scrub off rust.
- Sandpaper: Gently sand rusty areas until smooth.
- Grinder: Use an angle grinder for heavy rust.
Always wear safety gear. Protect your eyes and hands while working.
Chemical Solutions
Chemical solutions can effectively dissolve rust. Here are common options:
| Solution | Instructions |
|---|---|
| White Vinegar | Soak pliers for 24 hours. Scrub afterward. |
| Rust Remover | Apply according to the product instructions. |
| Lemon Juice and Salt | Mix and apply. Let sit for a few hours. |
Always follow safety instructions for chemical solutions. Protect your skin and eyes.
Natural Remedies
Natural remedies offer eco-friendly options. Try these simple methods:
- Baking Soda: Create a paste with water. Apply to rust. Let it sit for a few hours.
- Potato: Cut a potato in half. Dip in dish soap. Rub on rust.
- Olive Oil: Apply a few drops. Rub with a cloth. Wipe off rust.
Natural remedies are safe and easy to use. They also help preserve the tools.

Credit: planetsafelubricants.com
Polishing And Protecting Pliers
Rusty pliers can be frustrating. Fortunately, you can restore them with the right techniques. Polishing and protecting pliers helps extend their lifespan. Let’s explore how to achieve a smooth finish and prevent future rust.
Achieving A Smooth Finish
Start by gathering your materials:
- Fine-grit sandpaper
- Metal polish
- Soft cloth
Follow these steps for a smooth finish:
- Use fine-grit sandpaper to remove rust.
- Sand gently in a circular motion.
- Wipe away dust with a soft cloth.
- Apply metal polish to the pliers.
- Buff with a clean cloth for shine.
This process restores the pliers’ functionality and look. A smooth finish makes them easier to use.
Preventive Measures Against Future Rust
Taking care of your pliers prevents rust from returning. Consider these preventive measures:
| Action | Description |
|---|---|
| Store in a dry place | Avoid moisture exposure to reduce rust risk. |
| Apply oil | Use light machine oil on moving parts. |
| Regular cleaning | Clean pliers after each use to remove debris. |
| Use protective covers | Consider rubber or plastic covers for storage. |
Implementing these measures ensures your pliers remain rust-free. Regular maintenance keeps them in top condition.
Reassembling And Testing Pliers
After cleaning and restoring your rusty pliers, it’s time to reassemble them. This step is crucial for ensuring they work properly. Follow these steps carefully to put your pliers back together.
Putting The Pieces Back Together
Gather all the parts of your pliers. You should have:
- Handles
- Pivot screw
- Jaws
- Spring (if applicable)
Follow these steps to reassemble:
- Position the jaws correctly.
- Insert the pivot screw through the jaws.
- Attach the handles to the jaws.
- Tighten the pivot screw securely.
- If present, place the spring back in position.
Ensure all parts fit snugly. Check for any loose components.
Ensuring Functionality Post-restoration
Testing your pliers is vital after reassembly. Perform the following checks:
- Open and close the pliers several times.
- Check for smooth movement.
- Inspect the jaws for proper alignment.
- Test gripping strength on a small object.
If the pliers are stiff, apply a drop of oil. This helps improve movement.
Use the table below for quick reference on common issues:
| Issue | Solution |
|---|---|
| Pliers do not close properly | Check jaw alignment and tighten pivot screw. |
| Movement is stiff | Apply lubricant to pivot area. |
| Spring is not functioning | Ensure the spring is installed correctly. |
After testing, your pliers should work like new. Enjoy your restored tools!
Maintenance Tips For Pliers
Keeping your pliers in top shape is essential. Proper maintenance prevents rust and extends their life. Here are some effective tips to maintain your pliers.
Regular Cleaning Schedule
Cleaning your pliers regularly helps remove dirt and moisture. Follow these simple steps for effective cleaning:
- Use a soft cloth to wipe off dust.
- Dip a brush in soapy water.
- Scrub the joints and handles gently.
- Rinse with clean water.
- Dry thoroughly with a cloth.
For stubborn rust, use vinegar or baking soda:
- Soak rusty areas in vinegar for an hour.
- Scrub with a brush to remove rust.
- Rinse and dry completely.
Proper Storage Solutions
Storing pliers correctly prevents rust and damage. Follow these tips for optimal storage:
| Storage Method | Description |
|---|---|
| Toolbox | Keep pliers in a dry toolbox. Ensure it is clean. |
| Magnetic Strip | Attach a magnetic strip to the wall. It saves space. |
| Hanging Rack | Use a rack to hang pliers. Air circulation prevents rust. |
Always store pliers in a dry place. Avoid leaving them in humid areas. Following these maintenance tips will keep your pliers rust-free and ready to use.
Frequently Asked Questions
- How Can I Remove Rust From Pliers?
Use a rust remover or vinegar to soak the pliers. Scrub with a wire brush and rinse thoroughly.
- What Household Items Remove Rust Effectively?
Common items like baking soda, vinegar, and lemon juice work well for rust removal from tools.
- Can I Prevent Rust On Pliers?
Store pliers in a dry place and apply a light coat of oil to prevent moisture accumulation.
- Is It Safe To Use Rusty Pliers?
Rusty pliers can be unsafe as they may break or slip. It’s best to fix them before use.
- How Often Should I Maintain My Pliers?
Regular maintenance every few months can prolong their life and prevent rust buildup. “`
Conclusion
Rusty pliers can be easily restored with the right techniques. Regular maintenance can help prevent future rust. Remember to store your tools in a dry place and apply lubricant periodically.
Following these steps ensures your pliers remain functional and reliable.
Keep your tools in top shape for all your projects.