
Do you need a ladder for a project or household task? Making a ladder might seem challenging, but it’s doable with the right guidance.
In this blog post, you’ll learn the steps to create a sturdy, safe ladder from scratch. Creating your own ladder can save money and provide a custom fit for your needs. Whether you need a small step ladder for indoor use or a tall one for outdoor projects, the process is straightforward.
We’ll cover the materials needed, the tools required, and the step-by-step process to build a reliable ladder. By the end of this guide, you’ll have the knowledge and confidence to construct a ladder that fits your specific needs. Let’s get started on this practical and rewarding DIY project.

Credit: m.youtube.com
Choosing Materials
Choosing the right materials is crucial when making a ladder. The material determines the ladder’s strength, durability, and safety. Here are key factors to consider when deciding between wood and metal.
Wood Or Metal
Wood: Wooden ladders are traditional and offer a classic look. They are non-conductive, making them ideal for electrical work. They are also sturdy and can support significant weight. However, they can be heavy and require regular maintenance to prevent rot and damage from moisture.
Metal: Metal ladders, such as those made from aluminum or steel, are lightweight and durable. Aluminum is resistant to corrosion and is easy to transport. Steel ladders are stronger and can support more weight but are heavier. Both materials require less maintenance compared to wood.
Tools Required
Depending on the material chosen, different tools will be needed:
- For Wood:
- Saw (Hand or Circular)
- Hammer
- Nails or Screws
- Measuring Tape
- Wood Glue
- Sandpaper
- For Metal:
- Metal Saw or Cutter
- Welding Machine (for steel)
- Drill with Metal Bits
- Measuring Tape
- Bolt and Nut Set
Each tool plays a specific role in the ladder-making process. Accurate measurements ensure safety and stability.
Measuring And Cutting
Creating a ladder requires precise measurements and careful cutting. Properly measuring and cutting the wood ensures the ladder is safe and sturdy. This section will guide you through measuring and cutting steps for your ladder project.
Determining Ladder Height
First, you need to determine the height of your ladder. Measure the distance from the ground to the point where the ladder will rest. This height will be your ladder length.
Use a measuring tape for accuracy. Record the height measurement. This measurement will help in cutting the side rails and the steps.
| Measurement Step | Action |
|---|---|
| Ground to resting point | Measure and record height |
Cutting The Steps
After determining the ladder height, focus on the steps. Decide the number of steps based on the ladder height. Ensure each step is evenly spaced.
Use a saw to cut the steps. Ensure each step is of equal length. This will provide balance and safety.
- Determine number of steps.
- Mark the wood for each step.
- Cut each step using a saw.
Finally, smooth the edges of each step. This prevents splinters and provides a clean finish.
Assembling The Ladder
Assembling a ladder is a crucial step to ensure its safety and functionality. This process involves attaching the steps to the rails and ensuring the overall stability of the ladder. Each step must be executed with precision to ensure the ladder can support weight without collapsing.
Attaching Steps To Rails
Start by laying out all the materials. Ensure you have the rails, steps, screws, and a screwdriver ready. Follow these steps to attach the steps to the rails:
- Align the steps with the pre-marked slots on the rails.
- Use screws to secure each step to the rails. Ensure they are tight.
- Repeat the process for each step. Make sure they are evenly spaced.
Tip: Double-check the alignment of each step. This ensures a comfortable and safe climb.
Ensuring Stability
Stability is key to a reliable ladder. Follow these tips to ensure your ladder is stable:
- Check that all screws are tight.
- Test the ladder on a flat surface before use.
- Inspect for any wobbling or instability.
If the ladder wobbles, adjust the screws and rails as needed. You may also use a level to check the alignment of the ladder. Ensuring stability can prevent accidents and injuries.

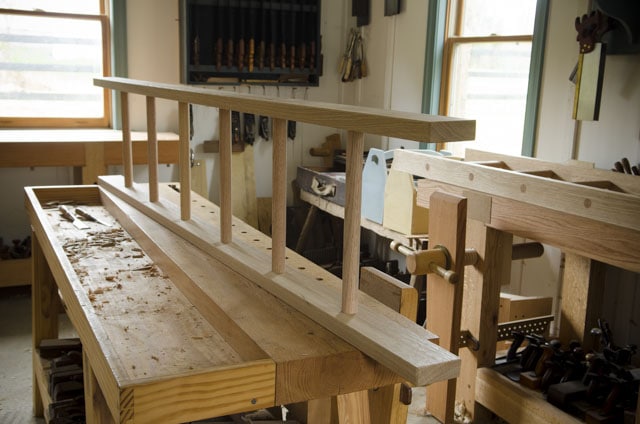
Credit: www.wikihow.com
Securing The Ladder
Ensuring your ladder is secure is essential for safety. A well-secured ladder prevents accidents and provides stability. Below, we discuss key steps to secure your ladder effectively.
Adding Braces
Braces enhance ladder stability. Make sure to add braces to both sides.
- Step 1: Measure the distance between the ladder legs.
- Step 2: Cut braces to fit this measurement.
- Step 3: Attach the braces using strong screws or bolts.
Braces should be checked regularly for wear and tear. Replace any damaged braces immediately.
Checking For Loose Parts
Loose parts can cause instability. Always check for loose parts before using the ladder.
- Step 1: Inspect all screws and bolts.
- Step 2: Tighten any loose screws or bolts.
- Step 3: Replace any missing parts.
Regular inspections keep your ladder in top condition. Make it a habit to check before each use.
Finishing Touches
After constructing your ladder, it’s crucial to add the finishing touches. This step ensures your ladder looks great and is safe to use. Here are some essential steps to follow:
Sanding And Smoothing
Sanding the ladder is the first step in the finishing process. Use sandpaper with a grit of 120 to 150 for the best results. Start by sanding all the surfaces of the ladder to remove any rough edges or splinters. Ensure the rungs and side rails are smooth to the touch.
Next, switch to finer grit sandpaper, around 220 grit, to give the ladder a polished finish. This step helps to prepare the wood for painting or staining. Pay special attention to the areas where the rungs meet the side rails.
Painting Or Staining
Once the ladder is smooth, decide whether to paint or stain it. Both options have their benefits. Painting can add a splash of color, while staining enhances the natural beauty of the wood.
If you choose to paint, start by applying a primer. This helps the paint adhere better and provides a more uniform finish. Use a paintbrush or a roller for even coverage. Let the primer dry completely before applying the paint.
For staining, select a wood stain that matches your desired color. Apply the stain with a brush or a cloth, following the wood grain for the best results. Allow the stain to penetrate the wood for a few minutes, then wipe off any excess with a clean cloth. Let the stain dry as per the manufacturer’s instructions.
| Step | Materials Needed | Time Required |
|---|---|---|
| Sanding | Sandpaper (120, 150, 220 grit) | 1-2 hours |
| Painting | Primer, Paint, Brushes/Rollers | 2-3 hours |
| Staining | Wood Stain, Brushes/Cloths | 1-2 hours |
Remember to let the ladder dry completely before use. These finishing touches make your ladder look professional and last longer.
Credit: woodandshop.com
Safety Tips
When making ladders, safety is crucial. Improper use or maintenance can lead to accidents. Here are some essential safety tips to keep in mind.
Proper Usage
Always follow the manufacturer’s instructions. Place the ladder on a stable, level surface. Avoid uneven ground or slippery surfaces. Ensure the ladder is fully extended and locked before use. Never overreach while on a ladder. Keep your body centered between the rails. Use both hands when climbing and descending. Wear slip-resistant shoes for better grip.
Regular Maintenance
Inspect the ladder before each use. Check for any damage or wear. Look for cracks, bent rungs, or loose screws. Clean the ladder regularly to remove dirt and debris. Store the ladder in a dry place to prevent rust. If the ladder is damaged, do not use it. Repair or replace it immediately. Regular maintenance ensures the ladder remains safe and functional.
Frequently Asked Questions
What Materials Do I Need To Make A Ladder?
You need wood, nails, screws, a saw, and a measuring tape.
How Do I Measure The Ladder Height Correctly?
Measure from the ground to the desired height. Add extra length for stability.
How Do I Ensure My Ladder Is Safe?
Check for strong joints. Make sure the ladder doesn’t wobble.
What Are The Basic Steps To Build A Ladder?
Cut the wood, assemble the sides, attach the rungs, and secure everything tightly.
Can I Customize My Ladder Design?
Yes, you can add paint, varnish, or extra steps to match your needs.
Conclusion
Creating ladders can be a rewarding experience. Follow the steps carefully. Use quality materials for safety and durability. Ensure all measurements are precise. Assemble the parts securely. Test the ladder for stability before use. Maintain your ladder regularly. This ensures it stays safe and functional.
Making ladders is a practical skill. It also adds value to your DIY abilities. Enjoy the satisfaction of crafting something useful. Always prioritize safety in every step. Happy building!