
Ladders are essential tools in every household. They help reach high places safely.
Learning how to make ladders is a valuable skill. Whether you need a sturdy ladder for home use or a unique design for your DIY project, building your own ladder can be rewarding. It saves money and ensures you have a ladder that meets your specific needs.
In this guide, we will walk you through the steps to create a ladder. We will cover the materials needed, safety tips, and the construction process. By the end of this post, you’ll have the knowledge to build a reliable ladder from scratch. Let’s get started on this exciting project!
Credit: woodandshop.com
Choosing Materials
Choosing the right materials is crucial for making ladders. The material affects the ladder’s weight, durability, and safety. Below, we discuss the pros and cons of two common materials: wood and metal. We also address quality and durability factors that will help you make an informed decision.
Wood Vs. Metal
Wooden ladders have been used for centuries. They are sturdy and can be made from various types of wood, each offering different benefits.
- Pros of Wood:
- Non-conductive, making them safer for electrical work.
- Less likely to slip due to better traction.
- Eco-friendly and sustainable.
- Cons of Wood:
- Heavier than metal ladders.
- Prone to rotting if not properly maintained.
- Can warp over time.
Metal ladders are often made from aluminum or steel. They are popular for their strength and lightweight nature.
- Pros of Metal:
- Lightweight and easy to carry.
- Resistant to weather and corrosion.
- Long-lasting with minimal maintenance.
- Cons of Metal:
- Conductive, which can be dangerous around electricity.
- Can be slippery if wet.
- More expensive than wooden ladders.
Quality And Durability
The quality of materials used in ladder construction is vital for safety. Ensure that the wood is free from knots and cracks. High-quality wood will be straight and strong. For metal ladders, look for durable aluminum or steel. These materials offer both strength and longevity.
Durability is another key factor. Wood ladders require regular maintenance to prevent rot and warping. They should be stored in dry conditions. Metal ladders are more durable but need to be checked for rust or damage regularly. Aluminum ladders are particularly durable and resistant to corrosion.
In summary, choosing the right material involves balancing weight, strength, and safety. Whether you choose wood or metal, ensure the materials are of high quality and suited to your specific needs.
Gathering Tools
Gathering the right tools is crucial for making a ladder. Without the right tools, the process can be difficult and unsafe. This section will guide you through the essential tools and safety gear required for this project.
Essential Tools
Building a ladder requires several essential tools. Here is a list of what you will need:
- Measuring Tape: Accurate measurements are key.
- Saw: For cutting wood to the desired length.
- Drill: To make holes for screws.
- Screwdriver: For driving screws into place.
- Clamps: To hold pieces of wood steady.
These tools will make the ladder-building process smoother and more efficient. Each tool plays a crucial role in ensuring the ladder is sturdy and safe.
Safety Gear
Using the correct safety gear is equally important. Here is what you will need:
- Safety Goggles: Protect your eyes from dust and debris.
- Work Gloves: Keep your hands safe from splinters and cuts.
- Ear Protection: Use earplugs or earmuffs to protect your hearing.
- Dust Mask: Prevent inhaling harmful particles.
- Sturdy Footwear: Wear shoes with good grip to avoid slips.
Wearing proper safety gear ensures that you can work without risk of injury. Safety should always be a top priority when working on any DIY project.
Measuring And Cutting
Creating a sturdy ladder starts with precise measurements and accurate cuts. This section will guide you through the essential steps of measuring and cutting the wood. These steps ensure your ladder is both safe and functional.
Accurate Measurements
To start, gather your materials and tools. You will need a tape measure, pencil, and a straight edge. Begin by measuring the height you need your ladder to reach. Add a few inches to this height for stability. Record all measurements carefully.
Next, measure the width of the ladder’s steps. The standard width is between 16 and 20 inches. Mark these measurements on your wood using a pencil. Ensure that each step is equally spaced.
For a clearer understanding, use this table to note your measurements:
| Measurement | Value (in inches) |
|---|---|
| Height | [Your Height Measurement] |
| Width of Steps | [Your Width Measurement] |
Cutting Techniques
With your measurements ready, it’s time to cut the wood. Use a saw for this task. A circular saw works best for straight cuts. Follow these steps for accurate cutting:
- Secure the wood piece firmly using clamps.
- Align your saw with the pencil marks.
- Start the saw and cut slowly along the line.
- Repeat the process for each piece of wood.
For intricate cuts, use a jigsaw. This tool allows for greater precision. Always wear safety goggles while cutting. This protects your eyes from wood dust.
After cutting, sand the edges of each piece. This step removes splinters and ensures smooth surfaces.
Remember, accurate measurements and clean cuts are crucial. They ensure your ladder is safe and durable.

Credit: www.wikihow.com
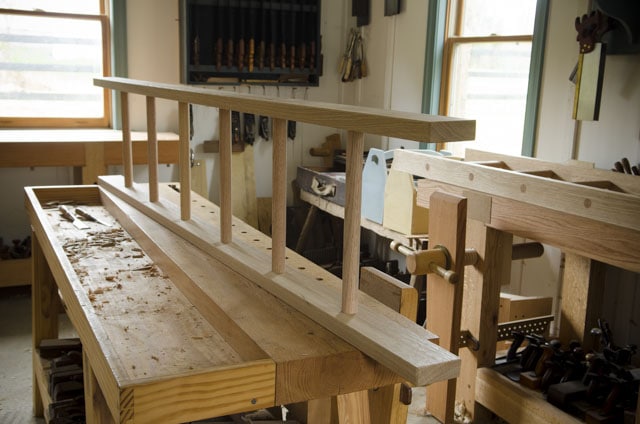
Assembling The Ladder
Assembling a ladder requires attention to detail and proper technique. Ensuring the parts are well-joined and the steps are secure is crucial. Let’s explore the process step by step.
Joining Parts
Start by laying out all the parts. This includes the two side rails, steps, and any additional hardware. Ensure you have everything needed before beginning assembly.
- Align the rails: Place the side rails parallel to each other on a flat surface.
- Position the steps: Place the steps at the marked positions on the rails.
- Attach the steps: Use screws or nails to attach the steps to the rails. Ensure they are straight and level.
Once all steps are attached, double-check the alignment. This ensures the ladder is stable and safe to use.
Securing Steps
Securing the steps properly is vital for ladder safety. Follow these steps to secure them effectively:
- Use the right screws: Select screws that are long enough to hold the steps firmly.
- Drill pilot holes: Drill small pilot holes in the steps and rails. This prevents the wood from splitting.
- Tighten the screws: Insert screws through the pilot holes and tighten them securely.
Check each step for stability. Wiggle them slightly to ensure they do not move. If any step is loose, tighten the screws further.
By following these steps, you can assemble a sturdy and safe ladder. Proper assembly ensures the ladder will be reliable for various tasks. Happy building!
Finishing Touches
After building your ladder, it’s time to add the finishing touches. These steps ensure your ladder is smooth, safe, and looks great. Let’s dive into the final steps to perfect your ladder.
Sanding And Smoothing
Start by sanding the ladder. Use medium-grit sandpaper to remove any rough edges. Sand all surfaces evenly. This makes the ladder safe to use.
Next, switch to fine-grit sandpaper. This step makes the wood smooth. Pay attention to corners and joints. Ensure every part is smooth to the touch.
After sanding, wipe down the ladder. Use a damp cloth to remove dust. Let the ladder dry before moving on to the next step.
Painting And Sealing
Choose a paint or stain that suits your ladder. Use a primer if needed. Apply the first coat evenly. Let it dry completely.
Once dry, apply a second coat. This ensures an even finish. Use a brush or roller for best results.
After painting, it’s time to seal the ladder. Use a clear wood sealant. This protects the wood from damage. Apply the sealant evenly. Let it dry fully before using the ladder.
Now, your ladder is ready! It’s smooth, safe, and looks amazing.

Credit: m.youtube.com
Frequently Asked Questions
What Materials Do I Need To Make A Ladder?
You need wood, screws, nails, a saw, and a measuring tape.
How Do I Cut Wood For A Ladder?
Measure the wood to the desired length. Use a saw to cut it.
How Do I Assemble The Ladder Steps?
Attach the steps to the side rails using screws and nails.
What Safety Tips Should I Follow?
Ensure all screws and nails are tight. Test the ladder’s stability before use.
How Can I Finish The Ladder For Durability?
Sand the wood smooth. Apply a protective finish like varnish or paint.
Conclusion
Crafting a ladder can be simple and rewarding. Follow the steps carefully. Use quality materials for safety and durability. Measure twice, cut once. Assemble with strong joints. Test your ladder before using it. Enjoy the process and the results. Building your ladder saves money and provides satisfaction.
Share your experience with others. Happy building!