
To use a back saw, grip the handle firmly and align the blade with your cut line. Apply steady pressure while sawing, letting the teeth do the work.
A back saw is a precision cutting tool ideal for woodworking tasks. Its stiff blade and fine teeth allow for clean, accurate cuts in hardwood and softwood alike. Commonly used for joints, miters, and tenons, this saw is a favorite among carpenters and hobbyists.
Understanding how to use it effectively can enhance your woodworking skills significantly. Proper technique ensures safety and efficiency, making it easier to achieve professional results.
Whether you’re a beginner or an experienced woodworker, mastering the back saw can elevate your craft. Explore the steps below to maximize your cutting potential with this essential tool.
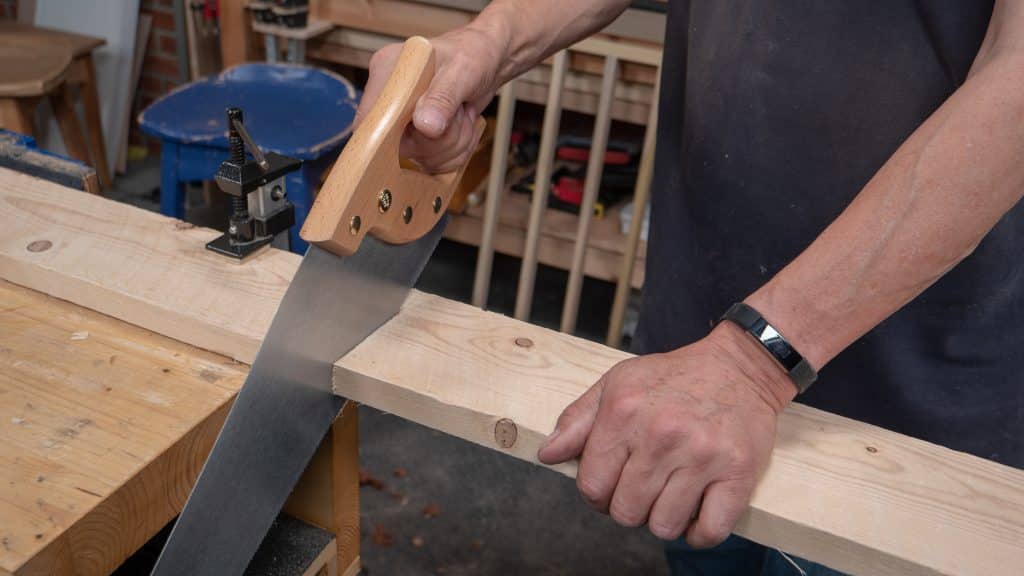
Credit: commonwoodworking.com
Introduction To The Back Saw
The back saw is a vital tool in woodworking. It is designed for precision cutting. Its unique structure allows for clean and accurate cuts. Many woodworkers rely on it for detailed tasks. Understanding its features and uses can enhance your skills.
Key Features
- Rigid Back: A stiff spine keeps the blade straight.
- Fine Teeth: Smaller teeth make smoother cuts.
- Short Blade: Typically ranges from 10 to 14 inches.
- Handle Design: Ergonomic grip for comfort and control.
Types And Uses
| Type | Description | Common Uses |
|---|---|---|
| Tenon Saw | Used for cutting joints. | Making furniture and cabinets. |
| Dovetail Saw | Ideal for fine joinery. | Creating dovetail joints. |
| Carcass Saw | Versatile and medium-sized. | General woodworking tasks. |
Choose the right back saw for your project. This ensures precision and efficiency. Learn to use it properly for the best results.
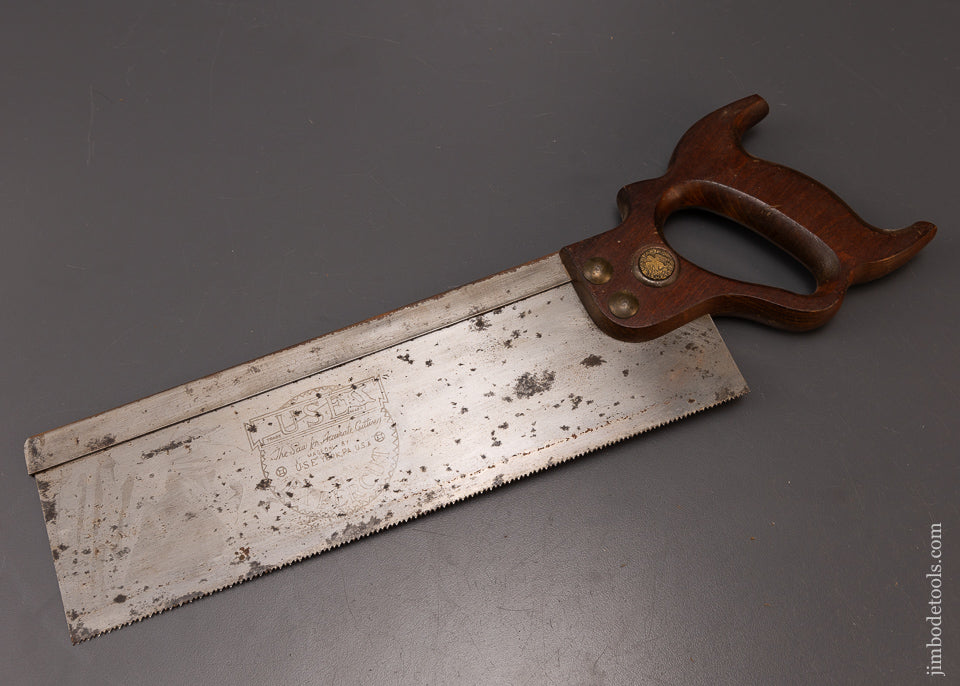
Credit: www.jimbodetools.com
Selecting The Right Back Saw
Choosing the correct back saw is crucial for successful woodworking. The right saw ensures precise cuts and enhances your overall experience. Focus on key features to find the perfect match for your projects.
Blade Length And Teeth Per Inch
The blade length and teeth per inch (TPI) are essential factors. They determine the saw’s cutting ability and precision.
| Blade Length | Recommended TPI | Best For |
|---|---|---|
| 10 inches | 14-20 TPI | Fine cuts in thin wood |
| 12 inches | 10-14 TPI | General-purpose cutting |
| 14 inches | 8-10 TPI | Rough cuts in thicker wood |
Choose a blade length based on the type of cuts needed. Finer teeth provide cleaner cuts. Coarser teeth cut faster but leave rougher edges.
Handle Comfort And Grip
A comfortable handle enhances control and reduces fatigue. Look for these features:
- Material: Wood, plastic, or rubber.
- Shape: Ergonomic designs fit better.
- Size: Ensure it fits your hand well.
Test different handles to find what feels best. A secure grip helps maintain accuracy. Comfort is vital during long projects.
Preparing Your Workspace
Preparing your workspace is crucial for effective use of a back saw. A clean and organized area promotes safety and accuracy. Follow these steps to set up a great workspace.
Safety Gear
Wearing the right safety gear protects you while working. Ensure you have:
- Safety goggles to protect your eyes.
- Work gloves for hand protection.
- Dust mask to avoid inhaling particles.
- Hearing protection if working with power tools.
Always check your gear before starting. This helps prevent accidents.
Securing The Wood
Securing your wood is vital for precise cuts. Use the following methods:
- Clamps: Use clamps to hold the wood steady.
- Vise: A workbench vise can secure your wood firmly.
- Weight: Place a heavy object on the wood to prevent movement.
Choose the right method based on your project. Secure wood allows for safer and cleaner cuts.
Basic Cutting Techniques
Using a back saw requires good techniques. These methods ensure clean, precise cuts. Let’s explore two key techniques: making the first cut and following through.
Making The First Cut
The first cut is crucial for accuracy. Here’s how to do it:
- Mark the Cut Line: Use a pencil to draw a clear line.
- Position the Saw: Align the saw with the mark.
- Start Slowly: Apply gentle pressure on the saw.
- Establish a Groove: Use the tip of the saw to create a small groove.
- Check Your Angle: Ensure the saw is at the right angle.
These steps help guide the saw. A steady hand makes a big difference.
Following Through
After making the first cut, maintain control. Follow these steps:
- Keep the Saw Steady: Focus on the cut line.
- Use Long, Even Strokes: Avoid short, choppy movements.
- Let the Saw Do the Work: Apply light pressure.
- Check Your Progress: Stop and inspect your cut.
Finishing the cut correctly ensures accuracy. Practice these techniques for better results.
Advanced Cutting Skills
Mastering advanced cutting skills with a back saw enhances your woodworking projects. Two essential techniques are miter cuts and dovetail cuts. These cuts create precise joints and angles, ensuring your projects look professional.
Miter Cuts
Miter cuts are angled cuts made across the width of the wood. They are commonly used in frames and trim work. Follow these steps for accurate miter cuts:
- Set the miter saw to the desired angle, usually 45 degrees.
- Secure the wood firmly on the saw.
- Align the blade with your cutting mark.
- Make the cut smoothly and steadily.
Tips for perfect miter cuts:
- Use a miter box for added stability.
- Always measure twice before cutting.
- Practice on scrap wood first.
Check your cut with a square tool for accuracy.
Dovetail Cuts
Dovetail cuts create strong joints for drawers and boxes. These cuts interlock pieces of wood securely. Follow these steps for perfect dovetail joints:
- Mark the tails and pins on the wood.
- Set the back saw to cut along the marked lines.
- Cut the tails first, then the pins.
- Chisel out the waste material carefully.
Helpful tips for dovetail cuts:
- Use a marking gauge for precise lines.
- Make sure your saw is sharp for cleaner cuts.
- Practice on scrap wood to improve your skills.
Ensure your joints fit snugly for a strong bond.
Maintaining Your Back Saw
Proper maintenance keeps your back saw in top shape. Regular care ensures clean cuts and extends the tool’s lifespan. Focus on two main areas: cleaning and sharpening.
Cleaning
Cleaning your back saw is essential for its performance. Follow these simple steps:
- Remove dust and debris: Use a soft brush or cloth.
- Wipe the blade: Use a damp cloth with mild soap.
- Dry immediately: Prevent rust by drying the blade quickly.
Check the handle for dirt. Clean it with a cloth. Avoid using harsh chemicals. They can damage the wood or finish.
Sharpening
Sharp blades cut better and safer. Here’s how to sharpen your back saw:
- Gather your tools: Use a triangular file and a vise.
- Secure the saw: Clamp it firmly in the vise.
- File the teeth: Angle the file at 20 degrees.
Follow this order:
| Step | Action |
|---|---|
| 1 | File one side of each tooth. |
| 2 | Switch sides and repeat. |
| 3 | Check for consistency in angles. |
Regularly sharpen your saw. This enhances its cutting efficiency.
Troubleshooting Common Issues
Using a back saw can be tricky. Here are solutions for common problems. Fixing these issues helps make cleaner cuts.
Drifting Cuts
Drifting occurs when the saw doesn’t follow the intended line. This can lead to uneven cuts. Here are some tips to prevent drifting:
- Ensure the saw is sharp.
- Check the alignment of the saw blade.
- Use a straightedge to guide your cuts.
- Apply consistent pressure while sawing.
If drifting continues, consider these adjustments:
- Adjust your grip on the saw.
- Change the angle of the cut.
- Use a finer-toothed saw for precision.
Binding
Binding happens when the saw gets stuck in the material. This can cause frustration and damage. Here’s how to reduce binding:
- Keep the cut line clear of debris.
- Use proper cutting techniques.
- Ensure the saw is maintained well.
To resolve binding issues:
- Stop cutting immediately.
- Carefully back the saw out of the cut.
- Inspect the blade for damage.
Regular maintenance helps prevent these problems.

Credit: www.youtube.com
Projects To Master Your Skills
Using a back saw can be fun and rewarding. You can create amazing projects while improving your skills. Here are two simple projects to help you become a back saw expert.
Simple Box
A simple box is a great starter project. It helps you practice precise cuts. Follow these steps:
- Gather your materials: wood, back saw, ruler, and glue.
- Measure and mark the wood pieces for the box.
- Use the back saw to cut along the marked lines.
- Assemble the pieces using glue.
- Let it dry before using your box!
This project helps you learn about angles and joints. It builds confidence in your cutting skills.
Picture Frame
Creating a picture frame is another fun project. It allows you to showcase your favorite photos. Here’s how to make one:
- Collect materials: wood, back saw, glass, and nails.
- Measure the wood for the frame size.
- Cut four pieces of wood at 45-degree angles.
- Join the pieces together to form the frame.
- Secure with nails and insert the glass.
This project teaches you how to make miter cuts. It is a great way to practice your precision.
Frequently Asked Questions
- How Do You Choose A Back Saw?
Selecting a back saw depends on your project. Consider blade size, tooth count, and handle comfort for optimal performance.
- What Materials Can A Back Saw Cut?
A back saw is ideal for cutting wood, plywood, and even some plastics, providing clean and precise cuts.
- How Do You Maintain A Back Saw?
Regularly clean the blade and check for dull teeth. Sharpen or replace the blade as needed for efficient cutting.
- What Is The Difference Between A Back Saw And A Hand Saw?
A back saw features a reinforced spine for stability, while a hand saw is more flexible, suitable for rough cuts.
- Can Beginners Use A Back Saw?
Yes, beginners can effectively use a back saw with practice. Its design promotes control and accuracy for various tasks.
Conclusion
Mastering the use of a back saw can elevate your woodworking skills. Practice makes perfect, so take your time to get comfortable with the tool. Always prioritize safety by wearing protective gear.
With patience and precision, you’ll achieve clean, accurate cuts that enhance your projects.
Enjoy the craft and happy sawing!