
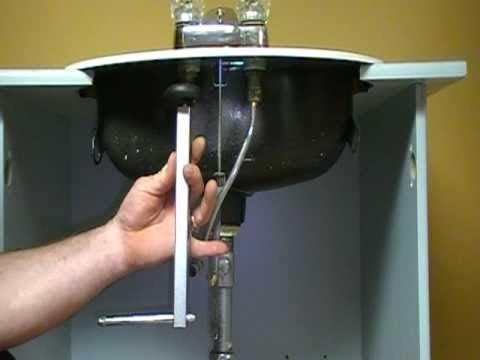
To use a basin wrench, position the adjustable jaws around the faucet nut and turn it counterclockwise to loosen. Tighten by turning clockwise.
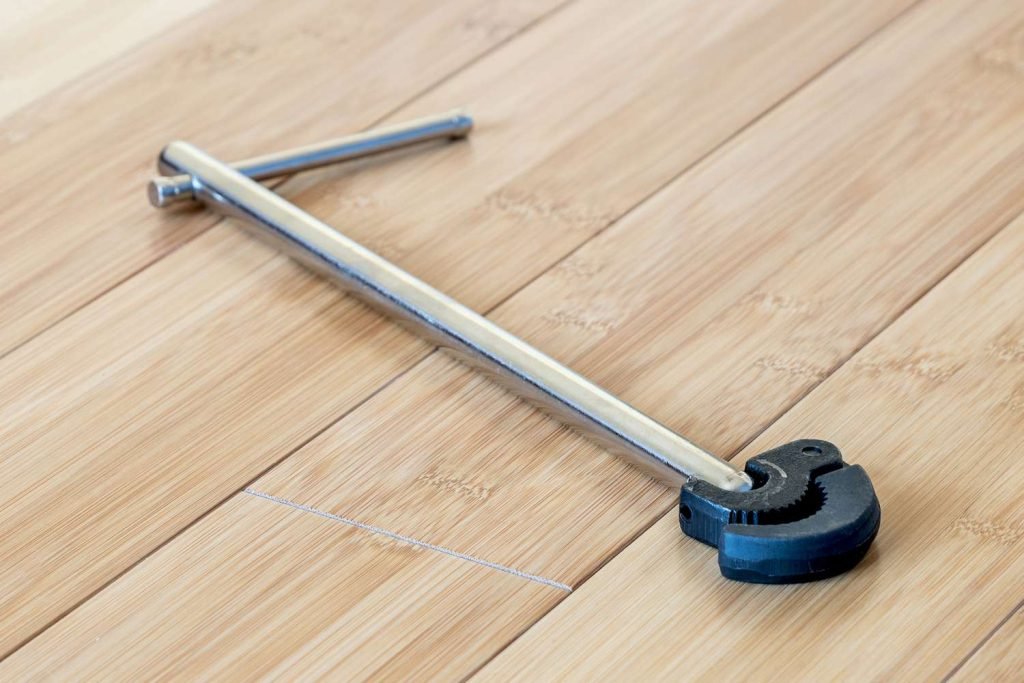
A basin wrench is a specialized plumbing tool designed to work in tight spaces, such as under sinks. It features a long handle and a swiveling jaw, which makes it ideal for reaching and turning nuts and bolts in hard-to-reach areas.
This tool is essential for tasks like installing or removing faucets, where traditional wrenches cannot fit. Using a basin wrench can save time and effort, making plumbing repairs and installations more efficient.
Proper use of this tool ensures that you can complete plumbing tasks with minimal hassle and frustration.
:max_bytes(150000):strip_icc()/SPR-how-to-use-a-basin-wrench-2718720-step-03-d6851359278f44cdb435e22c5d4bdfe8.jpg)
Credit: www.thespruce.com
Introduction To Basin Wrench
A basin wrench is an essential tool for plumbing tasks. It is specifically designed for working in tight spaces. This tool helps you reach and tighten or loosen nuts under sinks. Understanding how to use a basin wrench can make your plumbing jobs easier and more efficient.
What Is A Basin Wrench?
A basin wrench is a plumbing tool with a long shaft and a pivoting jaw. The jaw is designed to grip nuts in hard-to-reach places. This tool is perfect for working under sinks. The long handle provides leverage, making it easier to turn stubborn nuts.
The basin wrench has a spring-loaded jaw. This jaw adjusts to fit different sizes of nuts. The tool’s design allows you to work in confined spaces with ease.
Common Uses
The basin wrench is commonly used for several plumbing tasks. Here are some of its most common uses:
- Tightening or loosening faucet nuts
- Installing new faucets
- Repairing leaks under sinks
- Replacing old plumbing fixtures
This tool is essential for anyone doing plumbing work. It simplifies tasks that would be difficult with other tools.
Choosing The Right Basin Wrench
Using the right basin wrench can make plumbing tasks easier. A basin wrench helps you tighten or loosen nuts in hard-to-reach places. But, choosing the right one is crucial. Let’s explore the options and factors to consider.
Types Of Basin Wrenches
There are different types of basin wrenches available. Each type has its own use.
- Standard Basin Wrench: Good for most basic tasks.
- Adjustable Basin Wrench: Has an adjustable jaw for various sizes.
- Telescopic Basin Wrench: Features an extendable handle for deep spaces.
Factors To Consider
Choosing the right wrench involves several factors. Consider these points:
- Size of the Nuts: Ensure the wrench fits the nuts you will work with.
- Space Availability: Check the space where you will use the wrench.
- Handle Length: Longer handles offer better leverage.
- Grip Comfort: Comfortable grips reduce hand strain during use.
Here’s a table summarizing the key points:
| Type | Key Feature | Best For |
|---|---|---|
| Standard Basin Wrench | Basic design | General use |
| Adjustable Basin Wrench | Adjustable jaw | Multiple nut sizes |
| Telescopic Basin Wrench | Extendable handle | Deep spaces |
Preparation Before Use
Before using a basin wrench, it’s important to be well-prepared. This ensures safety and efficiency. Below are key steps to follow for preparation.
Gathering Tools
First, gather all necessary tools. These include the basin wrench, a flashlight, and a pair of gloves.
- Basin Wrench: This tool is essential for tight spaces under sinks.
- Flashlight: Helps you see in dark and cramped areas.
- Gloves: Protects your hands from cuts and bruises.
Having these tools ready will make the job easier and safer.
Safety Precautions
Safety is important when using any tool. Follow these steps to stay safe.
- Turn off the water supply: Locate the shut-off valve and turn it off.
- Check for electrical outlets: Avoid contact with electrical outlets or wires.
- Wear safety gear: Use gloves and safety glasses to protect yourself.
These precautions help prevent accidents and injuries.
Credit: youtube.com
Basic Techniques
Learning how to use a basin wrench is essential for plumbing tasks. It helps you tighten and loosen nuts in hard-to-reach places. Here are some basic techniques to get you started.
Gripping The Wrench
Gripping the basin wrench correctly is very important. Hold the wrench with one hand on the handle. Use your other hand to steady the jaw. Make sure the handle is pointing towards you.
Position the jaw around the nut you want to turn. Ensure the teeth of the wrench grip the nut tightly. This grip will prevent slipping and allow you to apply force effectively.
Adjusting The Jaw
Adjusting the jaw of the basin wrench is crucial for a good fit. Turn the knob near the jaw to open or close it. Make sure it fits snugly around the nut.
If the nut is too large or small, you may need to adjust again. A proper fit ensures you can turn the nut without damaging it.
| Step | Action | Tip |
|---|---|---|
| 1 | Grip the wrench | Hold the handle firmly |
| 2 | Position the jaw | Align teeth with the nut |
| 3 | Adjust the jaw | Ensure a snug fit |
Using a basin wrench becomes easier with practice. Follow these steps to master the basic techniques.
Using A Basin Wrench
Using a basin wrench can seem tricky, but it’s quite simple. This tool helps loosen and tighten nuts in hard-to-reach places. Learn how to use it effectively with our easy guide.
Loosening Nuts
To start, place the basin wrench around the nut. Ensure the jaws grip the nut firmly. Turn the wrench handle counterclockwise to loosen the nut. The long handle helps reach tight spaces under sinks.
If the nut is stuck, apply a bit of penetrating oil. Let it sit for a few minutes. Then, try loosening the nut again. The oil helps break any rust or grime.
Remember to keep the wrench steady. This prevents slipping and ensures a good grip. Repeat the process until the nut is fully loose.
Tightening Nuts
Place the basin wrench around the nut you want to tighten. Ensure the jaws grip the nut securely. Turn the wrench handle clockwise to tighten the nut.
Apply firm, even pressure. This prevents over-tightening and potential damage. Check the nut’s tightness periodically to avoid overtightening.
Use the wrench’s long handle for better leverage. This is especially useful in tight spaces. Repeat the process until the nut is snug.
| Step | Action | Direction |
|---|---|---|
| 1 | Place wrench around nut | Ensure firm grip |
| 2 | Turn handle | Loosen: Counterclockwise, Tighten: Clockwise |
| 3 | Apply pressure | Firm and steady |
| 4 | Check nut | Repeat as needed |
- Grip the nut firmly with the wrench.
- Turn the handle in the correct direction.
- Apply even pressure to avoid damage.
- Check the nut’s tightness periodically.
- Place the wrench around the nut.
- Turn counterclockwise to loosen.
- Turn clockwise to tighten.
- Repeat until the nut is secure.
Common Mistakes
Using a basin wrench can be tricky. Many people make common mistakes. These mistakes can lead to problems. Here are the most common mistakes and how to avoid them.
Over-tightening
Over-tightening is a frequent mistake. People think tighter is better. This is not true. Over-tightening can damage the fixture. It can also strip the threads. This makes future repairs harder.
To avoid this, use gentle force. Stop when the connection feels snug. Do not use extra muscle. Use a torque wrench if possible. This tool measures how tight the connection is.
Incorrect Positioning
Another mistake is incorrect positioning of the basin wrench. The wrench must be positioned correctly. The jaws should grip the nut firmly. If positioned wrong, the wrench will slip. This can damage the nut and the wrench.
To position the wrench correctly, align the jaws with the nut. Make sure the wrench handle is aligned with your arm. This gives you better control. Always double-check the position before applying force.
| Common Mistake | How to Avoid |
|---|---|
| Over-Tightening | Use gentle force and stop when snug. |
| Incorrect Positioning | Align jaws with the nut and double-check. |
By avoiding these mistakes, your job will be easier. Your fixtures will last longer. Practice using the basin wrench correctly. Over time, you will get better.
Maintenance Tips
Proper maintenance of a basin wrench ensures it lasts longer and works effectively. Follow these tips for keeping your basin wrench in top condition.
Cleaning The Wrench
Regular cleaning is crucial. After each use, wipe the wrench with a clean cloth. This removes any grime and grease. For stubborn dirt, use a brush with stiff bristles.
Submerge the wrench in soapy water for a deeper clean. Scrub gently with the brush. Rinse thoroughly and dry with a towel. Ensure all parts are completely dry to prevent rust.
Storing Properly
Proper storage prevents damage and keeps the wrench ready for use. Always store it in a dry place. Moisture can cause rust and reduce the tool’s lifespan.
Use a toolbox with compartments. This keeps the wrench organized and prevents it from getting lost. Hanging the wrench on a pegboard is also a good option. This keeps it accessible and off the workbench.
| Maintenance Task | Frequency |
|---|---|
| Wipe with cloth | After each use |
| Deep clean | Monthly |
| Dry thoroughly | Always |
| Store in dry place | Always |
- Cleaning the wrench extends its life.
- Storing it properly prevents damage.
- Regular maintenance keeps the wrench effective.
- Wipe the wrench after use.
- Use a brush for stubborn dirt.
- Submerge in soapy water for a deep clean.
- Dry thoroughly to prevent rust.
- Store in a dry place or toolbox.
Advanced Tips
Mastering the use of a basin wrench can be challenging. Here are advanced tips to handle difficult angles and work in tight spaces. These tips will help you become a pro in no time.
Credit: www.thespruce.com
Handling Difficult Angles
Working with a basin wrench often means dealing with tricky angles. The following tips will help you manage these angles with ease:
- Adjust the Jaw: Ensure the wrench jaw is set correctly. Turn the knob to open or close the jaw.
- Use an Extension: Attach an extension to the handle. This gives you better leverage in awkward spots.
- Rotate the Handle: Rotate the handle in small increments. This helps you maintain control and precision.
Working In Tight Spaces
Spaces under sinks are often cramped. Here are tips to work efficiently in tight spaces:
- Clear the Area: Remove any unnecessary items. This gives you more room to maneuver.
- Use a Flashlight: A small, bright flashlight helps you see better in dark areas.
- Shorter Handle: Use a basin wrench with a shorter handle. This helps in confined spaces.
These advanced tips will make your plumbing tasks much easier. Practice these techniques to become proficient with a basin wrench.
Frequently Asked Questions
- What Is A Basin Wrench Used For?
A basin wrench is used to tighten or loosen nuts under sinks.
- How Do You Use A Basin Wrench?
Place the wrench on the nut, adjust the jaws, and turn.
- Can A Basin Wrench Reach Tight Spaces?
Yes, it has a long handle and pivoting jaw for tight spaces.
- Do I Need A Basin Wrench For Faucets?
Yes, it’s essential for installing or removing faucet nuts.
- Where Can I Buy A Basin Wrench?
You can buy a basin wrench at hardware stores or online.
Conclusion
Mastering the use of a basin wrench is essential for any DIY enthusiast. It simplifies plumbing tasks, saving time and effort. Remember to always follow safety guidelines to avoid injuries.
Practice regularly to enhance your skills. With a bit of patience, you’ll handle plumbing projects like a pro.