
To use grommet pliers, first position the grommet in the desired location on your material. Then, align the pliers over the grommet and squeeze firmly to secure it in place.
Grommet pliers are essential tools for crafting and sewing projects. They allow you to create durable holes in fabric, leather, and other materials.
Whether you’re making curtains, bags, or even outdoor gear, grommet pliers offer a reliable solution for reinforcing openings.
Using these pliers effectively ensures that your grommets stay securely attached, enhancing the longevity of your projects. This guide will walk you through the steps to use grommet pliers correctly, ensuring professional results every time.
Understanding how to operate this tool can elevate your crafting skills and expand your project possibilities.
Introduction To Grommet Pliers
Grommet pliers are essential tools for crafting. They help attach grommets to various materials. Grommets create sturdy holes in fabric, leather, and more. This guide will teach you about grommet pliers and their uses.
Credit: www.pinterest.com
The Role Of Grommet Pliers
Grommet pliers serve a specific purpose in crafting. They simplify the process of adding grommets. Here are some key roles of grommet pliers:
- Securely attach grommets to materials.
- Make precise holes for grommets.
- Ensure a professional finish on projects.
- Reduce the risk of material damage.
Types Of Grommet Pliers
Different types of grommet pliers exist for various needs. Each type has unique features. Here’s a table comparing the main types:
| Type | Features | Best For |
|---|---|---|
| Manual Grommet Pliers | Simple, hand-operated | Light to medium projects |
| Heavy-Duty Grommet Pliers | Robust, requires more force | Thick materials |
| Electric Grommet Pliers | Automated, efficient | Large scale projects |
Choosing the right type depends on your project needs. Understanding each type helps you make informed choices.
Essential Features
Understanding the essential features of grommet pliers can enhance your crafting experience. These tools have unique components that make them efficient and effective.
Key Components
Grommet pliers consist of several key components. Each part plays a vital role in their functionality:
- Handles: Ergonomic design for comfort and grip.
- Jaws: Made to hold grommets securely.
- Die: Shapes and sizes vary for different grommets.
- Cutting Tool: Used to create holes in fabric.
Material And Durability
The material of grommet pliers affects their durability and performance. Common materials include:
| Material | Durability | Weight |
|---|---|---|
| Steel | High | Heavy |
| Aluminum | Moderate | Light |
| Plastic | Low | Very Light |
Choose materials based on your project needs. Steel offers strength, while aluminum provides ease of use. Plastic is lightweight but less durable.
Preparation Steps
Preparing to use grommet pliers is simple. Follow these steps to ensure a smooth process. Gather your materials first. Then mark the fabric accurately.
Gather Your Materials
- Grommet pliers – Choose a good quality pair.
- Grommets – Select the right size for your project.
- Fabric – Use a sturdy material that can hold grommets.
- Marker or chalk – For marking the fabric.
- Cutting mat – Protect your work surface.
- Scissors or rotary cutter – To cut the fabric.
Marking The Fabric
Marking the fabric correctly is crucial. Follow these steps for accuracy:
- Lay the fabric flat on a cutting mat.
- Decide where the grommet will go.
- Use a ruler to measure the distance from the edges.
- Draw a small circle where the grommet will sit.
Use a small dot for better visibility. Double-check the placement before cutting. This step ensures a neat finish.
Credit: haberdasheryfun.com
Attaching Grommets
Attaching grommets can enhance your fabric projects. This process is simple. Grommet pliers make it easy and quick. Follow these steps to attach grommets properly.
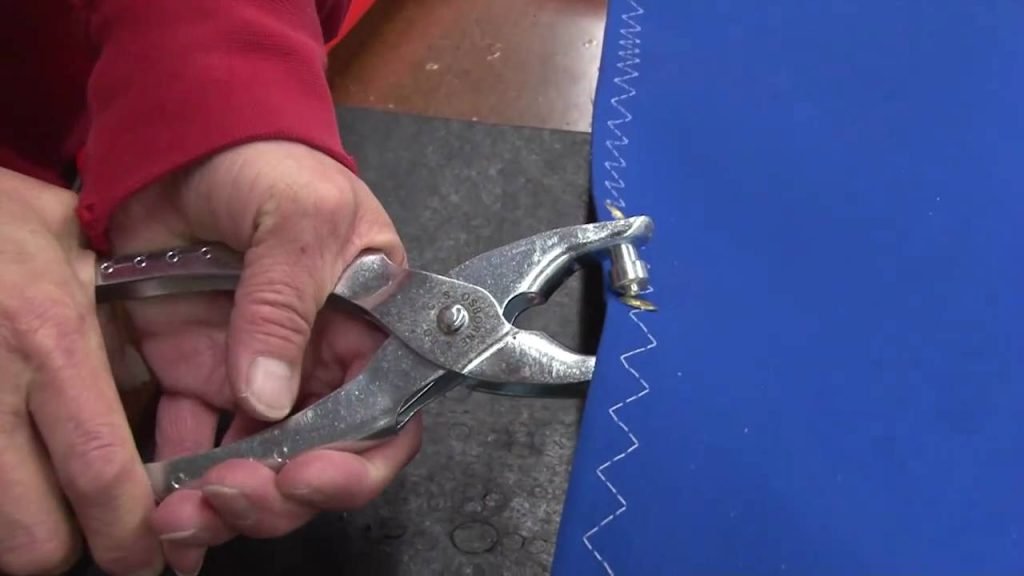
Aligning The Pliers
Start by preparing your fabric. Make sure it’s clean and dry.
- Mark the spot for the grommet.
- Use a fabric marker for visibility.
Next, place the grommet in the marked hole. Position the grommet so it sits flat against the fabric. Align the grommet side with the appropriate hole of the pliers.
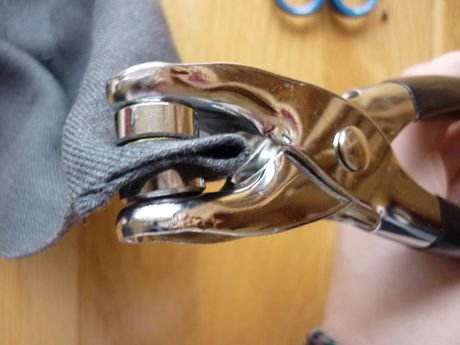
Press And Secure
Now it’s time to press. Firmly grip the pliers. Ensure they are aligned with the grommet.
- Squeeze the handles together.
- Apply steady pressure.
- Release the handles once the grommet secures.
Check the grommet. It should be tight against the fabric. Repeat the process for additional grommets.
Troubleshooting Common Issues
Using grommet pliers can sometimes lead to problems. Understanding how to fix these issues helps ensure smooth operation. Here are two common issues and their solutions.
Misaligned Grommets
Misaligned grommets can ruin your project. Here’s how to fix this problem:
- Check the alignment before applying pressure.
- Use a ruler to measure distances between grommets.
- Make a template for precise placement.
Follow these steps to align grommets correctly:
- Place the fabric on a flat surface.
- Mark the desired grommet locations.
- Insert grommets into marked spots.
- Carefully press down with grommet pliers.
Ensuring A Tight Fit
A tight fit is essential for grommet functionality. Loose grommets can lead to wear and tear. Here are tips to ensure a snug fit:
| Issue | Solution |
|---|---|
| Grommet pops out | Check if the fabric is thick enough. |
| Worn edges | Replace grommets regularly. |
Follow these steps for a tight fit:
- Select the right size grommet for your fabric.
- Use reinforced fabrics for added strength.
- Apply even pressure while using the pliers.

Credit: m.youtube.com
Creative Uses For Grommet Pliers
Grommet pliers are versatile tools for many projects. These handy devices can enhance creativity in crafts and home decor. Explore exciting ways to use grommet pliers effectively.
Craft Projects
Grommet pliers are perfect for various craft projects. Here are some fun ideas:
- Fabric Banners: Create custom banners for parties or events.
- Jewelry Making: Use grommets in necklaces and bracelets.
- Scrapbooking: Add grommets to pages for a fun look.
- DIY Bags: Make stylish bags with grommeted holes for handles.
Follow these steps for fabric banners:
- Choose fabric and cut it to size.
- Mark where the grommets will go.
- Use grommet pliers to install the grommets.
- String ribbon through the grommets to hang.
Home Decor Applications
Grommet pliers can enhance your home decor. Here are some creative uses:
- Curtains: Add grommets for easy hanging.
- Tablecloths: Create tie-down points for outdoor dining.
- Wall Art: Use grommets to hang art pieces.
- Storage Solutions: Make custom storage bins with grommets.
Try these ideas for grommeted curtains:
- Select your fabric and measure the window.
- Cut the fabric and mark for grommets.
- Use grommet pliers to attach the grommets.
- Hang the curtains on a rod.
Maintenance And Care
Proper maintenance ensures your grommet pliers last longer. Regular care keeps them in good working condition. Follow these steps to maintain your pliers effectively.
Cleaning The Pliers
Cleaning your grommet pliers is essential. Dirt and debris can affect their performance.
- Use a soft cloth to wipe the exterior.
- Remove any grommet debris from the jaws.
- For stubborn dirt, use a mild soap solution.
After cleaning, dry the pliers thoroughly. Moisture can cause rust. Store them in a dry place.
Storing Properly
Storing grommet pliers properly extends their life. Follow these tips for effective storage:
- Keep them in a toolbox or drawer.
- Avoid damp areas to prevent rust.
- Use a protective cover or bag for added safety.
Regular checks for rust or damage are essential. Fix any issues immediately to ensure optimal performance.
Advanced Tips
Mastering grommet pliers involves more than basic use. Explore advanced techniques to enhance your projects. These tips will help you achieve professional results with ease.
Working With Different Materials
Grommet pliers work well with various materials. Here’s how to handle some common options:
| Material | Recommended Grommet Size | Special Tips |
|---|---|---|
| Canvas | 1/2 inch | Use a cutting mat underneath. |
| Leather | 3/8 inch | Use a sharp punch for clean holes. |
| Vinyl | 5/8 inch | Warm the vinyl slightly before grommeting. |
| Fabric | 1/4 inch | Stabilize with interfacing for strength. |
Customizing Grommet Sizes
Custom grommet sizes can enhance your design. Follow these steps:
- Choose Your Size: Select grommets based on your project.
- Measure: Use a ruler to ensure accuracy.
- Mark: Clearly mark where each grommet will go.
- Test Fit: Insert a grommet to check the fit.
- Adjust: Resize if necessary before finalizing.
Customizing sizes can make your project unique. Experiment with different sizes for various effects.
- Use larger grommets for a bold look.
- Smaller grommets work well for delicate designs.
- Mix sizes for added interest.
Frequently Asked Questions
- What Materials Can I Use With Grommet Pliers?
Grommet pliers work well with fabric, leather, and canvas, allowing for versatile crafting options.
- How Do I Choose The Right Grommet Size?
Select a grommet size based on your project’s material thickness and desired hole diameter for best results.
- Can I Replace The Grommet On My Project?
Yes, you can easily replace grommets by removing the old ones and inserting new ones using the pliers.
- Are Grommet Pliers Easy To Use?
Yes, grommet pliers are user-friendly and ideal for both beginners and experienced crafters.
- Where Can I Buy Grommet Pliers?
Grommet pliers are available at craft stores, online retailers, and specialty sewing shops for convenience.
Conclusion
Grommet pliers are essential tools for various projects. Mastering their use can enhance your crafting skills. With practice, you’ll achieve professional-looking results.
Always remember to choose the right grommets and follow safety guidelines. Embrace your creativity and enjoy the process of making something unique with your grommet pliers!