
Discover how saw blade teeth meaning transforms your cutting precision. This guide explains tooth count, shape, and material matching to eliminate burning, chipping, and frustration. Master blade selection for flawless results on every project.
Key Takeaways
- Tooth count (TPI) dictates cut speed and finish: Fewer teeth = faster rough cuts; more teeth = smoother finishes
- Tooth geometry is critical for material: ATB teeth slice wood fibers; FTG teeth rip along grain; diamond teeth cut hard materials
- Kerf width affects material waste and motor strain: Thinner kerfs save material but require precise alignment
- Blade material must match your workpiece: Carbide-tipped for wood; diamond for tile; bi-metal for metal
- Proper maintenance extends blade life: Clean pitch buildup and replace when teeth are dull or damaged
- Matching blade to saw type is non-negotiable: Circular saws need different blades than table saws or miter saws
Why Saw Blade Teeth Meaning Matters More Than You Think
Ever watched your saw blade tear through wood like a hot knife through butter… only to leave splintered edges, burning smells, or a wobbly cut? That frustration often traces back to one overlooked detail: saw blade teeth meaning. It’s not just about sharpness—it’s about understanding how each tooth’s shape, count, and arrangement interacts with your material. Whether you’re building a bookshelf or trimming crown molding, the right teeth turn guesswork into precision. In this guide, you’ll learn exactly how to decode blade teeth for perfect cuts every single time. No more wasted materials or do-overs!
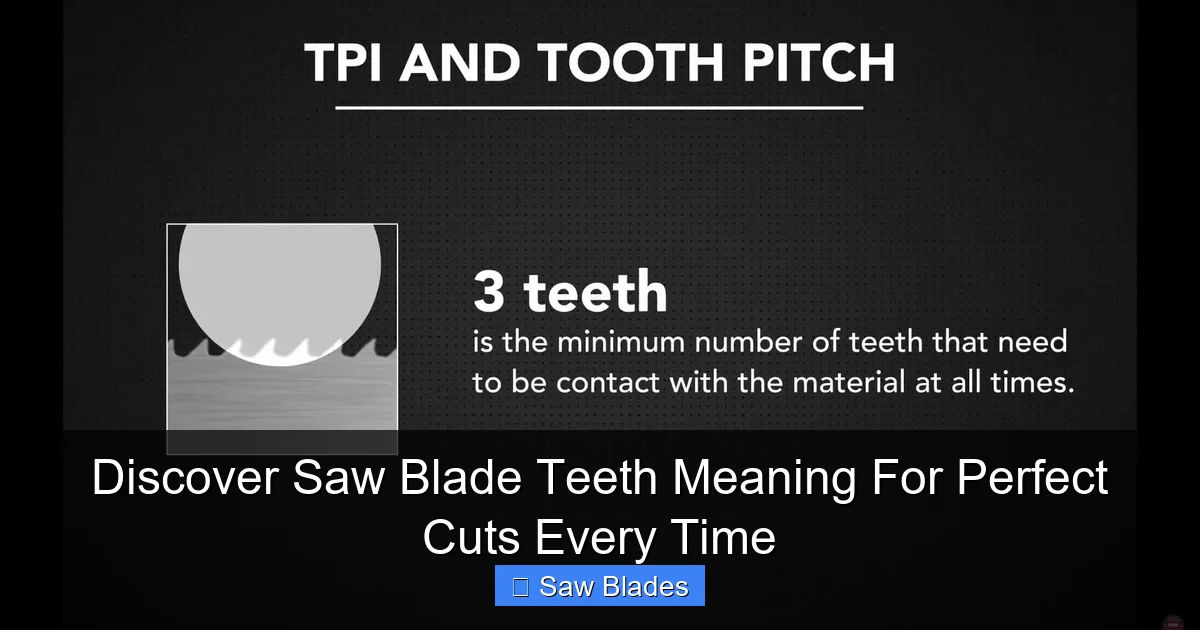
Step 1: Decoding Tooth Count (TPI) – Your Cutting Speed Control
Tooth count, measured as Teeth Per Inch (TPI), is the first clue to a blade’s personality. Think of it like gears in a car: low TPI = high speed for rough terrain; high TPI = smooth cruising on highways.

Visual guide about Discover Saw Blade Teeth Meaning For Perfect Cuts Every Time
Image source: konetool.com
How TPI Affects Your Cut
- Low TPI (24-40 teeth): Aggressive cutting for fast rip cuts in dimensional lumber. Fewer teeth mean bigger gullets (spaces between teeth) that clear sawdust quickly. Example: A 24T circular saw blade rips 2x4s in seconds but leaves a rough surface.
- Medium TPI (40-60 teeth): The “Goldilocks zone” for general woodworking. Balances speed and finish. Ideal for plywood, MDF, and cabinetry. Example: A 50T blade cuts plywood cleanly without excessive splintering.
- High TPI (60-100+ teeth): Fine finishes for delicate work. More teeth = smaller cuts per tooth = smoother surface. Example: An 80T blade produces glass-like edges on hardwoods for furniture.
Pro Tip: Match TPI to Material Thickness
Thicker materials need lower TPI to prevent clogging. A 1/4″ plywood sheet? Use 60-80T. A 2″ hardwood plank? Drop to 24-40T. When in doubt, start with medium TPI and adjust based on results. For circular saw users, this is why knowing how to swap blades quickly saves time on job sites.
Step 2: Understanding Tooth Geometry – The Secret to Clean Cuts
Tooth shape isn’t random—it’s engineered physics. Three main geometries dominate woodworking blades:
Visual guide about Discover Saw Blade Teeth Meaning For Perfect Cuts Every Time
Image source: sawbladeuniversity.com
Alternate Top Bevel (ATB)
- What it looks like: Teeth angled left/right in alternating pattern
- Best for: Crosscutting (cutting across wood grain). The bevel slices fibers cleanly like a chisel.
- Real-world use: Cutting plywood faces, trimming picture frames. A 60T ATB blade leaves splinter-free edges on oak.
Flat Top Grind (FTG)
- What it looks like: Teeth with flat tops, no bevel
- Best for: Ripping (cutting with wood grain). Flat tops shear fibers aggressively.
- Real-world use: Breaking down 2x10s for framing. A 24T FTG blade powers through pine studs.
Triple Chip Grind (TCG)
- What it looks like: Alternating flat and pointed teeth
- Best for: Hard plastics, laminates, and non-ferrous metals. Resists melting and chipping.
- Real-world use: Cutting countertops or aluminum trim. Essential for tile saws tackling glass.
Geometry Cheat Sheet
See a blade with all teeth pointing forward? That’s a raker set for aggressive ripping. Wavy set teeth (teeth bent left/right) reduce binding in thin materials. Always check the blade’s label—reputable brands like Freud or Diablo specify geometry clearly.
Step 3: Matching Teeth to Material – No More Burning or Chipping
Using a wood blade on metal? Or a metal blade on plywood? That’s like wearing snow boots to a beach party—disastrous. Teeth must align with material properties.

Visual guide about Discover Saw Blade Teeth Meaning For Perfect Cuts Every Time
Image source: detroitbandsaw.com
Wood Cutting Blades
- Softwoods (pine, cedar): Medium TPI (40-60) FTG or ATB. Softwoods gum up easily—look for anti-friction coatings.
- Hardwoods (oak, maple): High TPI (60-80) ATB. Hardwoods demand sharp, fine teeth to prevent tear-out.
- Engineered wood (plywood, MDF): High TPI (80+) ATB with negative hook angle (teeth lean backward) to reduce splintering.
Metal Cutting Blades
- Ferrous metals (steel, iron): Low TPI (10-24) with aluminum oxide or ceramic teeth. Requires coolant to prevent overheating.
- Non-ferrous metals (aluminum, copper): Medium TPI (32-48) TCG geometry. Sharp teeth prevent material from welding to the blade.
For metalwork, remember: miter saws can cut metal—but only with the right blade. A wood blade on steel will shatter dangerously!
Specialty Materials
- Tile/Stone: Diamond-tipped teeth with continuous rim (smooth edge) for clean cuts or turbo rim (notched) for speed.
- Plastics: High TPI (80+) TCG to prevent melting. Use a zero-clearance insert on your table saw.
- Concrete: Diamond blades with segmented rims for dust ejection. Never use wood blades!
Step 4: Kerf Width – The Invisible Factor in Precision
Kerf is the width of the cut—the material “eaten” by the blade. It’s determined by blade thickness and affects everything from accuracy to motor strain.
Why Kerf Matters
- Thin kerf (1/8″ or less): Saves material (crucial for expensive hardwoods), reduces sawdust, and eases motor load. Best for: Precision joinery, thin plywood.
- Standard kerf (1/8″ – 3/32″): Most common. Balances durability and material waste. Best for: General framing, decking.
- Heavy kerf (3/32″+): Ultra-durable for abrasive materials. Wastes more material but resists bending. Best for: Cutting pressure-treated lumber, concrete.
Pro Tip: Kerf and Saw Compatibility
Table saws with zero-clearance inserts work best with thin-kerf blades for splinter-free cuts. For circular saws, standard kerf is ideal—thin kerf blades can vibrate excessively on handheld tools. Always check your saw’s arbor size (5/8″ or 1″) to ensure blade compatibility.
Step 5: Blade Maintenance – Keeping Teeth Sharp for Longer
Even the best blade dulls. Ignoring maintenance turns perfect cuts into burned, jagged messes. Here’s how to extend blade life:
Cleaning Pitch and Resin
- Soak blade in oven cleaner or citrus-based solvent for 15 minutes.
- Scrub gently with a nylon brush (never steel wool—it scratches the coating).
- Rinse and dry immediately to prevent rust.
Recognizing Dull Teeth
- Signs: Burning smell, excessive sawdust (instead of chips), blade wanders during cuts.
- Test: Run your finger along the teeth (carefully!). Dull teeth feel smooth; sharp teeth feel crisp and grab your skin slightly.
If you’re using diamond blades, learn how to spot wear on diamond segments—they dull differently than carbide.
When to Replace
- Teeth are chipped or broken
- Blade vibrates excessively even after cleaning
- Cuts require excessive force
Don’t wait until performance plummets—swap blades at the first sign of struggle.
Troubleshooting Common Cutting Problems
Still getting bad cuts? Your blade teeth might be the culprit:
Problem: Burning or Scorching
- Cause: Dull teeth, wrong TPI for material thickness, or incorrect feed speed.
- Fix: Use higher TPI for thin materials; slow down your feed rate; replace dull blades.
Problem: Tear-Out or Splintering
- Cause: Wrong geometry (e.g., FTG for crosscutting), dull teeth, or inadequate support.
- Fix: Switch to ATB blade; use masking tape over cut line; add zero-clearance insert.
Problem: Blade Wandering or Binding
- Cause: Incorrect tooth set (e.g., wavy set in thick wood), warped blade, or misaligned saw.
- Fix: Use raker set for thick materials; check blade for flatness; calibrate saw fence.
Conclusion: Your Perfect Cut Starts With the Right Teeth
Understanding saw blade teeth meaning isn’t just technical jargon—it’s the difference between a project you’re proud of and one that ends in the scrap heap. By matching tooth count to material thickness, selecting geometry for your cut direction, and maintaining blades properly, you transform frustration into flawless results. Remember: a $50 blade used correctly outperforms a $200 blade used wrong. Keep this guide handy, experiment with different blades on scrap wood, and soon you’ll instinctively reach for the perfect teeth for every cut. Your saw—and your projects—will thank you.
🎥 Related Video: Beginner Woodworker Tips on Buying the Right Saw Blades
📺 731 Woodworks
What is the best saw blade for a table saw? Best saw blade for miter saw? Best saw blade for hardwood? This is the beginner …
