
Learn everything about cordless drills in this complete guide. We cover how they work, key features, choosing tips, and safe usage. Perfect for DIY beginners and pros looking to master portable power tools.
Key Takeaways
- What is a cordless drill: A portable power tool powered by rechargeable batteries, designed for drilling holes and driving screws without needing an electrical outlet.
- Battery voltage matters: Higher voltage (18V-20V) provides more power for tough jobs, while lower voltage (12V) offers better control for light tasks.
- Key features to consider: Look for variable speed settings, torque control, LED lights, and ergonomic design when choosing your tool.
- Maintenance is crucial: Proper battery care, regular cleaning, and correct storage can extend your drill’s life by years.
- Safety first: Always wear eye protection, secure your workpiece, and use the right bit for each material.
- Versatility is key: A cordless drill can handle wood, metal, plastic, and masonry with the right attachments, making it essential for any toolbox.
What Is a Cordless Drill? Your Guide to Portable Power Tools
Welcome to your complete guide about cordless drills. Whether you’re a DIY beginner or a seasoned pro, understanding this essential tool will transform how you tackle projects. This guide will walk you through everything you need to know about cordless drills, from basic operation to advanced techniques.
You’ll learn how these portable powerhouses work, what features matter most, and how to choose the perfect model for your needs. We’ll cover safety tips, maintenance routines, and troubleshooting tricks that keep your tool running smoothly. By the end, you’ll confidently know when and how to use your cordless drill for any job.
Understanding Cordless Drill Basics
What Is a Cordless Drill Exactly?
A cordless drill is a handheld power tool that runs on rechargeable batteries. It combines a motor, gearing system, and chuck to rotate drill bits and drive screws. Unlike corded models, you can use it anywhere without being tethered to an outlet. That freedom makes it indispensable for home repairs, construction sites, and woodworking projects.
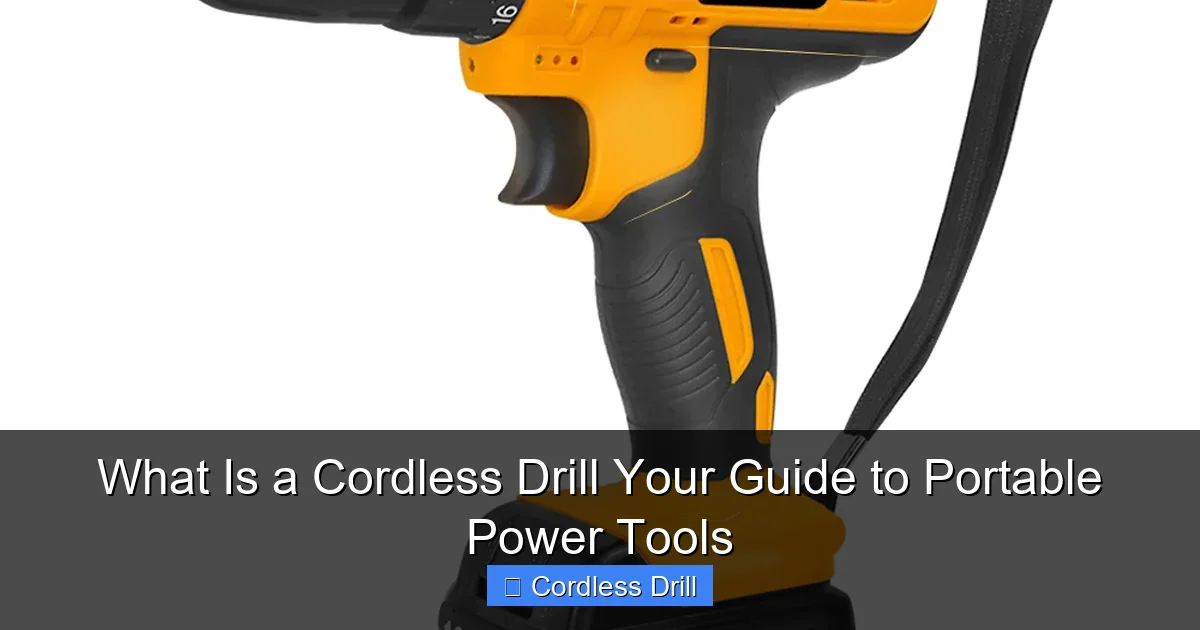
Visual guide about What Is a Cordless Drill Your Guide to Portable Power Tools
Image source: ueeshop.ly200-cdn.com
Modern cordless drills pack surprising power into compact designs. They handle everything from hanging pictures to building decks. The tool’s versatility comes from interchangeable bits and adjustable settings that match different materials and tasks.
A Brief History of Portable Power
The first cordless drill appeared in the 1960s but was heavy and weak. Nickel-cadmium batteries limited runtime and power. Today’s lithium-ion technology changed everything. These batteries are lighter, stronger, and don’t suffer from memory effect. Voltage increased from 9.6V to 20V and beyond, putting cordless drills on par with corded models.
How Cordless Drills Work: The Technology Explained
Battery Power: The Heart of Your Tool
The battery is your cordless drill’s power source. Lithium-ion batteries dominate the market today. They offer longer runtimes, faster charging, and lighter weight than older nickel-based batteries. Most homeowner models use 12V, 18V, or 20V systems. Professional-grade tools often reach 36V or higher for maximum power.
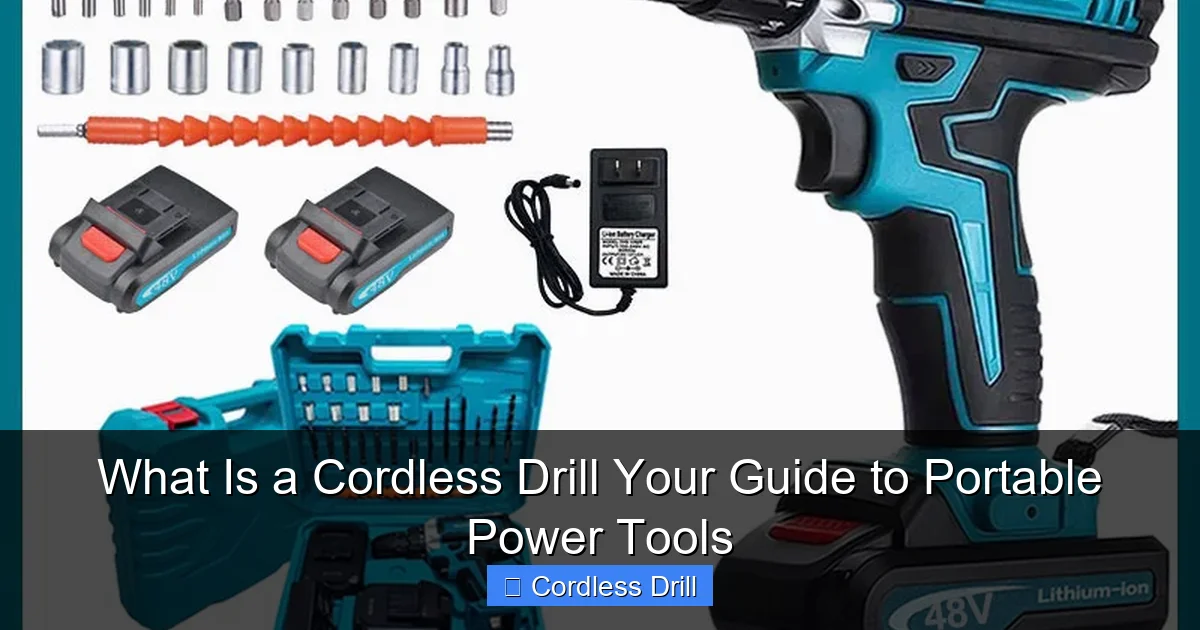
Visual guide about What Is a Cordless Drill Your Guide to Portable Power Tools
Image source: down-ph.img.susercontent.com
Battery capacity is measured in amp-hours (Ah). A 2.0Ah battery runs longer than a 1.5Ah model. Many drills come with two batteries so you can swap them and keep working. Smart chargers protect against overcharging and monitor battery health.
Motor and Gearing: Converting Power to Performance
Inside your cordless drill, an electric motor spins when you pull the trigger. This motor connects to a gearbox that controls speed and torque. Most drills have two speed ranges: low (0-500 RPM) for driving screws and high (0-1,500 RPM) for drilling holes.
Torque is rotational force. Higher torque settings drive larger screws into tough materials. Clutch settings limit torque to prevent stripping screws or damaging surfaces. This control is what makes cordless drills so versatile.
Chuck and Bit System: Your Workholding Solution
The chuck is the clamp that holds your drill bits and driver bits. Keyless chucks let you change bits by hand in seconds. Most cordless drills have 3/8-inch or 1/2-inch chucks. The larger size accepts bigger shanks and provides more gripping power for heavy-duty tasks.
Bits are the interchangeable tools that do the actual work. Twist bits drill holes in wood and metal. Spade bits bore larger holes quickly. Masonry bits handle concrete and brick. Driver bits come in dozens of shapes for different screw heads. This system makes one cordless drill capable of countless jobs.
Key Features and Components You Should Know
Battery Types and Voltage Ratings
Voltage determines your cordless drill’s power potential. Here’s a quick breakdown:
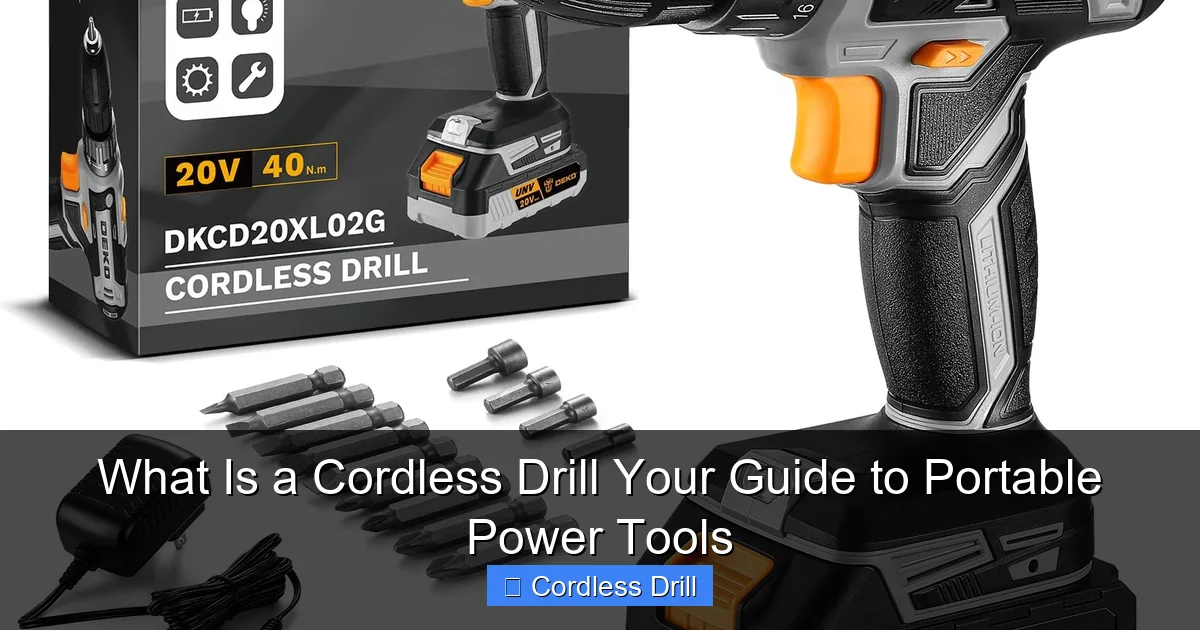
Visual guide about What Is a Cordless Drill Your Guide to Portable Power Tools
Image source: m.media-amazon.com
- 12V: Perfect for light tasks like assembling furniture or hanging shelves. These compact drills fit into tight spaces and weigh under 2 pounds.
- 18V/20V: The sweet spot for most users. These handle 90% of home and professional projects. They drill through wood, metal, and masonry with ease.
- 36V+: Heavy-duty tools for construction and industrial use. They drive large lag bolts and drill deep holes in hard materials.
Choose voltage based on your typical projects. A 20V cordless drill serves most homeowners well. Contractors might prefer the same voltage for consistency across their tool collection.
Speed Settings and Torque Control
Variable speed triggers let you control rotation speed by how far you pull the trigger. This precision is crucial for starting screws without stripping them or drilling delicate materials without cracking them.
Two-speed gearboxes give you broad control ranges. Low gear provides high torque at slow speeds for driving. High gear offers fast rotation for drilling. Torque adjustment rings, usually numbered 1-20, set the maximum rotational force. Lower numbers are for small screws, higher numbers for large fasteners.
Ergonomics and Additional Features
Modern cordless drills feature ergonomic handles with rubber grips that reduce fatigue. LED work lights illuminate dark spaces like under sinks or inside cabinets. Belt hooks let you keep the tool accessible while using both hands. Some models include built-in levels for perfectly vertical or horizontal drilling.
Step-by-Step: Choosing Your First Cordless Drill
Assess Your Real Needs
Before shopping, think about your projects. Will you mostly hang pictures and assemble furniture? A compact 12V cordless drill might suffice. Planning major renovations or building projects? Invest in an 18V or 20V model with extra batteries.
Consider where you’ll use the drill. Outdoor projects demand longer battery life. Working in tight spaces calls for a compact, lightweight design. If you’re a contractor, brand ecosystem matters—many brands share batteries across tools.
Understand the Specifications
Read the specs carefully. Look for maximum drilling capacity in wood (should be 1-1/2 inches or more) and metal (3/8 inches or more). Check the chuck size—1/2 inch is better for heavy tasks. Review battery amp-hour ratings; 2.0Ah or higher is ideal.
Consider the warranty. Most quality cordless drills come with 3-year limited warranties. Some brands offer 5-year warranties for added peace of mind. Read user reviews to learn about real-world performance and reliability.
Make the Purchase
Buy a kit rather than a bare tool for your first cordless drill. Kits include batteries, a charger, and often a carrying case. This saves money and ensures you have everything needed to start working immediately.
For most DIYers, a 20V cordless drill kit is the best value. It provides enough power for challenging projects while remaining affordable. If you’re on a tight budget, a 12V model still offers impressive capability for light tasks.
When you’re ready to buy, check out our guide to the best cordless drill options across different categories and price points.
Essential Accessories and Attachments
Must-Have Drill Bits
Start with a basic drill bit set that includes sizes from 1/16 inch to 1/2 inch. Titanium-coated bits last longer in metal. Brad-point bits are superior for woodworking because they prevent wandering. Masonry bits have carbide tips for concrete and brick.
Driver bit sets are equally important. They should include Phillips, flathead, Torx, and square drive bits. Many sets come with nut drivers and socket adapters for versatility. Keep these organized in a case for quick access.
Specialty Attachments That Expand Functionality
Right-angle attachments let you drill in tight corners where the drill body won’t fit. Offset drivers reach screws in awkward positions. Wire wheel brushes clean rust and paint. Sanding attachments transform your cordless drill into a portable sander.
For serious woodworkers, pocket hole jigs create strong joints quickly. Mixing attachments stir paint and thinset mortar. These accessories multiply your cordless drill’s value, turning it into a multi-tool for countless applications.
How to Use a Cordless Drill: A Beginner’s Guide
Safety First: Protect Yourself
Always wear safety glasses when operating a cordless drill. Metal shavings and wood chips fly at high speeds. Secure your workpiece with clamps or a vise so it doesn’t spin unexpectedly. Keep loose clothing and long hair away from rotating parts.
Work in a well-lit area. Use your drill’s LED light when needed. Avoid using the tool in wet conditions. If drilling overhead, wear a dust mask to avoid inhaling debris. These simple precautions prevent most common injuries.
Inserting the Battery and Powering On
Slide the battery onto the drill’s base until it clicks securely. Test it by pulling the trigger slightly—the battery should power the LED light if equipped. Make sure the forward/reverse switch is in the correct position: forward for drilling and driving, reverse for removing screws.
Adjust the torque setting before starting. For a pilot hole, set torque low. For driving a wood screw, start at setting 5 and increase if the screw strips. For metal, use higher torque settings. This prevents damage to both the fastener and the material.
Changing Bits Like a Pro
To change bits, open the keyless chuck by rotating it counterclockwise. Insert the bit shank fully into the chuck. Tighten by rotating clockwise while holding the chuck firmly. The bit should be secure and centered. Test it by pulling gently on the bit—it shouldn’t slip.
For precision work, use a chuck key to ensure maximum grip. Check bit alignment by spinning the chuck by hand—the bit should run straight without wobbling. A bent bit or loose chuck causes poor results and can damage your workpiece.
Mastering Drilling Techniques
Mark your drilling spot with a pencil or awl. Place the bit tip on the mark. Hold the drill perpendicular to the surface for vertical holes or at your desired angle. Start at low speed to create a small guide indentation, then increase speed smoothly.
Apply steady, moderate pressure. Let the bit do the work—forcing it can break bits or damage material. For deep holes, pull the bit out periodically to clear chips. In metal, use cutting oil to reduce heat and extend bit life. For hardwood, clamp a scrap board behind the workpiece to prevent tear-out.
When driving screws, set the drill to low speed and appropriate torque. Position the driver bit firmly in the screw head. Start slowly to prevent cam-out (the bit slipping out). When the screw is nearly flush, reduce pressure slightly to avoid stripping the head.
Advanced Tips for Professional Results
Use a depth stop when drilling holes to precise depths. Many drills have adjustable collar stops. For repetitive holes at the same depth, wrap tape around the bit as a visual guide. Countersink bits create tapered holes for flat-head screws to sit flush.
When working with delicate materials like tile, start with a small pilot hole and use low speed. For large holes in wood, use spade bits or hole saws with a pilot bit to maintain accuracy. Always keep the drill perpendicular unless you specifically need an angled hole.
Maintenance and Care for Long-Term Performance
Battery Maintenance Best Practices
Charge your batteries fully before first use. Lithium-ion batteries perform best when kept between 20% and 80% charge. Avoid letting them drain completely or leaving them on the charger indefinitely. Remove batteries from the drill if you won’t use it for several months.
Store batteries in a cool, dry place. Extreme heat or cold reduces performance and lifespan. If a battery gets hot during use, let it cool before recharging. Clean battery contacts with a dry cloth if they appear dirty. Replace batteries when runtime drops significantly.
Cleaning and Lubrication
Wipe your cordless drill with a damp cloth after each use to remove dust and debris. Pay special attention to the chuck and ventilation slots where buildup occurs. Never use solvents that can damage plastic parts. For stubborn grime, use a mild soap solution.
Lubricate the chuck occasionally with a few drops of light oil. Open and close it several times to distribute the lubricant. Check gears through inspection holes if your model has them. If you notice grinding noises, have a professional service the tool.
Proper Storage Solutions
Store your cordless drill in its case when not in use. This protects it from dust, moisture, and accidental drops. Keep batteries separate if storing for long periods. Hang the case on a wall or place it on a shelf where temperature stays stable.
Avoid storing tools in unheated garages where temperature swings can cause condensation inside the drill. If you must store in a garage, place silica gel packs in the case to absorb moisture. Proper storage can double your tool’s lifespan.
Troubleshooting Common Cordless Drill Problems
Battery and Power Issues
Problem: The drill doesn’t turn on.
Solutions: Check that the battery is fully charged and properly seated. Try the second battery if available. Inspect the battery contacts for dirt or damage. If the battery feels loose, the mounting tabs may be broken. Ensure the forward/reverse switch isn’t stuck in neutral (some models disable the trigger in this position).
Problem: Short runtime.
Solutions: Lithium-ion batteries lose capacity over time. If your battery is more than 3 years old, consider replacement. Clean the battery contacts. Make sure you’re using the correct charger. Cold temperatures reduce runtime—warm the battery before use if possible.
Mechanical and Performance Problems
Problem: The drill bit slips in the chuck.
Solutions: Clean the chuck and bit shank. Tighten the chuck more firmly. Check for worn chuck jaws that no longer grip properly. Replace the chuck if it’s damaged. Ensure you’re using the right bit size for your chuck capacity.
Problem: Overheating during use.
Solutions: You may be applying too much pressure. Let the drill do the work. Check that ventilation slots aren’t blocked by debris. Allow the motor to cool for 10-15 minutes. If overheating happens frequently, you may need a higher voltage drill for the task.
Problem: Inconsistent speed control.
Solutions: The trigger switch may be dirty or worn. Have it serviced by a professional. Check for loose connections inside the handle. If the electronic speed control fails, the drill may need replacement. Some models have resettable thermal protectors that trip if overloaded—wait for them to reset.
Cordless Drill vs. Other Power Tools: Making the Right Choice
Understanding how your cordless drill compares to similar tools helps you build an efficient collection. Each tool has specific strengths that make it better for certain tasks.
An impact driver looks similar but delivers rotational impacts for driving long screws and lag bolts. It’s not ideal for drilling. A hammer drill adds a pounding action for masonry work. Your standard cordless drill excels at general-purpose drilling and driving but lacks these specialized features.
For a complete comparison of these tools, read our detailed analysis of impact driver vs hammer drill to understand when to use each one.
Most professionals own all three: a cordless drill for general work, an impact driver for heavy driving, and a hammer drill for masonry. DIYers can often get by with just a cordless drill and the right bits, adding specialized tools as needs grow.
Conclusion: Your Cordless Drill Journey Starts Now
You now understand what a cordless drill is and how it can transform your approach to projects. This versatile tool offers freedom from outlets while delivering impressive power. From hanging shelves to building furniture, your cordless drill will become your most-used power tool.
Remember to choose the right voltage for your needs, maintain your batteries properly, and always prioritize safety. Keep learning new techniques and exploring accessories that expand your drill’s capabilities. With practice, you’ll handle any drilling or driving task with confidence.
Start with simple projects to build your skills. As you become comfortable, challenge yourself with more complex jobs. Your cordless drill grows with you—from beginner to expert, it remains an essential part of your toolkit. Now grab your drill and start creating!
🎥 Related Video: Cordless Drill Basics | Beginner
📺 Training Hands Academy
Today we’re talking about cordless drill basics for the beginner. If you’re new to carpentry or woodworking, the cordless drill will …
